

Hello folks and welcome all to our new blog series “Learn and solve it with Amped FIVE“. This weekly series focuses on how to solve common challenges related to video evidence using Amped FIVE. We will start with how to deblur a moving car. Over the course of this series, we will be diving into the most common enhancement workflows. Our goal is to bring you valuable insights and practical solutions, ultimately improving your day-to-day investigations.
Whether you’re an investigator dealing with video evidence or simply intrigued by the world of video forensics, this series is for you. Stay tuned as we will be publishing a new article from this series every Tuesday!
What’s in Store for You
Let’s take a sneak peek at the topics we will cover:
- Deblur a moving car
- Integrate multiple frames to improve visibility
- Correct the perspective of a license plate
- Super-resolution from different perspectives
- Video deinterlacing
- Remove periodic noise from an image
- Enhance a backlit scene
- Deblur a license plate in an image
- Unroll a 360 camera
- Measure heights from surveillance video
- Enhance details in poor-contrast images
- Correct optical distortion
- Enhance and optimize facial detail
- Increase exposure of dark footage
- Separate a fingerprint from the background
- Measure speed from surveillance video
- Correct the aspect ratio of CCTV footage
If you know us a little, you’ll also know that we are very passionate about teaching our users how to confidently use our software. This is why our training program is just as important to us as are our products. But for those of you who want a quick guide on how to apply the right filters, then you’ve landed in the right place!
Deblurring a Moving Car
Our first article focuses on how to deblur a moving car. But what is blurring caused by? And how do we read that crucial license plate in a blurry image? Blur is a common occurrence in images and one which can make objects and subjects depicted in a scene appear unclear and/or unrecognizable. As always with anything video forensic, resolving a problem involves identifying its cause first.
What is Motion Blur?
There are two main types of blur:
- one which is caused by an inadequate focal length set on the camera lens (or optical deblurring)
- the other which is caused by a combination of too slow a shutter speed set on the camera and/or too fast a moving object or subject in the scene (motion blur)
In this article we’ll talk about the second type, the motion blur.
Shutter
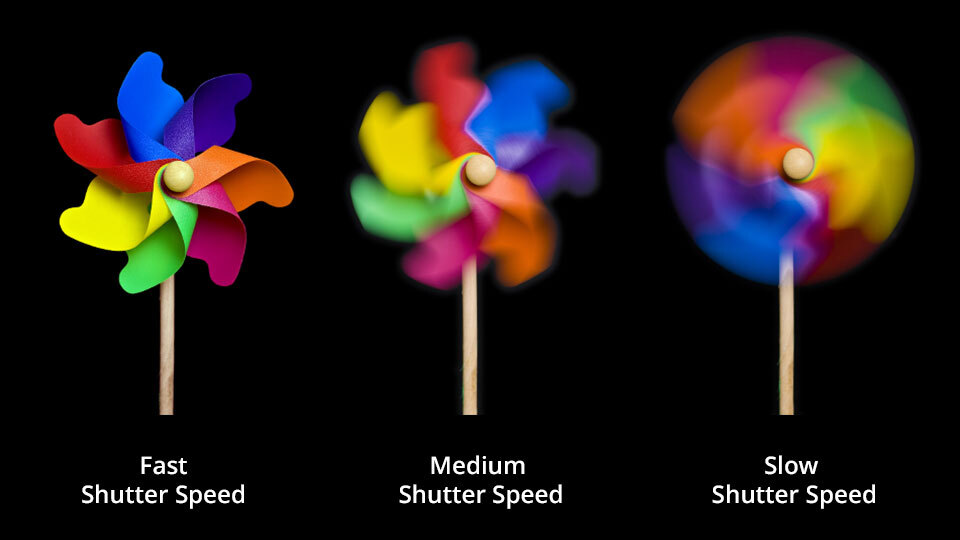
Every camera device is equipped with a shutter, either mechanical or electronic. The shutter is like a “door” that can be set to open and close at different speeds to control the amount of light coming from the scene that hits the film/sensor. The longer the shutter is opened for, the more the light which will hit the film/sensor.
The shutter can be used effectively to photograph or record a scene under low light conditions. At night for example, you may want to open the shutter for a little longer than usual to record an adequate contrast of detail in the scene. The byproduct of doing this though is that a fast moving object/subject in the scene will appear blurry. This is due to the combined motion that occurs while the shutter is open. It will be channeled into one single moment in time captured by the film/sensor. The amount of blurriness will be dependent on the shutter speed and the speed of the moving target.
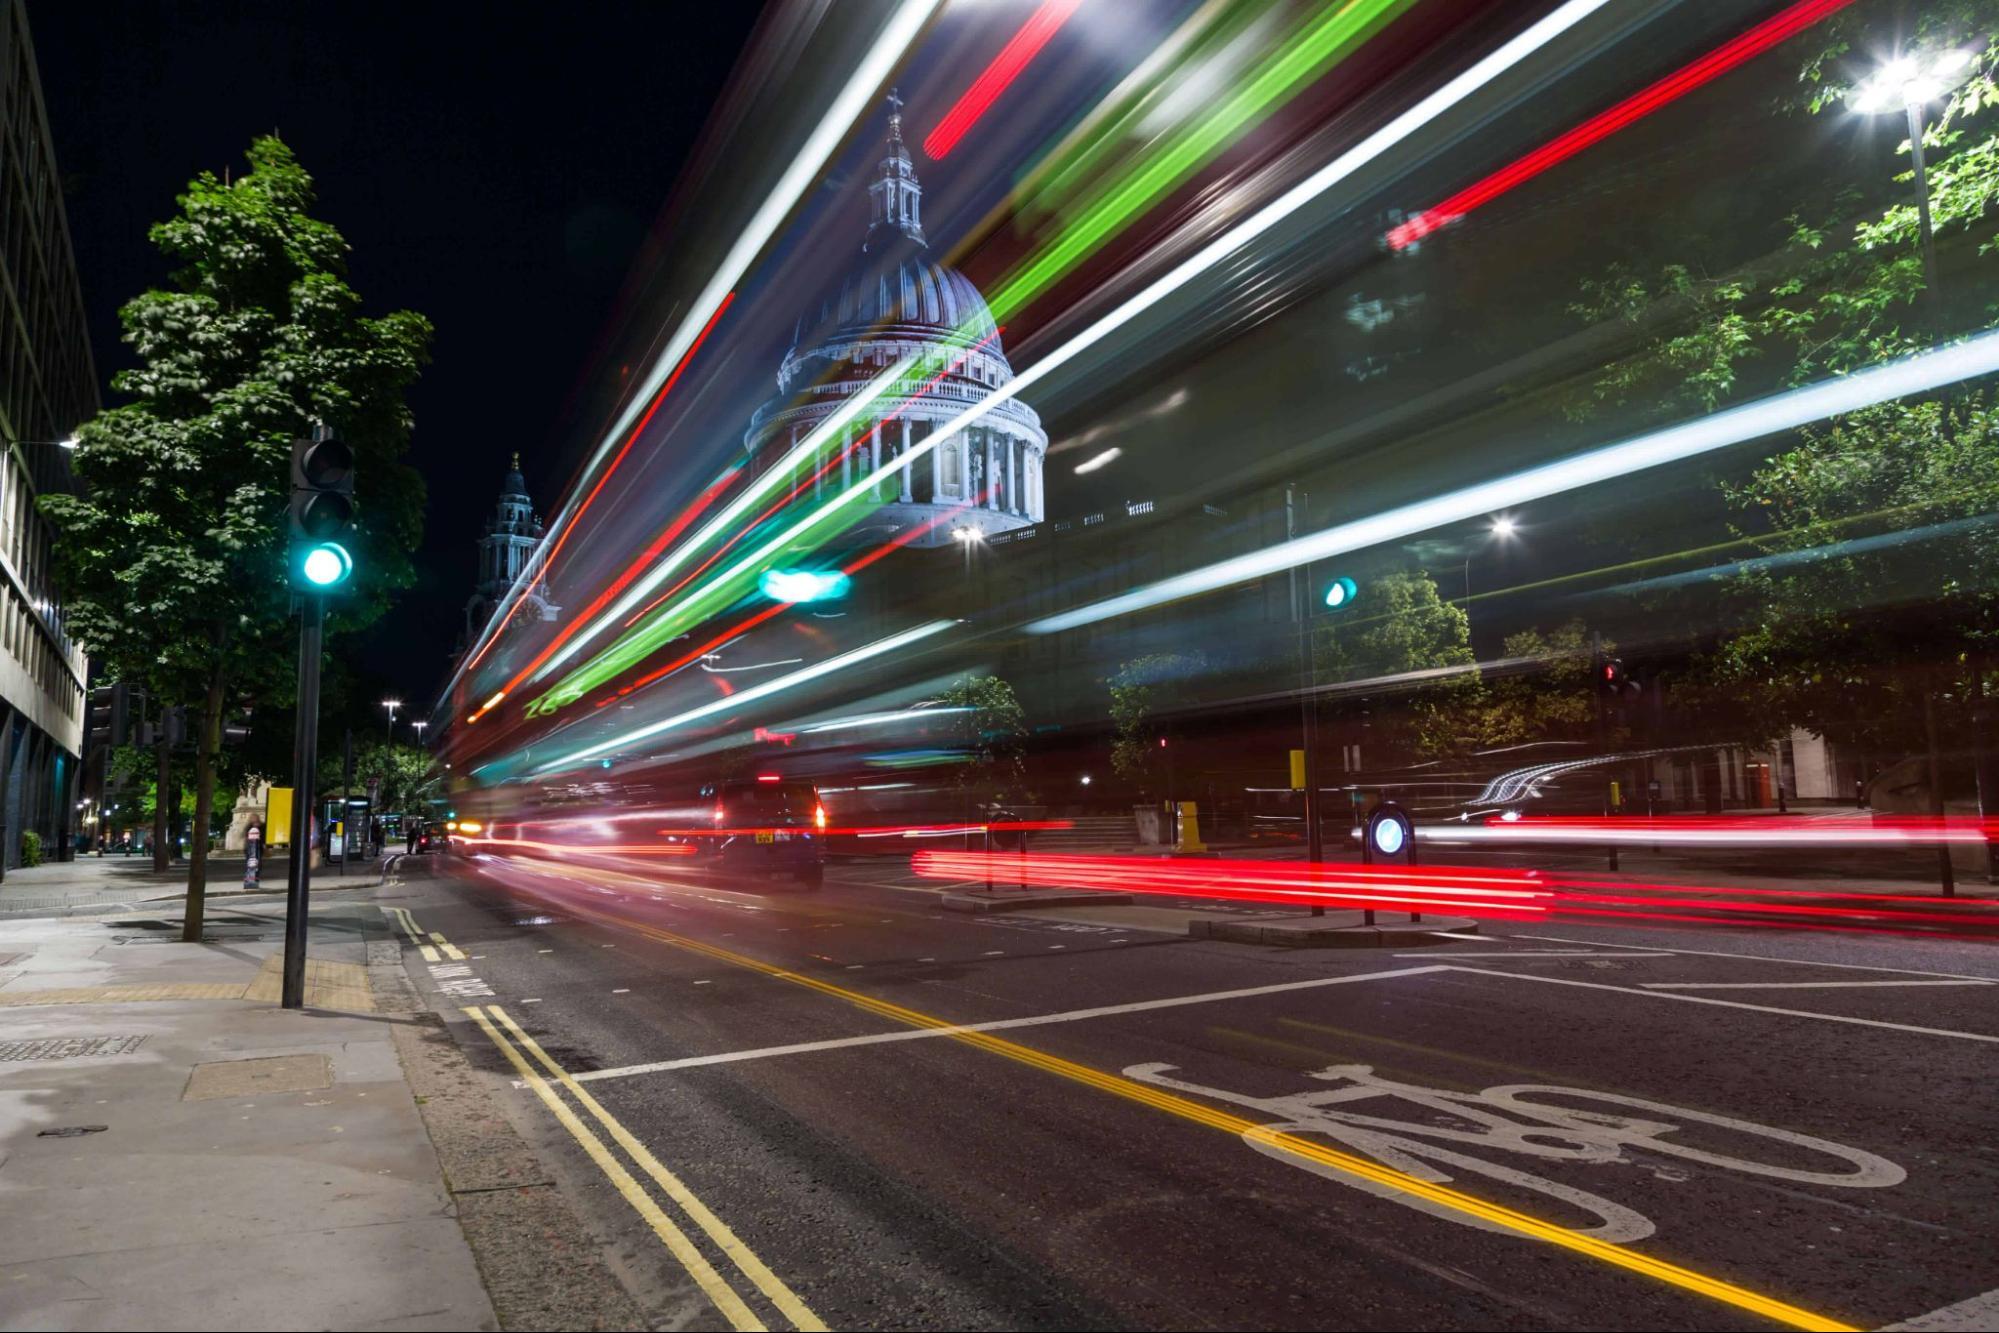
Manual use of the shutter speed can also be used creatively to portray a moment in time captured in the frantic chaos of everyday life. For example, a static building surrounded by the multitude of fast moving city lights generated by vehicles and traffic.
Shutter in Video Cameras
Video cameras also operate the same way. However, controlling the shutter speed may be necessary to find the right balance between the natural light present in a scene and capturing fast moving targets. When filming a sporting event, such as a football game for example, the shutter speed must be such that players and the ball don’t blur when moving too fast.
In most camera devices, especially those employed in video surveillance (such as CCTV and body worn cameras) the shutter speed is set automatically by the device. This can be convenient, as different conditions can be dealt with by the camera without user intervention. However, it can be unpleasant when these conditions change rapidly and the settings can’t be adjusted quickly enough.
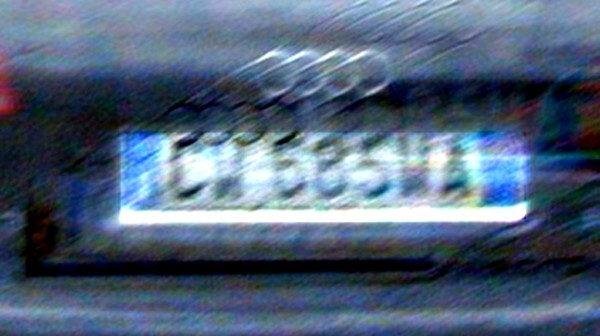
As you may now imagine, fast moving cars will cause the camera device some issues (especially in low light conditions) as it tries to adjust to this new change in the scene. Motion blur can affect areas of interest, such as a vehicle’s VRN (Vehicle Registration Number). This is influenced by factors such as the vehicle’s speed and shutter speed setting. Additionally, the movement of the device itself (e.g., when using a handheld camera) can contribute to motion blur.
Preparing for the Motion Deblur filter in Amped FIVE
First drag your image or video into Amped FIVE. Move the playhead to the relevant frame of interest (if working with a video).
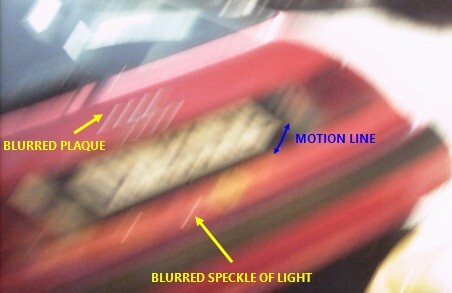
In order to identify the correct type of blur in an image, you will need to look for clues in the image itself. If the problem is indeed motion blur, then you should be able to locate the motion line. It is also the direction of movement of the target (and/or of the recording device). This will be a line adjoining two points in the image which in real life are in fact one single point. For example, the corner of a license plate.
Other references you can use as motion lines are speckles of illumination particles on the chassis, a known vehicle plaque or anything else you can clearly identify in the blurred image. There is no written rule as to which is the best motion line of reference.
So, don’t be afraid to have multiple attempts and use different reference lines. Remember that in Amped FIVE, duplicating chains and loaders is as easy as dragging them down to an empty area of the history panel with your mouse.
At this stage, if you are dealing with a large resolution image, it may be a good idea to crop it to the relevant area of interest to maximize processing times later on.
Applying the Motion Deblur filter in Amped FIVE
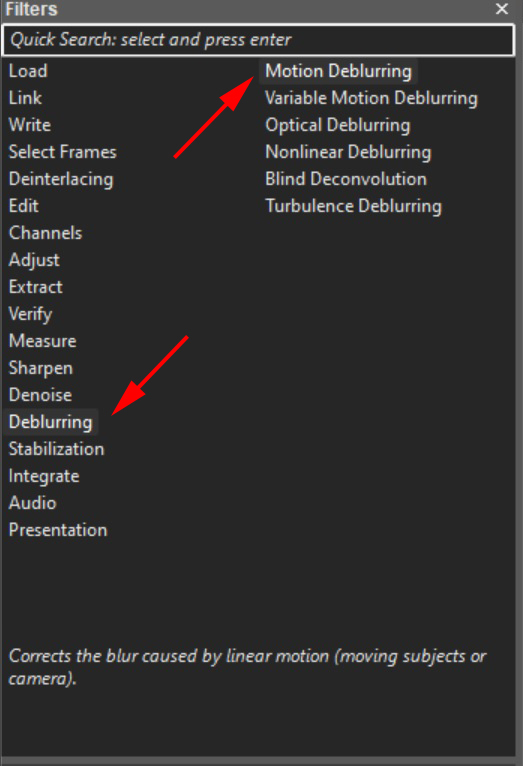
Click on the Motion Deblurring filter from the Deblurring group in the filters panel to add it to your chain. The Ruler tool will automatically be selected for you. Then, draw a line in your image across the motion line of choice.
As soon as the line is drawn, the filter will re-adjust the position of all the pixels in the image in order to combine the two points of the line together.
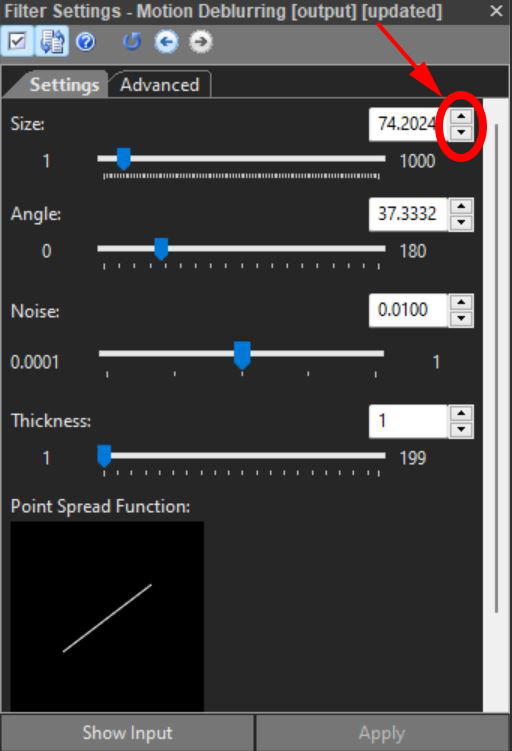
It may be difficult to draw an accurate line if the image is very blurred and/or the end points of the line are not clear. Try to be as precise as you can with replicating the angle of the motion line. However, feel free to further adjust the length of the line by clicking on the up and down arrows within the Size parameter of the Motion Deblurring filter settings. You can also hold down the CTRL button on your keyboard and scroll up and down with your mouse for even more precise adjustments.
This may give you that little improvement that you need to obtain a clearer license plate. Once finished, don’t forget to apply refinement filters such as Levels and/or Unsharp Mask to bring out the contrast of the plate characters even further.
To learn more about motion deblurring, check out this video on our YouTube channel.
Conclusion
That’s all for today! We hope you’ve found this issue of the “Learn and solve it with Amped FIVE” series interesting and useful! Stay tuned and don’t miss the next article coming out next Tuesday!
Don’t forget to share this blog post with your friends and colleagues on LinkedIn, YouTube, Twitter, and Facebook.


