
Hello folks, good to see you back to our series “Learn and solve it with Amped FIVE” that focuses on how to solve common challenges related to video evidence using Amped FIVE. This week we are going to expand on the concept of stabilization and frame integration. We will discuss how we need to apply a perspective stabilization and super resolution to clarify a planar surface. For example a license plate when it is changing its angle and/or distance to the camera lens.
Local Stabilization or Perspective Stabilization?
When we first talked about stabilization and integration in a previous article in this series, we mentioned how the Local Stabilization filter locks a target area in position throughout a video. We would use this filter before we integrate all our available frames together with the Frame Averaging filter. However this workflow only works when the target (and/or the recording device) is performing an up/down and/or a left/right translational movement.

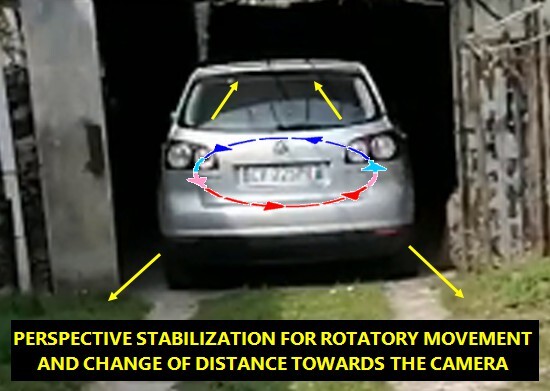
There may be is a change in perspective that requires a different type of stabilization. For example when the target is changing its distance and/or angle (rotational movement) towards the camera. That is if we wish to integrate frames together which are affected by this type of movement.
To learn more about the Local Stabilization filter in Amped FIVE, check out this video:
Preparing for Perspective Stabilization
Once we have established that there is a change in perspective which requires stabilization, then we will need to apply the Perspective Stabilization filter, found in the Stabilization group of filters.
But before we do that, we will need to select the most relevant and the best quality frames in the video. This can be accomplished using a Range Selector, Sparse Selector or similar. Same as we would for a Local Stabilization and Frame Averaging workflow.
We may also need to adjust the Levels to get the best possible contrast of pixel values in our target area and/or apply a Crop to reduce the size of the video. This will optimize the processing time because the Perspective Stabilization filter is computationally demanding. The fewer pixels we apply the filter to, the quicker the processing will be. When you crop however, you will need to ensure that the target is in view throughout all of the frames used and not just the one being previewed.
Applying the Perspective Stabilization Filter
When you have performed a frame selection, a crop and other preparatory filters, then it is time to stabilize our target.
Apply the Perspective Stabilization filter to your chain and the quadrilateral selector will automatically be activated for you. Ensure your playhead is at frame “0” of your selection. You can only select the reference area of stabilization within the first frame. In the viewer, select the four corners of the largest possible area. This is in the same planar surface as that of the target.
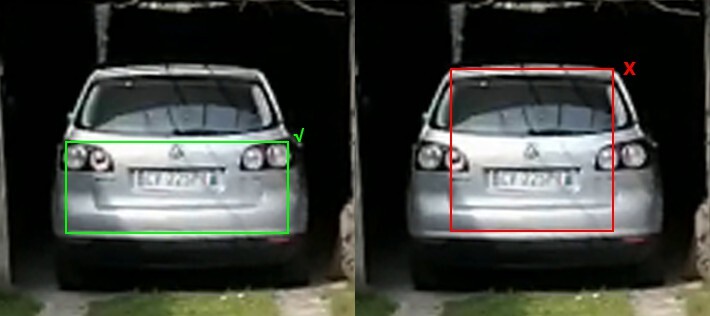
It is important to select the largest area as this will increase the accuracy of the stabilization. But this area must be all in the same planar surface of the target. Otherwise, the stabilization process will not be able to relocate the pixels correctly.
If you are stabilizing the license plate of a car, for example, you can select the area of the boot where the plate is affixed to. However, you can not select the tilted glass of the back window. Its upper aspect will be in a separate plane from that of the license plate.
Once the area is selected, all you have to do is click Apply in the filter settings.
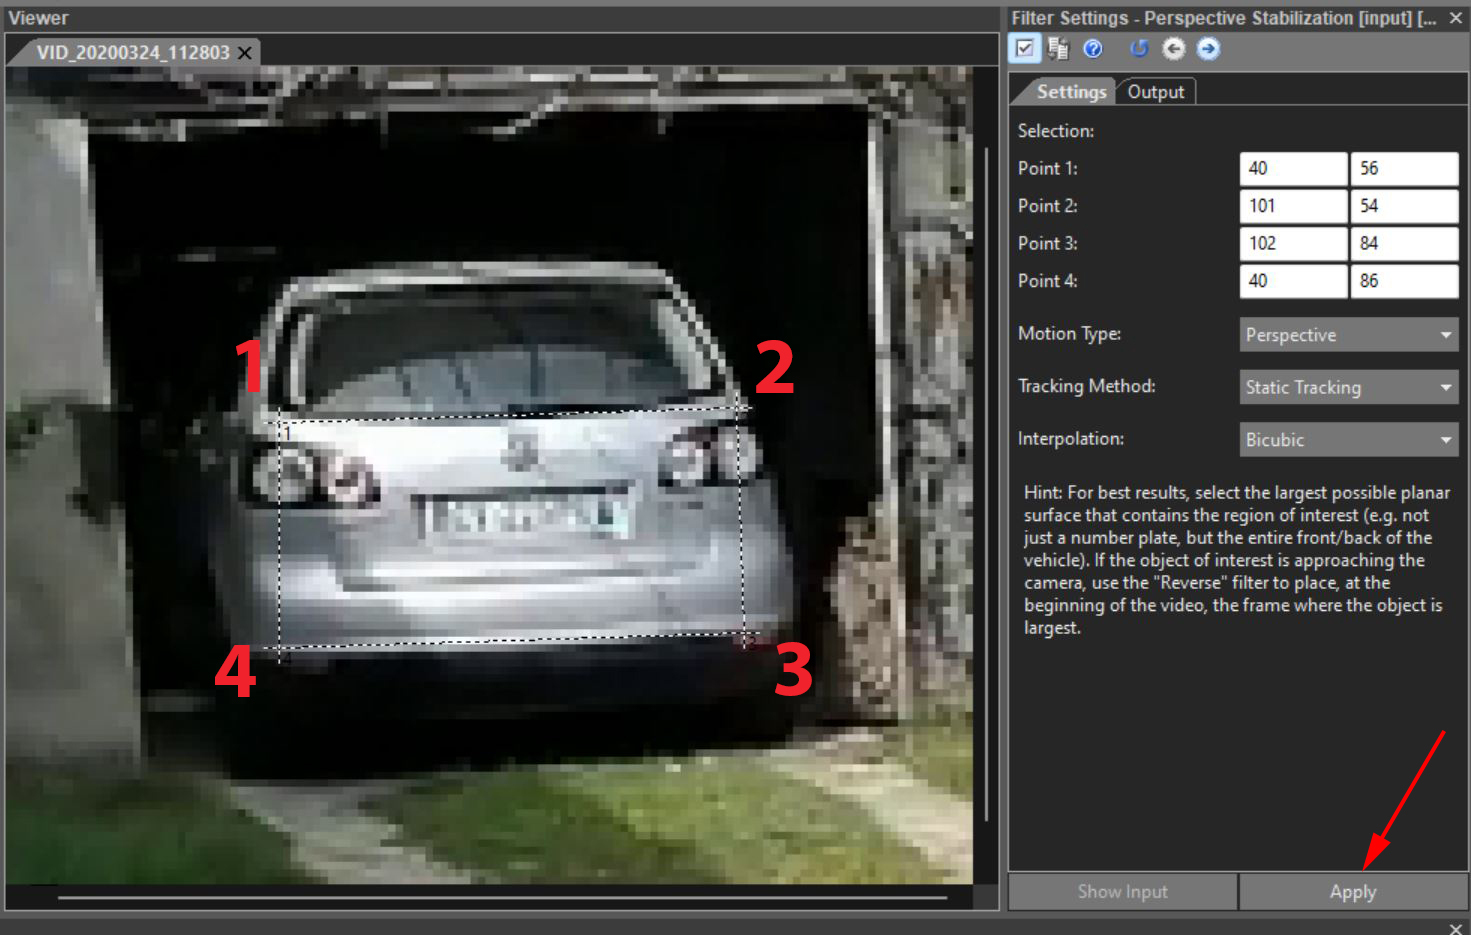
Playback the video and ensure the target is being accurately stabilized throughout all of the available frames. If the stabilization is not quite right, try to change the Tracking Method from “Static Tracking” to “Hybrid Tracking”. This can better stabilize the reference region when there are substantial changes throughout the frames in the pixel pattern within this area. If changing the tracking method is not enough, you may need to redo the anchor points selection and try again.

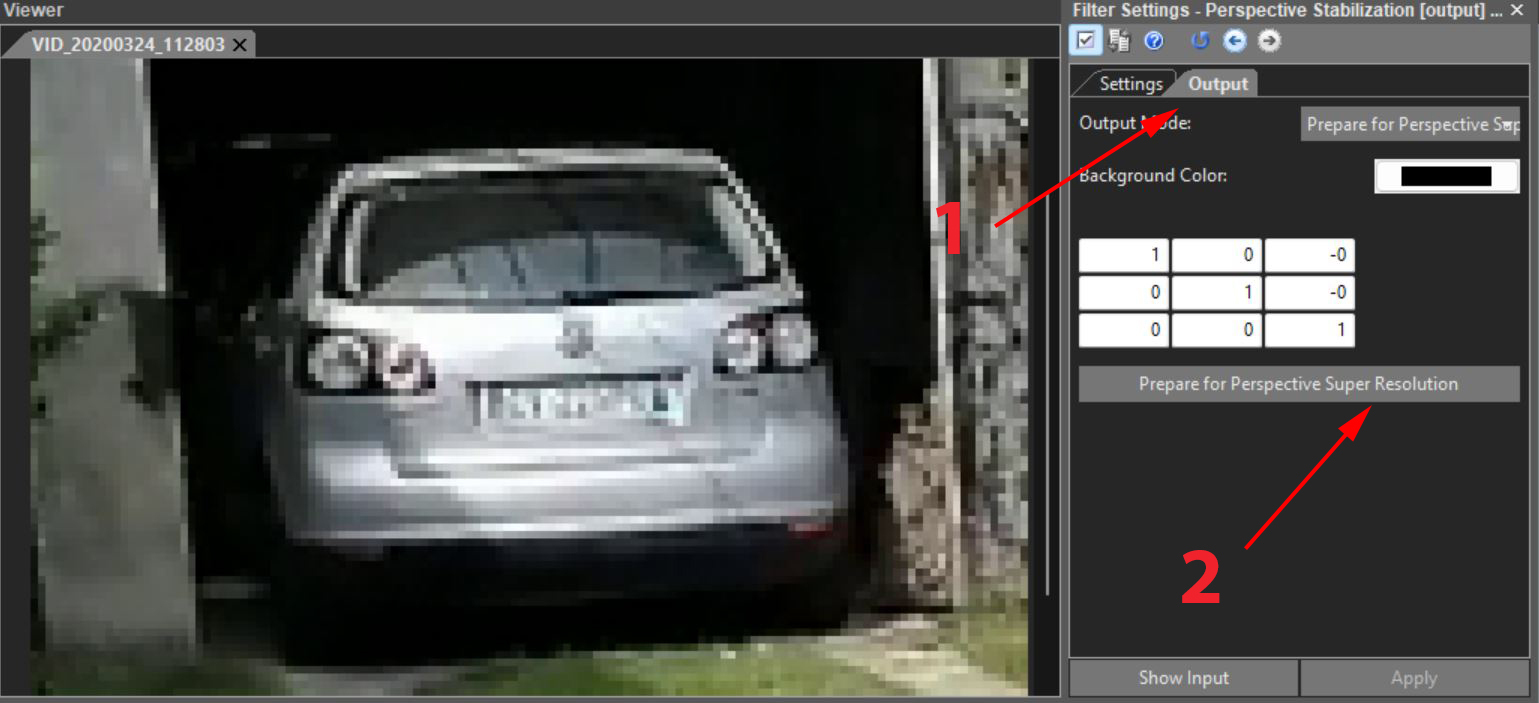
Applying the Perspective Super Resolution Filter
Once you are satisfied that the target is being stabilized correctly, it is time to integrate the frames together. You could use the Frame Averaging filter we already discussed in our previous article in the series. However, there is a more appropriate filter we can use, which is designed to work in tandem with the Perspective Stabilization filter. This is called Perspective Super Resolution and it can actually be applied within the Perspective Stabilization filter itself.
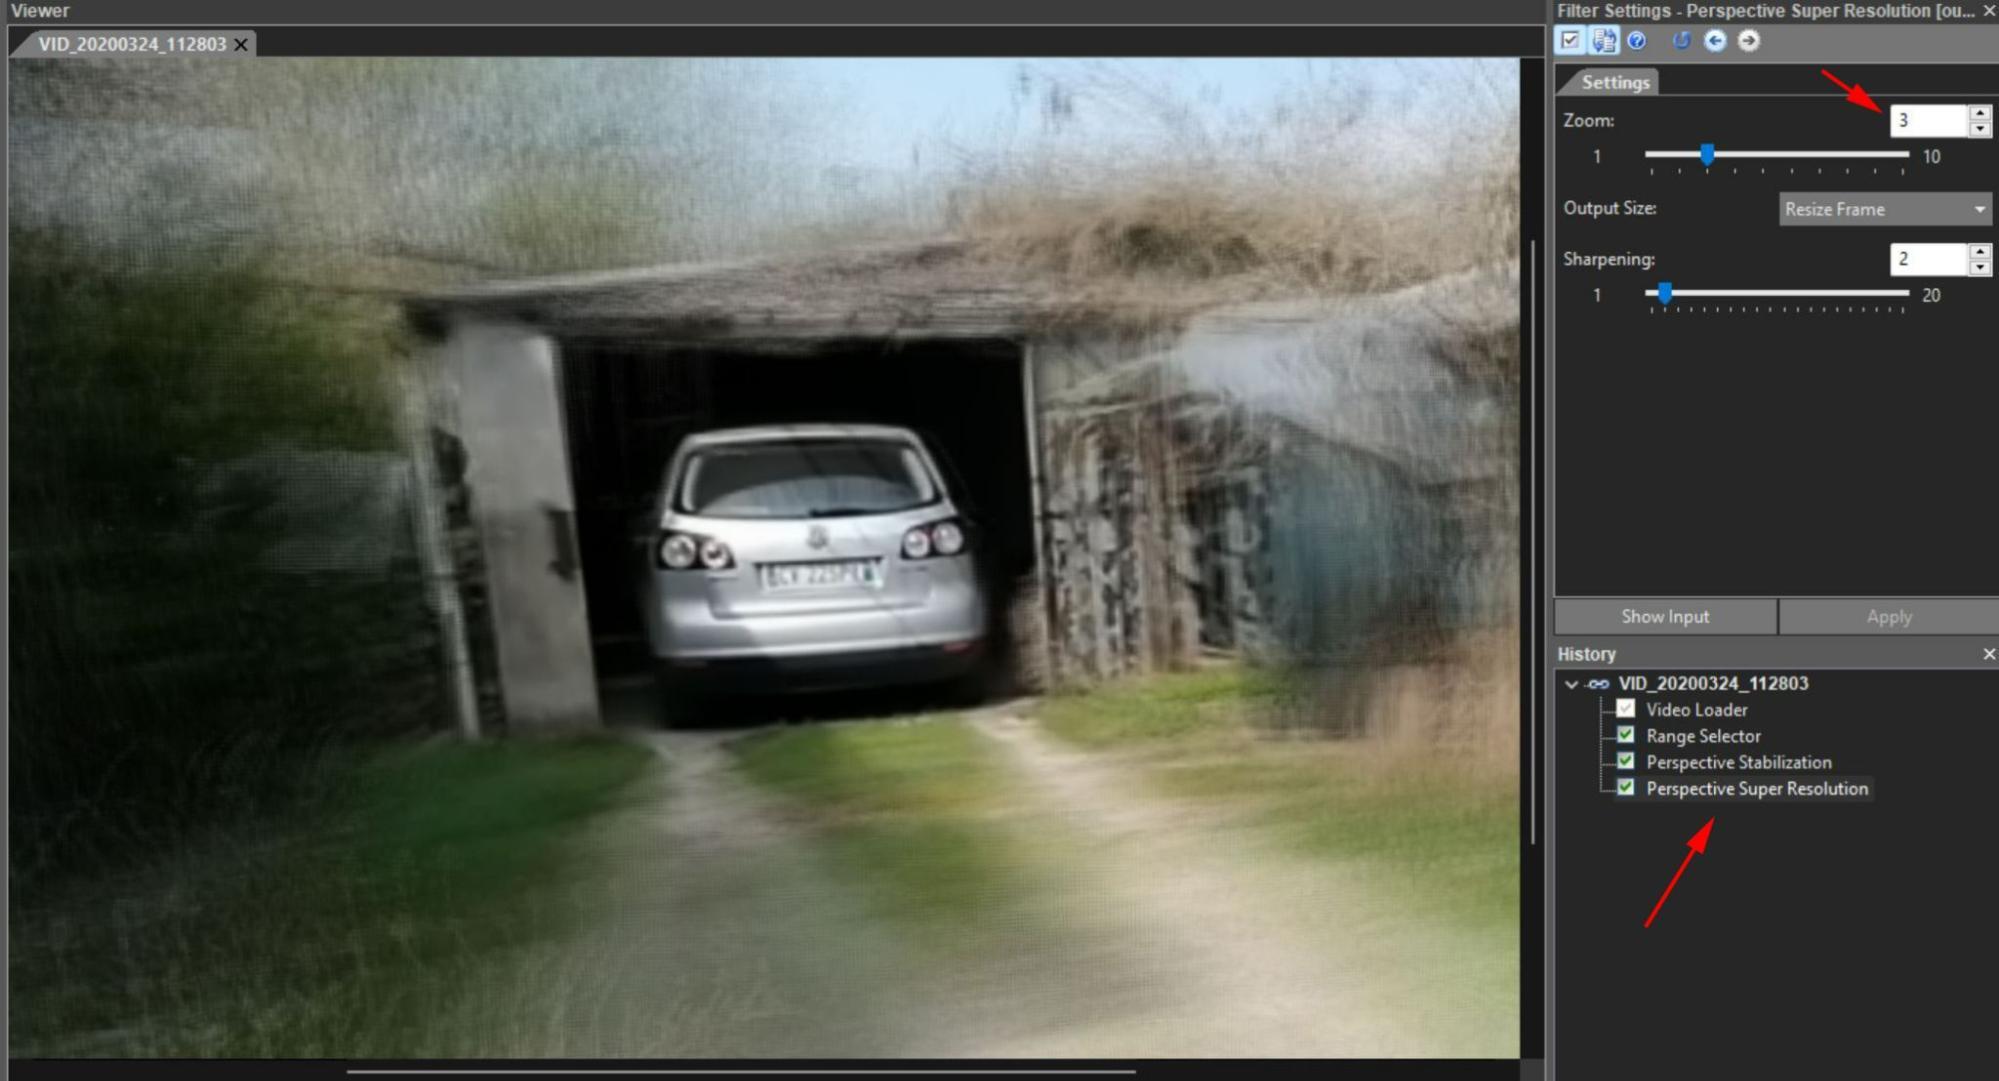
This filter does two crucial things at once. Firstly, it integrates the stabilized frames (just like the Frame Averaging filter). Secondly, it increases the resolution of the original video using a process of interpolation. This is based on sub-pixel registration from the several low resolution frames used. A result that can only be achieved by performing a perspective stabilization first, which is why these two filters have to work together to output the final super-resolution image.
The enlargement amount (or Zoom level) can be adjusted if needed from the filter settings of the Perspective Super Resolution filter. This has now been automatically applied in the chain.
Refining Your Enhancement
It is also possible to sharpen the super-resolution image by using the Sharpening parameter in the same filter settings. The Turbulence Deblurring or Blind Deconvolution filters could also be quite effective at sharpening the details of the target. Equally, the residual movement generated by the process of stabilization and then integration (usually the result of small omnidirectional shifts in the referenced pixel patterns) is strikingly similar to that of real physical turbulence.
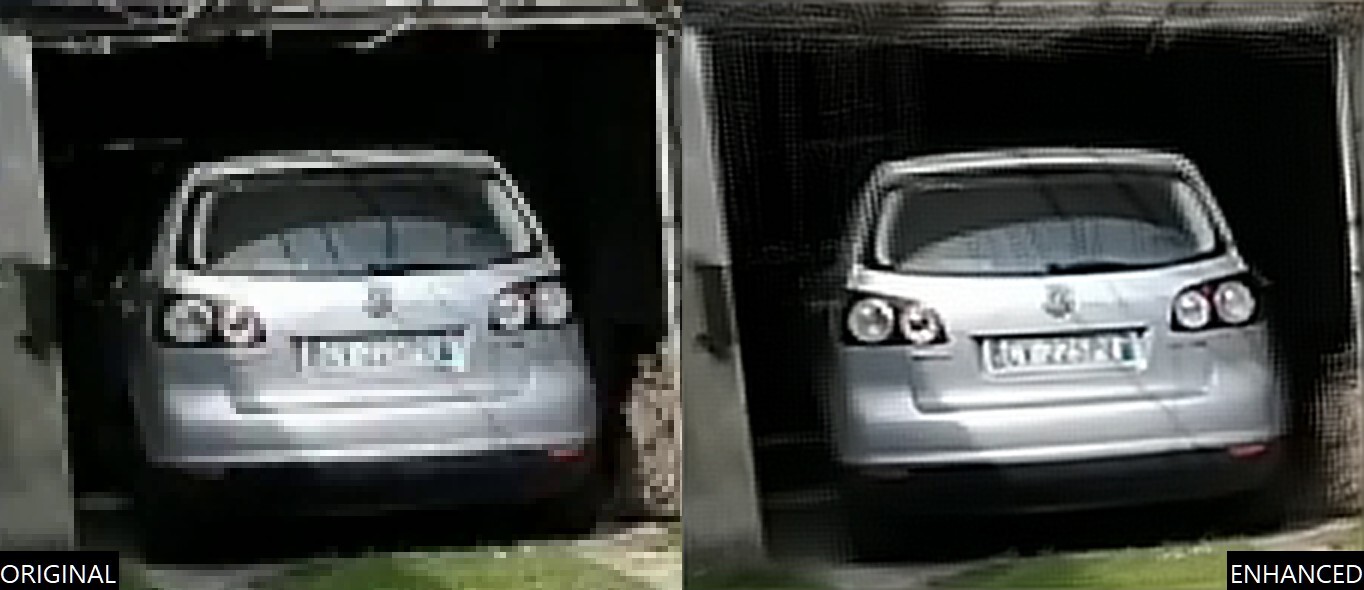
This is quite easily the most common workflow you will come across when clarifying detail in video material. To ensure safe and appropriate use, only apply the filter to flat surfaces like license plates, billboards or signs. Avoid using it for facial enhancement or other non-planar targets as this could be inappropriate and forensically unsafe.
If you have any doubts or need clarification on the filter usage, just drop us a line in support and we will be glad to help.
To learn more about the Perspective Stabilization filter with Amped FIVE, check out this video on our YouTube channel.
Conclusion
Well folks, that is that for this week. We have plenty of more articles from the series “Learn and solve it with Amped FIVE” coming your way so don’t anyone go anywhere and stay tuned to our blog!
Don’t forget to share this blog post with your friends and colleagues on LinkedIn, YouTube, Twitter, and Facebook.


