Deblur a License Plate in an Image

Reading time: 4 min

deblur a license plate in an image

Hello folks and welcome back to our “Learn and solve it with Amped FIVE” series. You may remember the very first article of our series, in which we discussed motion blur in quite some detail. Well, this week we are going to talk about optical blur and how to deblur a hazy image to read text, such as a license plate.

Optical Blur

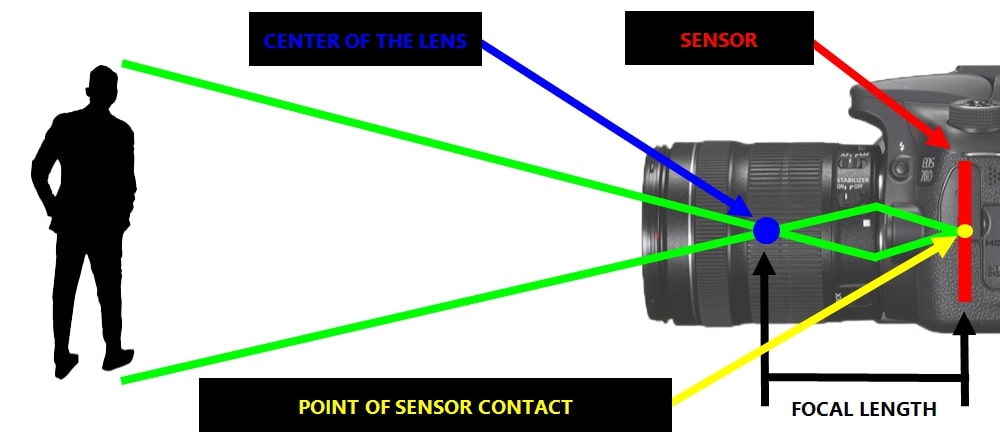
Optical blur (unlike motion blur) is caused by an incorrect focal length setting on the camera. This can cause objects and subjects to appear blurry, depending on how far they are from the lens. But what is the focal length? This is a variable distance between the camera sensor and the center of the lens cylinder. This distance can be increased or decreased manually (or even automatically). This is so that we can focus on subjects or objects of interest in the scene. Their light projection will be channeled into the lens and will then touch the sensor at a specific point of contact, as shown below.
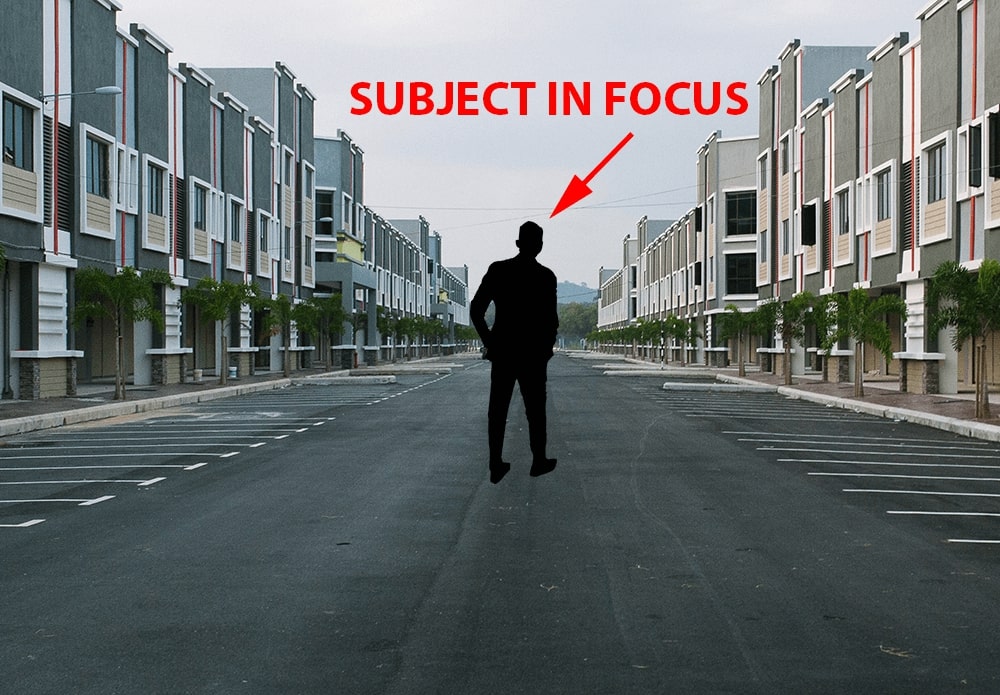
Silhouette of a man standing in the center of a deserted urban street with modern multi-story buildings on both sides, labeled "SUBJECT IN FOCUS" in bold red text, with a red arrow pointing at the figure to indicate the focal point of the image.

Diagram showing a silhouette subject being photographed, with colored lines illustrating the optical path from the center of the lens to the camera’s sensor. Labels highlight the "Center of the Lens" (blue), "Sensor" (red), "Point of Sensor Contact" (yellow), and "Focal Length" (yellow line between sensor and lens), demonstrating the relationship between focal length and image capture.

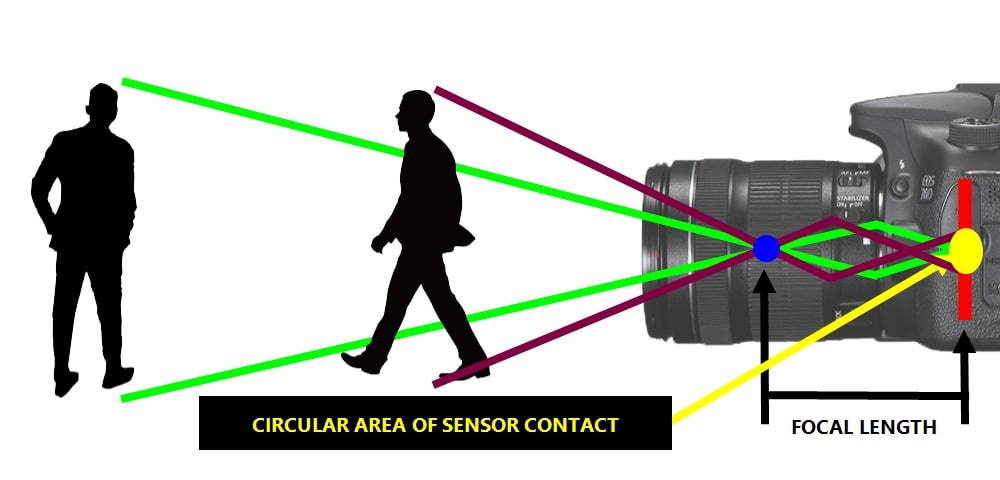
Conversely, objects or subjects that appear blurry or out of focus are so because the light channeled in the lens will hit the sensor in a circular area, as opposed to a point.
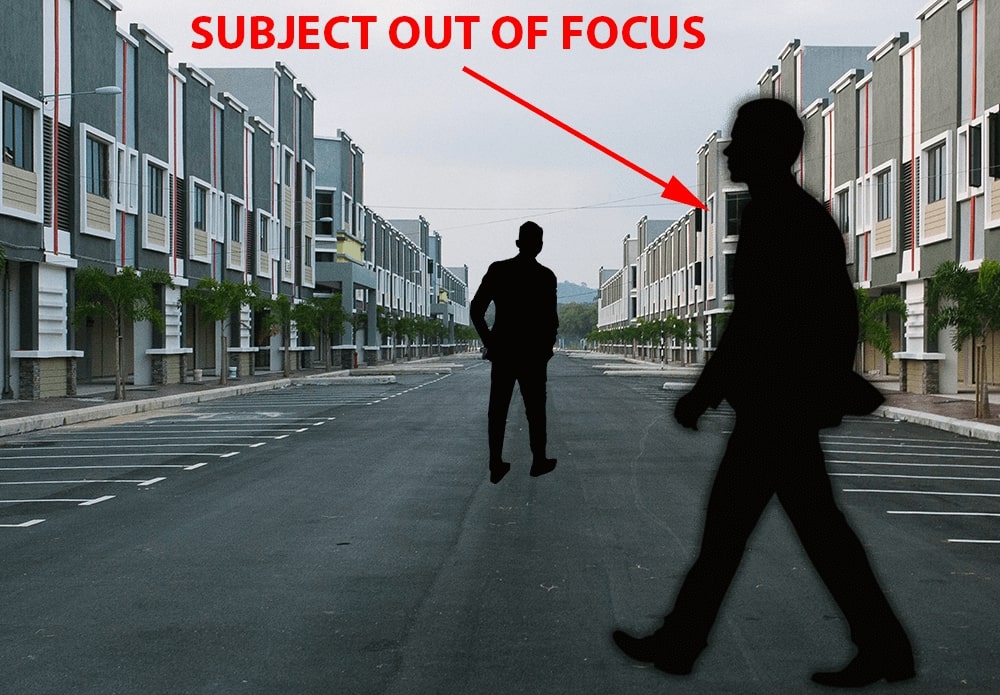
Photography depth-of-field example showing two silhouetted figures on a deserted urban street, with a red arrow and "SUBJECT OUT OF FOCUS" label pointing to a large foreground silhouette, while the smaller background figure remains sharp and in focus.

Illustrated camera focus diagram showing two silhouetted subjects at different distances from a DSLR camera on the right. Green lines trace the field of view from each subject to the lens center (marked with a blue dot). Purple lines represent the circular area of sensor contact labeled in a black box, while a yellow line marks the focal length from the lens to the red vertical sensor on the camera body. The diagram demonstrates how light from both the nearer walking figure and the farther standing figure converges through the lens to the sensor.

In the example above, a reduction of the focal length will channel the light projected by the nearer subject into a specific sensor point. This will ensure the subject is in focus relative to his distance to the lens, as shown below.
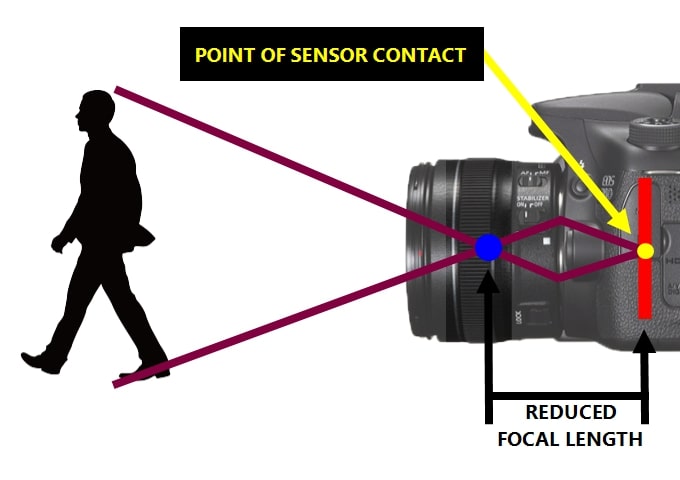
Camera optics diagram showing a silhouette of a walking person on the left with purple lines extending from head and feet to the center of the camera lens (blue dot). Yellow arrow labeled "Point of Sensor Contact" indicates where light converges on the red vertical sensor inside the DSLR. Black arrow labeled "Reduced Focal Length" shows the shorter distance between the lens center and the sensor, illustrating the effect of reducing focal length on the image capture process.

The Point Spread Function

Now that we have a better idea of what the point of contact is, we will talk about how to restore a hazy image caused by optical blur. We need to restore blurry images to have a clearer view of a target of interest, such as a license plate or a suspect’s face.

Image restoration involves reversing fundamental defects using a specific mathematical model. As we said before, in images affected by optical blur, a point in the scene is “spread out to a circle” in the image. We can effectively model this phenomenon mathematically by defining a Point Spread Function. It basically represents how a singular point in the real scene is rendered in the image. Below, you can see an example of a Point Spread Function for a moderately blurred image and a strongly blurred image.
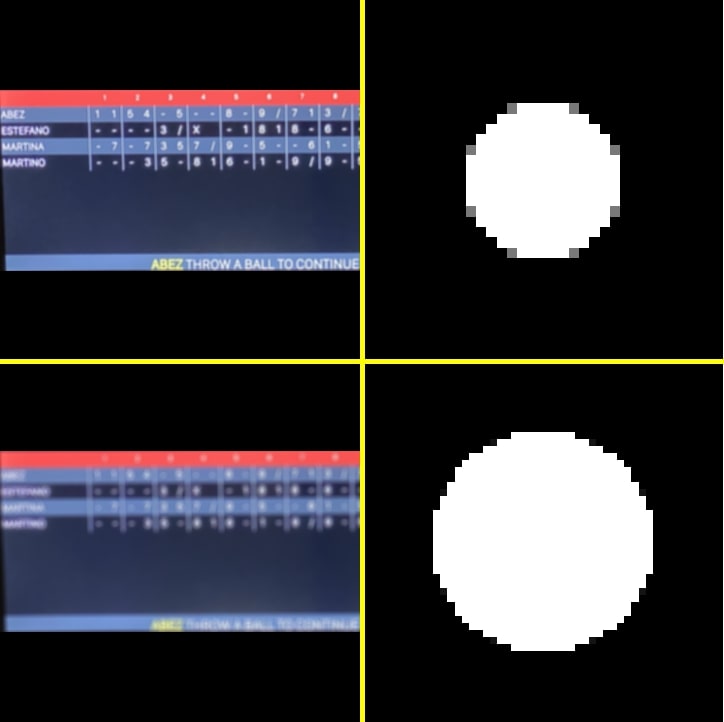
Side-by-side comparison illustrating Point Spread Function (PSF) for image sharpness analysis, showing a moderately blurred image with its corresponding PSF pattern on top and a strongly blurred image with its PSF pattern below. Left panels display scoreboard text clarity, while right panels show white circular PSF shapes on a black background for each blur level.

The Optical Deblurring Filter

Let’s get the theory turned into practice and apply the Optical Deblurring filter. In this example, the focal length is incorrectly set in relation to the distance of the vehicle from the camera. The license plate is therefore blurred and we cannot read the VRN (vehicle registration number) in its original representation.
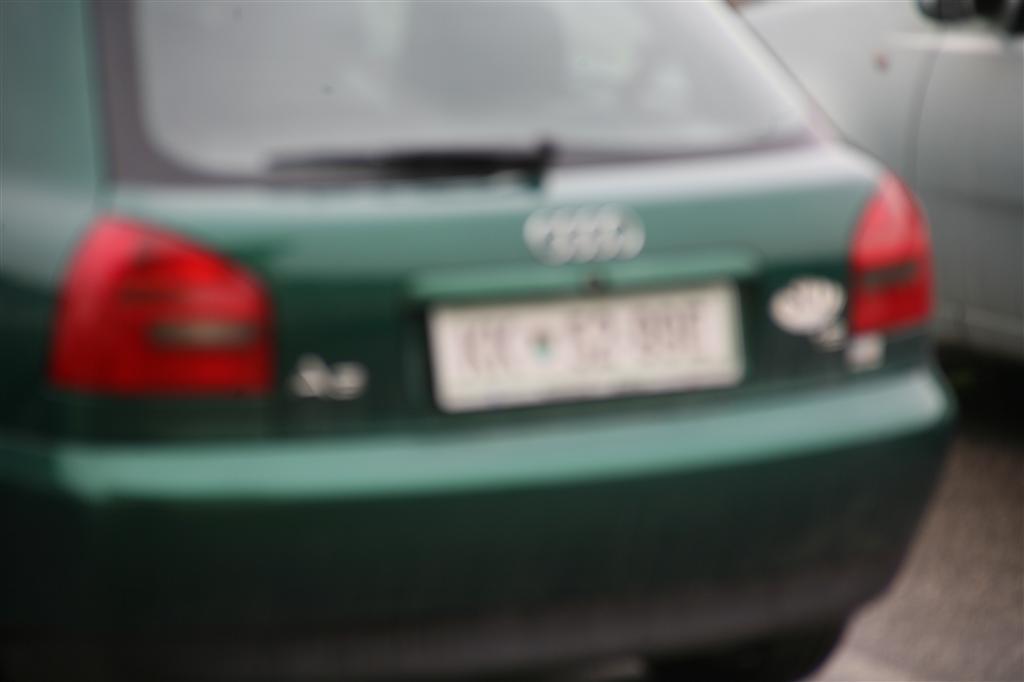
blurred image of a license plate

If you have a high-resolution image, we strongly recommend you crop the image to the area of interest before applying the Optical Deblurring filter. This is because the latter is computationally demanding. In this instance, we will deblur the whole image as it is a relatively small image.

Navigate to the Deblurring group of filters in Amped FIVE. Click on the Optical Deblurring filter to apply it to your chain.
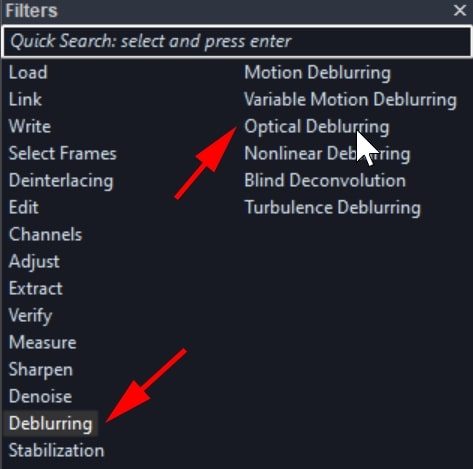
Screenshot of the Filters panel in Amped FIVE software showing a red arrow pointing to the "Deblurring" category and a second arrow pointing to the "Optical Deblurring" filter used for removing motion blur, optical blur, and image distortion.

Adjusting the Filter Settings

Adjust the Size slider by clicking the up and down arrows. This will facilitate the fine adjustments of this parameter, which you will need to make in order to deblur the license plate. Remember that you can also hold down the ALT key and use the scroll wheel on your mouse for fine adjustment. And you even have the CTRL key available for decimal steps, if you need that level of precision.
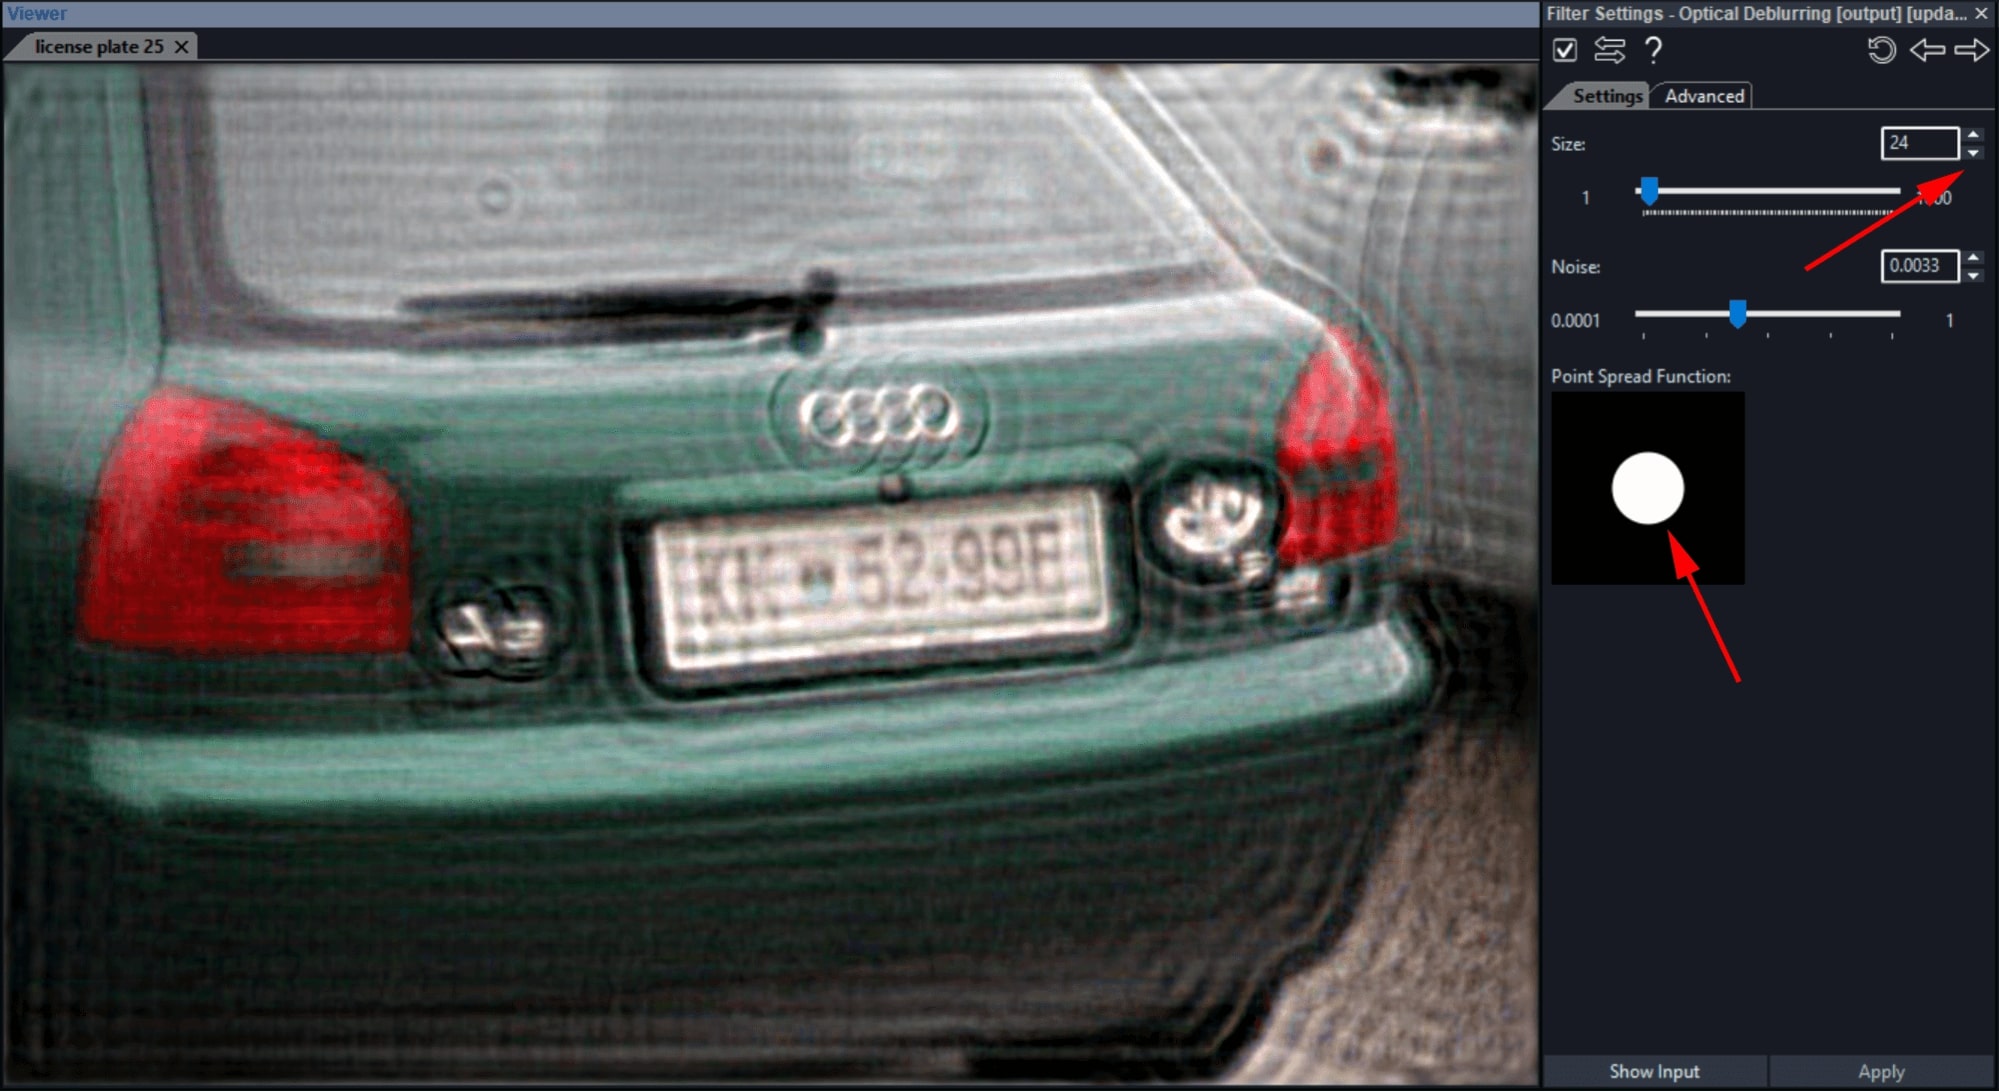
Screenshot of Amped FIVE interface displaying the Optical Deblurring filter applied to a blurred rear license plate on a green Audi, with right-side settings panel showing size parameter set to 24, noise adjustment at 0.0033, and Point Spread Function (PSF) preview as a white circle on a black background. Two red arrows highlight key controls — one pointing to the size value box, and another pointing to the PSF preview — to illustrate image restoration adjustments.

Note how your point is spreading in the lower part of the Optical Deblurring filter setting. This gives you a graphical representation of the Point Spread Function you are trying to compensate for in your image. You also have a Noise slider which will adjust the noise threshold. This can give you better detail but also more noise. So, as always, find the best compromise needed to read the VRN.

When finished, feel free to adjust your levels to get a better contrast of detail. If necessary, use the Correct Perspective filter to correct plates or signs at an angle.
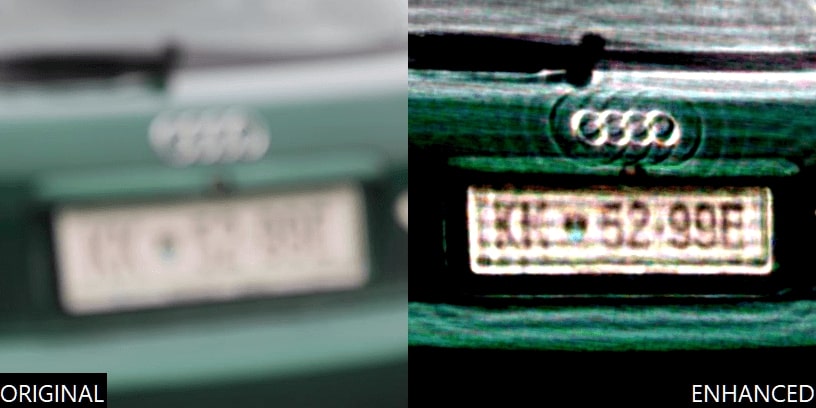
Side-by-side comparison of a blurred original image and an enhanced image of a green Audi’s rear license plate, showing forensic optical deblurring results where the plate characters become legible after image restoration and sharpening.

Watch the video below to learn how to deblur a license plate in Amped FIVE.

Conclusions

Thank you for reading and we hope you have learned something new today. Next week we will discuss how to unroll a 360-degree fisheye camera. Until then, as always, stay safe and take care.



 Emi Polito

Emi is a LEVA Certified Forensic Video Analyst and an expert in CCTV recovery, enhancement and analysis. He has worked as a forensic video/audio analyst and ISO17025 CCTV technical lead for a number of Police forces and leading forensic providers. He has also provided testimony in court as an expert witness on a number of occasions in the southeastern region of the UK. Emi has over 20 years’ experience in the field of media and imagery and his CV also includes a 10 years employment as a technical director and senior video editor and engineer for a major international broadcaster based in London. He is now a forensic expert and international trainer at Amped Software and continues to assist Police forces, the CPS, and criminal defense firms with the interpretation of video and audio evidence in court.

Subscribe to our Blog

Receive an email notification when a new blog post is published and don’t miss out on our latest updates, how-tos, case studies and much more content!