

Welcome back everyone to our series “Learn and solve it with Amped FIVE“. This week we are going to be clever and use mathematics to remove noise from an image! Don’t fret! We will learn how we can use the graphical representation of image frequency to remove noise. Curious? Read on!
Random Noise and Periodic Noise
In images and videos we can define noise simply as an undesired variation of pixel values. This is normally generated by extraneous elements. For example, interference, electronic gain or even adverse weather at the scene, such as rain or snow. The variation of pixel values can either be random or periodic, depending on the type of noise.

When the noise is random and we only have one single image (or frame) to work with (as illustrated above) there is no other option than to average out pixel values so that the contrast between them is less abrupt. In Amped FIVE, you can find such filters in the Denoise group of filters. They are great at reducing noise. However, the by-product of using these filters is that you will also reduce valuable detail. So the best you can do is to find the right compromise between what you lose and what you gain.

There is a more effective way to reduce random noise when we have a video. We can use neighboring frames to average out noise in time (as well as in space). This process is known as frame averaging and is very common with clarification of detail in Amped FIVE. But is there anything else we can do when we have noise that is not random, but whose pattern can be identified?
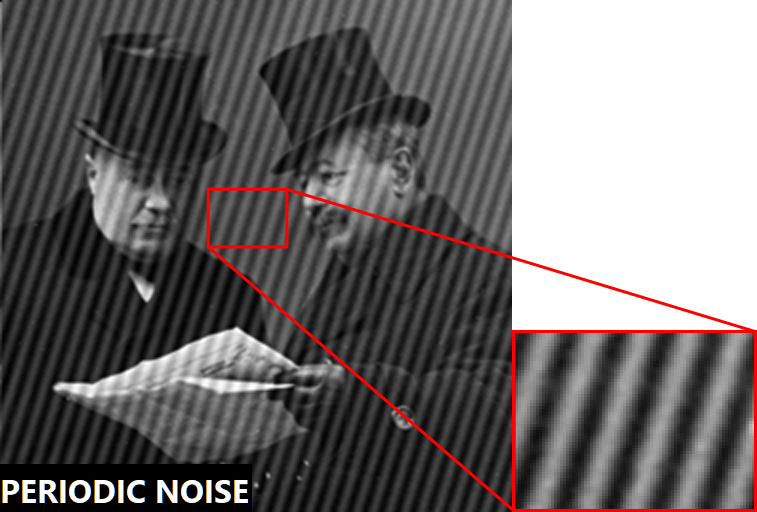
In the illustration below we can identify noise in the form of linear patterns of similar size, orientation, luminosity and equally distant to each other. This noise is not random, but what we call periodic.
What Is the Frequency Domain?
When we have periodic noise, we can use a filter in Amped FIVE called Fourier to remove it. This filter will use the frequency domain of the image (instead of the spatial domain) to identify and locate the patterns of the noise. This is so it can be removed from the image more effectively. But what exactly is the frequency domain? When we look at an image, we are acquainted with looking at it in the spatial domain, where every piece of image detail can be defined by its spatial coordinates. But we can also look at an image by using the frequency domain. Below you can see the same previous image of the two men represented in the frequency domain.
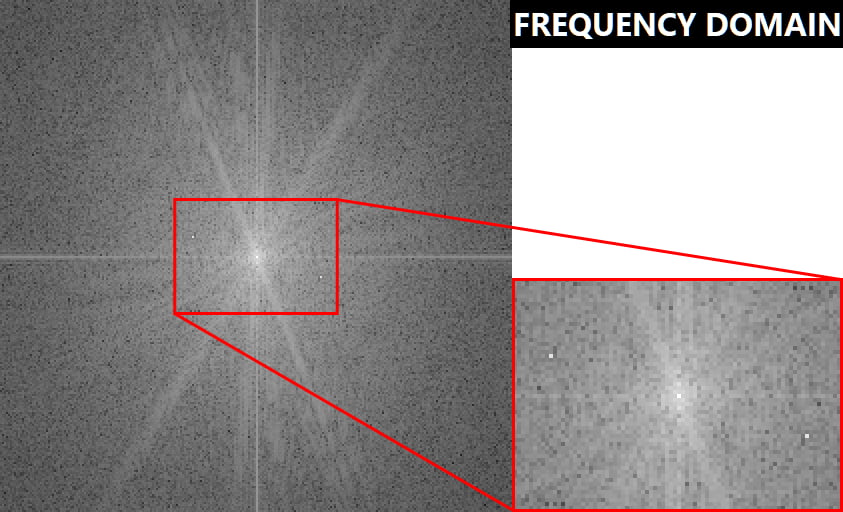
Identifiable patterns of image detail in the frequency domain are mathematically calculated and represented graphically. The geographical location of pixel values in the spatial remit of the image will no longer apply in the frequency domain. So don’t expect to find noise in the same location as where you’ve previously seen it.
Segregating the Frequency of Detail
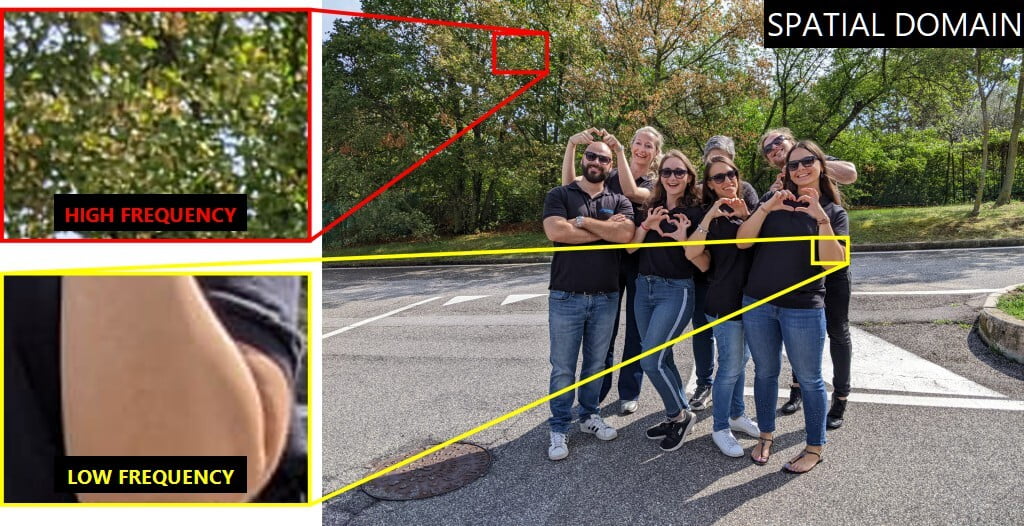
Looking at images in this domain is not only helpful to identify periodic noise patterns but can also be used to compress images more effectively. JPEG compression, for example, uses a similar transform block-wise to proportionally reduce high frequency of detail because our eyes register it less effectively than low frequency of detail. In the image below, for example, our eyes will be drawn to a low frequency of information (the uniform skin tone of a person, for example) prior to the intricate detail of the tree’s leaves (the high frequency of information).
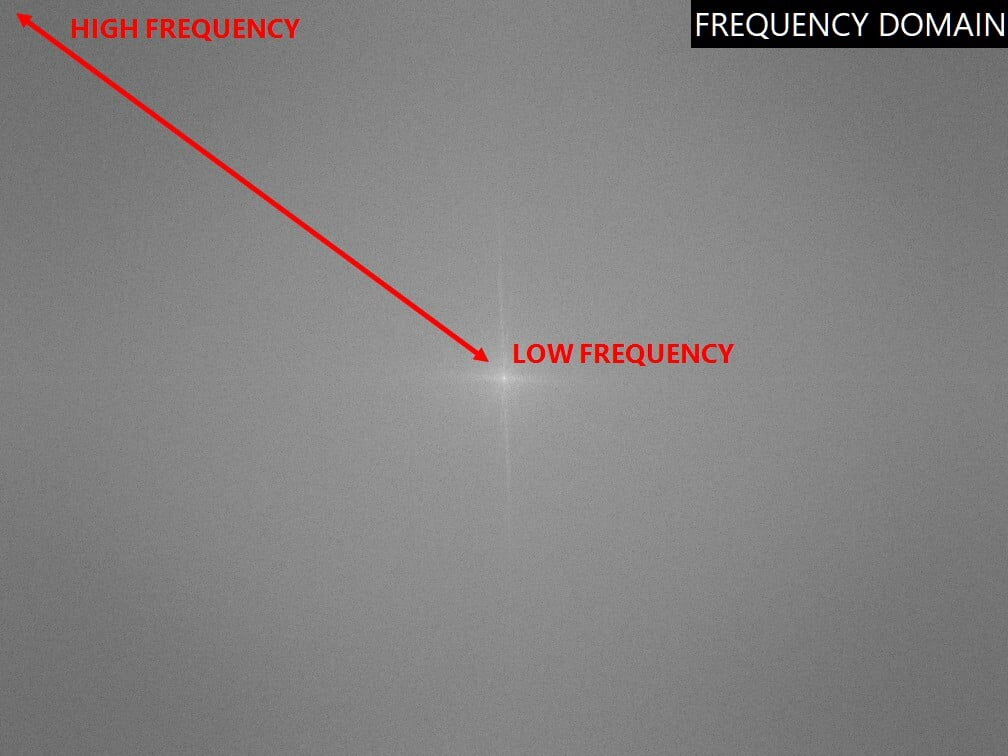
In the frequency spectrum as displayed in Amped FIVE, the low frequency data is nearer to the center spot of the spectrum and the high frequency data is located towards the periphery of the spectrum.
Removing Periodic Noise Using the Fourier Filter
Once you determine that the noise in the image is periodic (and not random), go ahead and apply the Fourier filter. This can be found in the Extract group. The image will change immediately from spatial representation (IFFT or Inverse Fast Fourier Transform) to frequency domain (FFT or Fast Fourier Transform). You are still looking at the same image! So, don’t panic. Everything is under control.

Working in the Frequency Domain
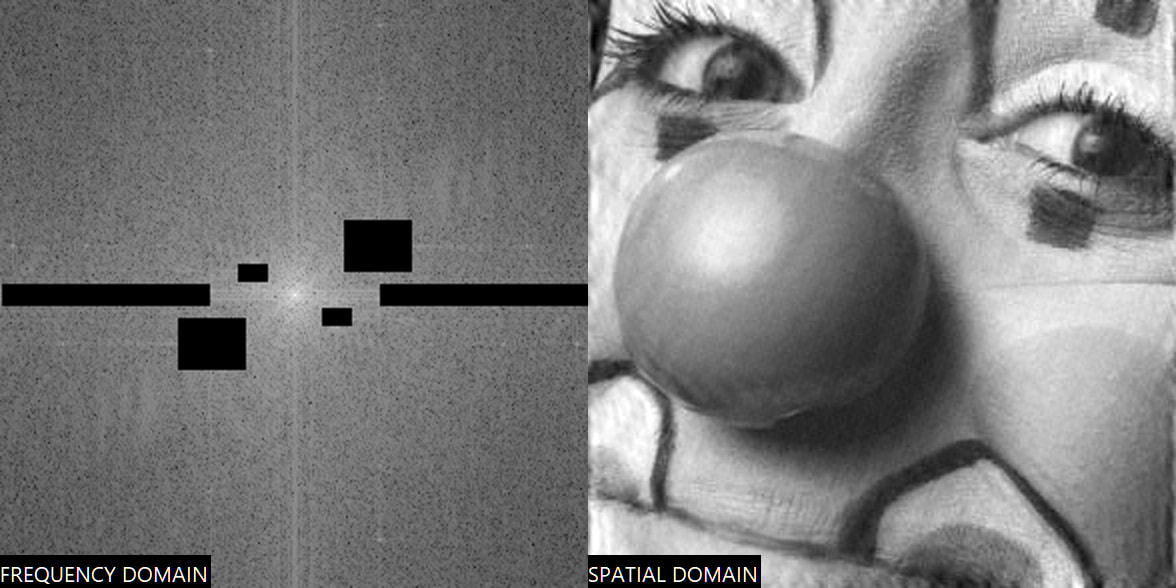
In the frequency domain, patterns of noise that are periodic will be represented as brighter pixel regions. In this sample, we have patterns of noise that appear to be of similar size and orientation. They are equally distant to each other in the image of the clown. Using the rectangular selector already activated for us by the Fourier filter, we can select these bright spots in the displayed frequency spectrum. We can add them to the selections to be removed by clicking on the first Add button, as shown below.

You will notice that three things will happen. The selected area will be shown as black in the image. The coordinates of the selection will be listed in the “Selections to Remove” text box. And, finally, your selection will be symmetrically replicated in the opposite area of the frequency spectrum, relative to the center spot (because of the mathematical properties of the Fourier transform). To assess how your selections in the frequency domain have processed your image in the spatial domain, simply select the Image (IFFT) option from the output drop down box in the Fourier filter settings. Below you can see how the periodic noise originally present has been neatly removed from our image.
Stay Away from the Center Spot
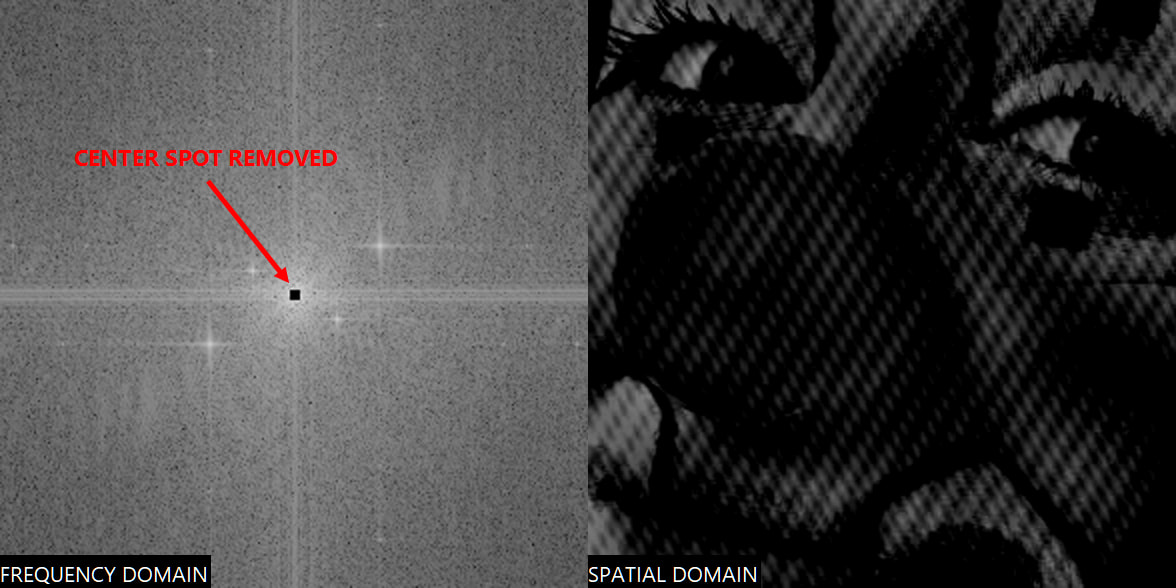
And, since we have mentioned the center spot, take care not to remove this from your selection. Why not? Because this is where the majority of perceptually relevant information is in your spatial representation of the image. Remove the center spot in the frequency domain and you will remove the so-called “continuous component” of the image. It is essentially the average value of all pixels throughout the image. As you can see below, the image appears much darker because you’re basically subtracting the average image value from it.
Automating Noise Selections in the Fourier Filter
There may be instances where the noise components in the frequency domain are so many and so scattered about. Removing them manually one by one may not be so time effective. Especially when dealing with video, where the noise patterns may change frame by frame in the frequency spectrum.
In this situation you may want the filter to automatically select (and remove) bright spots. To do so all you need to do is tick the Automatic Selection at the top of the Fourier filter settings.
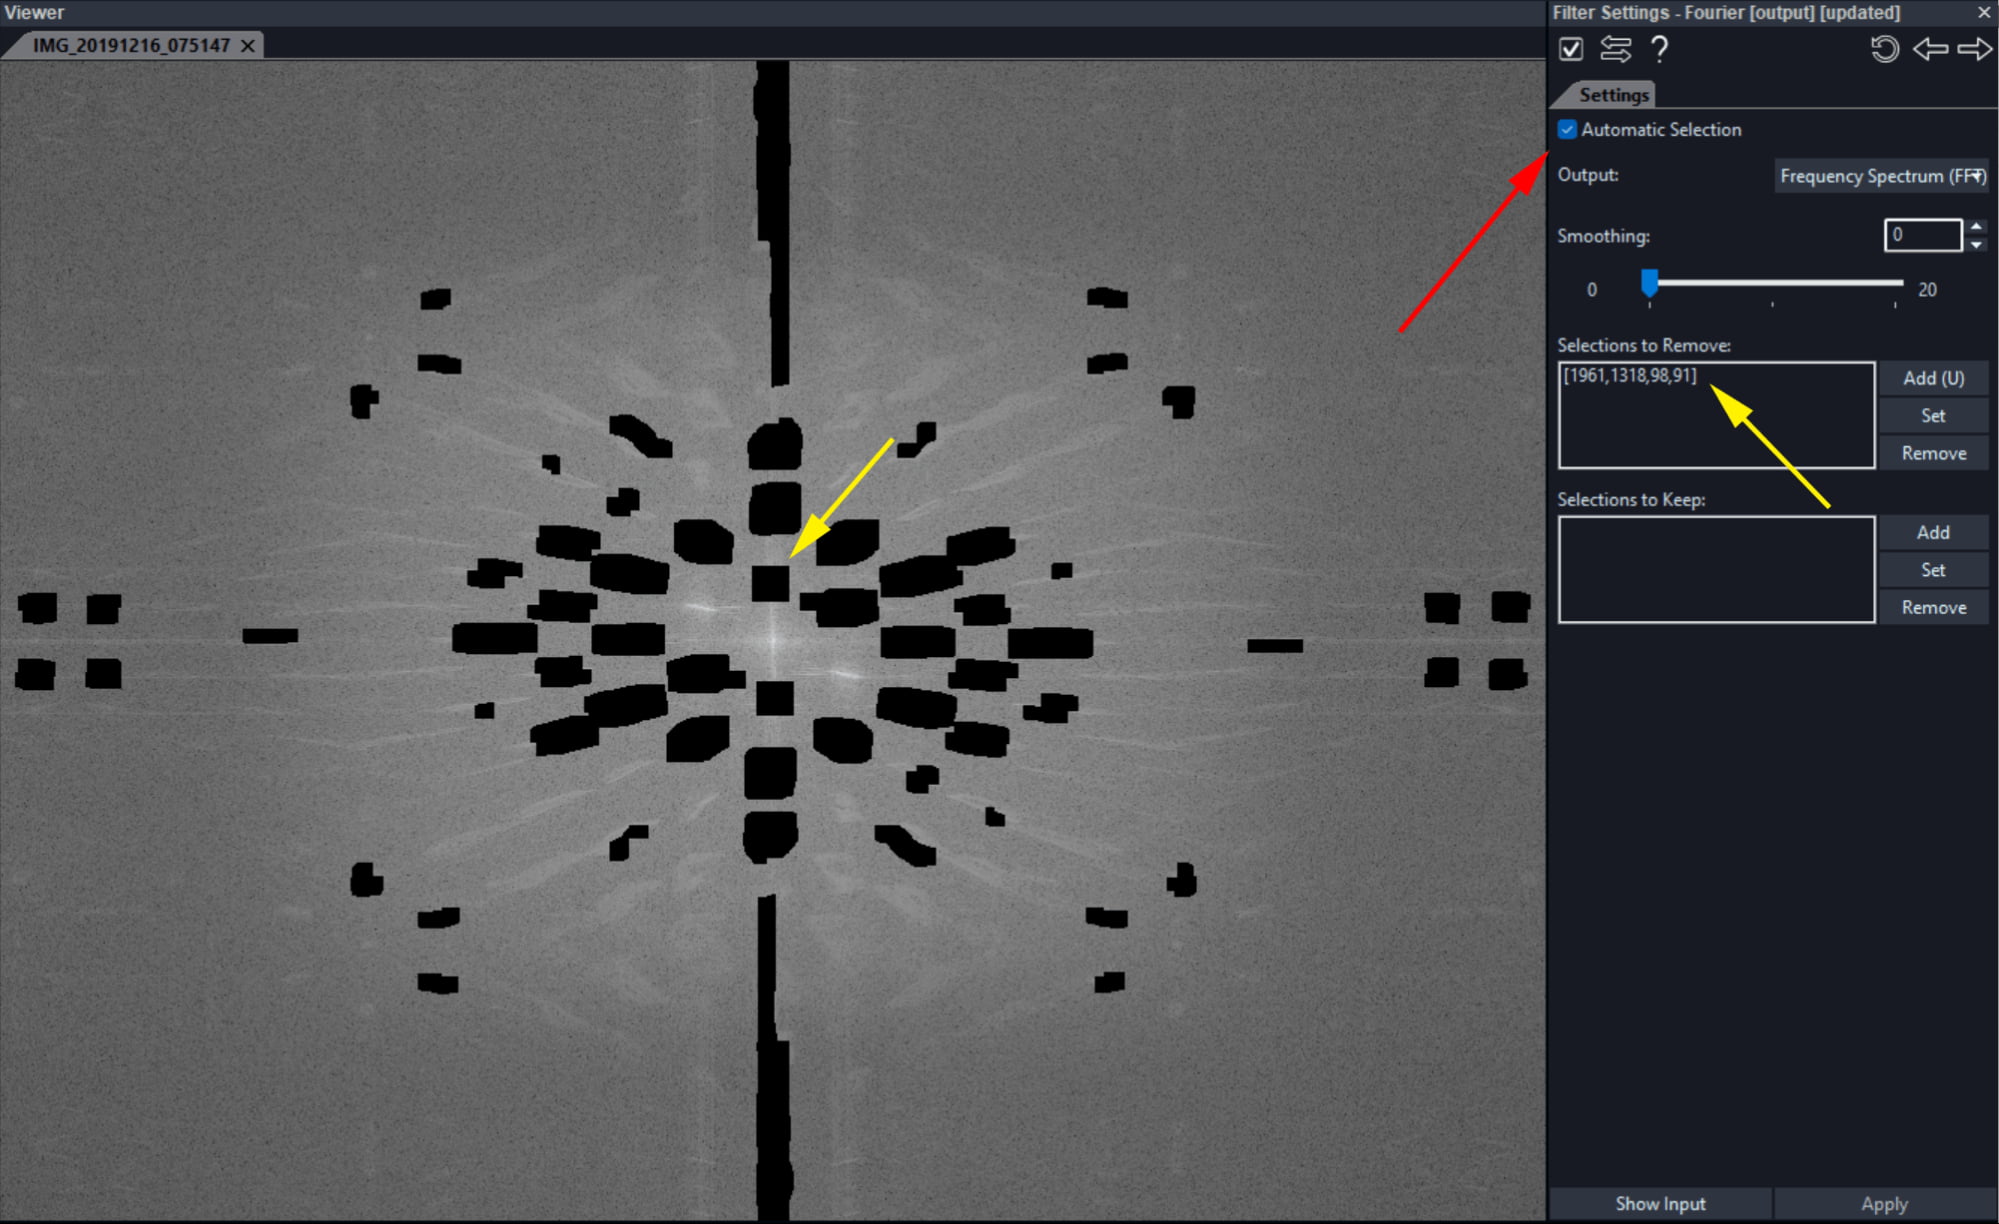
You will still of course be able to add manual selections to the automatic selection by applying the procedure already described.
Conclusions
To learn more about removing noise from an image, check out this video on our YouTube channel.
We hope you enjoyed this week’s content. Of course, feel free to ask us any questions on the topics discussed in our Discord channel, where members of staff or indeed other users will have the opportunity to respond.
We look forward to seeing you next Tuesday for another article in our “Learn and solve it with Amped FIVE” series.


