
Dear colleagues, welcome back to our series “Learn and solve it with Amped FIVE“, dedicated to common enhancement workflows in Amped FIVE! This week we’re going to address scene issues in images and videos. We will explore how we can correct the perspective of a license plate.
Why Is Perspective an Issue?
In imagery, just as in life, clarity depends very much on the angle at which we look at things. Unfortunately for us though, unlike real life, images and videos are two dimensional representations of a three dimensional world. So, overly skewed and narrow angles of view are going to give us many headaches in attempting to read the characters of that important license plate.
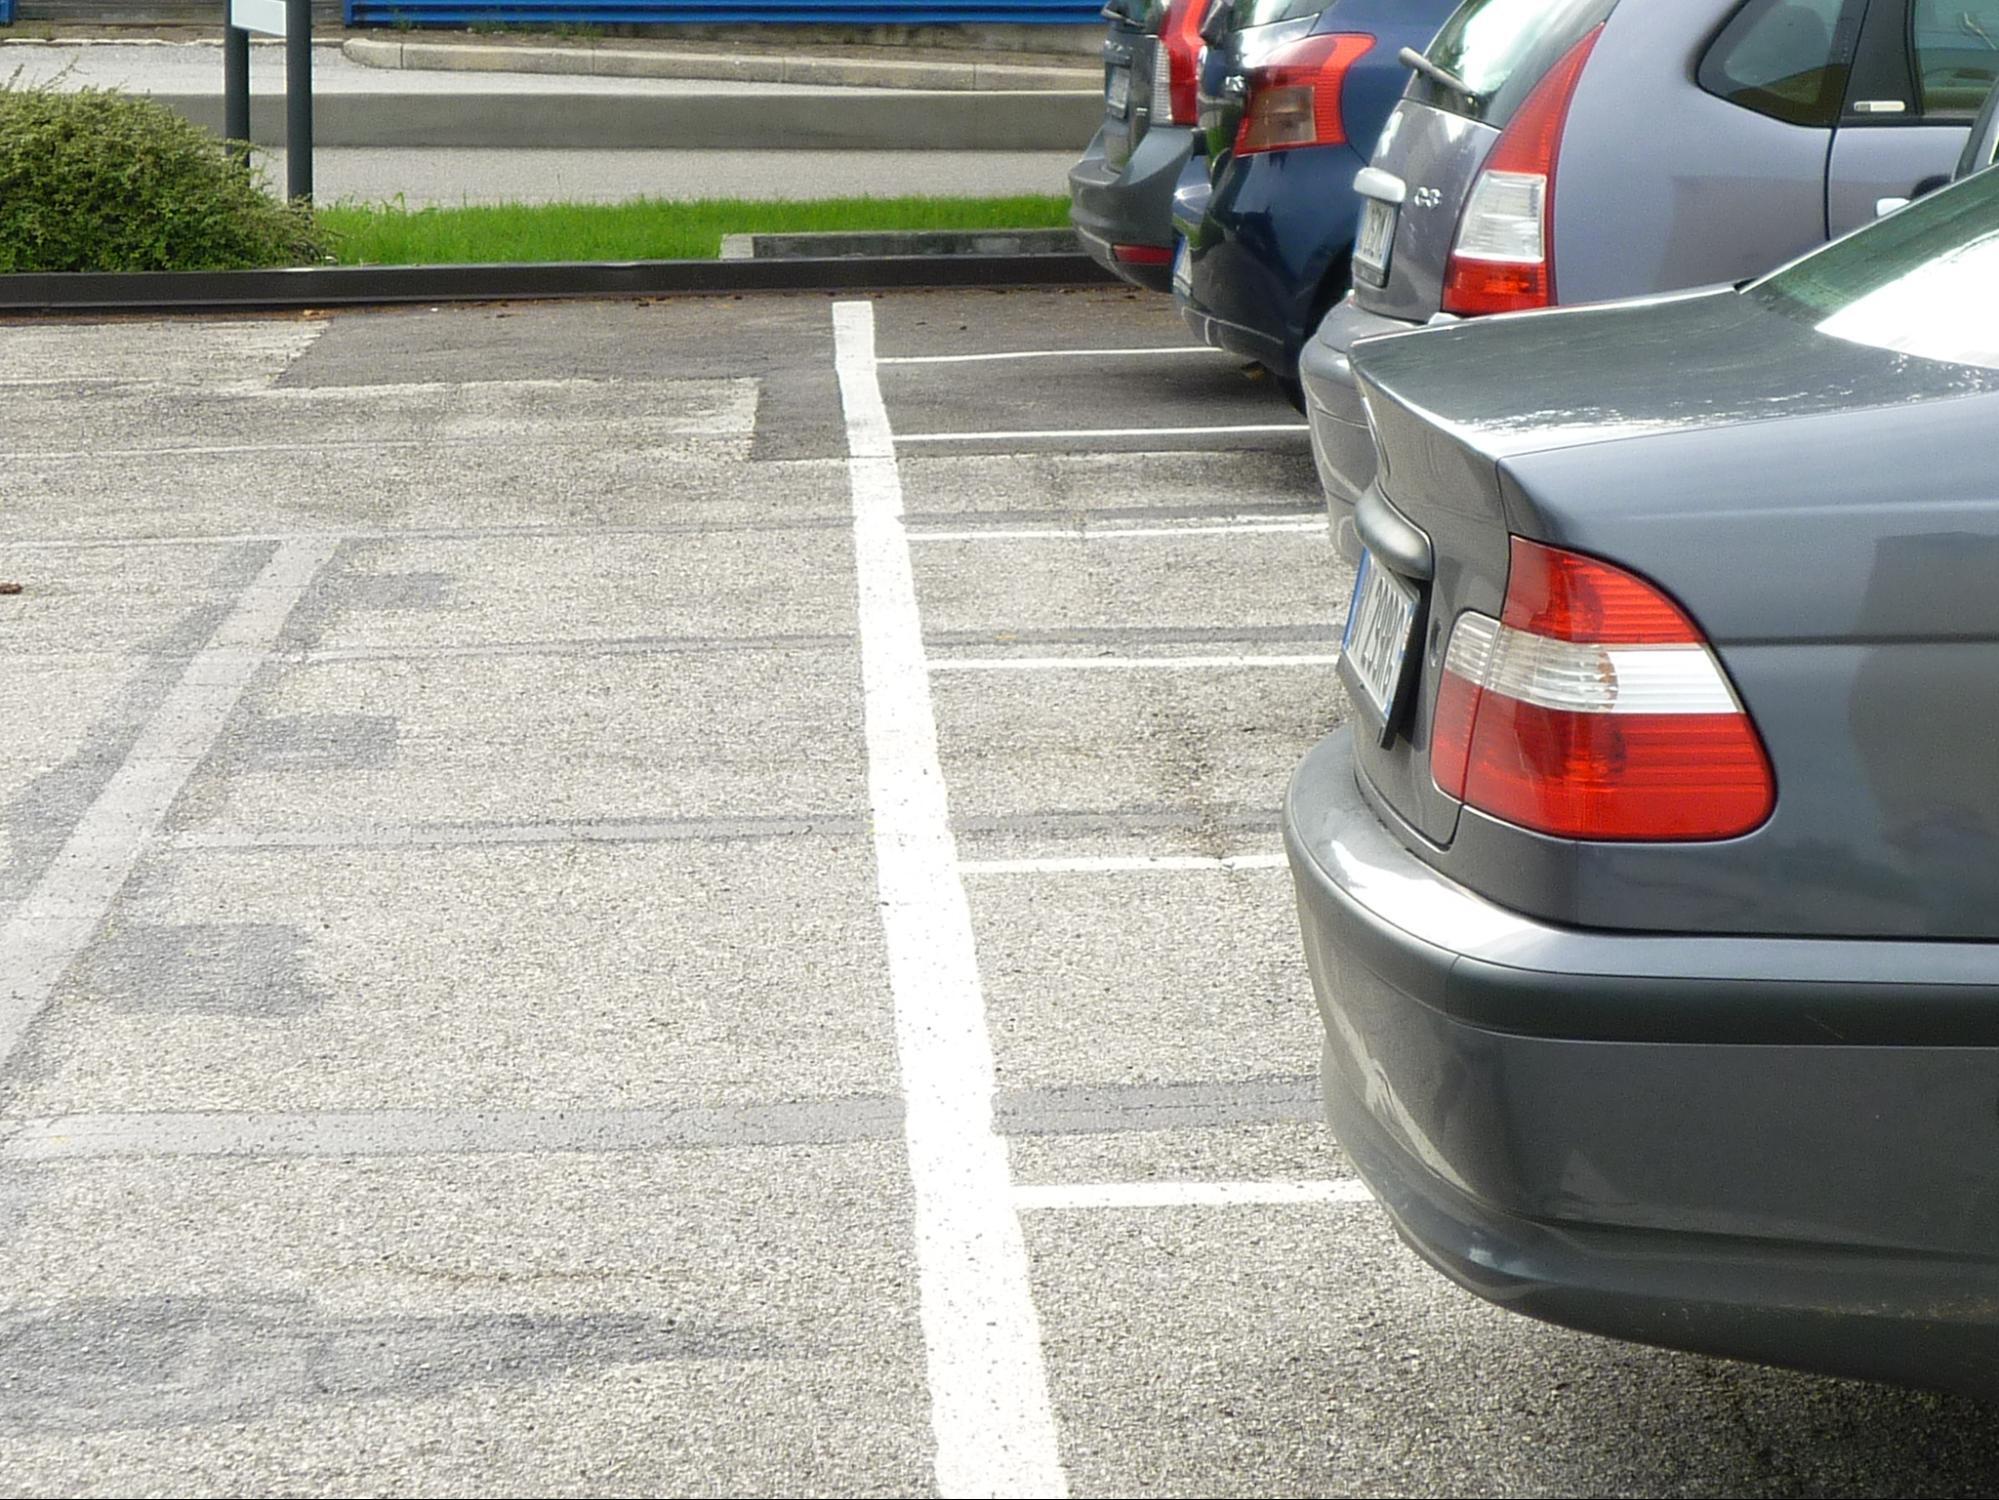
I always say (and always will) that a successful enhancement is directly dependent on the detail already available to us. In other words, if we are trying to improve the visibility of a license plate, for example, the detail inherent in the characters of the plate must already be available in the original material. We may encounter cases when we have good quality material. However, an awkward angle of view may prevent us from registering this detail properly in our brain. And that’s where Amped FIVE can help. Correcting the perspective may also help with deciphering characters after a stabilization and integration workflow on a poor quality piece of CCTV footage, for example as explained in the previous blog post of this series.
Preparing for the Correct Perspective Filter
In preparation to using the Correct Perspective filter, it is a good idea to first Crop the image to the area of interest and adjust the Levels if necessary. You may also need to conduct a stabilization and integration workflow and/or deblur as necessary prior to applying this filter.
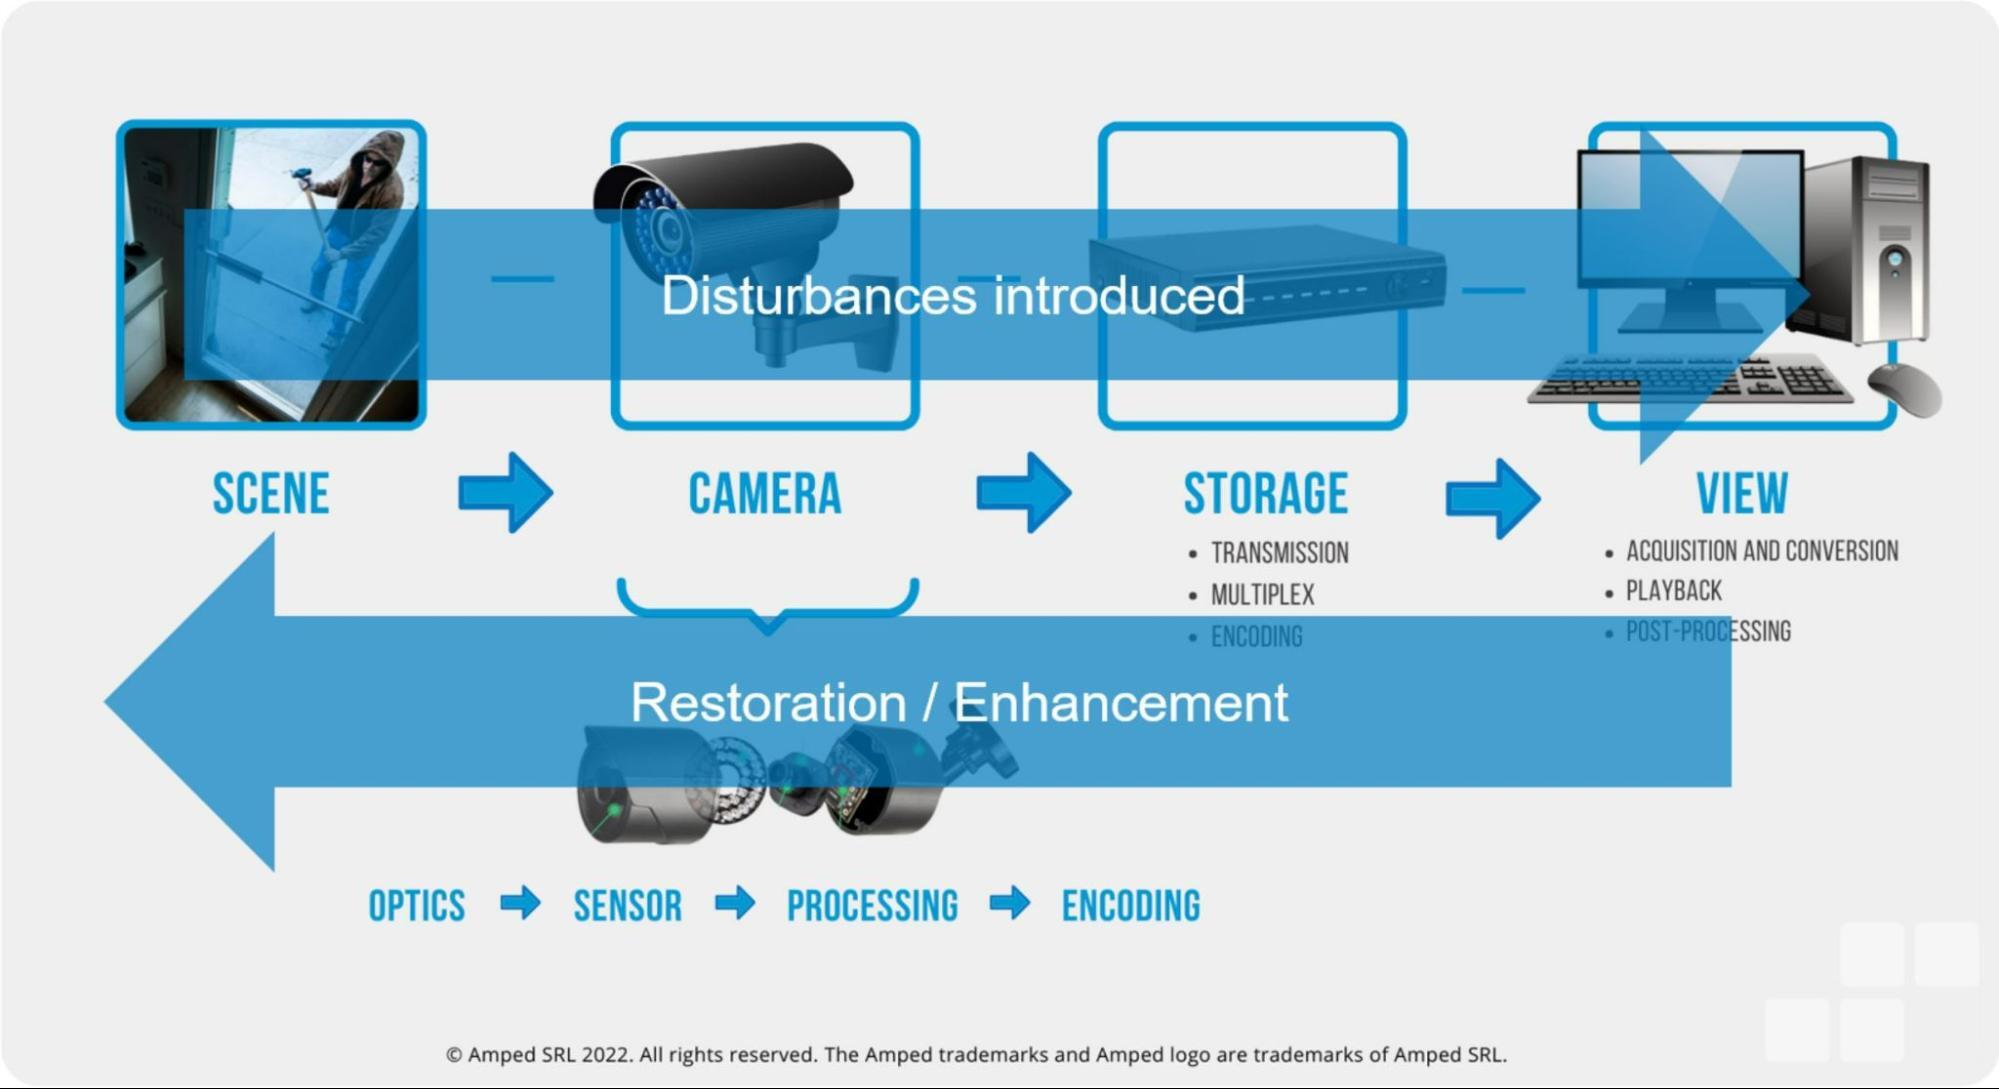
Remember that an issue with perspective is one that occurs at the scene stage of the image generation model. Therefore, if we follow the “Reversing the Chain” methodology, we will need to correct the perspective towards the end of a workflow.
Applying the Correct Perspective Filter
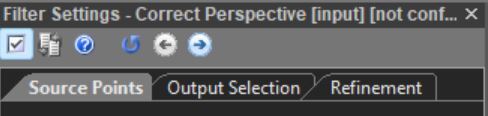
Apply the Correct Perspective filter, which can be found in the Edit group of filters, to your image or video chain. The filter settings are made of three sequential tabs. These will assist in reproducing and correcting the perspective and aspect ratio of your license plate:
- Source Points – This is where you select the four corners of the license plate (using the Quadrilateral Selector tool)
- Output Selection – This is where you tell Amped FIVE where to reposition the four corners of the license plate (using the Rectangular Selector tool)
- Refinement – This will give you the opportunity to re-select the four corners of the license plate (using the Quadrilateral Selector tool) from an already corrected image
Source Points
As soon as you apply the filter, you will be in the “Source Points” tab. The Quadrilateral Selector will already be activated for you. Start by drawing a polygon across the four corners of the license plate. From the top left corner proceed and make your way clockwise around the plate. The polygon needs to be drawn this way. Otherwise, you may end up with an upside down, or worse, a flipped plate (or both!).
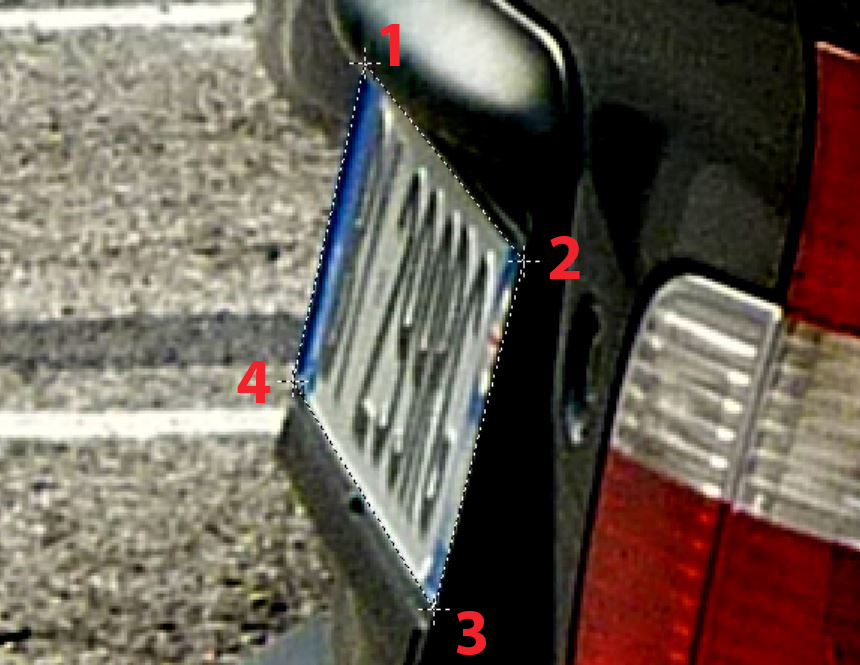
Once the four corners are drawn, the polygon will close and the image will be processed. The pixels of the image will be relocated so that the license plate will appear as if it is virtually in front of us. But the aspect ratio will be inaccurate, as the filter still needs to know the distance between the four corners in the adjusted image.
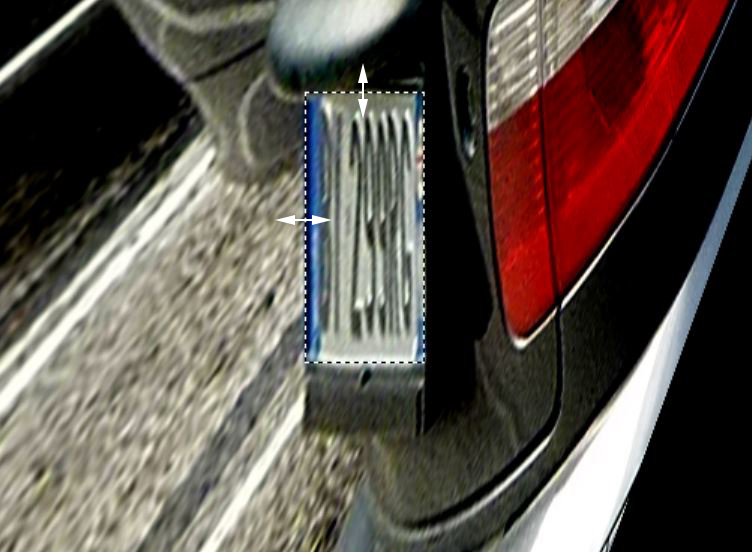
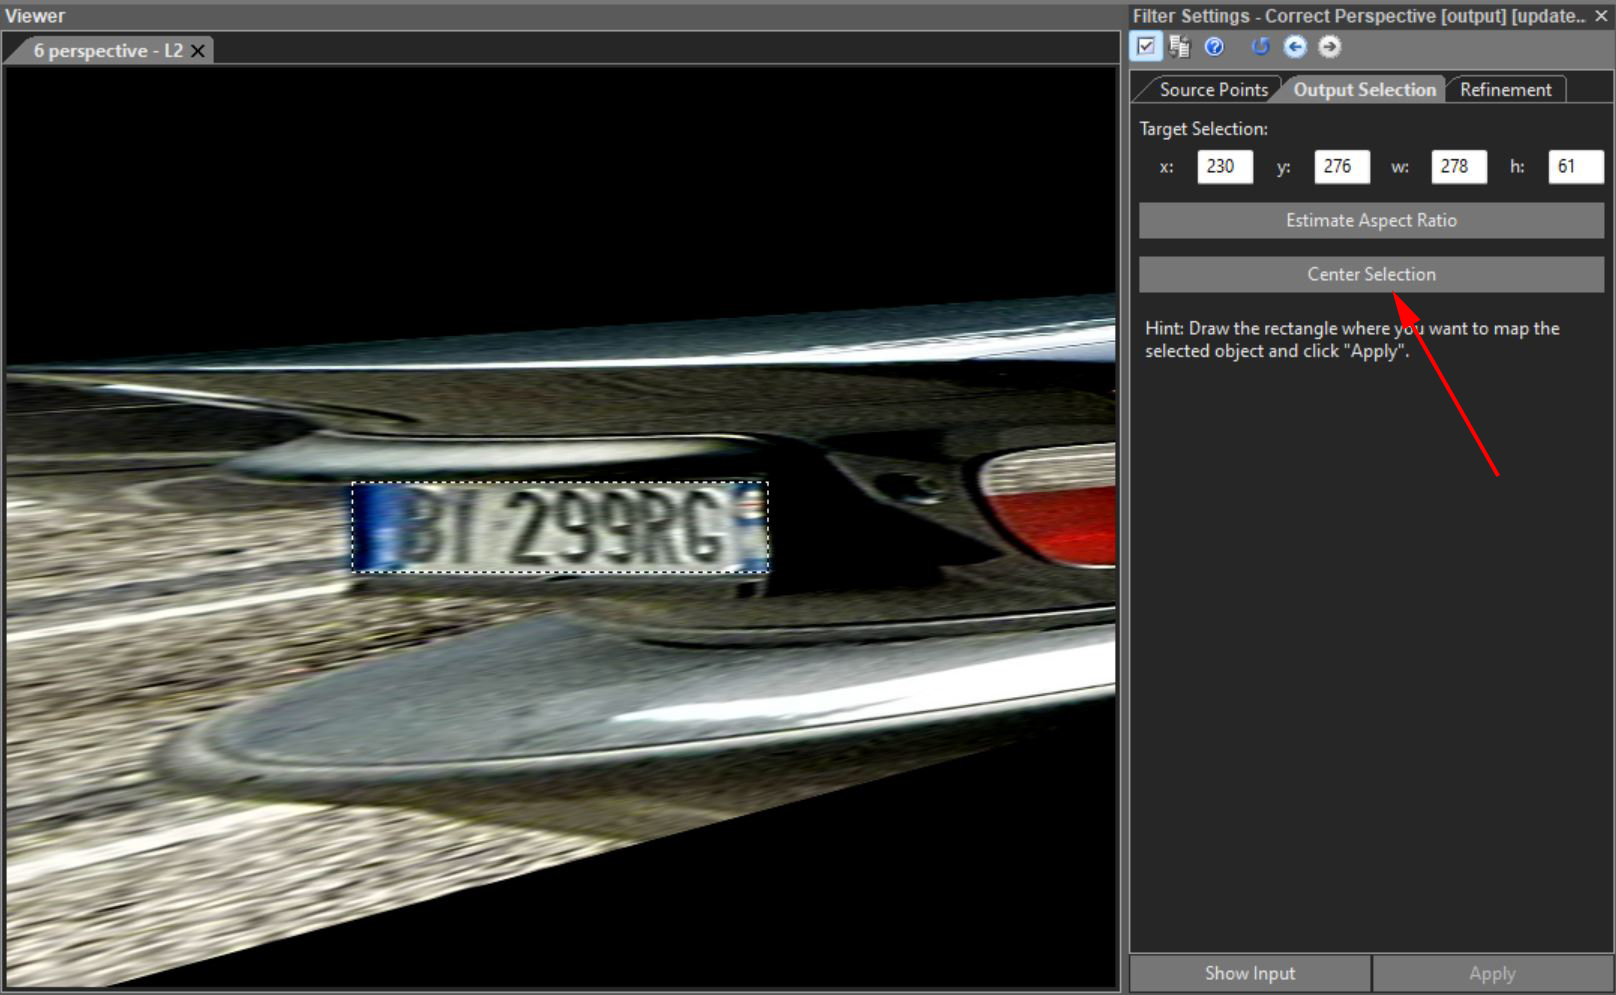
Output Selection
You will be automatically moved to the “Output Selection” tab in the filter settings. Now, you can draw a rectangle on the screen to replicate the appearance of the license plate in the corrected perspective. Alternatively, you can hover the mouse over the edges of the existing rectangular selection. From there, you can stretch and adjust the aspect ratio as needed. If you wish, you can also click on the Center Selection button to position the adjusted license plate in the middle of the picture area.
Refinement
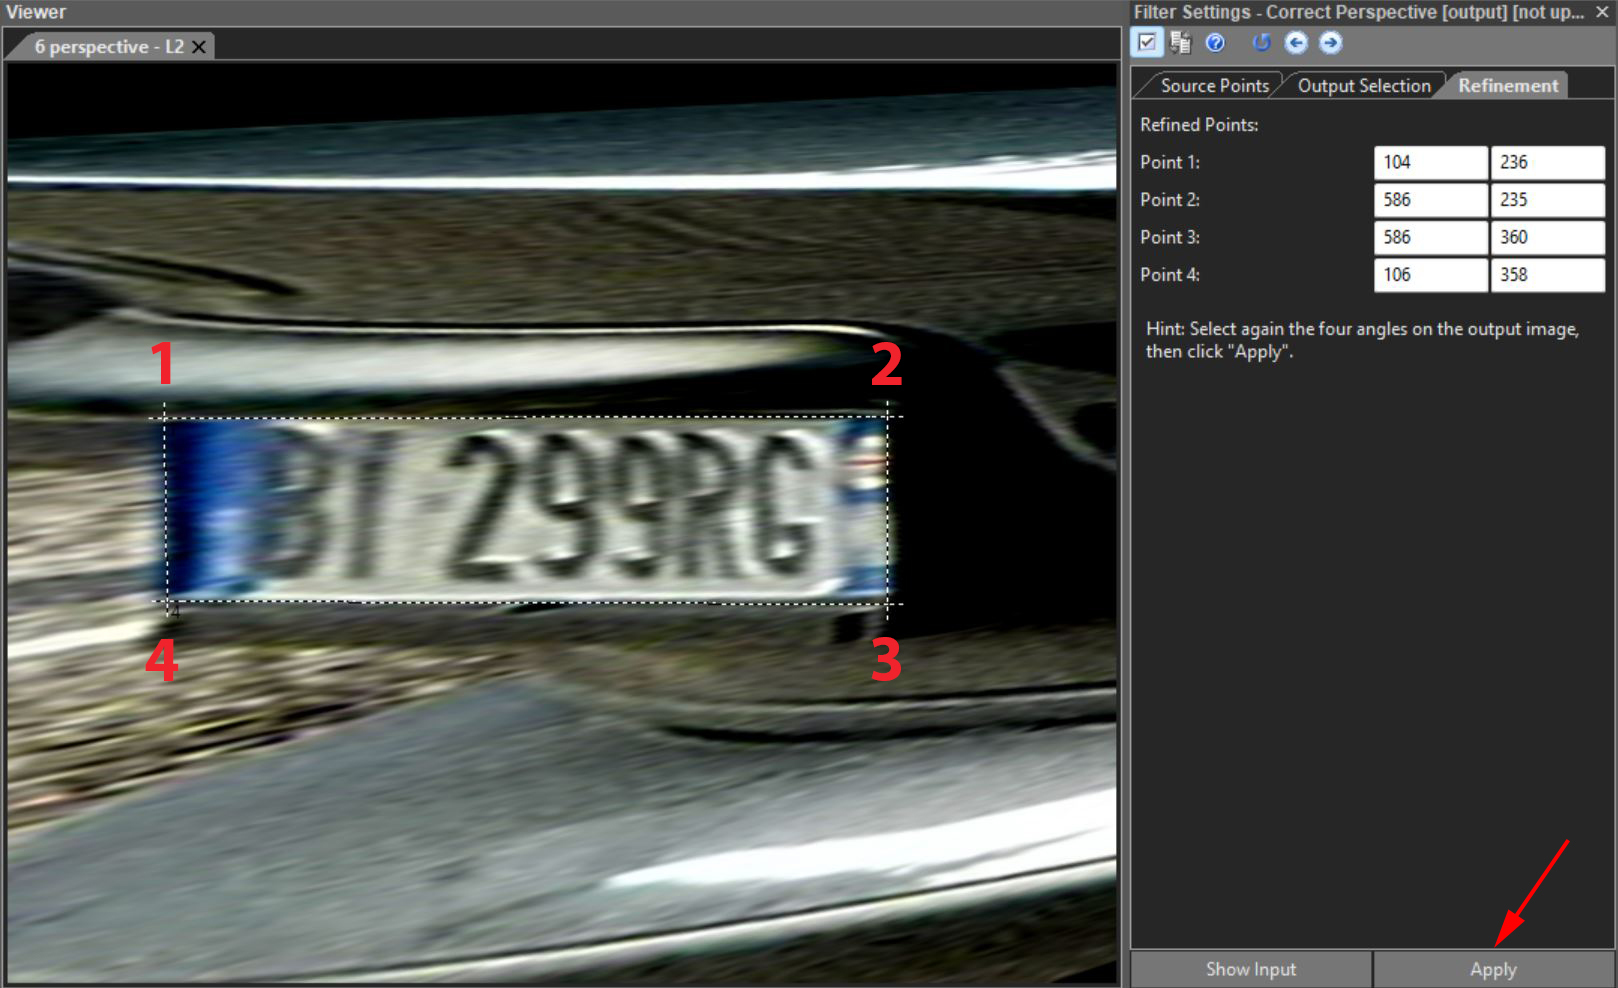
Finally, you also have the option to refine the position of the four corners by clicking on the “Refinement” tab. This is optional, but can be incredibly useful if the initial view of the plate is so skewed that it is not possible to accurately select the four corners in the first instance. When in this tab, you will have the view of the plate already corrected. Then, you can fine tune the selection of the four corners again with the Quadrilateral Selector to obtain an even better representation of the corrected perspective. Just remember to click the Apply button after you have selected the four corners in this tab.
To learn more about correcting the perspective with Amped FIVE, check out this video on our YouTube channel.
Conclusion
Before we say goodbye, let me remind everyone of an important point. Correct Perspective should only be used for flat surfaces, such as a license plate, a building’s facade, or a billboard. You should not use this filter to correct the perspective of faces or other non-planar surfaces. This could lead to a misrepresentation of the scene.
And that’s it fellas! We hope you’ve found this issue of the “Learn and solve it with Amped FIVE” series interesting and useful! Stay tuned and don’t miss the next article coming out next Tuesday! Don’t forget to share this blog post with your friends and colleagues on LinkedIn, YouTube, Twitter, and Facebook.


