

Happy Tuesday everyone and welcome to our fourteenth installment of the “Learn and solve it with Amped FIVE” series. This week we will discuss how to increase the exposure of dark footage.
Why Is It So Dark?
Dark images and videos can cause us many problems when trying to discern details. But why are they dark in the first instance? On many occasions, the reason will be simple: there is a lack of natural and/or artificial lighting in the scene. In combination with inadequate camera settings that would counteract the low lighting conditions of the scene, we will end up with underexposed images.
The exposure of light in the camera lens is controlled by the aperture. Similar to our own eyes, lenses are equipped with thin plates that create a circular opening in the center. The bigger the opening, the more light is channeled into the lens. And vice versa.
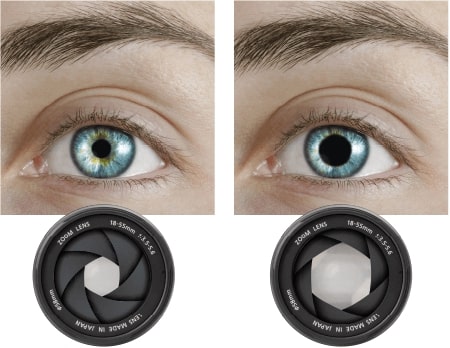
Most cameras are set to adjust the aperture automatically. This works fairly well in most general scenarios. It can be more of an issue when we are dealing with uneven areas of illumination.
Even when the iris is completely open, there may still be insufficient lighting in a scene. In such cases, alternative solutions should be considered to capture an adequate amount of light at the scene. These solutions can include increasing voltage on the camera sensor (also known as gain) and/or decreasing the shutter speed. For a detailed explanation of what the shutter is, please refer to our previous article in this series.
A Little Variation of Pixel Values Can Go a Long Way
How can we determine if we have enough detail to clarify an underexposed image? We will use the Histogram just as we did in the past installments of this series, when we talked about how to enhance a backlit scene and how to enhance details in poor-contrast images.
In Amped FIVE, the Histogram can be accessed from the Tools panel. Simply click on the third shortcut in the ribbon.

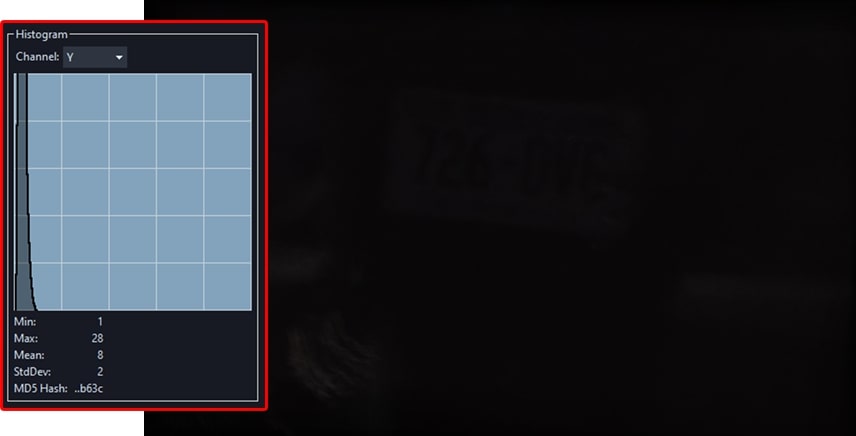
The image below is very dark. We may be tempted to think that there is not very much we can do to increase the visibility of detail in this scene (if there is any in the first place!).
However, by looking at the Histogram, we can see a healthy variation of luminance values. It is a very narrow variation (between 1 and 28) but it can be stretched, nevertheless, to fill the complete range between 0 (pure black) and 255 (pure white).
If you want to find out more about the Histogram and how to assess variation of pixel values, please have a look at this in-depth explanation contained in a previous article of our series.
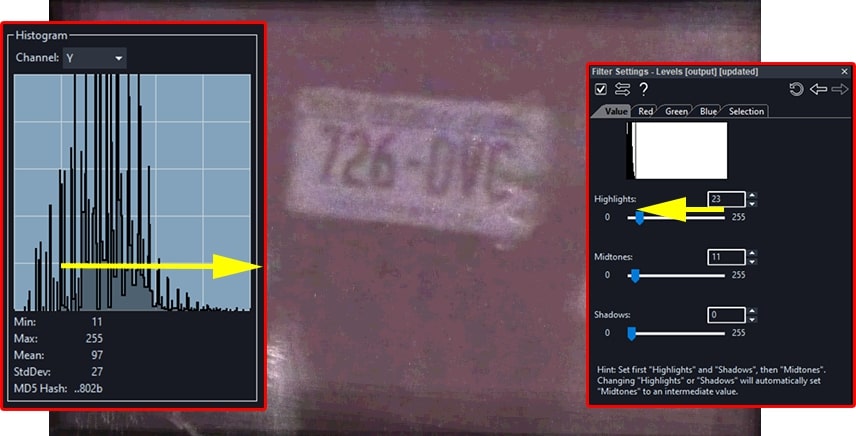
We can apply any of the Adjust filters available to us in Amped FIVE, such as the Levels filter. For example, we can stretch the narrow variation of values to reveal detail in the scene and even obtain a reading of the license plate.
In this instance, we simply pushed the Highlights down to increase the luminance variation of pixels.
Nothing We Can Do!
There will be situations where there is simply not enough detail to work with. But we must be able to explain why the limitations of the imagery are such that no improvement can be obtained.
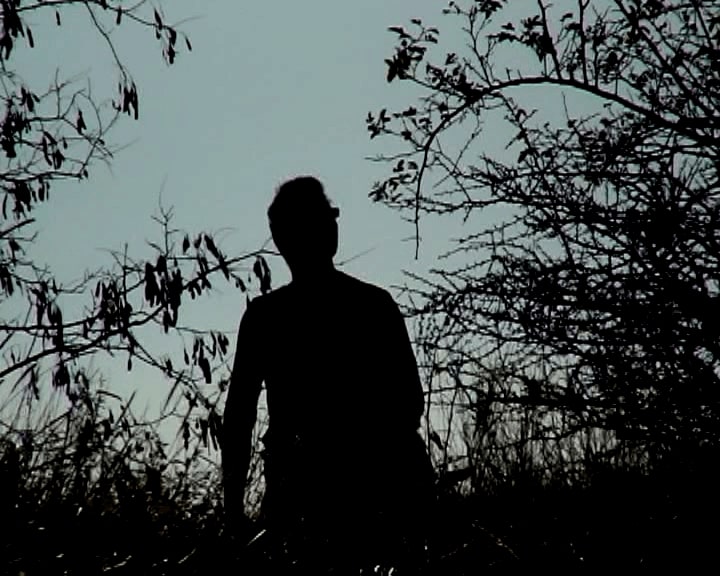
Have a look at the image above. The face of the subject is dark but can we enhance it? In Amped FIVE, we can assess the Histogram for a selected area of the image. We will examine the variation of pixel values only within the facial region of the subject. Apply the Levels filter in FIVE and click on the Selection tab of the filter settings. This will activate the Selector in the Tools panel. Draw a rectangle on the area of interest, as shown below, and click on the Histogram tool.
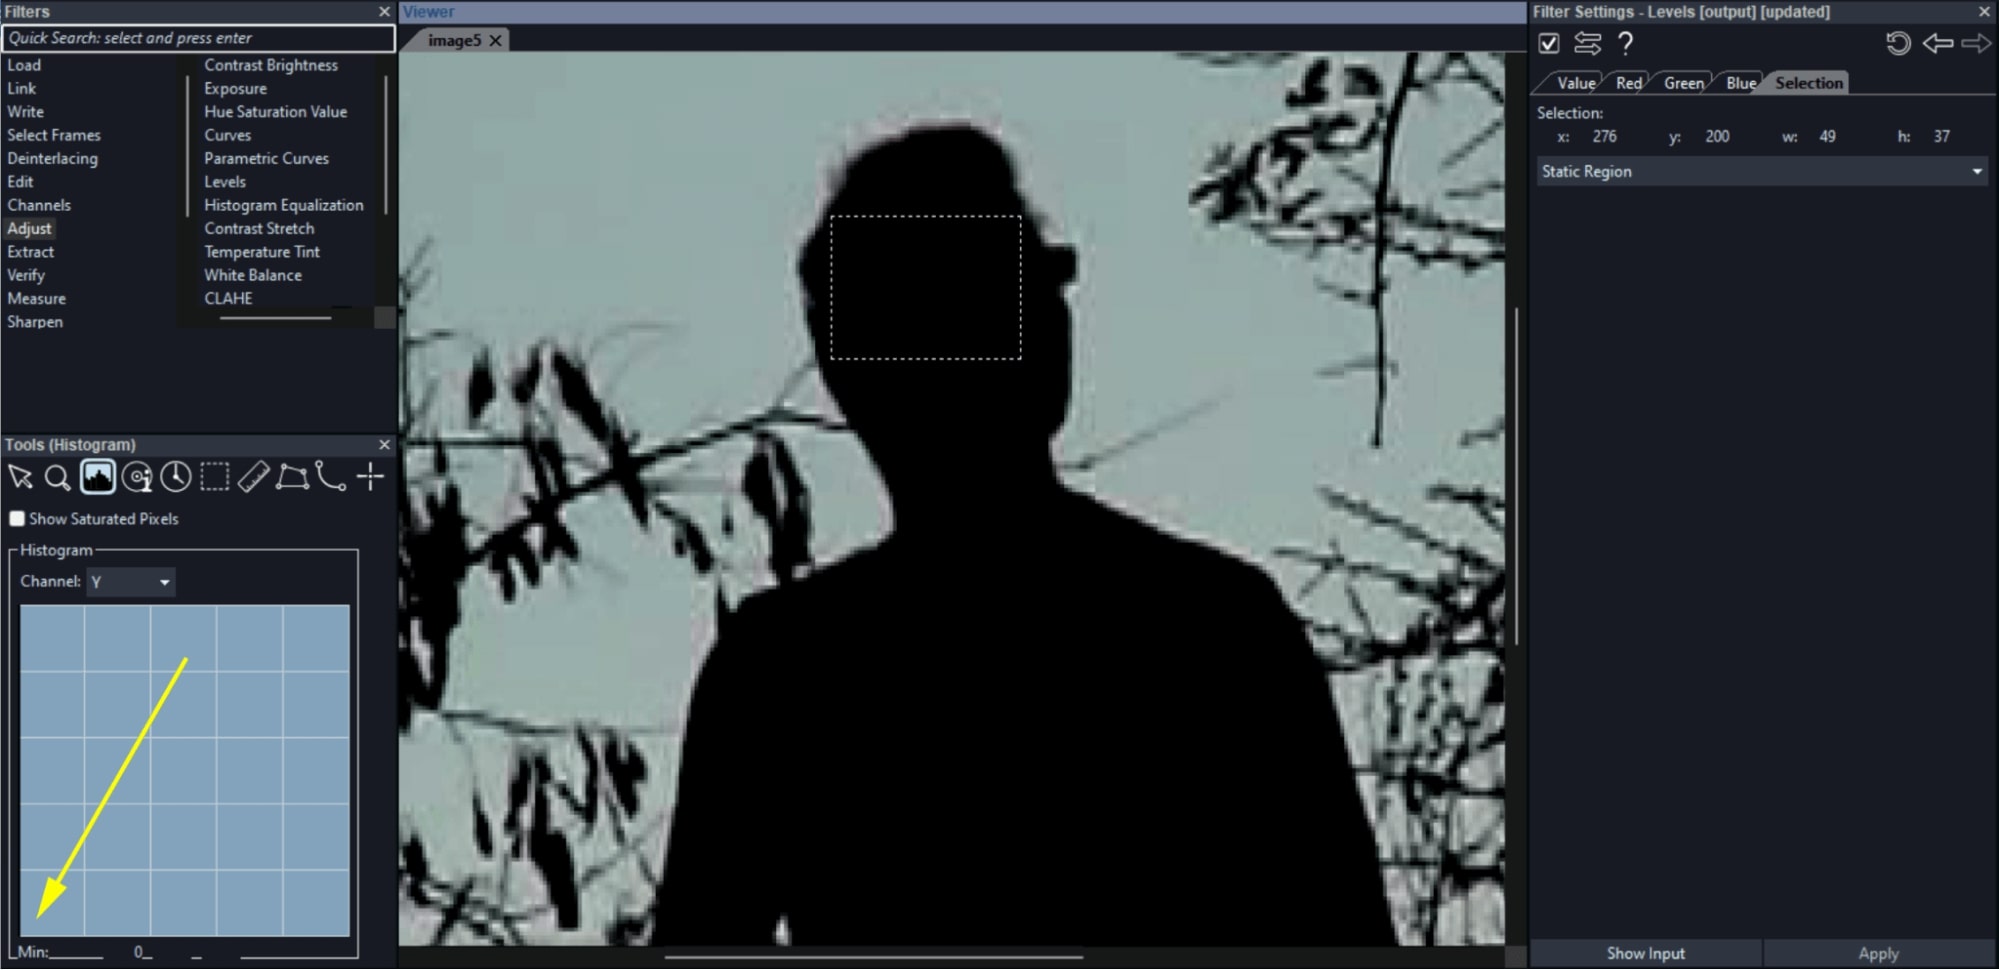
The Histogram now only shows us values for the selected area. As we can see, in this area there are only 0 values (pure black). Due to the lack of variation in values, there is no contrast of detail. Brightening up this region would only result in making it all the brighter, as shown below. We cannot create variation, when there is none. In this instance, we simply cannot enhance any facial detail, as a result.
Limited vs. Full-Color Range in Videos
When dealing with videos, specifically those that are excessively dark or bright, we may be viewing a limited range of pixel values. In fact, the full range is available in the video file container. We refer to this as the color range. But what is it, exactly?
In an 8-bit depth digital imagery system using 256 color pixel values, a limited range is between RGB values 16 and 235. This means that the darker pixel values (between 0 and 15) and the brighter (between 236 and 255) are unused. The reason why we have this distinction between limited and full range is, again, historical. Like pretty much everything else that involves digital imagery!
It all goes back to when analog video became digital. The analog video signal specifications for both PAL and NTSC allow frequencies that extend past white and past black. Therefore, mapping the entire analog signal spectrum into the full 0-255 interval would cause a reduction in contrast. To compensate for this, during the analog-to-digital conversion, the luminance values are squeezed into the 16-235 interval, leaving values outside the range unused.
Stretching the Range
Of course, when a video with a limited color range is digitally decoded, pixel values have to be converted back into the 0-255 range. Their values will need to be appropriately stretched. The problem is that many digital video files may be recorded at a full-color range, but set to be decoded with a limited color range. Due to this stretching, we could be losing detail variation at the very dark and bright spectrum of the range.
We need to bring this detail back even if the video does not look as “pretty”. This could be key to enhancement success. To do so, we simply change the Color Range filter parameter on the Video Loader to “Full”, and then click Apply.
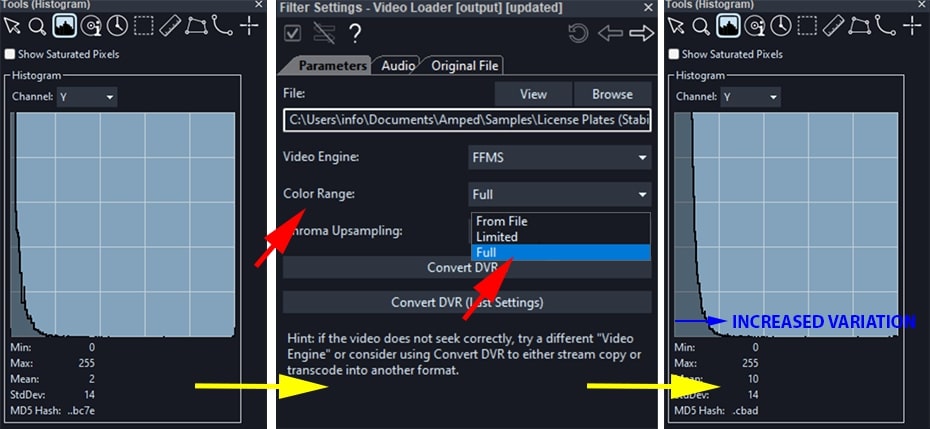
In the sample above, we can clearly see an introduction of new values in the Histogram. This occurs after setting the color range to full, resulting in a wider variation of values and more detail to work with.
Increasing Exposure in Amped FIVE
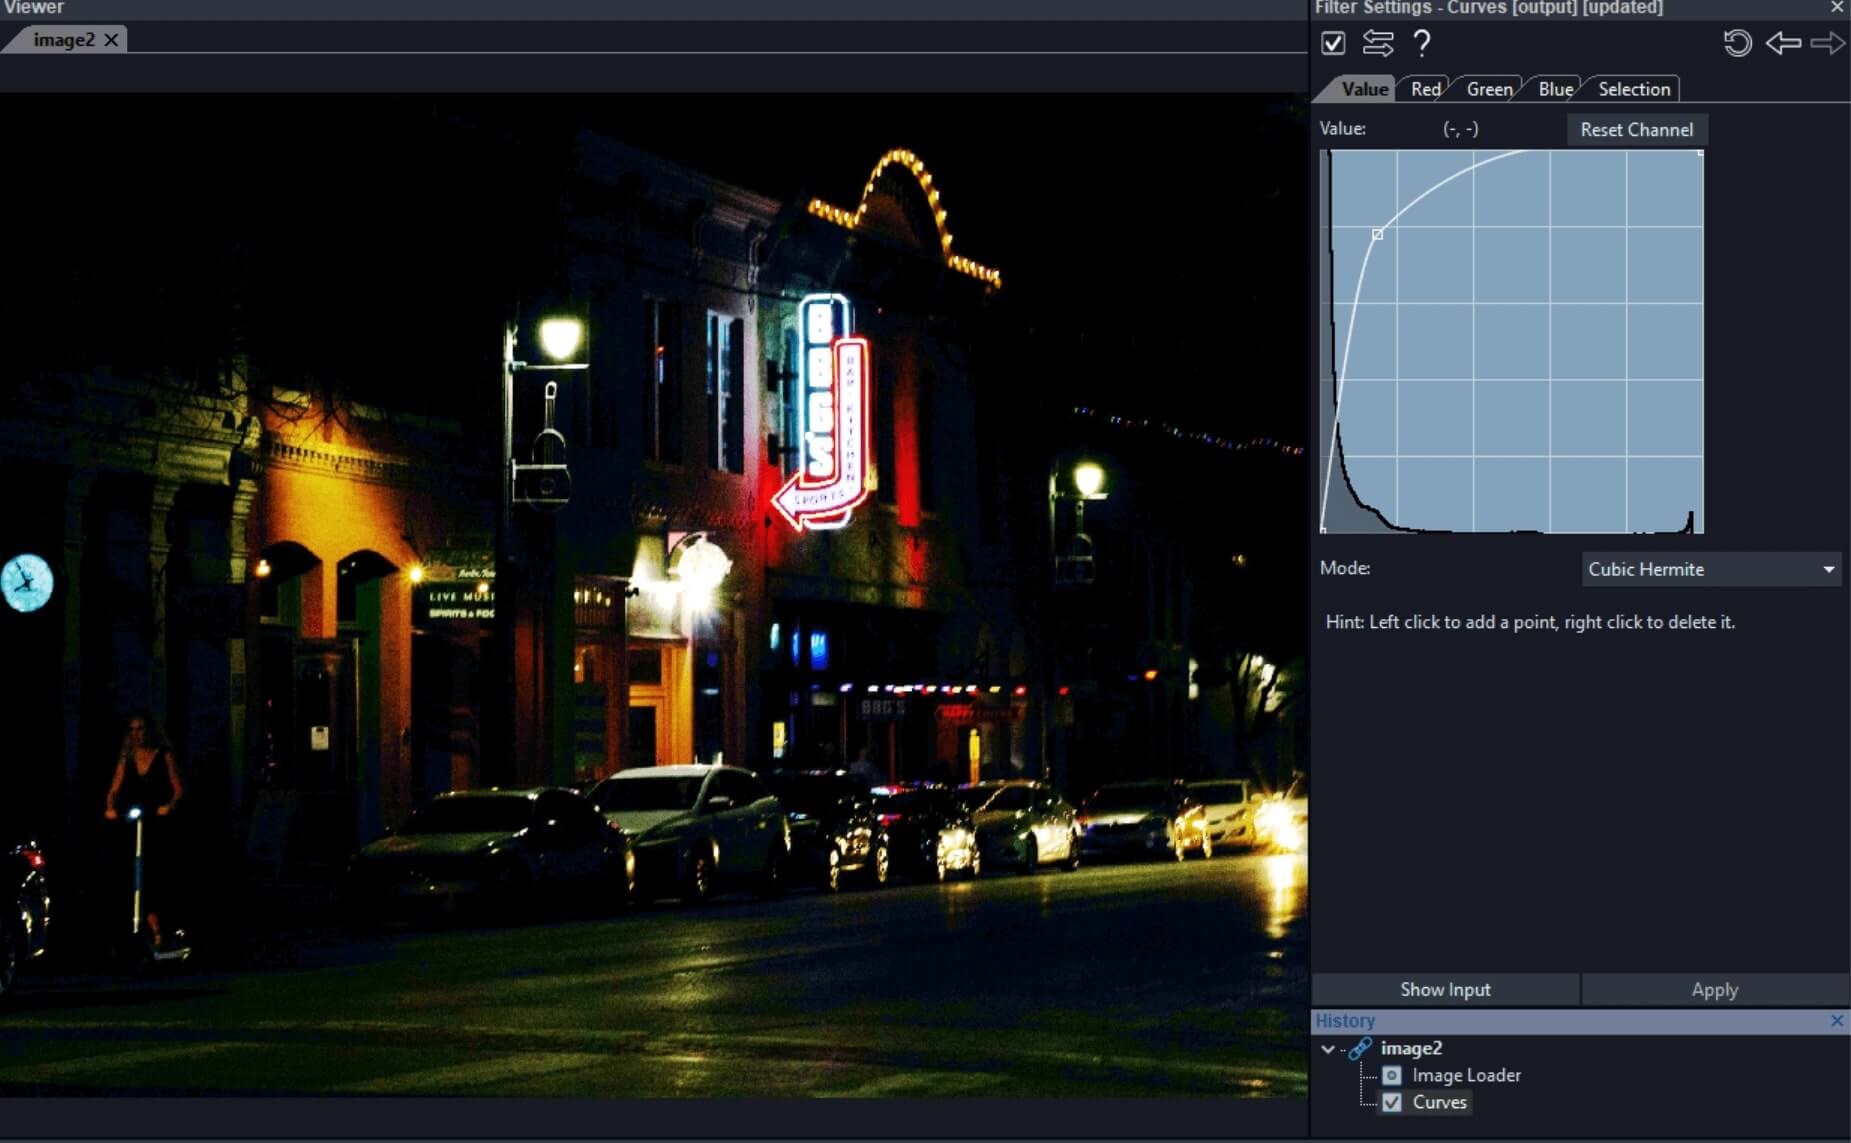
When we do have a variation of values, as little as it may be, then there is quite a lot that we can do. As well as adjusting the Levels, which will increase or decrease all selected pixel values in conformance to a mathematical line, we can also use the Curves filter, if we want. This filter will increase the variation in selected areas of the available range of values. Be aware though, that if you do use such a filter, you have to be prepared to explain why you have more discriminately changed pixel values. In the example below, we have used the Curves filter to sharply increase the darker pixels, and more subtly increase the mid-tone and bright pixels, using a mathematical curve.
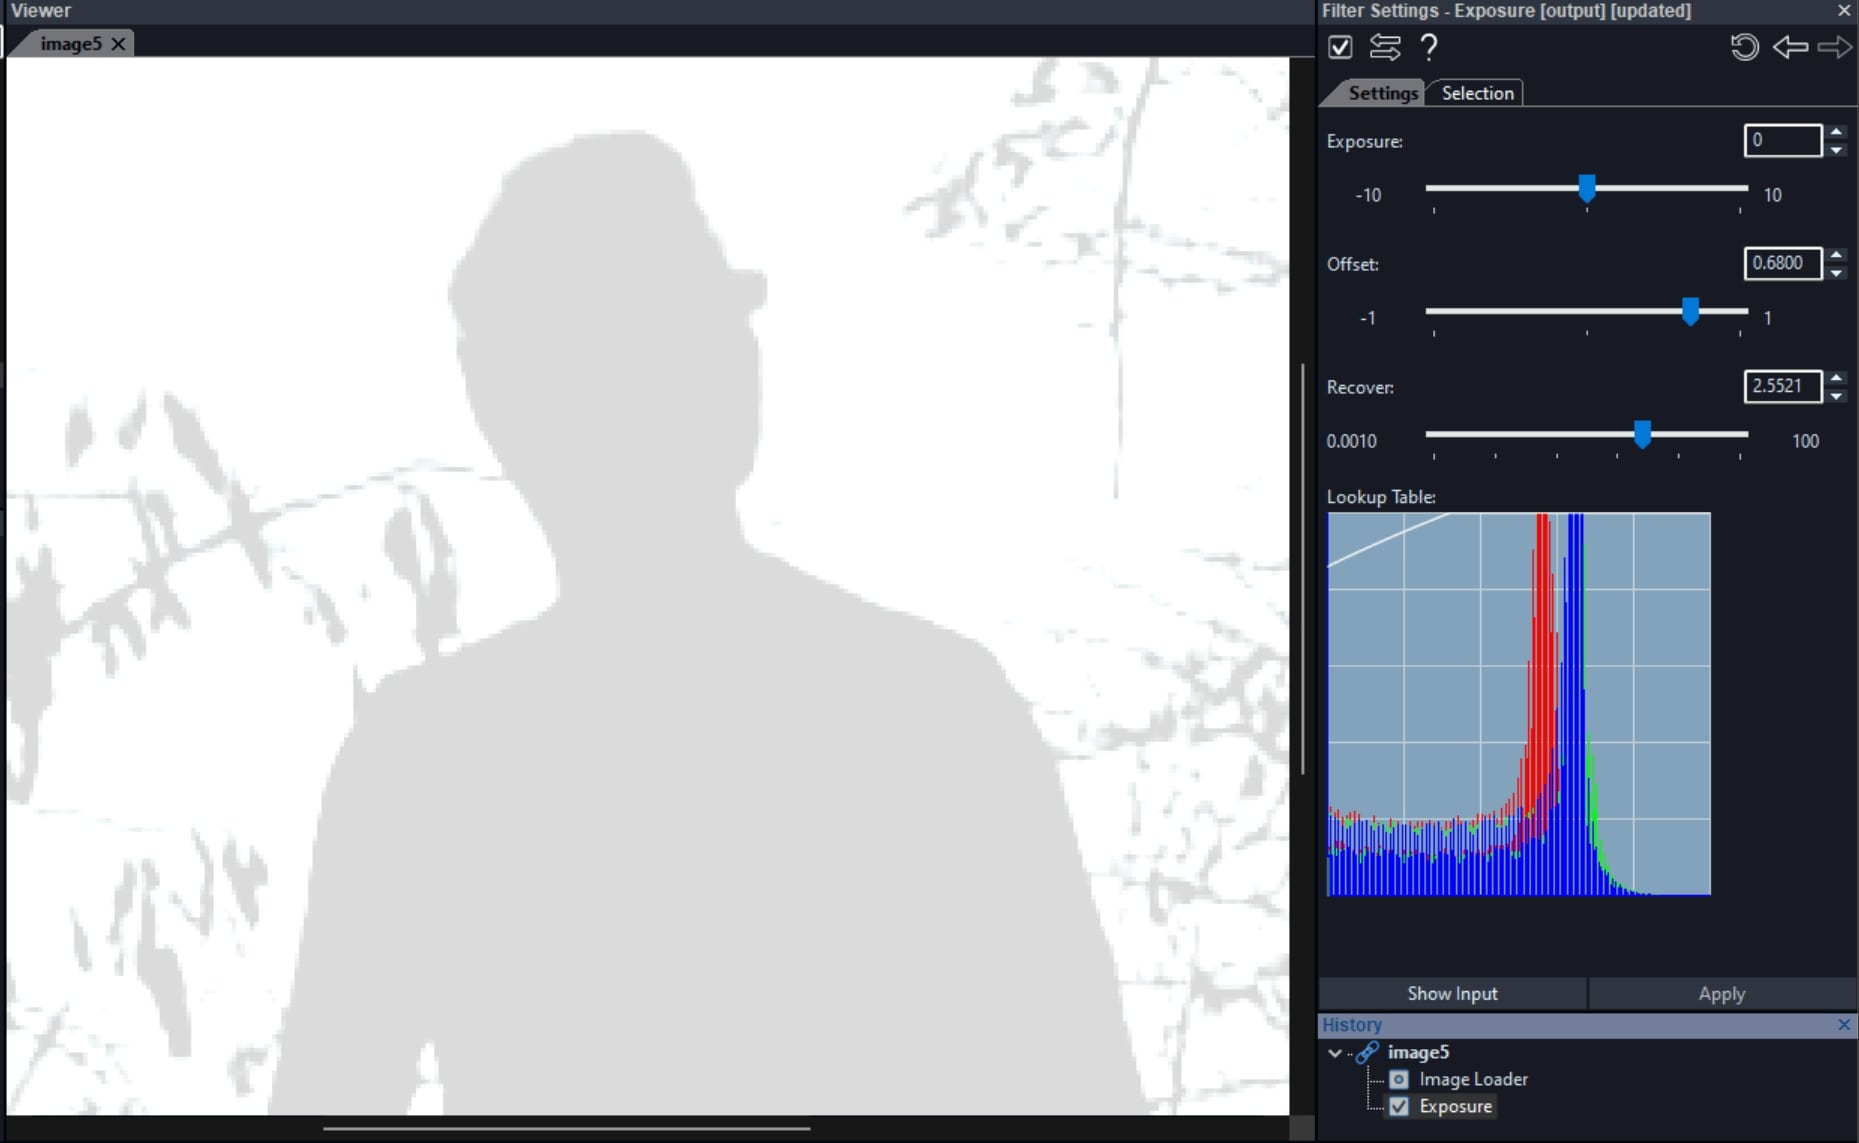
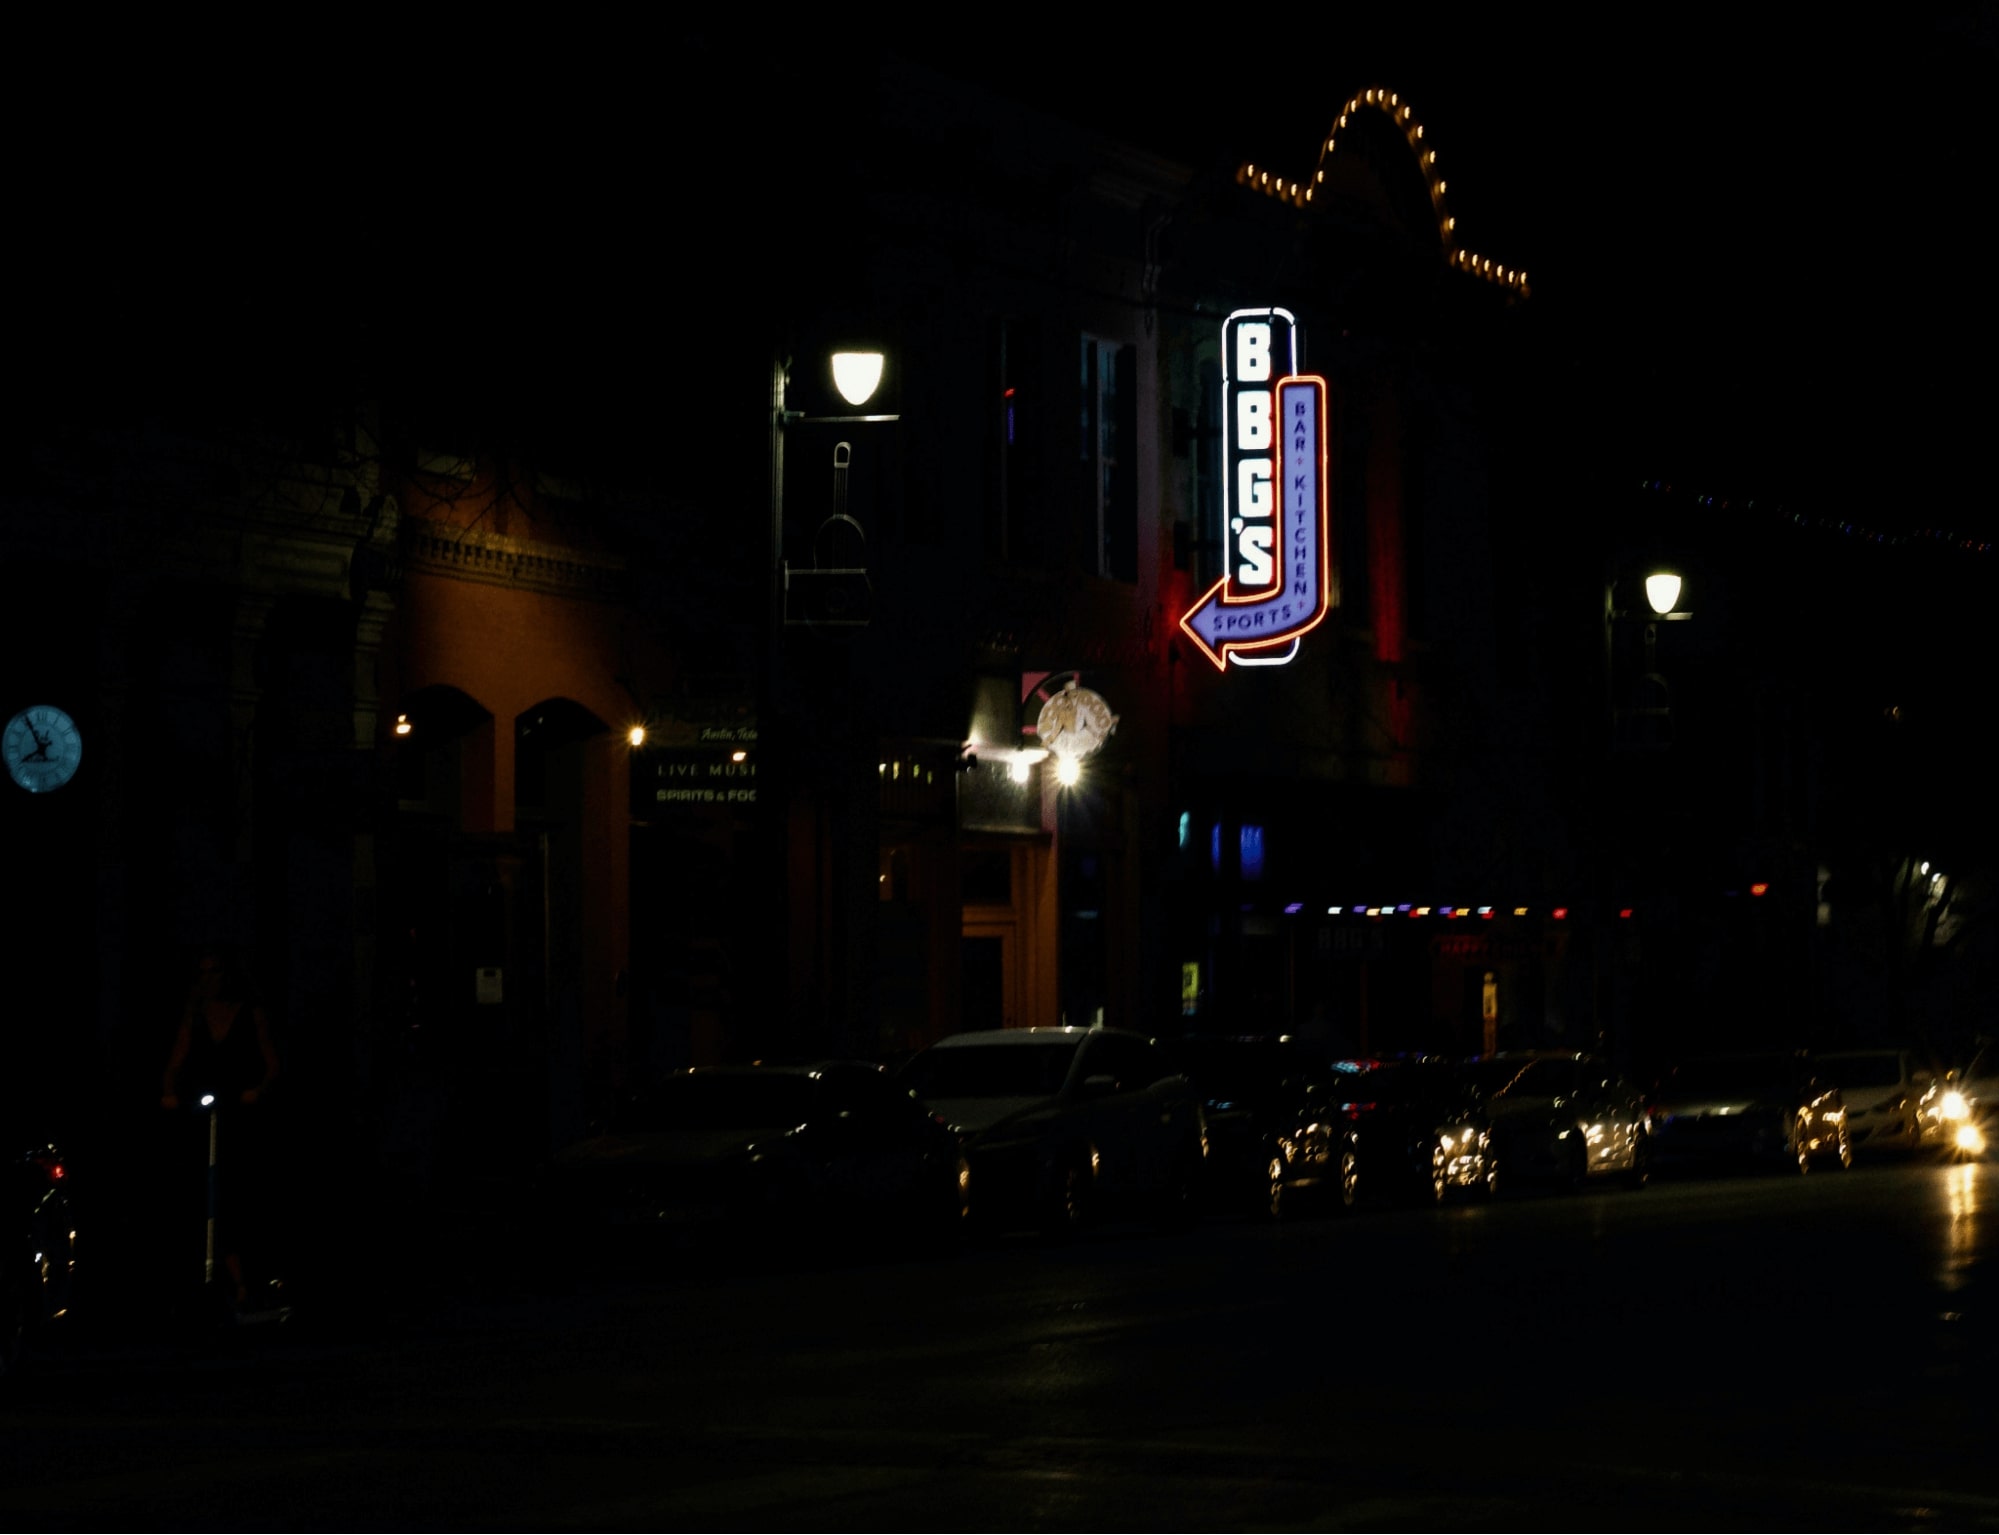
There will also be situations in which you can tackle the issue of incorrect exposure, specifically, with dedicated filters that can facilitate this process. In the image below, the lighting conditions at the scene are such that there is low exposure of light. However, there is a variation of dark detail that we can purposefully increase.
Applying the Exposure Filter
In this instance, we can use the filter Exposure in the Adjust group. Using the filter is as easy as increasing the “Exposure” parameter in the filter settings using the slider or the up arrow button.
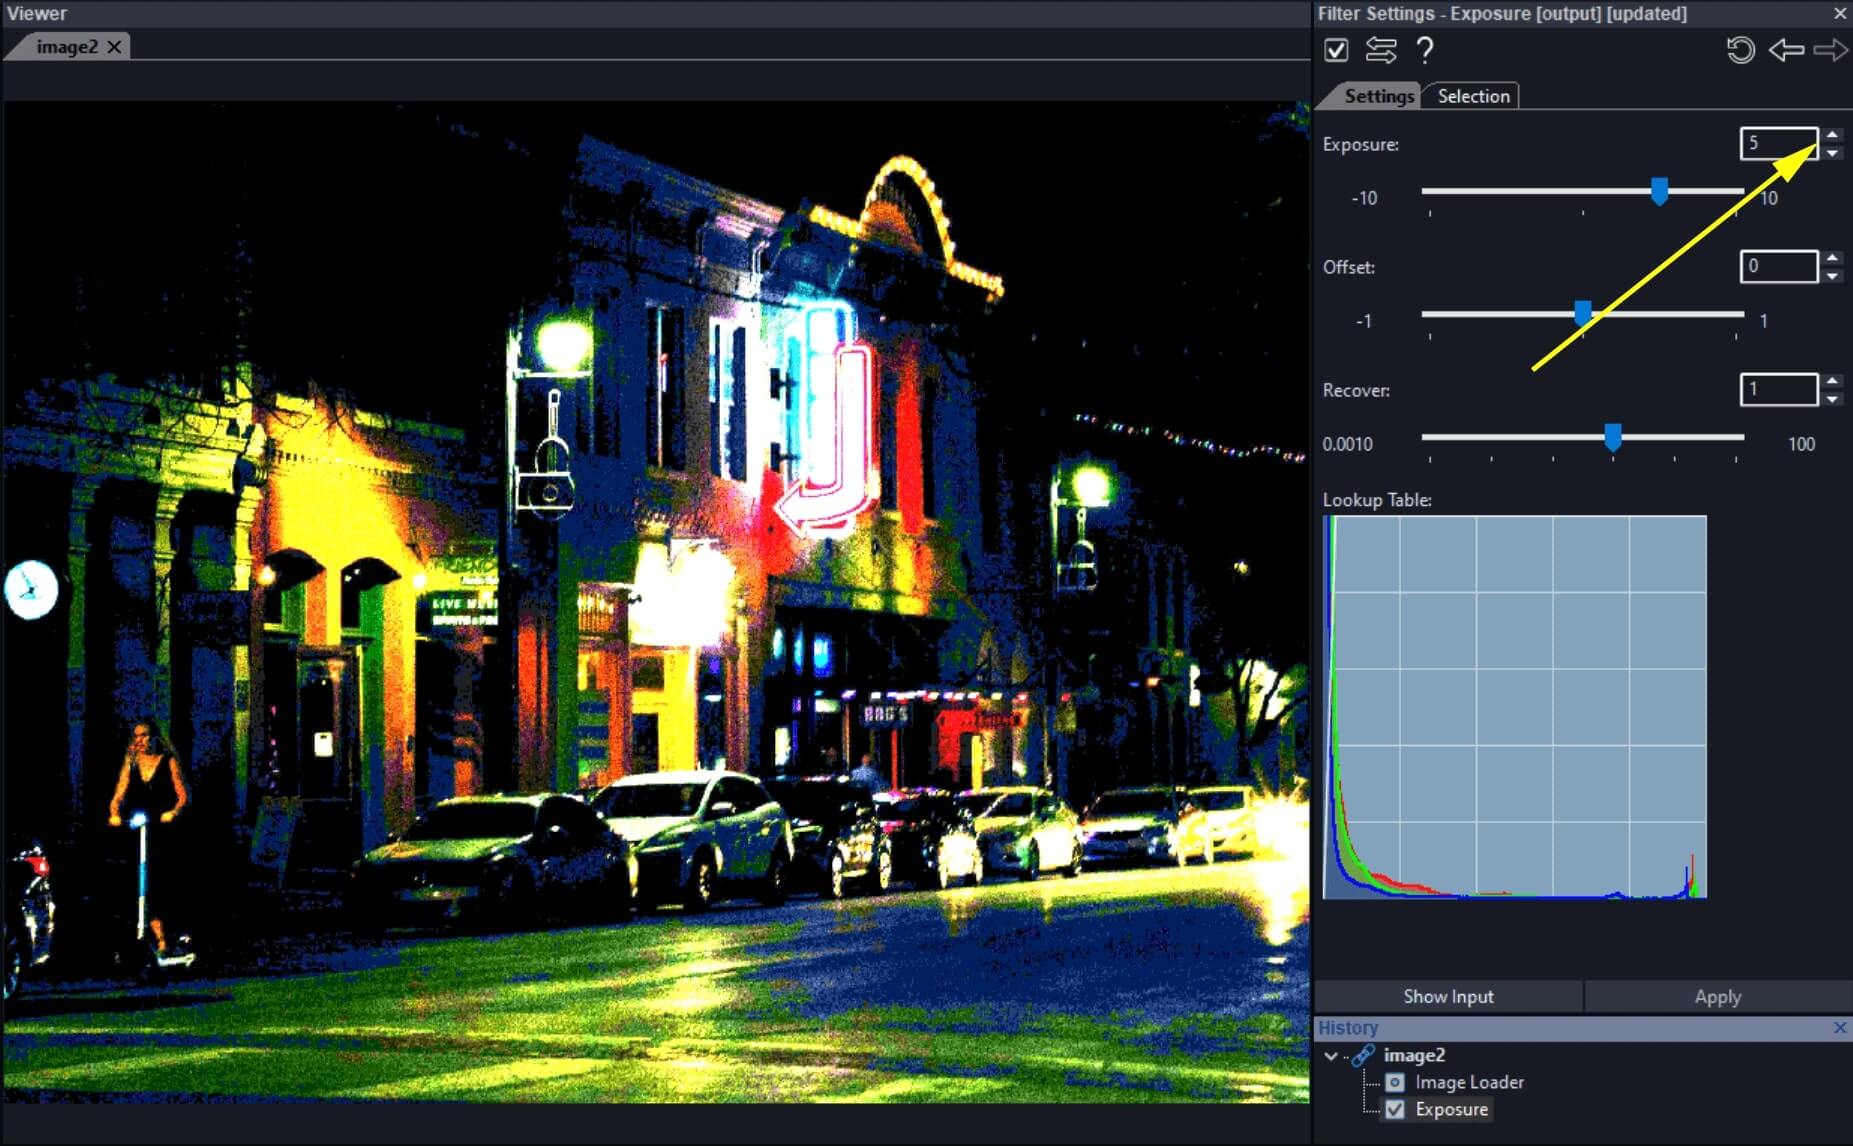
In this instance, we have recovered details in the line of parked vehicles and elsewhere in the scene. However, we also have to be aware that we have saturated brighter areas of the image in order to do so. If you look at the original “BBGS” sign for example, you can see that we have lost variation of detail in this area, because we have pushed pixels above the maximum value of 255 (pure white).
Check out the video below to learn how to increase the exposure of dark images in Amped FIVE.
Smart Adjust
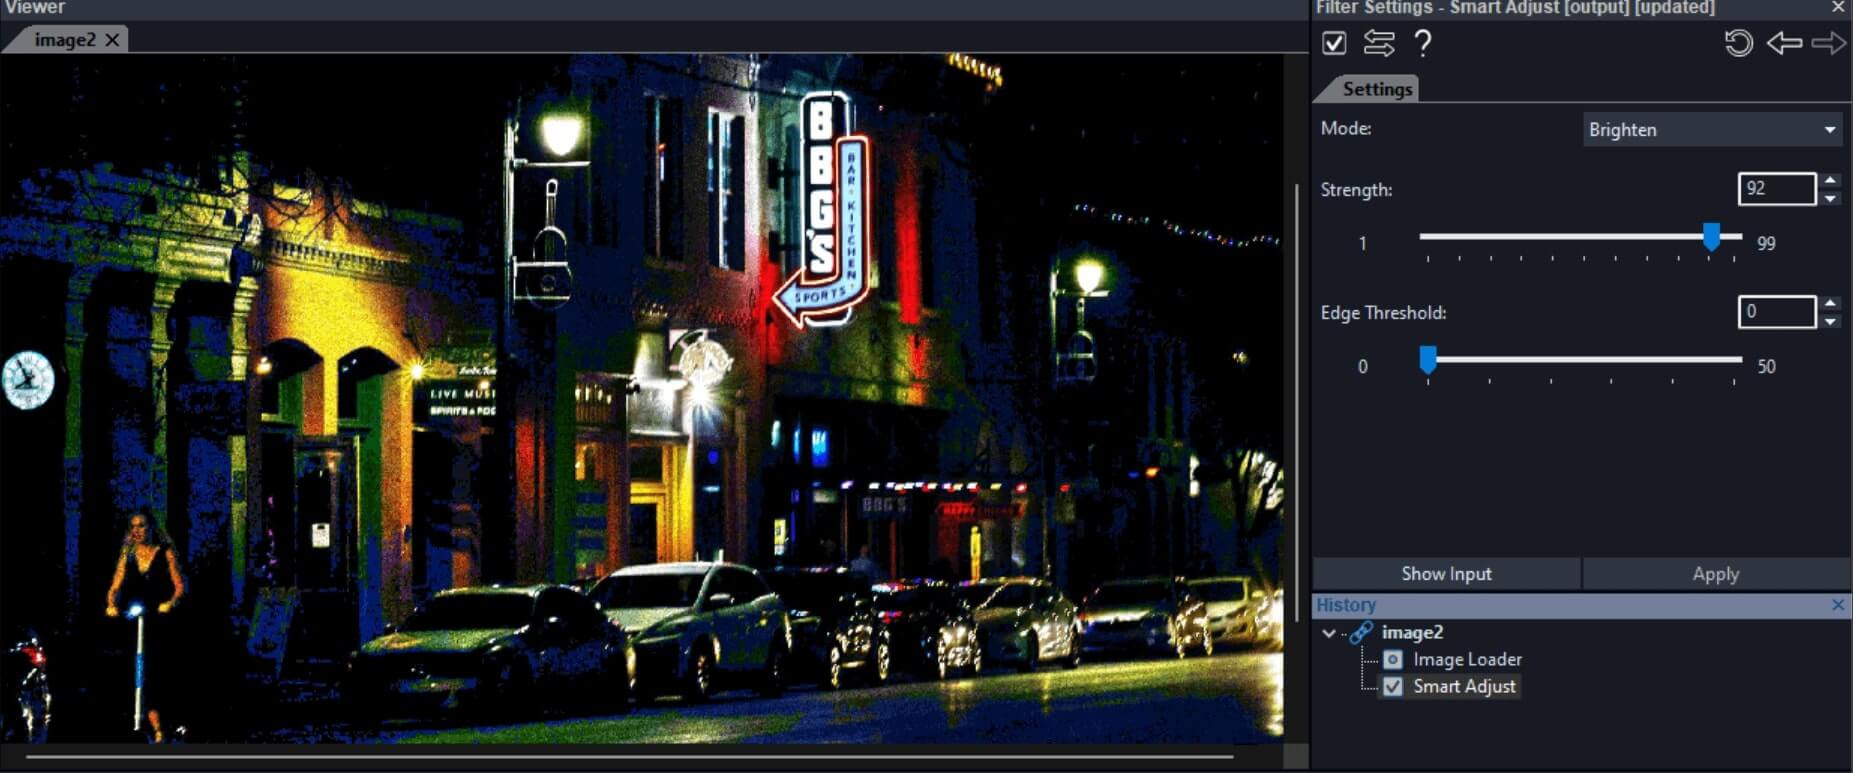
In a recent update of Amped FIVE, we have released the Smart Adjust filter, also available in the Adjust group. This filter is capable of applying more sensible adjustments by mathematically calculating local minimum and maximum values within the image. Meaning that it is better suited to deal with uneven illumination in the scene. Using the same city street sample, we have applied the Smart Adjust filter in FIVE in Brighten mode to restore detail in the scene without saturating the sign, which is still fully readable.
Conclusions
We hope that you enjoyed this week’s content and that you now have a better understanding of how to deal with dark images and videos. Until next week, my dear friends and colleagues, stay safe and take care.


