
G’day folks and thank you for coming back to our blog and checking out another article of our “Learn and solve it with Amped FIVE”. Today we are going to talk about issues deriving from the curved shape of camera lenses and how to correct optical distortion. If you analyze shapes and sizes of subjects and objects on video or, indeed, if you conduct measurements on surveillance cameras, then you will want to read on!
The Root Cause of Lens Distortion
Camera lenses are curved in shape for a specific reason: they have to ingest a large and wide quantity of light from the outside world, a much bigger area than the shape of the lens itself. The use of transparent curved glass surfaces will permit just that.
Due to this shape, we may encounter an optical aberration when capturing a wide area. This can cause straight lines in the real world to appear curved in the resulting image.
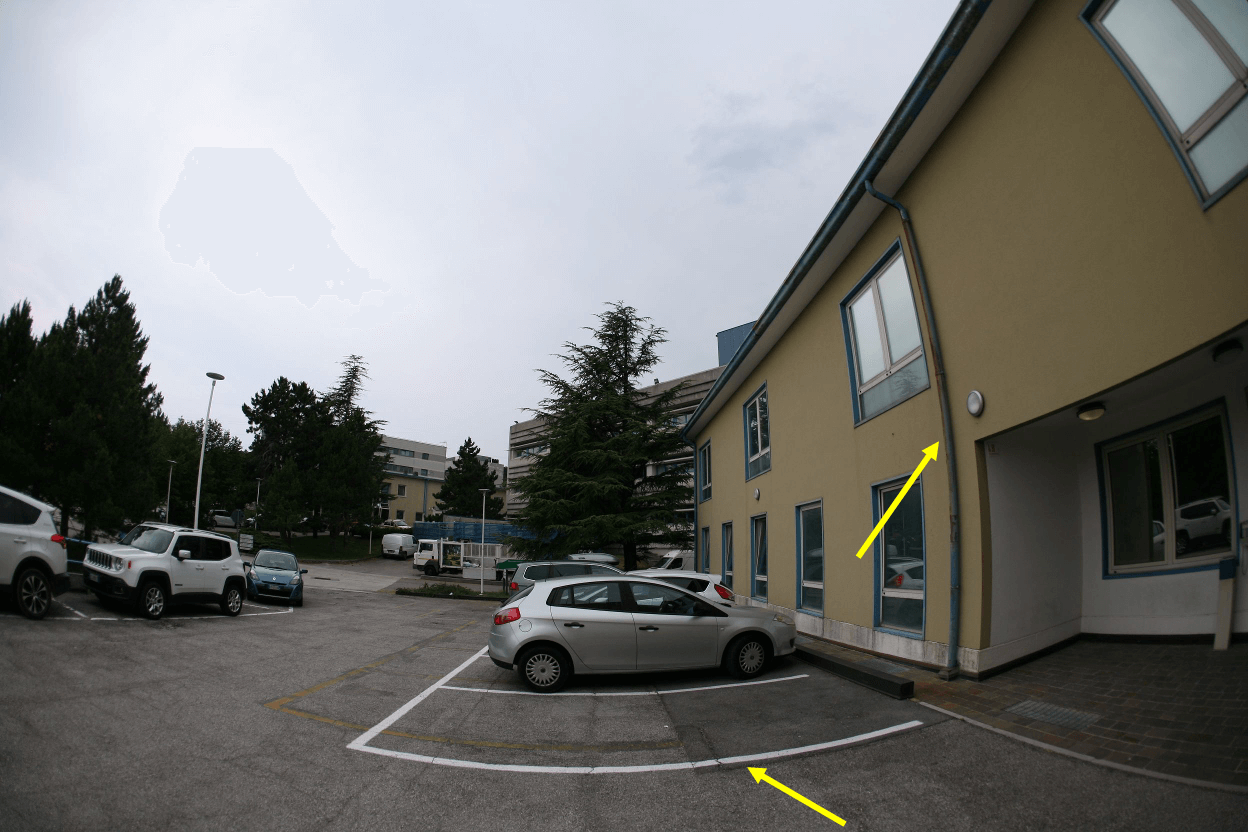
Have a look at the image below. The water pipe and parking lines are straight lines in the scene but have a clearly defined curvature in the image. This is what we call Barrel distortion.
Barrel Distortion and Pincushion Distortion
Lens distortion can appear in the form of two defined curvatures. In Barrel distortion, curved lines will converge toward the central aspect of the image, as shown below. This is the most common type of lens distortion we will encounter. It applies to concave lenses.
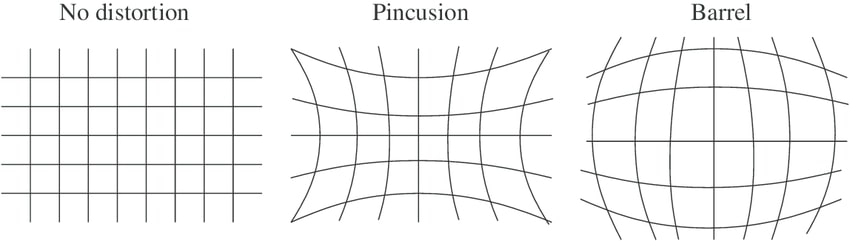
Conversely, in Pincushion distortion, curved lines will diverge from the central aspect of the image. This type of distortion is less commonly observed and it applies to convex lenses.
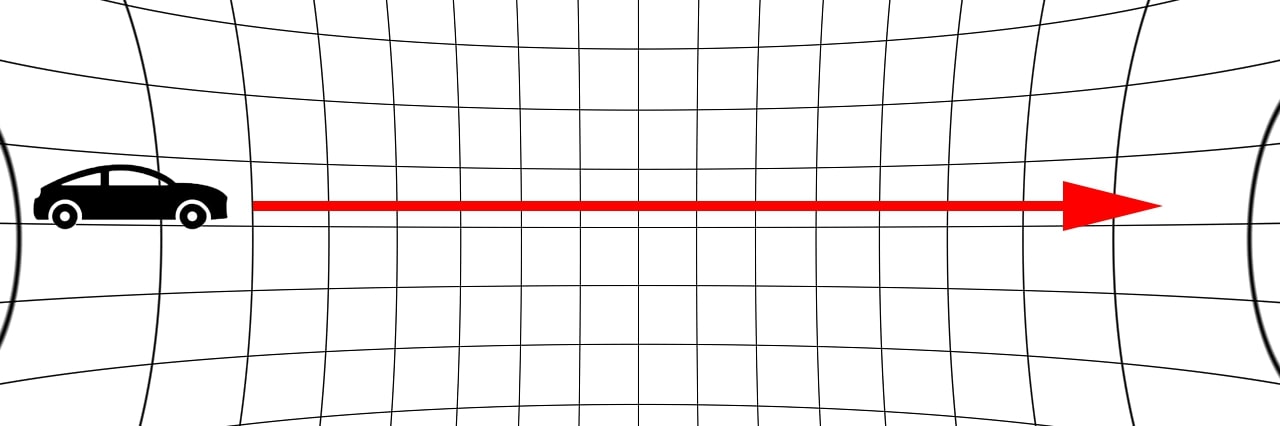
In the image above, we observe that not only the appearance but also the size of lines gradually change due to lens distortion. As we move away from the center of the image, the lines progressively increase in size.
Imagine a vehicle going through the middle line of these distorted images, as illustrated below. Time and spatial measurements will be affected quite considerably by the distortion. Furthermore, the optical distortion also affects the perspective of an image. Lines that are parallel in the real world would not converge anymore to a vanishing point. For these reasons, we must correct this issue before we perform any measurements on images.
Correcting Distortion Using Undistort
Correcting distortion in Amped FIVE requires the use of the Undistort filter. It can be found in the Edit group of filters. We need to register the amount of distortion in an image. This can be done by drawing a pattern on a feature, which we know is completely linear in the scene, but that appears curved in the image.
Once the filter has obtained this information, it can then apply a mathematical process. This will interpolate pixels in the whole image to re-establish the correct position and shape of elements depicting the scene. Simple, right? Let’s give it a go.
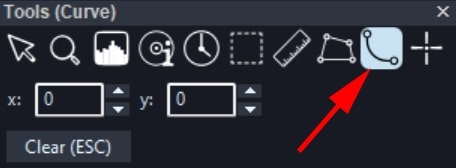
Using the parking lot image at the top of this article as an example, let’s put the Undistort filter in our chain. Switch to the Line 1 tab and notice how your Curve tool is now activated in the Tools panel.
It is not possible to draw one single curve. However, this can be done by registering some points in the image. To replicate the curvature of your reference object accurately, simply left-click in the viewer to mark these points. In this case, the water pipe. You can add as many points as you like to replicate this curve the best you can. You can also right-click on any point you’ve drawn to edit its position. When done, simply right-click and click Apply on the filter settings.
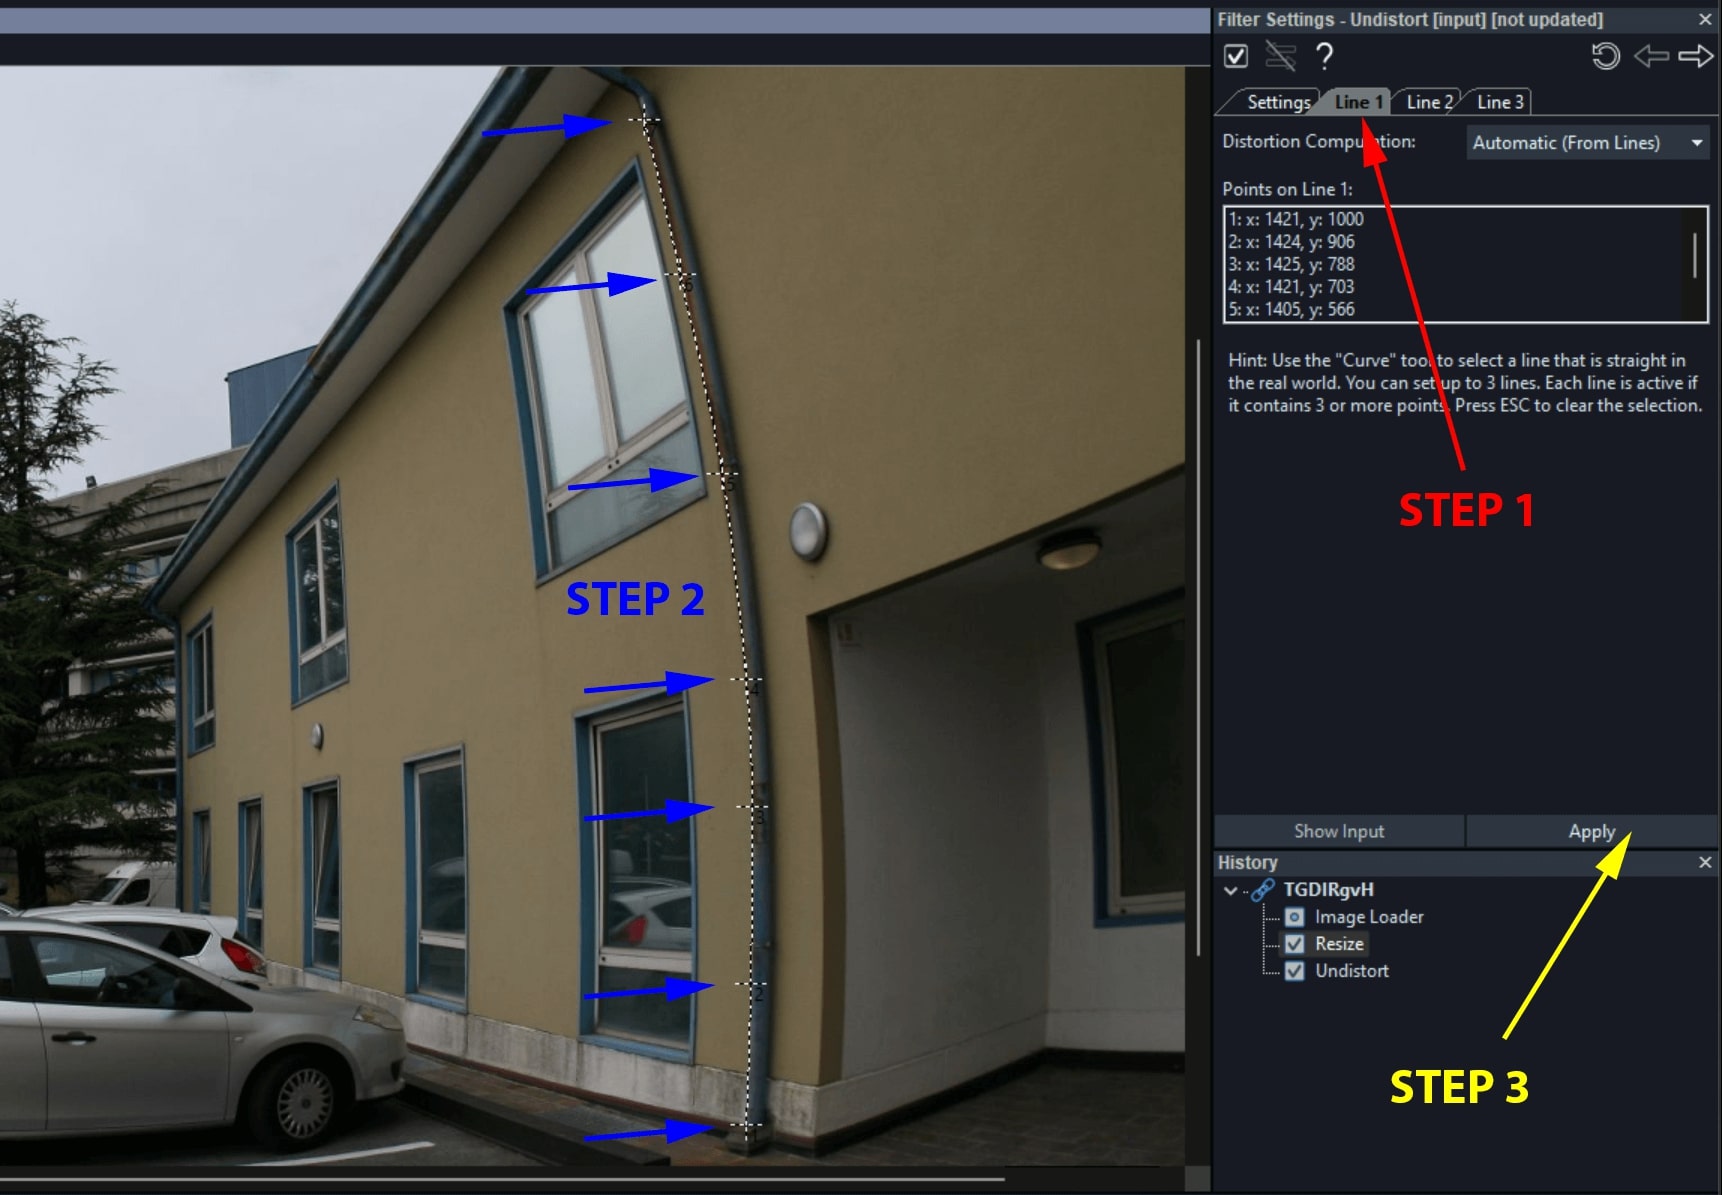
Before clicking the Apply button, you can register other lines (for a maximum of three), using other references in the image. This will result in an even more accurate correction.
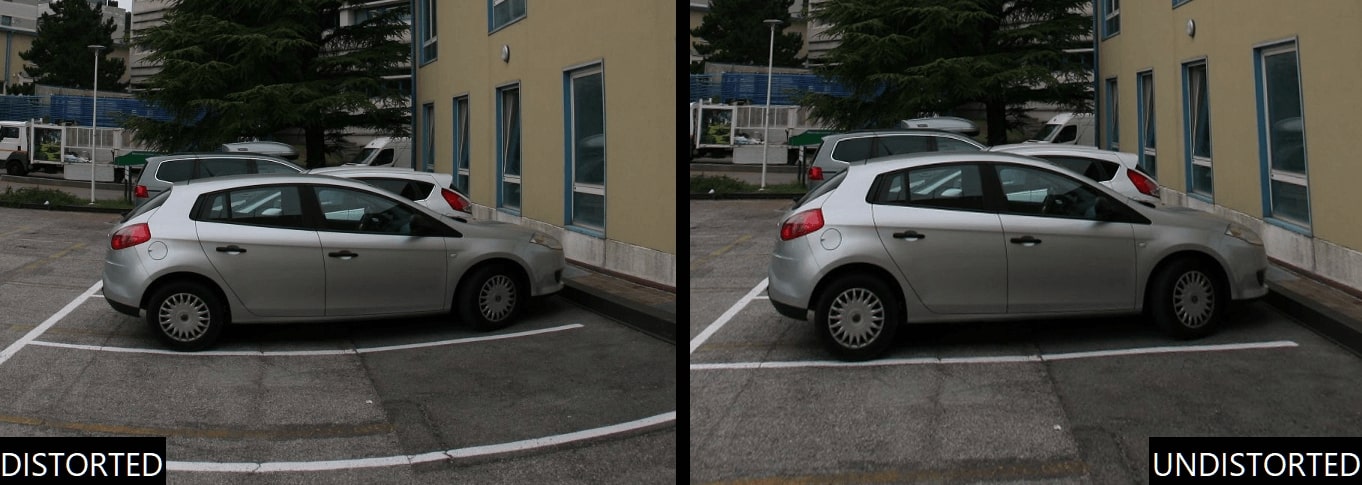
The image will be corrected and the curved lines should now have a straight appearance. Notice how the appearance of the gray hatchback vehicle has considerably changed, despite its central position within the image.
Check out this video on our YouTube channel. You will learn how to correct optical distortion in Amped FIVE.
Further Adjustments
An obvious byproduct of the correction is that the detail that was previously visible at the edges of the image has now gone out of the image canvas. To address this, we can switch back to the Settings tab of the Undistort filter settings. From there, we can increase the size of the canvas to bring back the detail. This will also increase the resolution of the processed image.
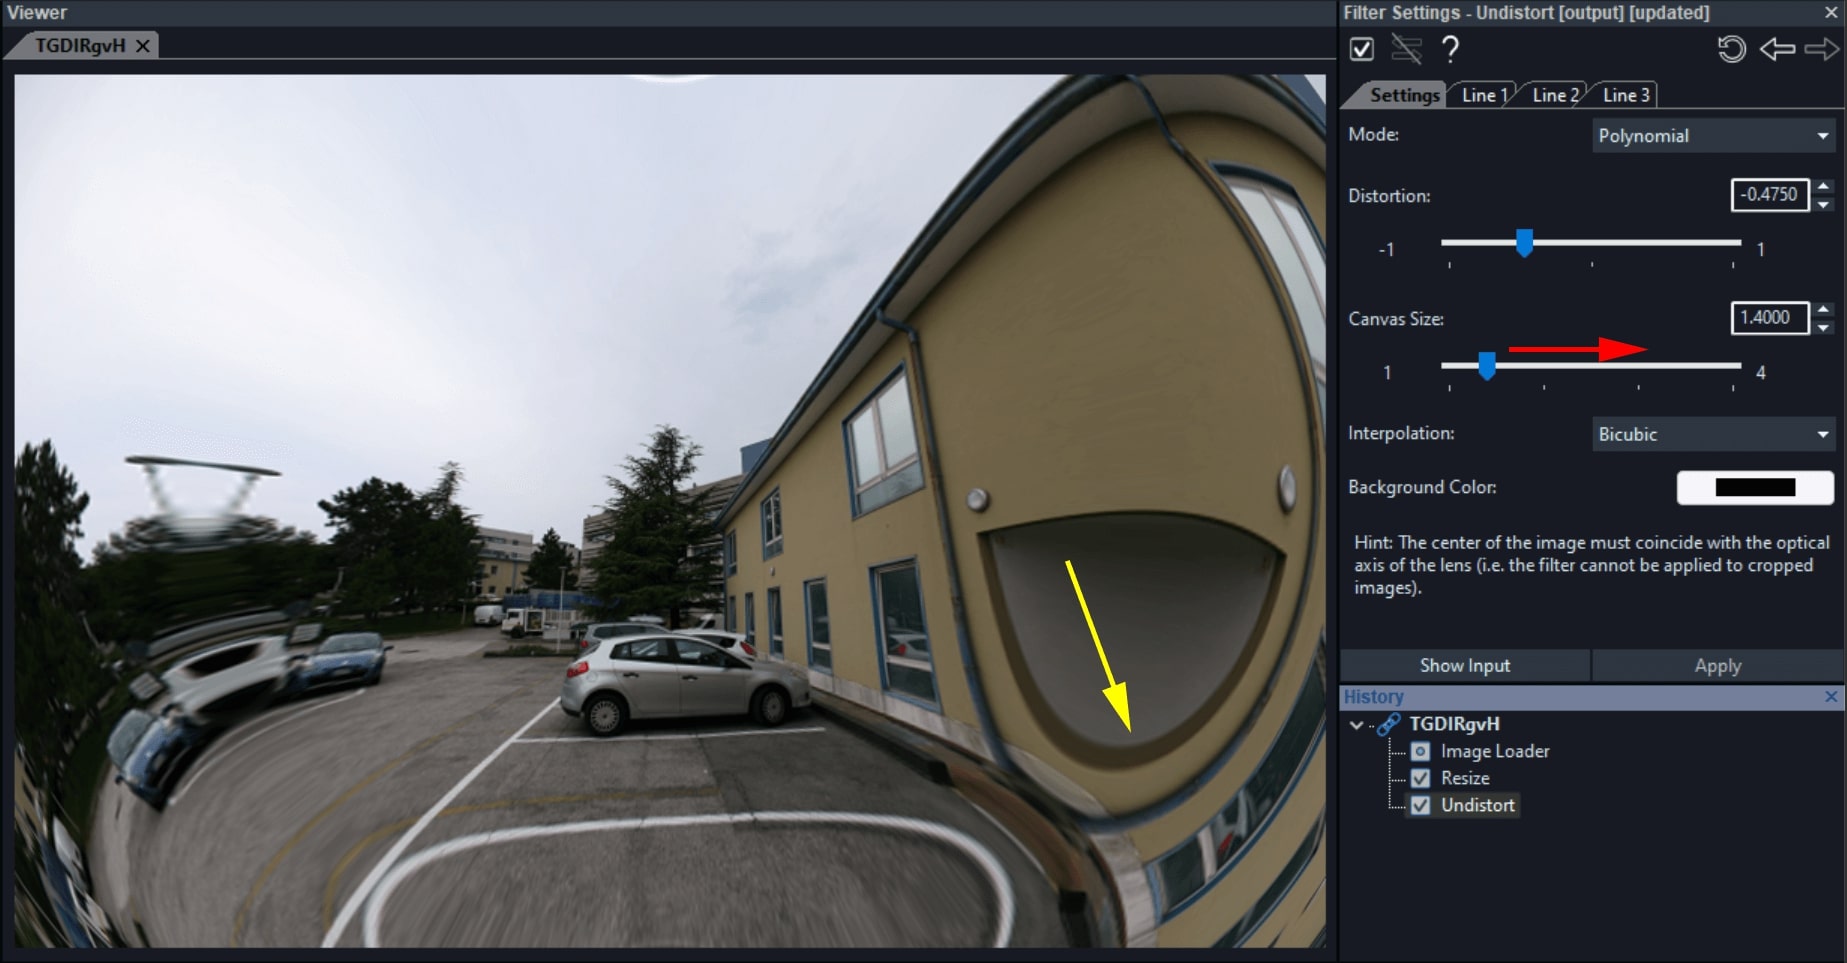
By doing so, however, we are also bringing back areas of the original image that are now unnaturally corrected. Look at the porch entrance at the bottom right of the image with increased canvas. That’s surely not what it would look like in real life! But the detail nearer to the center of the image has had its realistic appearance re-established.
If you wish, you can also further adjust the distortion manually by moving the Distortion slider in the filter settings. This slider also allows correction without the registration of the curved lines which we previously performed. You may wish to bypass that workflow and simply use this setting in conjunction with a visual aid. For example, in the viewer, you can easily draw a straight line using the ruler tool.
Correct a Fisheye Lens
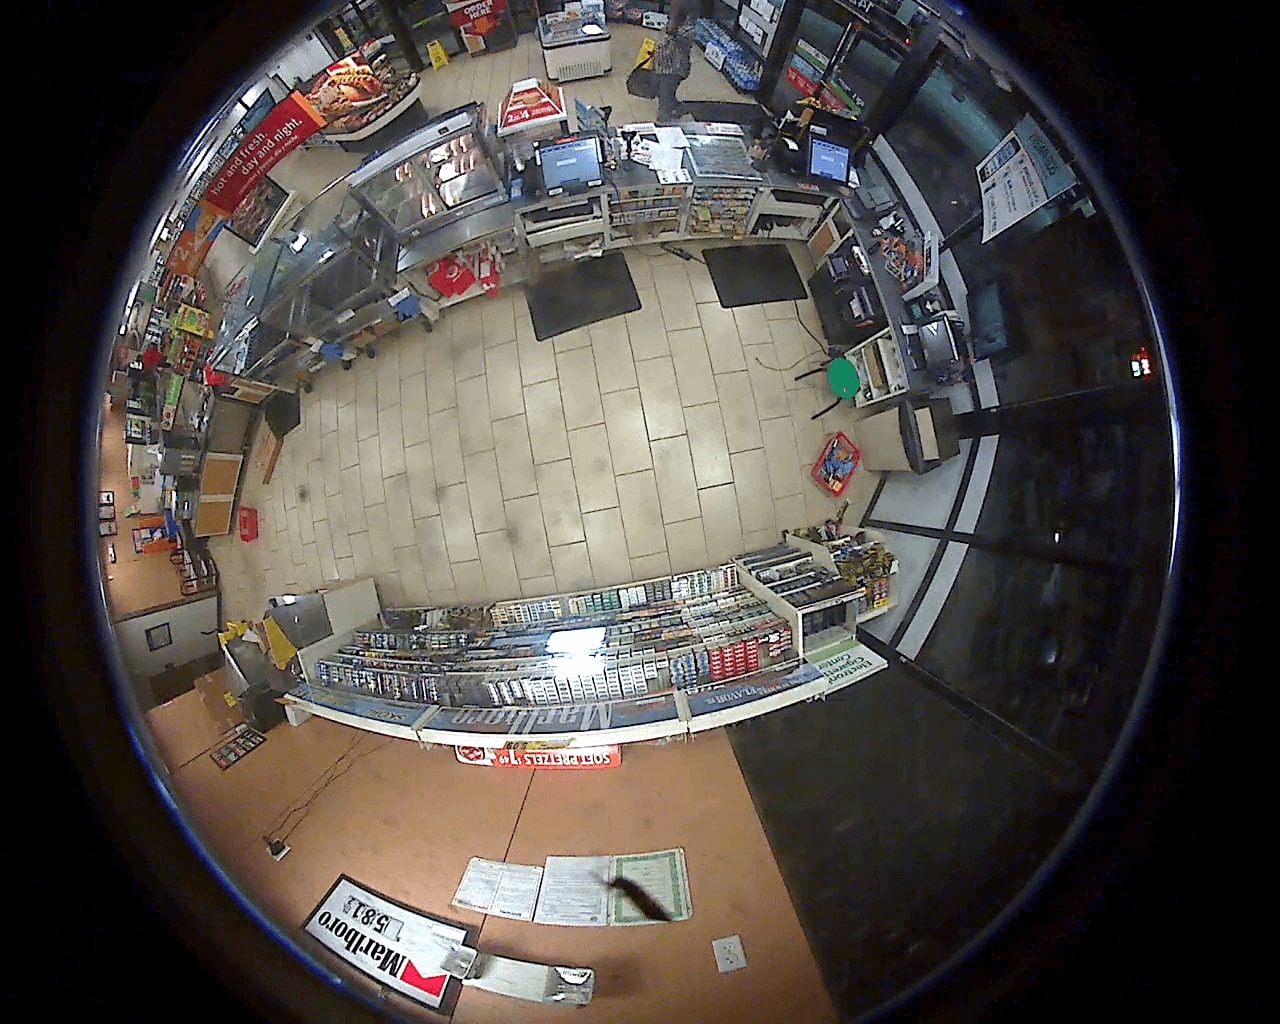
Some camera lenses can capture an even wider range of light than conventional cameras. Because of the wide angle of view which resembles the vision of a fish, these types of lenses are amicably referred to as “fisheye”. Their advantage is the ability to capture events on the side of the recording camera. However, as we would expect, the wider the range, the more distorted the image. Below is an example of this type of lens.
To deal with fisheye distortion, we could, of course, use the Undistort filter. Technically, this is the same aberration that we encountered previously.
However, an issue would arise due to the higher amount of distortion. This would result in a great part of the image extending beyond the original image canvas. So, to make the most of all detail present in the original image, we will use the Correct Fisheye filter, instead. This can also be found in the Edit group of filters. The advantage of using Correct Fisheye is that we will be able to change the virtual view of the camera to focus on a particular area of interest.
Using the Correct Fisheye Filter
Let’s apply the filter to our chain. This time we will drag the Focal Length slider in the filter settings towards the value “0” to straighten the lines in the scene. This is a similar process to what we previously did with the Undistort filter.
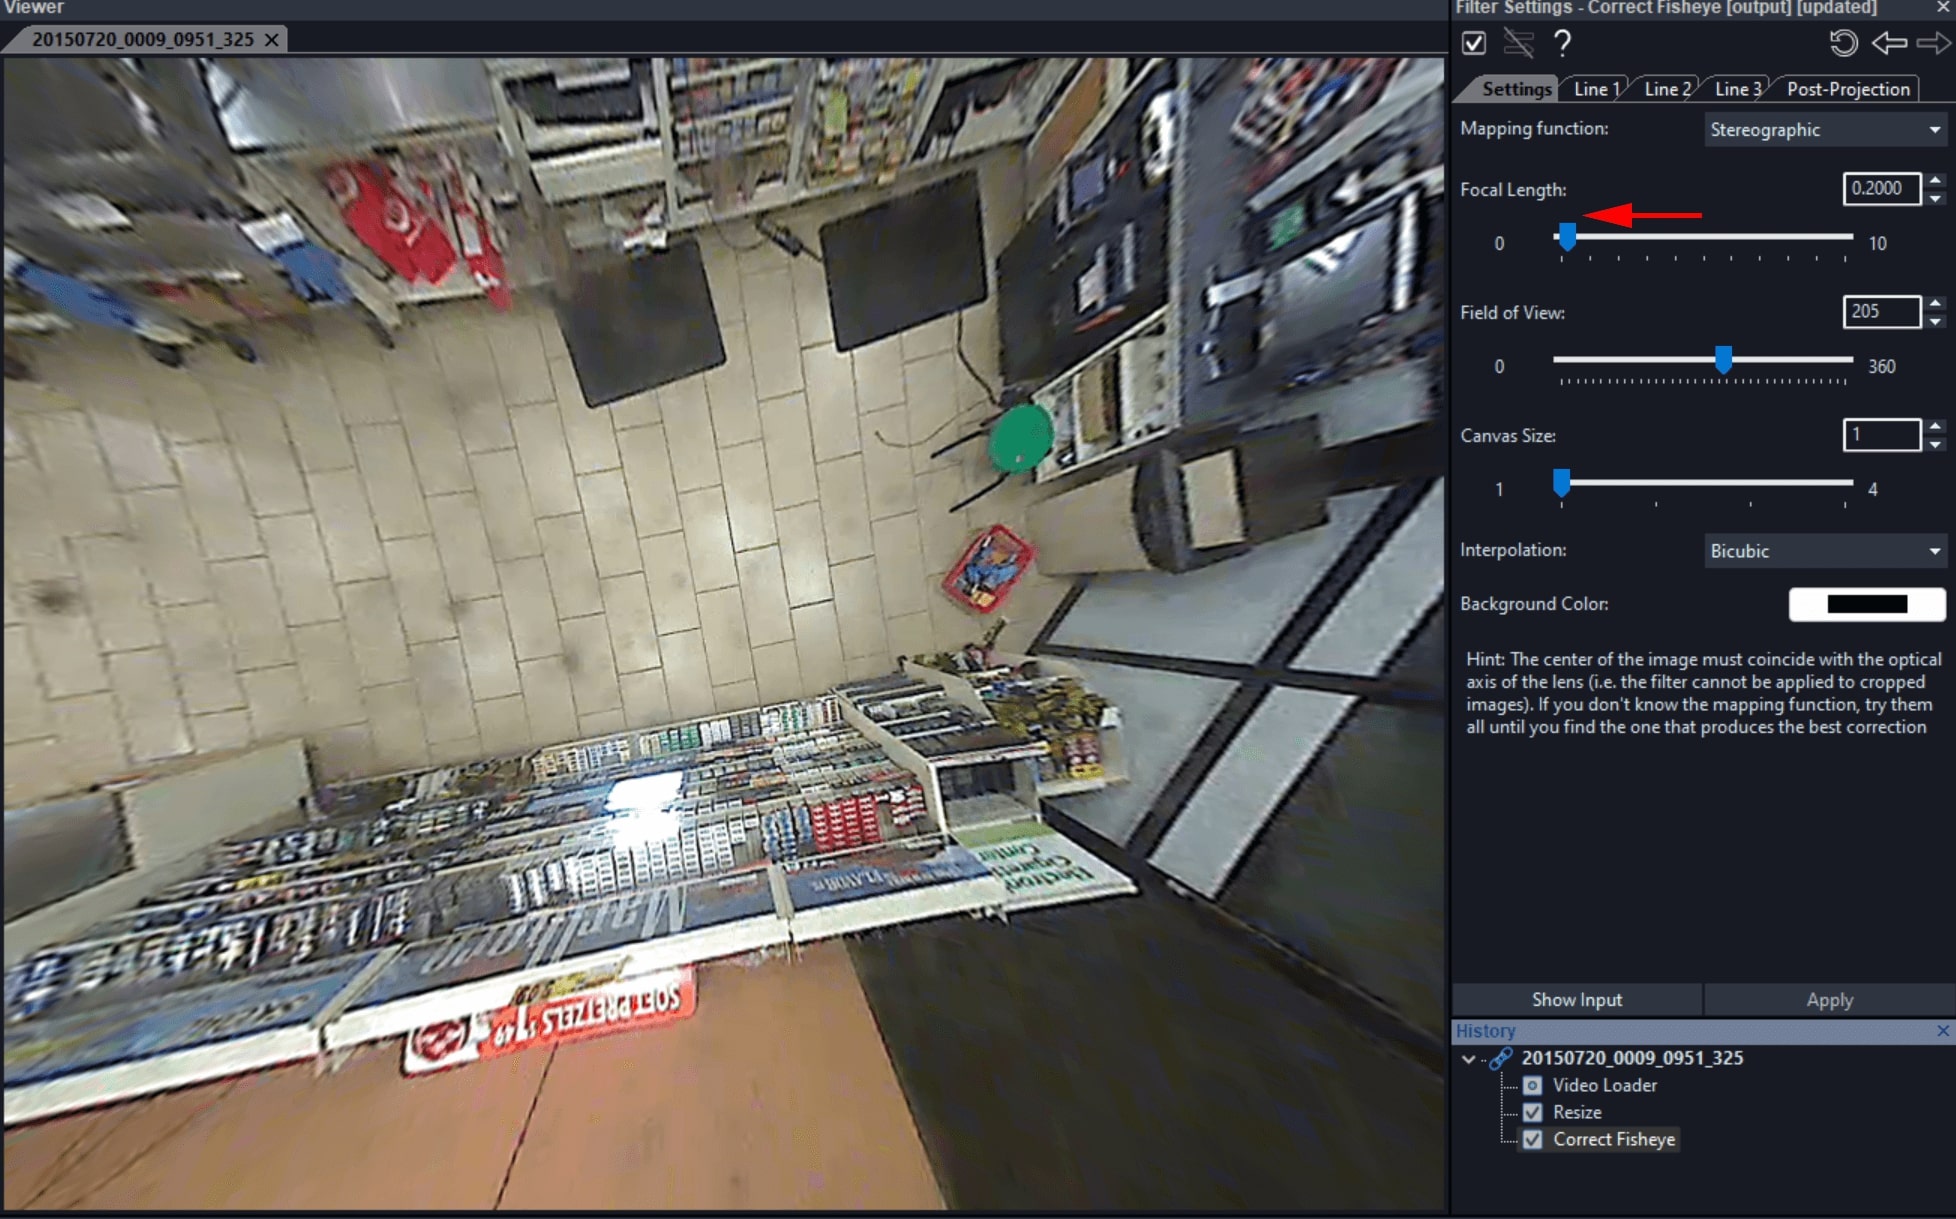
Notice how the distortion is corrected. But the majority of the original image content is no longer visible inside the canvas. This is because of the greater amount of distortion inherent in fisheye lenses. You can still register Lines with the Curve tool, just as we did previously with the Undistort filter, by clicking on the Line tabs.
Switch to the Post Projection tab. Move the three sliders in this tab to reposition the view of the camera in a virtual three-dimensional environment, as shown below.
The imagery will now not only be undistorted, but it will also contain the details of interest.
Watch the following video on our YouTube channel to learn how to use the Correct Fisheye filter in Amped FIVE.
Conclusions
When using Undistort and Correct Fisheye, we need to take into account the question that is being asked of us. For sure, we will need to undistort imagery if we are commenting on or comparing shapes and sizes of subjects or objects depicted in the scene.
The imagery must be corrected when performing measurements, such as the speed of a vehicle or the height of a suspect, for example. Although it is true that any correction using these filters will never be 100% perfect, measurements will be severely compromised if performed on distorted images.
We hope you enjoyed this week’s content and we hope to see you again next week! Till then, stay safe and take care.


