Hello, jolly good people! Nice to see you popping back for another article of our “Learn and solve it with Amped FIVE” series. This week we are going to focus on people. We’ll have a look at the workflow required to enhance and optimize facial detail. This is similar to that which we use for license plates but with some fundamental differences we all ought to know about!
After twelve previous articles in this series, we should now be familiar with the workflows that deal with detail enhancement. We have talked about lighting issues, resolution, poor pixel definition, and a variety of challenges inherent to still images. We also talked about the advantages of working with video footage. This gives us the opportunity to integrate multiple frames, increasing resolution and reducing noise.
Check out the twelve previously published articles below:
- Deblur a moving car
- Integrate multiple frames to improve visibility
- Correct the perspective of a license plate
- Super-resolution from different perspectives
- Video deinterlacing
- Remove periodic noise from an image
- Enhance a backlit scene
- Deblur a license plate in an image
- Unroll a 360 camera
- Measure heights from surveillance video
- Enhance details in poor-contrast images
- Correct optical distortion
The Issue with Face Recognition
We need to take into account the main issue with face recognition before we attempt to identify people from imagery. Contrary to license plates, where we have a limited number of characters to distinguish from (numbers from 0 to 9 and letters from A to Z in Western countries), we do not have a database of facial features for the world population at large. This makes it extremely difficult to positively identify people from imagery alone.
Facial imagery comparison is a good source of evidence, but it will always be limited by the quality of our images and the inability to deal with statistics. In other words, even if the imagery quality allows us to spot distinctive features, such as a mole on a forehead, how significant is this finding? For all we know, thousands of people in one country alone could have such a distinctive facial feature. Understandably, a great deal of caution is now being taken when dealing with facial identification in the courtroom.
Answering the Right Questions
Another issue we have is that it is virtually impossible to define the minimum quality requirements for facial enhancement. It depends on what question we are trying to answer from the imagery.

Look at the image above, for example. The same gentleman depicted at three different distances from the camera gives us different challenges to deal with. When he is further away from the camera, there is simply not enough detail to even tell whether the subject is a male or a female. In his middle position, we can perhaps discern he is a male with dark-toned hair and some facial hair. Only when he is at a close distance to the camera, can we comment in more detail. At this distance, we can reliably discern he has medium-length, dark-toned hair, a prominent dark-toned beard, bossing on his forehead, and a visible lip-to-chin fold. Dealing with faces is a whole new kettle of fish!
Recommended Video Workflow for Facial Enhancement
Notwithstanding the challenges, we can better present facial detail when there is sufficient quality to go by. And even more so when we have multiple frames depicting the same face.
The workflow is very similar to that explored in our previous articles on frame integration and super resolution. We will still look at adjusting levels to increase the contrast of pixel values, stabilizing where necessary, and applying Frame Averaging. But, we have to be very careful about selecting the correct frames and using the right method of stabilization. We can either use the Local Stabilization filter or the Perspective Stabilization filter.
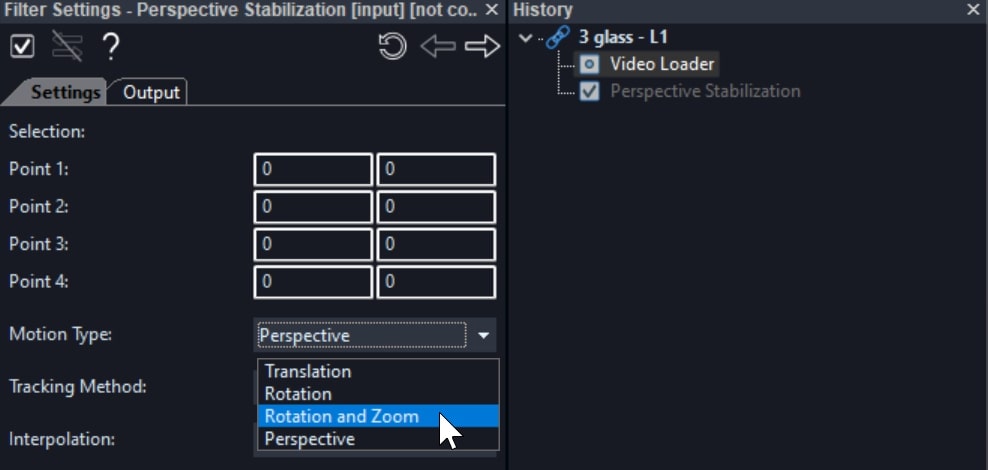
When we use the Perspective Stabilization filter, only the “Translation”, “Rotation” or “Rotation and Zoom” Motion Types will give us authentic results. This is because a face is not a planar surface (more on this later in this article).
Contrary to license plates and billboard signs, faces move and change their appearance! Before integrating frames, we need to ensure that the person’s head orientation remains consistent within the selected frames. If there is a change of the person’s head towards the camera it may cause many issues. The risks are even higher if the facial expression changes as well.
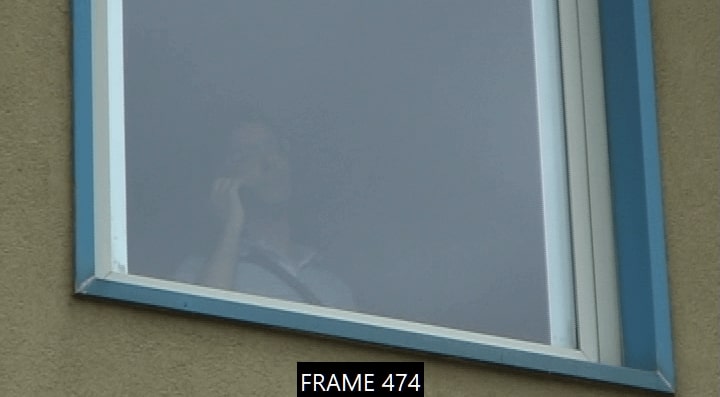
Let’s enhance the facial detail of a subject standing beyond a glass surface. Below we have grabbed a frame from a smartphone video recording.
In this instance, we have rendered the video in “grayscale” and adjusted the Levels prior to stabilization and integration. You may want to adjust the levels and/or increase the contrast of pixel values before starting your integration workflow. This is because any noise introduced during this process will be later averaged out.
Frame Selection
Be prepared to spend a considerable amount of time selecting the appropriate frames for integration. Within the selected frames, the facial detail of interest must not change its orientation/perspective towards the camera. And the facial expression must remain the same. Look at the example below. We can select frame 494 and frame 519 but the remaining two frames cannot be selected due to the different angle of view.

Remember that in Amped FIVE you can customize your frame selection. As well as the Range Selector, you also have the Sparse Selector and the Remove Frames filters to ensure that the best and most appropriate frames are picked for your workflow. Even if you only have three or four frames to go by, your improvements can still be considerable after integration.
Local Stabilization
Because our video is shaky due to camera movement, we will now use the Local Stabilization filter, which will ensure the position of the subject’s face remains static throughout the selected frames.

There is an alternative stabilization method that you can use, which can offer you an additional option when the face of interest is subtly moving away or towards the camera and/or the recording camera is rotating slightly.

As mentioned earlier, however, you can use the Perspective Stabilization filter to enhance faces, but you are limited to using the “Translation”, “Rotation” or “Rotation and Zoom” Motion Types. You can only use it when the angle of view remains the same and there is no change in facial expression. Under no circumstances can you use the “Perspective” Motion Type as this should only be used for planar surfaces.
Check out the video below to learn how to use the Local Stabilization and Perspective Stabilization filters in Amped FIVE.
Frame Averaging and Refinement Filters
Once we have adjusted the pixel values to optimize contrast, selected our frames and stabilized our facial area, we can go ahead and apply the Frame Averaging filter. Please note that everything prior to this point has to be done carefully and correctly, as previously described. If you have used the Perspective Stabilization filter, you can apply the Perspective Super Resolution filter instead of the Frame Averaging filter. The former has the extra benefit of increasing the resolution of the output image as well as performing a frame integration.
As expected, the noise will be averaged out through the selected frames after integration. Now, we can clearly discern the subject’s main facial landmarks. To sharpen the detail even more, we can use several refinement filters, such as Unsharp Masking, Turbulence Deblurring, or Blind Deconvolution.
As described in previous articles about integrating frames and super resolution, the use of deblurring filters is justified in this workflow, because we are removing residual movement caused by the frame integration process. In this instance, we have used Turbulence Deblurring. However, we need to be extra careful not to overdo the Strength parameter of the filter.
We also applied the Levels filter one more time into the chain. We don’t usually encourage users to apply the same filter twice or more in a chain but in this instance we are justified. The previous Levels filter was put in place in preparation for the frame integration process. The second is being applied to refine the image outputted by the Frame Averaging filter.
We have finally put a Resize filter with “Bicubic” interpolation at the end of the chain. This is followed by a Crop filter, which is used for presentation purposes.
Conclusions
As we have now learned, there is no fundamental difference between the workflow required to enhance a license plate and a human face. Due to the limitations in dealing with perspective on non-planar surfaces and changing facial expressions, extra care must be taken in selecting and stabilizing frames.
If you perform any type of facial identification or comparison from imagery, remember to check the guidelines in your country, especially when it comes to sharing an opinion in court.
We hope that you enjoyed this week’s content and we shall welcome you back next week for a new article in our “Learn and solve it with Amped FIVE” series.


