

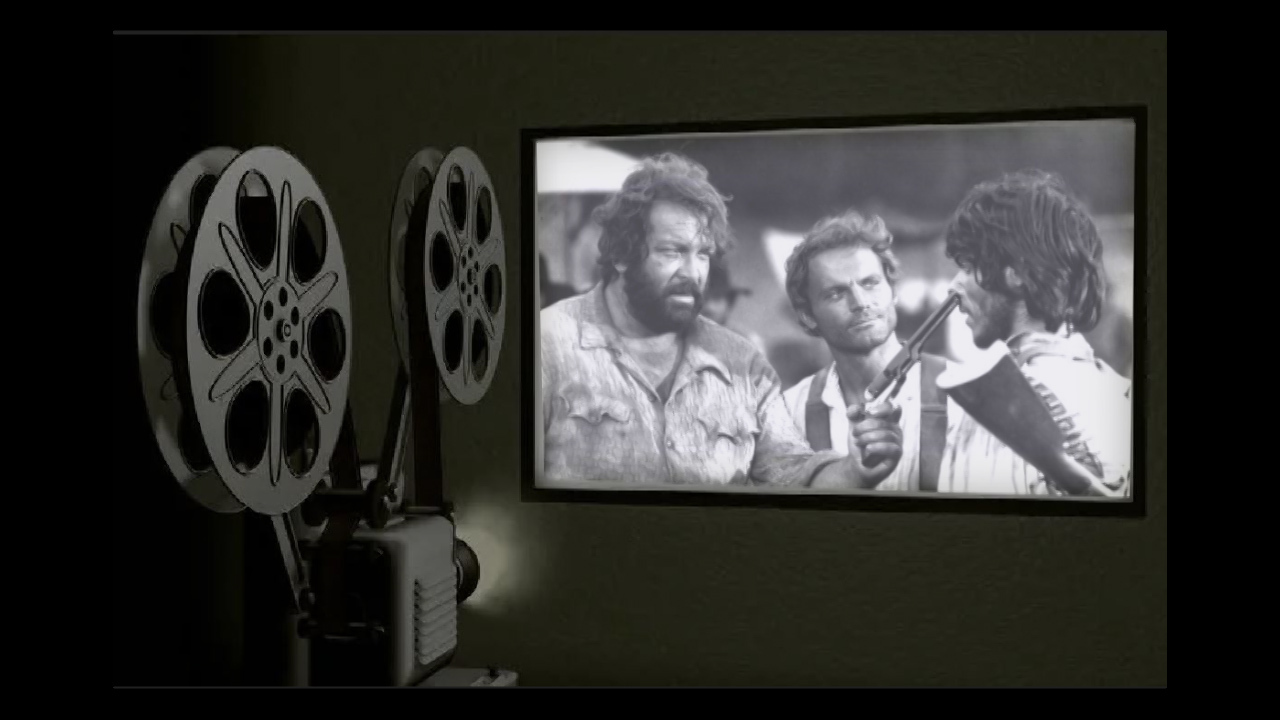
Good day, jolly people! We are back this week with our series “Learn and solve it with Amped FIVE” to talk about filter tips for the most common workflow scenarios in Amped FIVE! This time around we will talk about video deinterlacing. It’s another problem that we inherit from the conversion of analogue video into digital. Let’s go back in time and learn some more about it!
From Cinema to Television
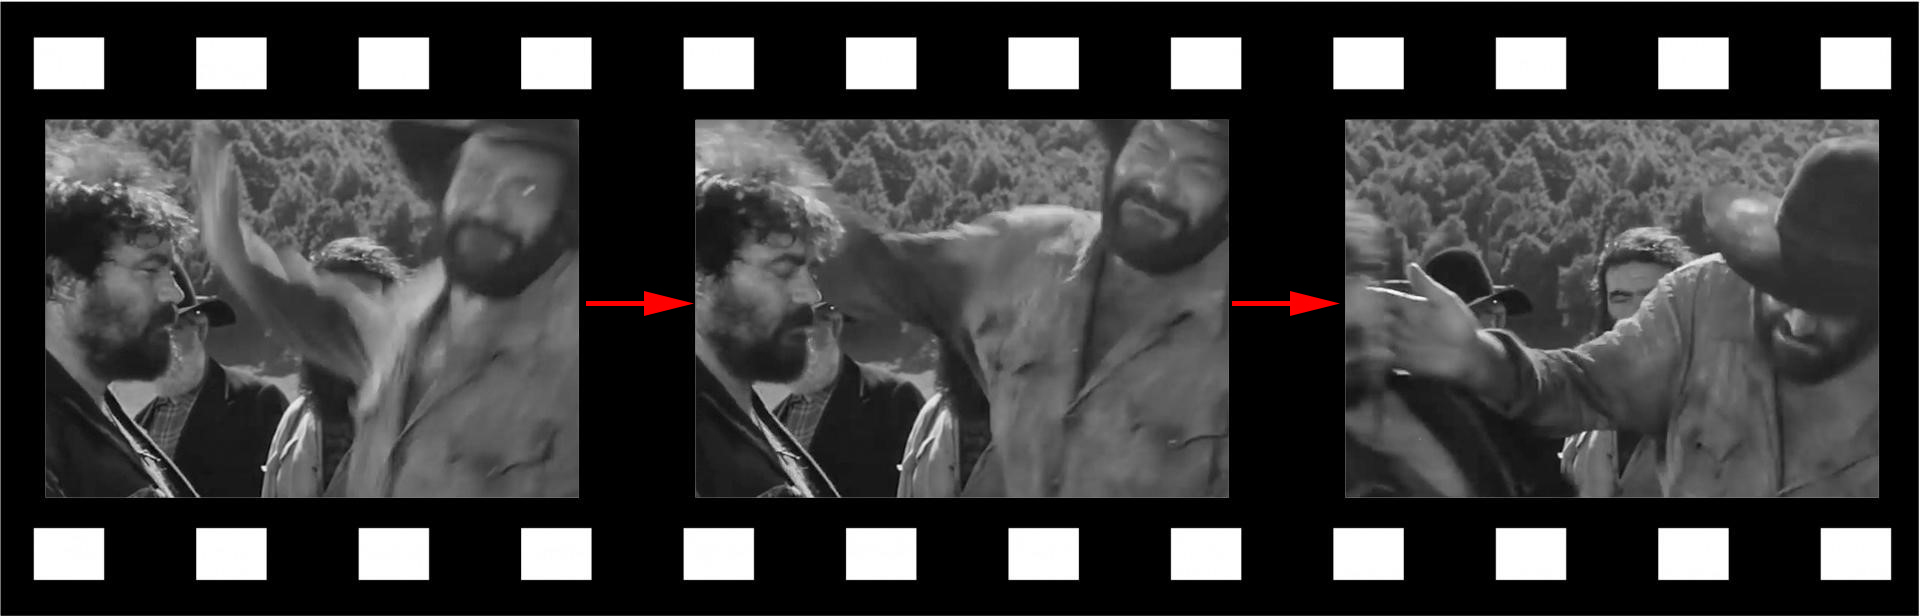
When cinemas were first introduced at the end of the 19th century, viewers enjoyed watching the illusion of movement on a big screen. This consisted of a number of still images (or frames) rapidly and progressively projected from film onto screen from one end of a big room to another.
This type of showing the frames in rapid succession is also called “Progressive”, because the frames are fully projected onto the screen, one after another.
When Television was introduced later in the 1920’s, saving bandwidth of transmission became increasingly important. That’s because it was no longer a case of broadcasting a signal from one end of a room to another. It now involved transmitting the signal to a vast number of locations, within a broad and widespread area.
This is exactly why the interlaced scan was introduced. This new method of rapidly showing still images to simulate movement involved broadcasting two halves of the original frame (now called fields). Each field is made up of alternating horizontal lines and broadcasted at twice the frequency of its progressive equivalent.
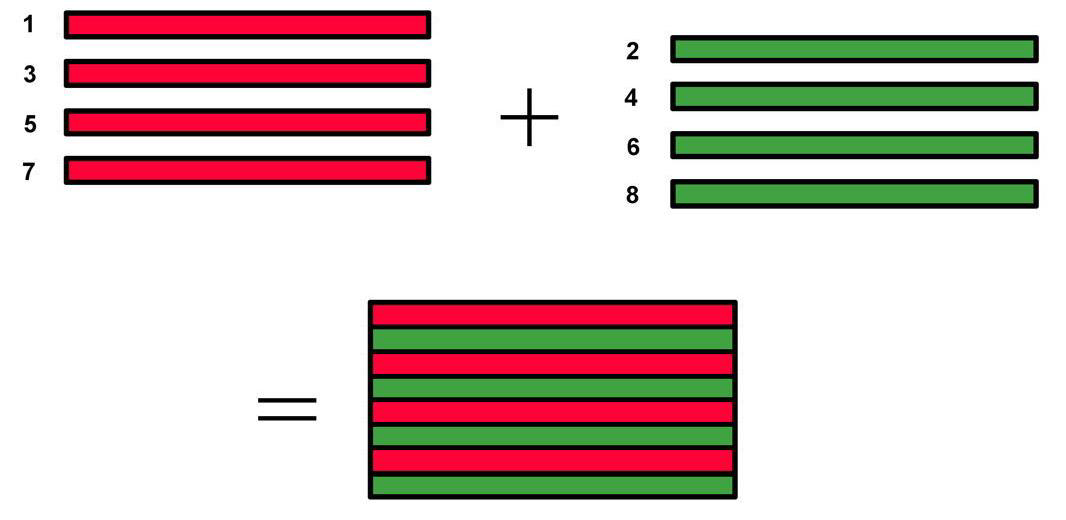
Because the scanning happens so quickly, we perceive the two halves of the picture as one full picture. This is due to the visual persistence phenomenon inherent in human vision. The two halves are played one after the other so quickly that they are perceived as one whole image. Pretty cool, right?
From Analog to Digital
This transmission worked seemingly well in the analogue era with CRT (Cathode Ray Tube) television sets. They were able to deal with the interlaced scanning internally with no issues whatsoever.
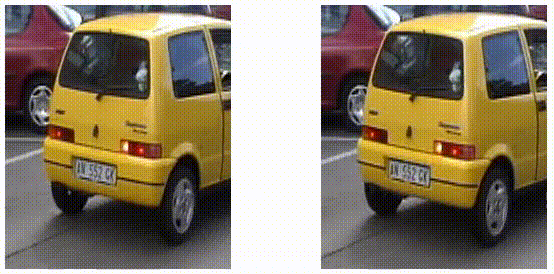
Bit more of an issue when we are dealing with analogue video converted into digital format (such as digital CCTV for example). Computer monitors are made of liquid crystals that will react to certain stimuli in a RGB (Red, Green, Blue) color space. When looking at a digital video on a computer screen, the pixels (the smallest picture elements of a digital image or video) will be transposed to the crystals in the RGB monitor.
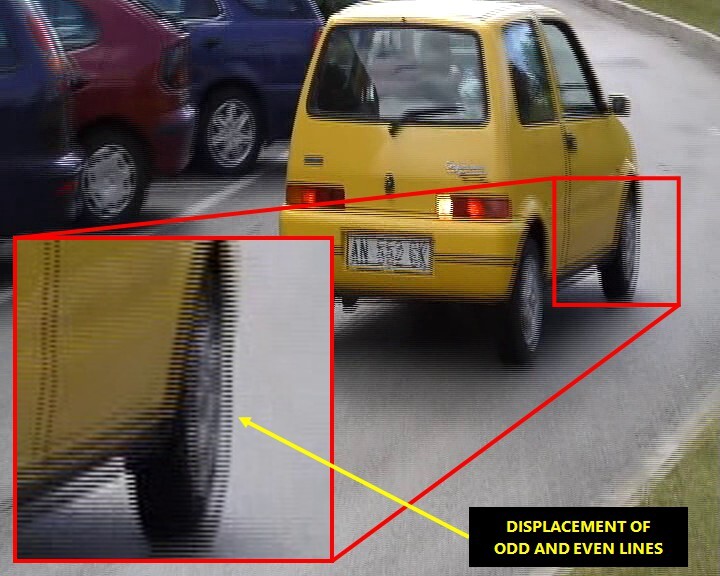
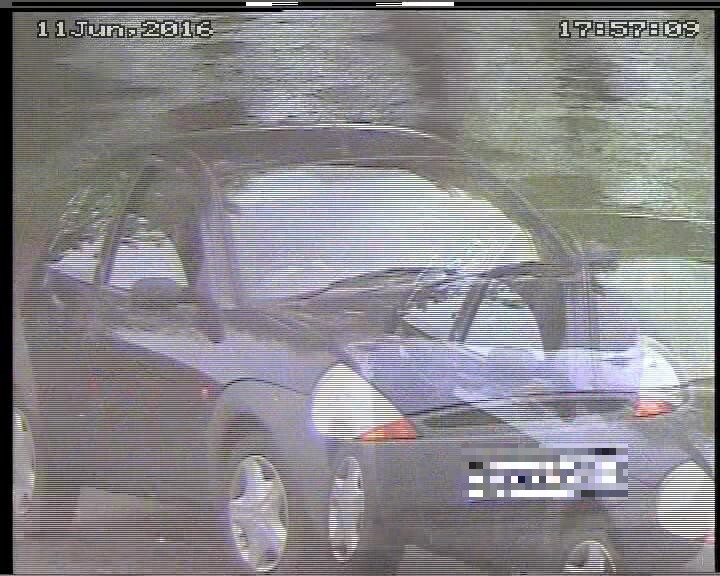
Because of how they are made, computer monitors are therefore incapable of dealing with an interlacing scan as well as analogue television sets. The by-product of this problem is that we will notice a displacement within the odd and even lines of an interlaced image on our computer screen. This is especially noticeable when there is a considerable amount of movement in the scene.
How to Deal with Interlaced Video
Deinterlacing a video is actually a very simple process, which involves two logical steps:
First, we split every interlaced frame back into two separate fields, one keeping the odd lines only, the other keeping the even lines. Each field has half the vertical resolution of the original clip.
Then, we add the missing lines to each de-interlaced image by a process of interpolation to restore the original resolution (and aspect ratio!) of the video. It really is a no brainer.

As an obvious consequence of this process, the amount of frames in the de-interlaced video is also doubled. This is because each frame of the original interlaced video is now split into two different images. The frame rate is then adjusted in order to match the playback speed of the original video.
Applying the Deinterlace Filter
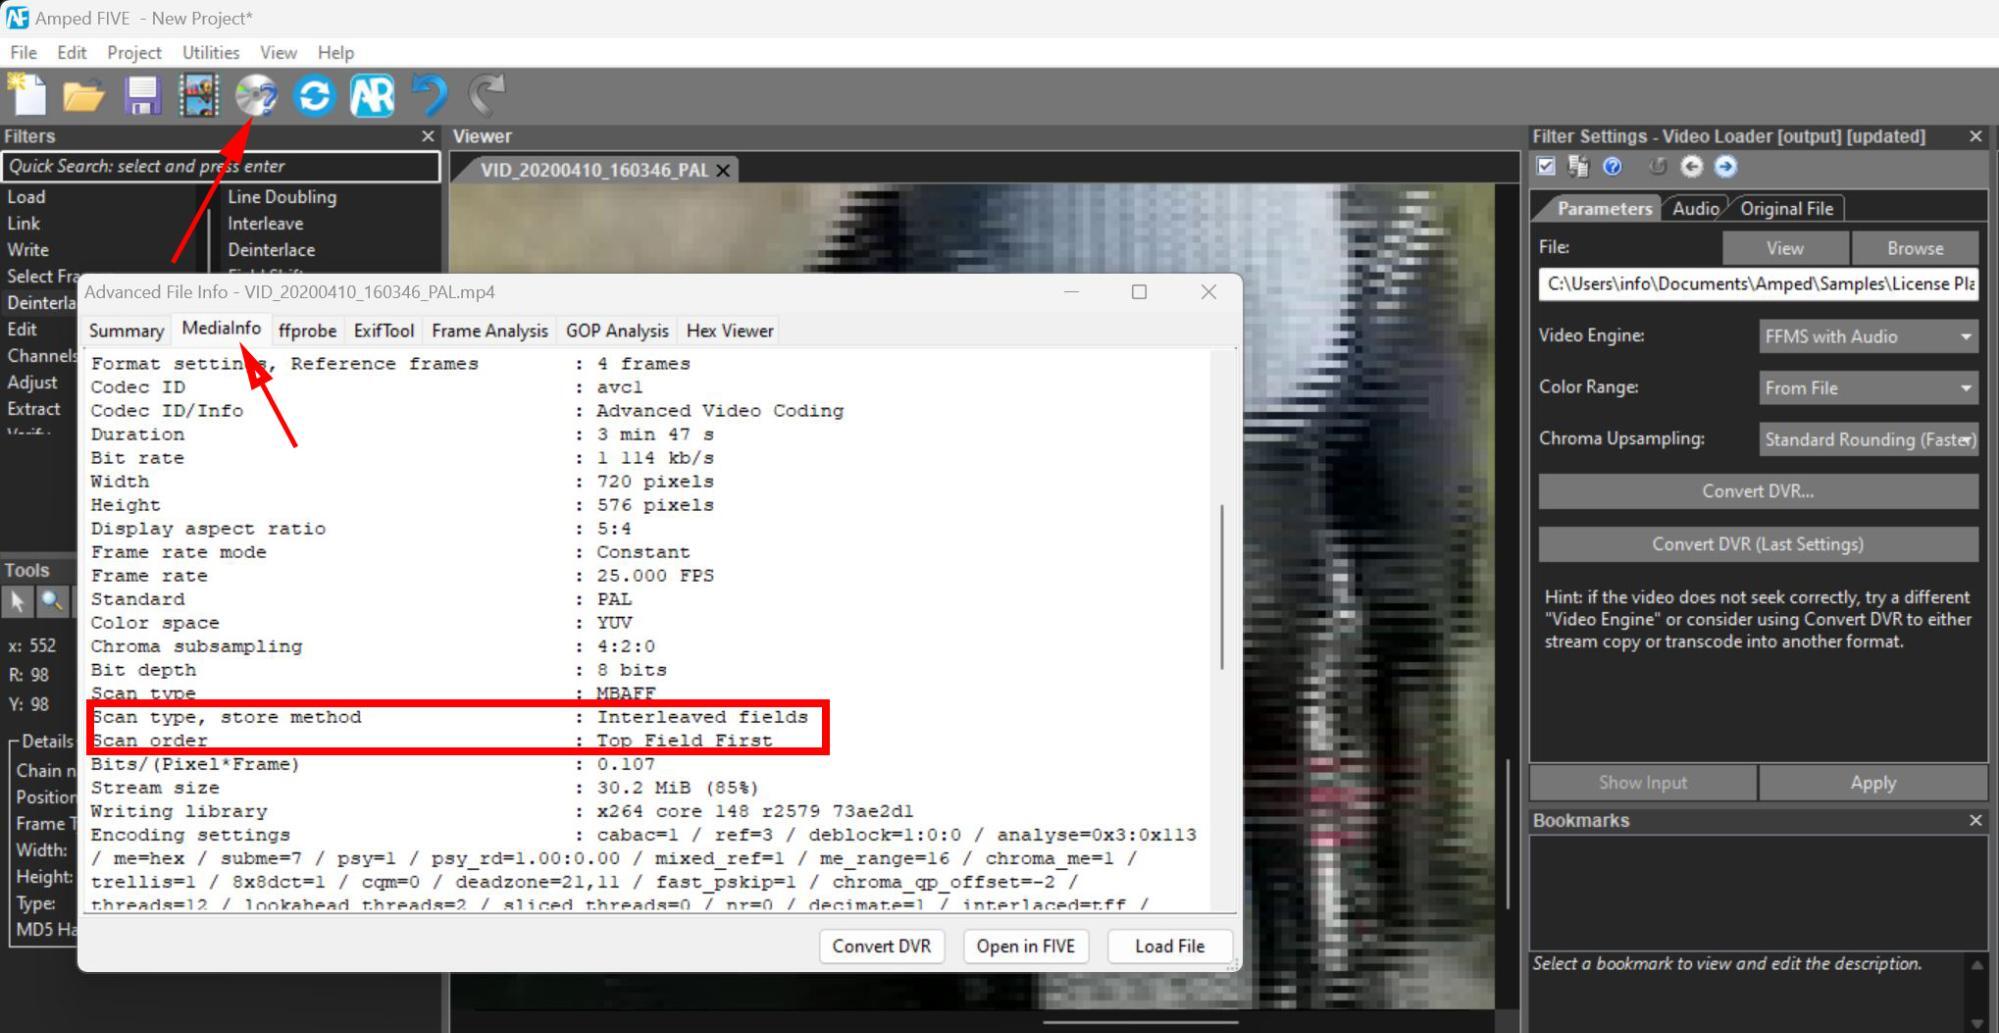
Look out for any obvious sign of interlacing in the video by visually checking areas of movement in the scene. Zoom in if necessary to locate the displacement of the fields. Remember that metadata can also be useful to identify the issue. Get into the habit of opening up Advanced File Info. The MediaInfo tab may (but not always!) indicate if the video is interlaced or otherwise.
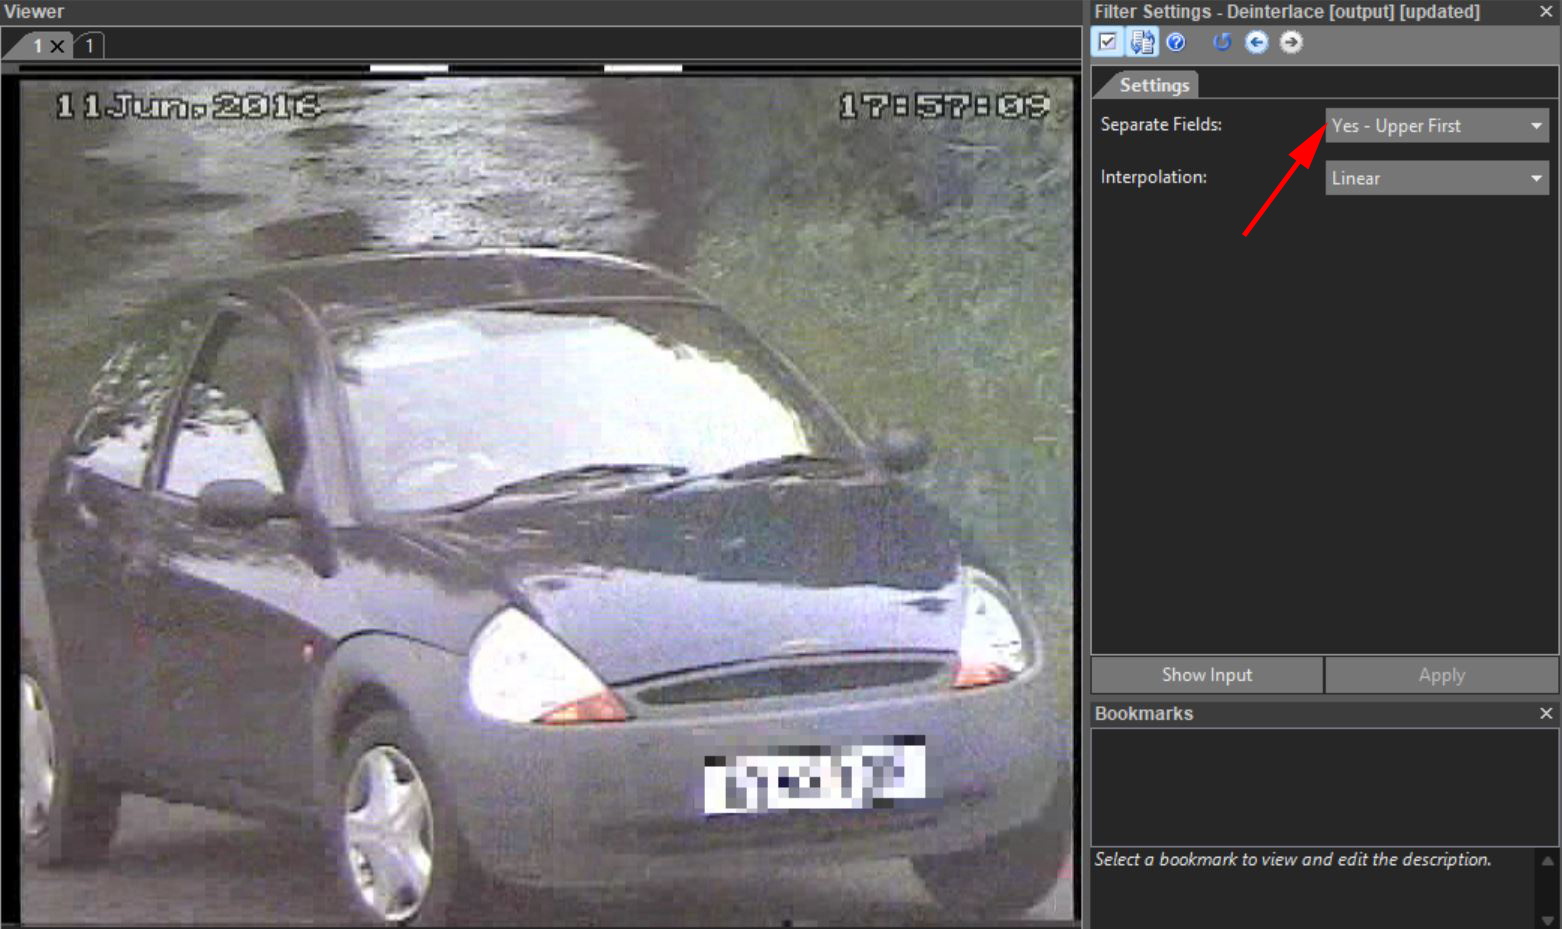
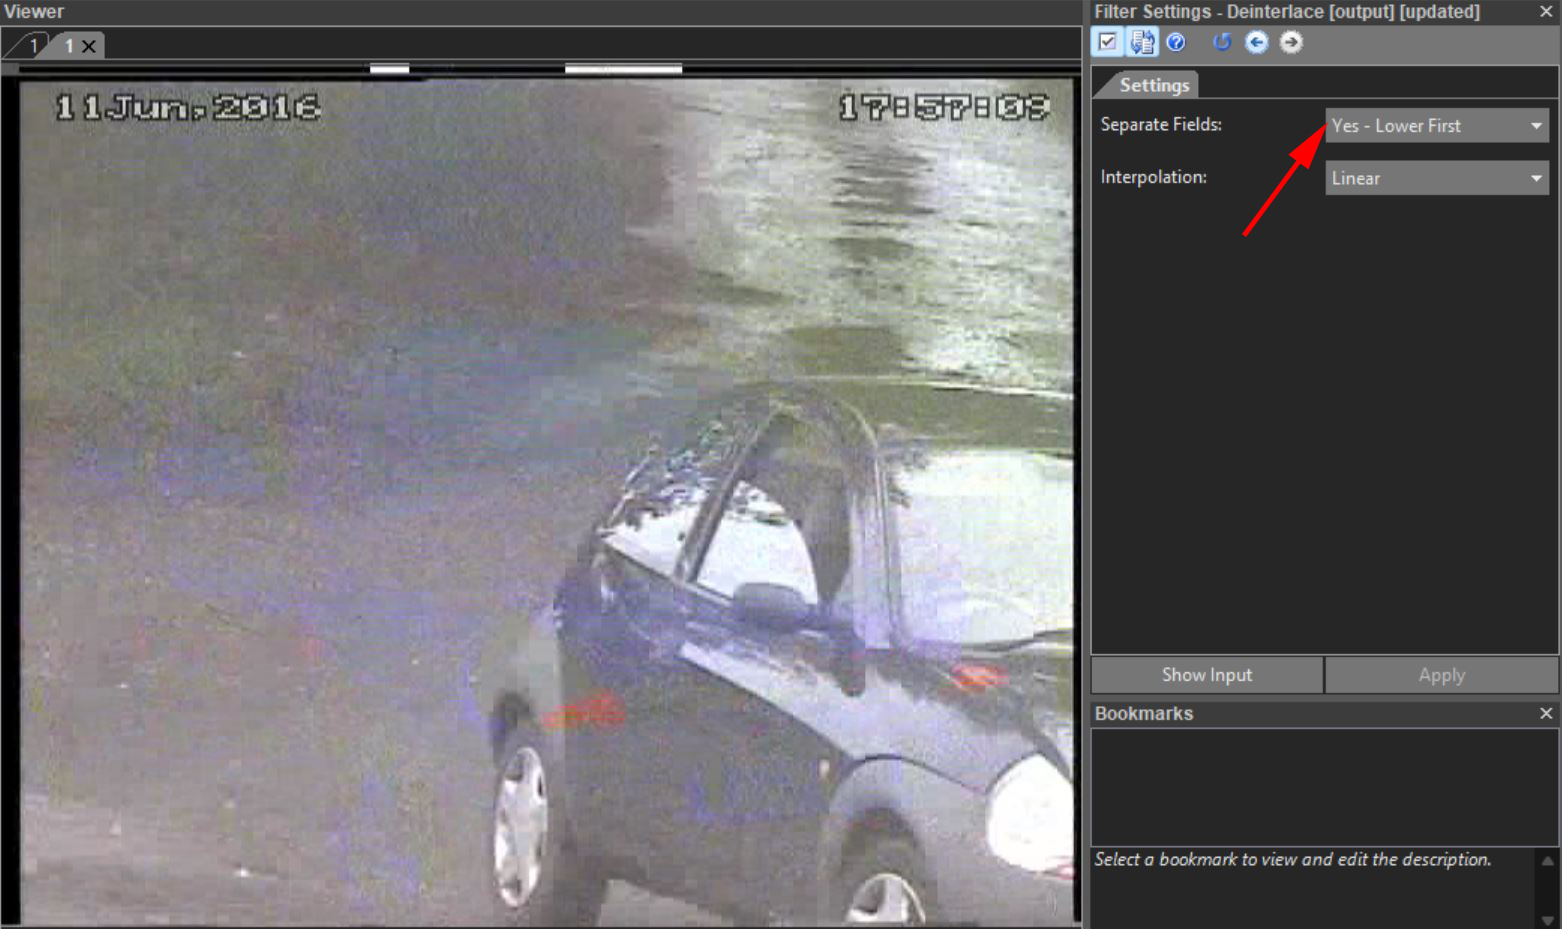
Navigate to the Deinterlacing group of filters and simply click on the Deinterlace filter. In normal circumstances you will not need to change any of the filter settings. However, you can choose which lines (the upper or the lower) to re-create the deinterlaced frames. Additionally, you can also specify the interpolation method used to duplicate the recreated lines.
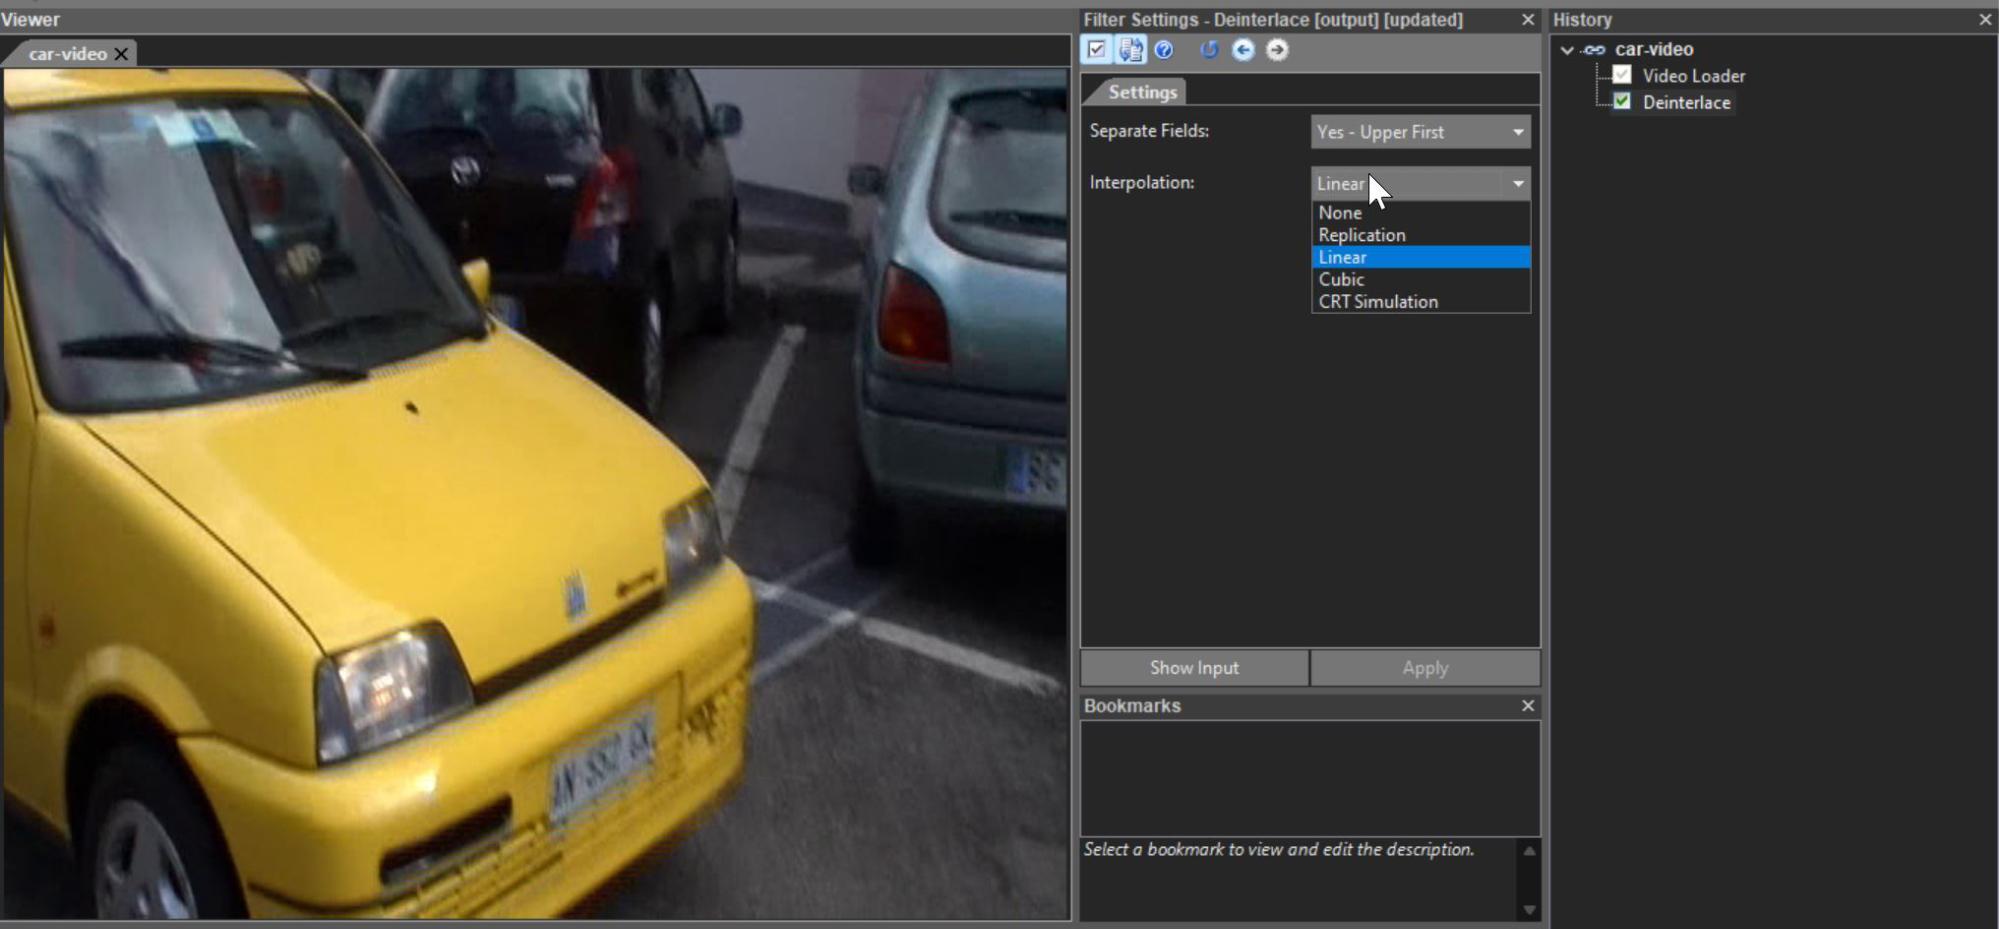
The default Linear interpolation method works quite well because the newly created pixels can simply be averaged out from lines above and below them. If you wish, you can also use the Interpolation drop-down. This allows you to preview how the video looks like with no interpolation at all (none). In this case the vertical resolution will be halved. Alternatively, you can even simulate the CRT effect by displaying missing alternative lines.
To learn how to use the Deinterlace filter in Amped FIVE, check out this video:
Watch Out for Two Multiplexed Cameras in One Interlaced Video!
You may have come across CCTV video that contains two separate cameras within an interlaced scan.
This is a clever way of optimizing storage space, which CCTV manufacturers use to store multiple cameras. In such situations, we can use the Deinterlace filter effectively to “de-multiplex” the video. Simply copy the video in two individual chains and apply a Deinterlace filter on both. On the filter settings – Separate Fields option – select “Yes – Upper First” on one chain and “Yes – Lower first” on the other chain to fully separate and restore the two individual camera views.
Conclusions
We hope you now have a better understanding on what is interlacing, what is causing it and how to deal with it.
We hope you’ve found this issue of the “Learn and solve it with Amped FIVE” series interesting and useful! Stay tuned and don’t miss the next article coming out next Tuesday! Don’t forget to share this blog post with your friends and colleagues on LinkedIn, YouTube, Twitter, and Facebook.


