
The CCTV Acquisition series continues this week with open-box acquisition using the internal Hard Disk Drive (HDD). Yes, it’s time to get the screwdrivers out!
It’s taken us several months to get to this point, with a slow progression starting with the basics and understanding the crazy world of CCTV systems. In the last post, we covered the removal and replacement of a recording device. As the complexity of each stage has increased, so has the competency and equipment required. If we have reached the stage of recovering all of the data, or raw data recovery is being considered, the investigation is likely to become more serious. Consequently, the risks involved also rise.
One of the challenges to consider when retrieving evidence using the internal Hard Disk Drive (HDD) is the time taken to complete the task. This is never a quick job with a workflow consisting of:
- Identification of parameters and priorities
- Attend and assess the venue
- Conduct system evaluation
- Complete native or temporary backup of critical incident
- Power down system
- Remove and possibly replace the system
- Open-box to access the internal HDD
- Create a clone of the HDD
- Create a forensic digital image of the HDD
- Identify and forensically copy files, or
- Use DVR recovery software to assist in the identification of internal indexing and video data, or
- Manually identify internal Indexing or file structure
- Acquire native video streams
- Convert proprietary streams for analysis and viewing.
As you can see, an open-box acquisition using the internal HDD may take some time. The decision making process will be very dynamic with many unknowns to start with. You may not know how many HDDs are inside a DVR until you open it. Will software decode it? Will it be best to remove the device and clone the internal HDD? You may not need to do everything, but you may do many of them. It will all depend on the device and the circumstances.
It is important to emphasize the importance of note-taking and photographing and we will look further at photographing the DVR shortly. Taking good notes on your decision making whilst at the scene or in lab may benefit you if questions are asked later on why actions were, or were not, completed.
Opening the Box
Now that we have the recording system safely powered down and removed, which was the subject of our previous post, decisions can be made on the next steps.
Before we start to think about using the screwdriver though, let us take some photographs. Photograph all the sides of the device, and then, importantly, all opening points, screws and any stickers or warranty labels. This is a forensic process, so you must start with how the device was before you opened it.
This is also an important stage if the device has suffered serious damage prior to your involvement. For example, if the device suffered from fire or water damage.
After taking the photographs, it may be decided to remove the device from the scene and complete all other tasks within a controlled environment. It will all depend on the situation and investigation.
You may, however, just want to take a forensic image of the HDD whilst at the scene and then immediately reinstall it. Or, you may wish to create a forensic clone of the HDD.
Accessing the HDD
Later in the series, we will look at kits and equipment. However, as you can imagine, you often need more than a simple screwdriver. You may need several different sizes and perhaps also some small pliers. You may be lucky and will only need one!
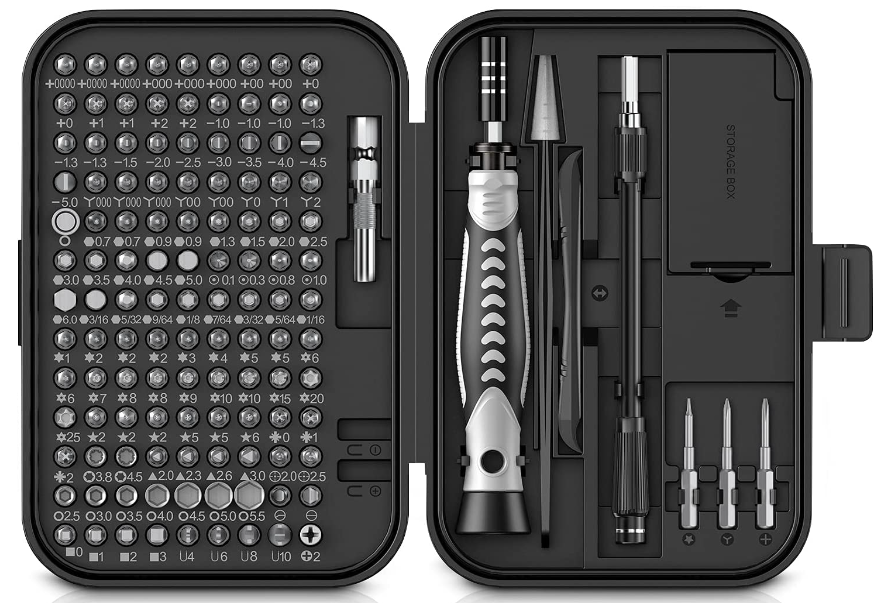
Some manufacturers use glue on the screw heads and use different screw types just to slow you down.
At this point then, let us briefly consider the ethics of taking apart a device to recover video evidence. The device will often belong to someone who is not connected to the incident being investigated. They are putting their trust in you to ensure that nothing gets damaged or broken. But what about those warranty labels that we mentioned earlier?
Legal Considerations
If there is a legal requirement to recover the data, most manufacturers or resellers will understand the reasoning for an investigation to open the box. A few actually make this easy by placing the HDD into a removable caddy on the front of the device. If this is the case, it may be worth researching as often the manufacturer will also have an HDD reader application available. A round of applause to those that do.
Depending on the objective, you may not need to fully remove the Hard Drive from the DVR. If your intention is to clone or image the drive whilst in the venue, you only need to access the power and data ports. Before disconnecting anything, it’s time for more photographs. Pay particular attention to any signs that the box has been opened and dust disturbed inside, perhaps suggesting a new drive has been installed prior to your arrival.
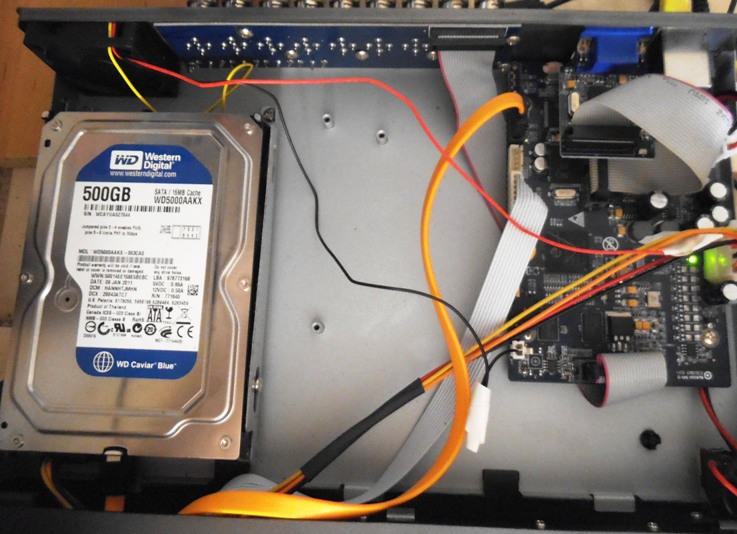
You may also want to take notes or photographs of any stickers on the device’s motherboard. These can be handy if you have a generic black box with just “H264 DVR” on it. Internet research could reveal further details that may help further along in the investigation.
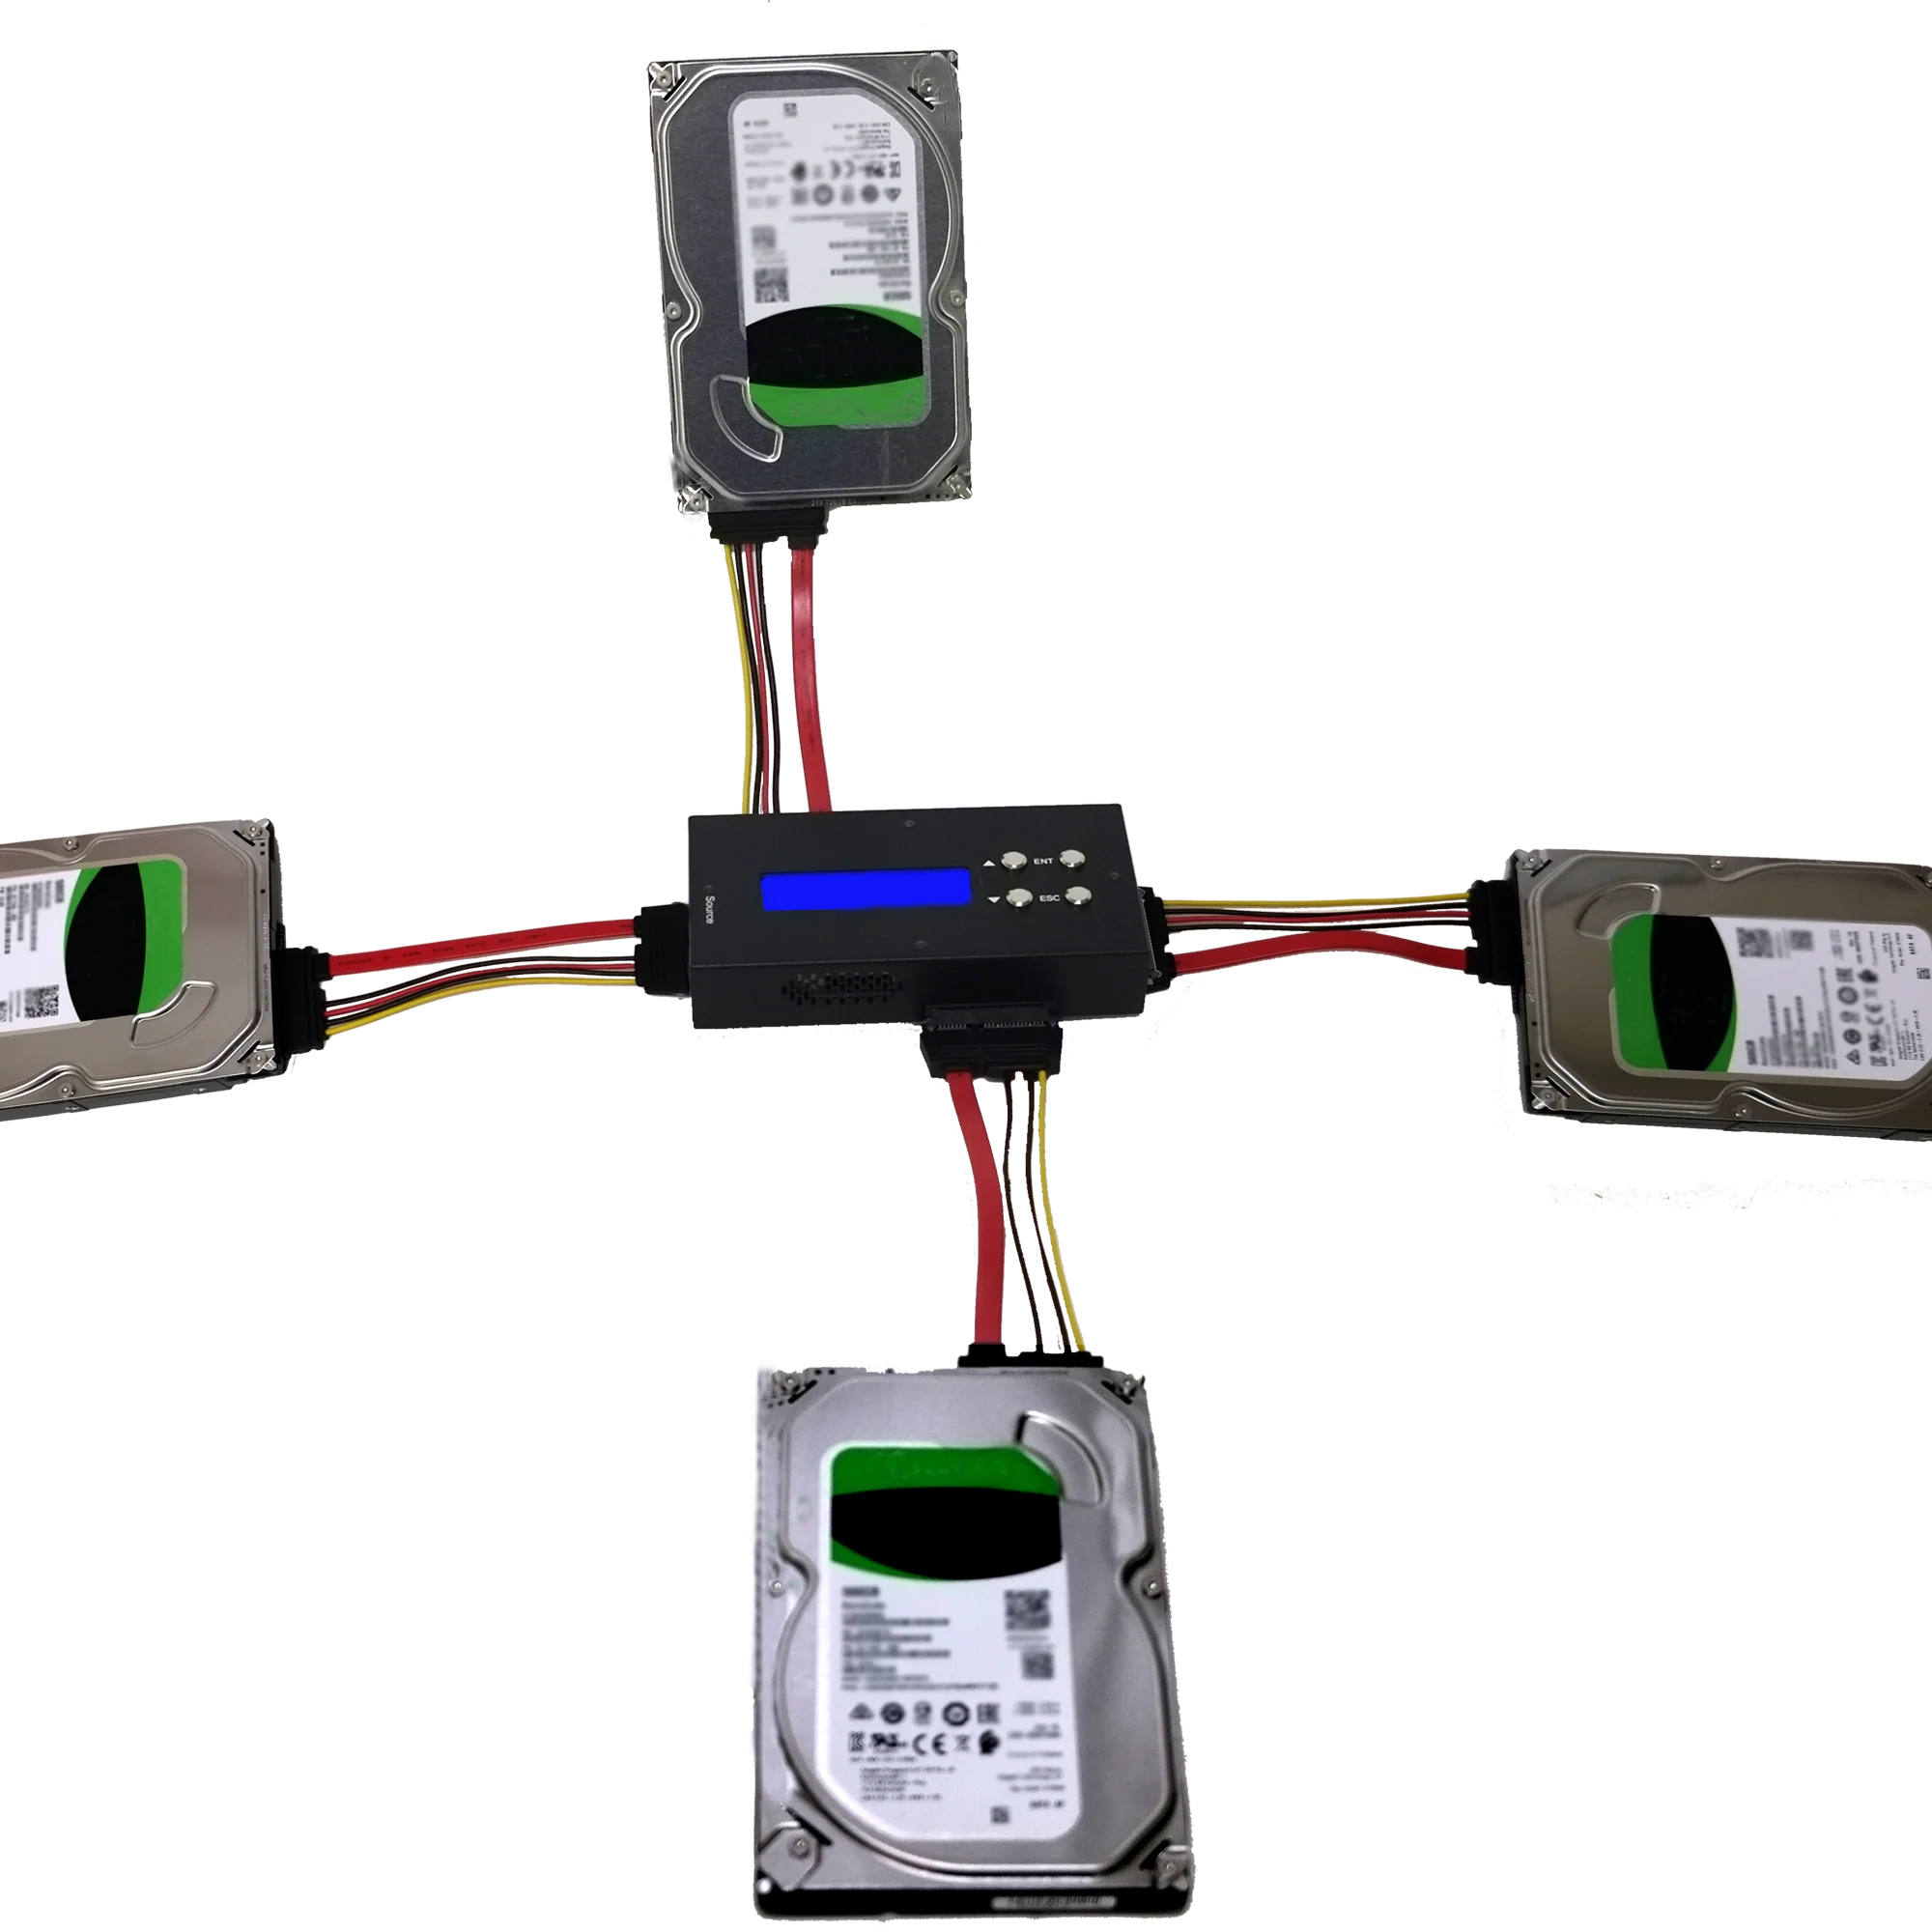
Cloning the HDD
A clone is exactly that, a true bit-for-bit copy of an internal HDD. A small powered device sits between the evidence HDD and a new blank HDD. There are many different types available, with one evidence drive to one new drive being the most common. One to three is also possible, with some portable devices allowing 2 evidence drives to be duplicated onto 2 new hard drives at the same time. Consider a cloner that supports the older IDE connection type, along with SATA, for CCTV work. There are still many old devices out there.
Clones are a good way to back up the data if there is a fear that the drive may not boot up again if allowed to completely cool down.
They are also good for placing the clone back into the recording device, so it can be booted up again with all settings and footage intact, whilst you are able to walk away with all the preserved data. However, you must remember that reading this data may not be possible or easy. To refresh your memory on some of the issues surrounding the recording of surveillance data, take a look back at the beginners guide of CCTV Acquisition.
There are circumstances where the recording device will not accept a clone, and will force an overwrite and reformat once reinstalled. Luckily, these are quite rare, but something to consider, especially if dealing with an older device.
If the new empty HDD is from the same manufacturer, then it’s usually fine to have the same size HDD, such as 1Tb etc. If it’s from a different manufacturer, it’s wise to select a larger HDD to allow for any difference in sector sizes.
The clone is a good, “just-in-case” option for various situations, with the most common being that you need to use the DVR to export native data but are worried about damaging or overwriting existing data.
Creating a Forensic Image
A forensic image of a HDD is a data copy of the structure, partitioning, and all the bytes on the HDD. It is also possible to place a created image onto another HDD to make a clone.
The most common reason for taking an image, when completing an open-box acquisition using the internal Hard Disk Drive, is that it can then be easily forensically examined and data acquired from it at different times. You can be using a working copy of an image, with the master image preserved safely on a server.
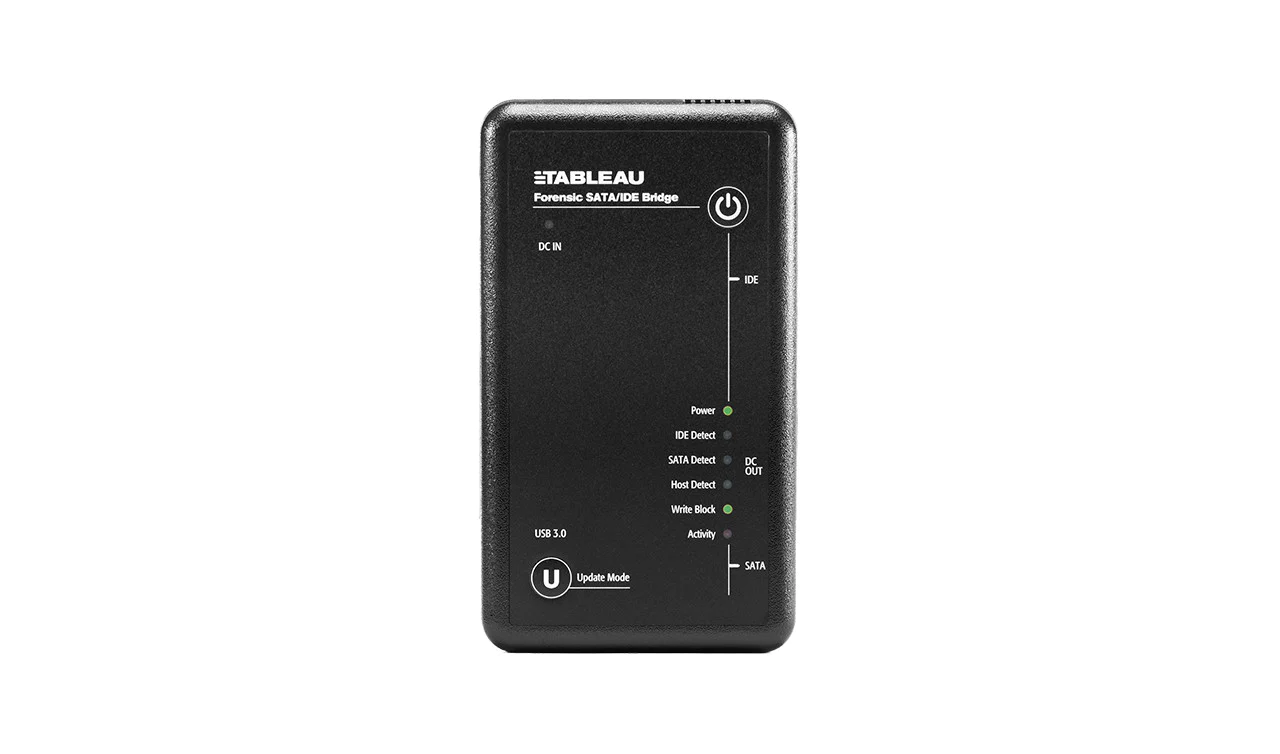
The creation of a forensic image is completed using a software application. You will, however, require some hardware to sit in between the HDD and the computer to ensure that no data is changed on the drive. This is known as a write-blocker and is built into the forensic cloning devices that we mentioned earlier.
As we are attaching evidence directly to a computer, we need a firewall between the two. There are many different types available. Remember that for CCTV Hard Drives, one that also supports the older IDE standard for drive connectivity should be considered.
Next comes the forensic imaging software. Again, there are several popular forensic applications to complete this task.
You may simply wish to create the image, but it’s a good idea to think ahead and assess the file structure first. This may save you some considerable time, especially if you are dealing with a file-based system and it presents you with understandable files, rather than just unknown data.
Most imaging applications will allow you to mount a drive, making its contents visibile to the application, and for it to be examined before taking an image.
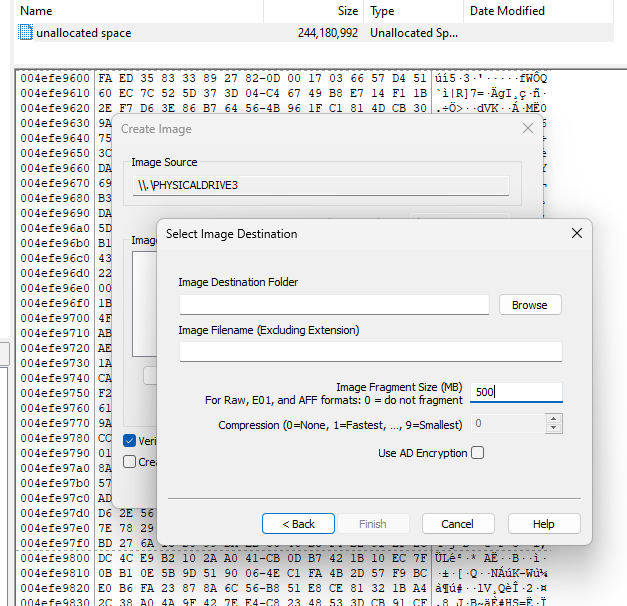
In this example, we are selecting to fragment our data into 500mb chunks. This may come in handy later on. To get an idea on using a forensic imaging tool, take a look at the video here on using a popular one.
Identifying Files in File-Formatted Partitions
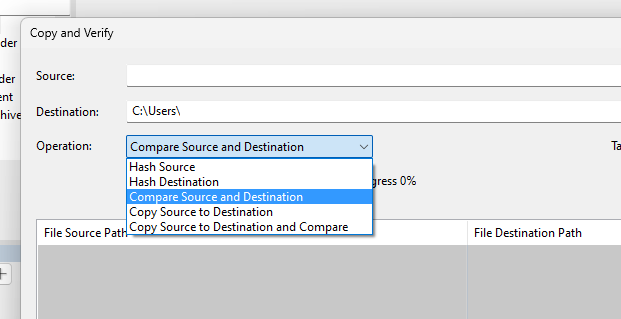
There are many PC-based systems where the HDD partition and structure are visible to Windows. In these cases, Copy and Verify can be used within Amped FIVE.
If successful, there will be no requirement to do anything further, apart from re-install the system. The decision on whether to conduct this process on a write blocked live drive, or a clone, will be down to you and the situation.
After write-blocking our evidence drive, there are two scenarios:
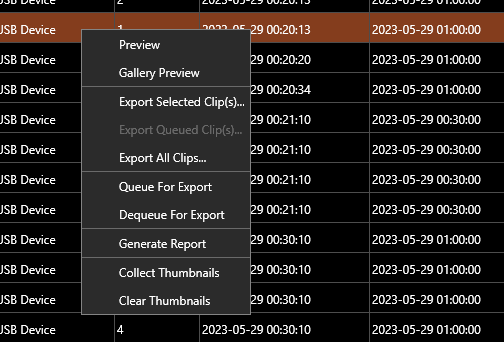
- If you want the entire contents of the drive or directory, then select “Copy Source to Destination and Compare”.
- If you only require specific dates and/or cameras, then you can use Windows, or another file management application to select and copy the required files to your destination. You can then use “Compare Source and Destination” to ensure that the copied files are the same, and to list all the files, including those not copied.
This same process should also be used on cameras that utilize Edge storage. This is where a small data device is held within a camera. Usually, it is an SD card or Micro SD card. Sometimes the card is easily accessible, but often it’s hidden within the camera housing.
You must deal with these storage devices exactly the same as a HDD. Therefore, they must be write-blocked before being accessed. Hardware USB write blockers are available for this purpose.
Often, with smaller storage devices like these, it is best to play it safe and conduct a full forensic image of the drive, and then extract files from the image. We will look more at this later in the series when dealing with master and working copies, but the decision again will be down to you.
Any data files extracted from a drive may not be immediately decodable. Those originating from Edge storage may also be encrypted.
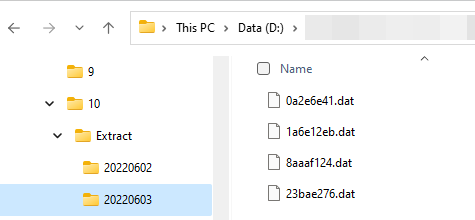
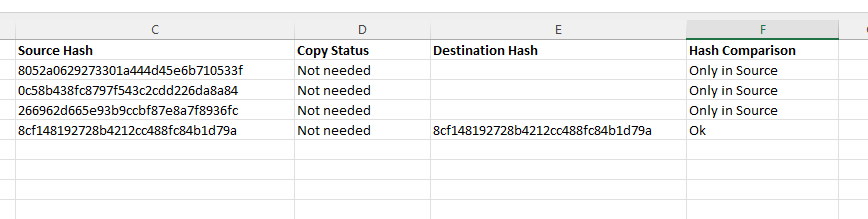
In the case shown above, we have successfully located files relating to the dates required using the directory name. However, the files are not clean video streams. Each one contains all the video, audio, and data timestamps. Later on, we will look at how the Amped conversion engine can help here.
Using DVR Recovery Software
Unfortunately, the majority of Video Surveillance Systems do not store their recorded data in a file-based system. The formatting of the data structure does not have to conform to standards, and this does raise further challenges.
We have now arrived at a point where we have safe access to the HDDs data, either with a clone or a forensic image, but cannot understand it. Some manufacturers support open-box acquisition using the internal Hard Disk Drive through the use of their own software.
Many of them do not publish this information, so it is always worth doing a internet research, especially within the security system installation community. They may not support forensic images, so a cloned HDD would be required. Reminder: always use a write-blocker.
Several forensic HDD tools now exist that read both drives and forensic images. The main point to consider though, is in the same way as CCTV manufacturers do not announce how they are recording, they do not announce how they format their hard drives. You may find that one piece of software works, but another does not. Also, you may find that it partially works, allowing access to certain information but not all. You may often find that nothing works. In this case, you may have to clone the HDD and then remove the DVR as we covered in the last post.
Most DVR HDD software will identify data in the same way. The drive is scanned and a pattern is recognized that matches a known structure. The index, presenting the date and times, is displayed, and you can view and export that data.
Drive Identification
On the test DVR that we are using for this series, the data on the drive has been recognized by forensic recovery software.
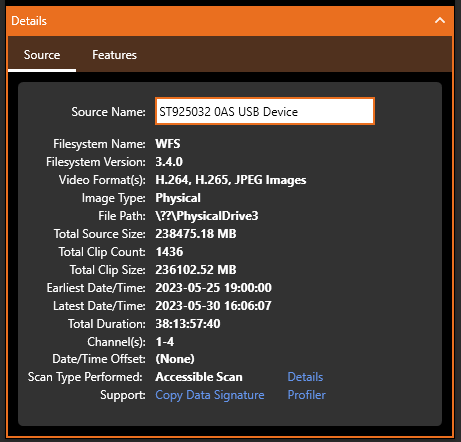
It has been able to read the index with all the dates and times accessible and also reports on the features it supports.
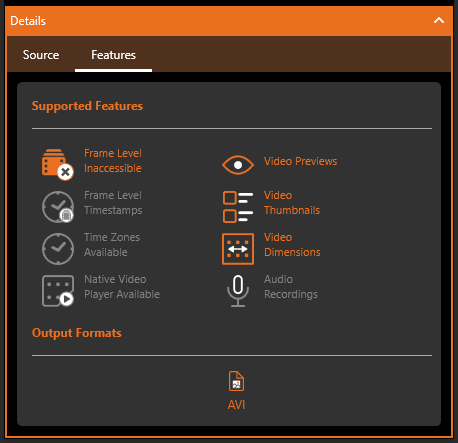
In this case, native video is not supported. It would be best practice therefore, to have all the native data to start with. Either by having a forensic clone of the HDD or by having a forensic image of the HDD.
Using the Index allows date and time navigation of the files identified on the HDD.
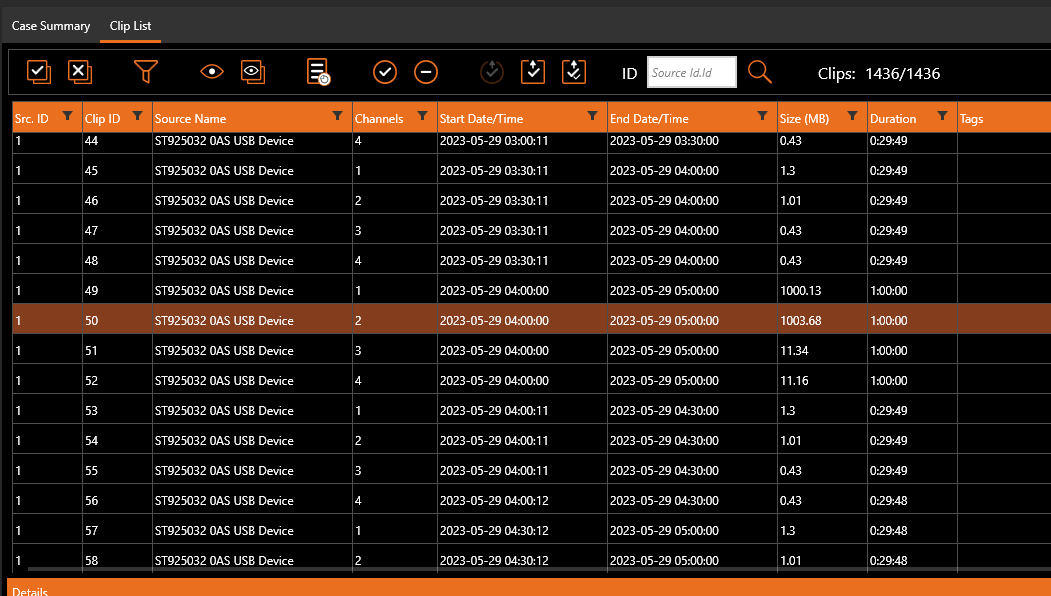
In previous posts, we identified that this DVR records sub-streams for remote viewing of the footage. This is important to be considered, as half of the files identified will be the lower-quality streams. However, you may not have access to this information at the start. As such, a full assessment of the files, their sizes, and the resolutions they present should be conducted before acquiring any files. If you only selected one file for a specific date and time, you could accidentally only recover the sub-stream. Again, this shows the importance of taking an image of the entire drive first, so you have all the data to return to.
We also identified in previous posts that both network and USB data acquisition methods produced files with the H264 file extension. This software has produced AVI’s. Again, this is something that would require further research and testing.
Manual Identification of Index and Video Streams
Manually identifying the index, interpreting the data, and using this to locate and then copy data from areas of the HDD is known as file carving. This is not easy, and it involves far more than any blog post could cover. However, it would be remiss not to mention this in an article on open-box acquisition using the internal Hard Disk Drive.
There is no requirement to do this if a DVR recovery application has done all the hard work for you. If that has failed however, it may be time to dive into that raw hex data.
There is very little published on the thousands of DVR file systems. Each one has to be researched and comes with a lot of trial and error. Be prepared to fail, a lot!
In general, a DVR HDD will be separated into the DVR’s operating system and GUI, settings and logs, indexing and then all the video and audio. Many, however, only have an index with the video and audio, with all the GUI stored on a solid-state chip. The indexing will often be seen somewhere within the data on an HDD. The data pattern may reveal a date and time, along with the location of the associated video data on the HDD.

This is how the DVR’s software works. It converts the date and time visible to the user into data, and then has an index that connects that date and time with the recorded footage. With multiple cameras, there will be a camera marker also. There may be dates and times within the video streams themselves and this is where testing is required.
Creating Test Data
After removing the DVR to a controlled environment, a possible testing procedure could look something like this:
- Place a clean new HDD inside the DVR and format the drive using the GUI
- Connect at least 2 cameras
- Place tablets in front of the cameras that display a dynamic view of the current date and time
- Set the DVR time to match the tablet time
- Record 2-3 hours of footage
- Power down the DVR
- Create a forensic image of the HDD
You now have a known to start with. You know what dates and times to search for within the hex data, and if you find video, you can relate it to dates and times and also camera number.
Once you have interpreted all of the data, the next stage is the automation of the acquisition. Again, it is not an easy task, with a fairly high level of data carving skill required.
Acquisition of Native Data
The prime objective in any acquisition should always be the recovery of native data. This is the forensic starting point. Think of the HDD as a box full of evidence. You want to extract that evidence without any changes. If there are changes, you need to know what those changes are, how they occurred, and why.
We go all the way back to one of the two pillars of forensic video analysis: integrity. Has the data changed since the time it was created?
Sometimes, when completing an open-box CCTV acquisition using the internal Hard Disk Drive, you may believe that all hope is lost.
The DVR cannot be used and all attempts with various HDD recovery tools have failed. You have run some tests on a new HDD but cannot identify any times or patterning.
Searching in the raw data of your forensic image for a video header may be worthwhile and also produce some useable video.
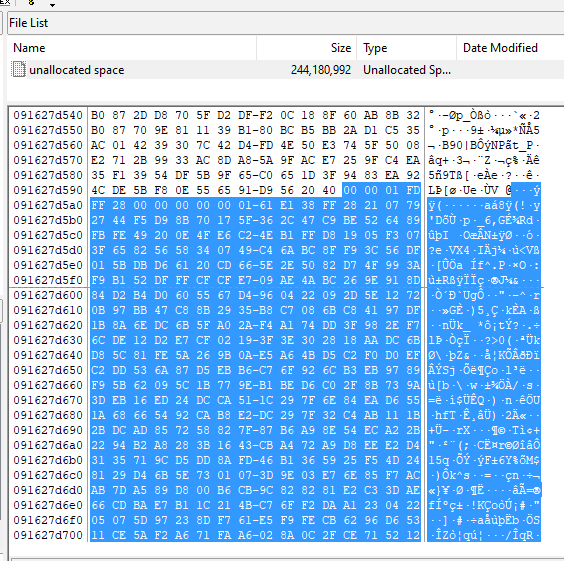
The value “00 00 01” is a H264 MPEG header. Selecting approx. 10mb of data from this start point and saving it into a raw file with a hex editor may give us something to work with.
Do you also remember when we created our forensic image of the HDD? We fragmented the data into 500mb chunks. How about trying to decode one of those chunks as video?
Conversion of Native Data to Standard Video Files
We now have either a small part of raw data or one of the fragmented data chunks. We may also have some native files that were carved or automatically extracted through the use of DVR HDD recovery software. You may also have a data file copied directly from the HDD if it was file-formatted.
As most of you know, the lossless conversion of proprietary video formats is the purpose of the Amped conversion engine. Our team of codec engineers analyze submitted data and identify the structure and multimedia components, including the data timestamps. They then build the decoder into our engine. Consequently, if you have acquired raw files, you have a very high chance that they can be correctly converted using either Amped Replay, Amped FIVE, or Amped DVRConv.
For those with FIVE, even if you are unable to produce a clean conversion, fallbacks give you another helping hand to produce some actionable video.
Using Amped FIVE on HDD Image Chunks
Here we have loaded chunk number 43 from our forensic image directly into Amped FIVE. Convert DVR has detected the H264 video data inside. It doesn’t recognize the formatting, so it cannot extract the data timestamp or separate the 4 camera streams cleanly.
Luckily though, with this DVR, the footage has pixel encoded timestamps so at least we can associate date and time with the visual events.
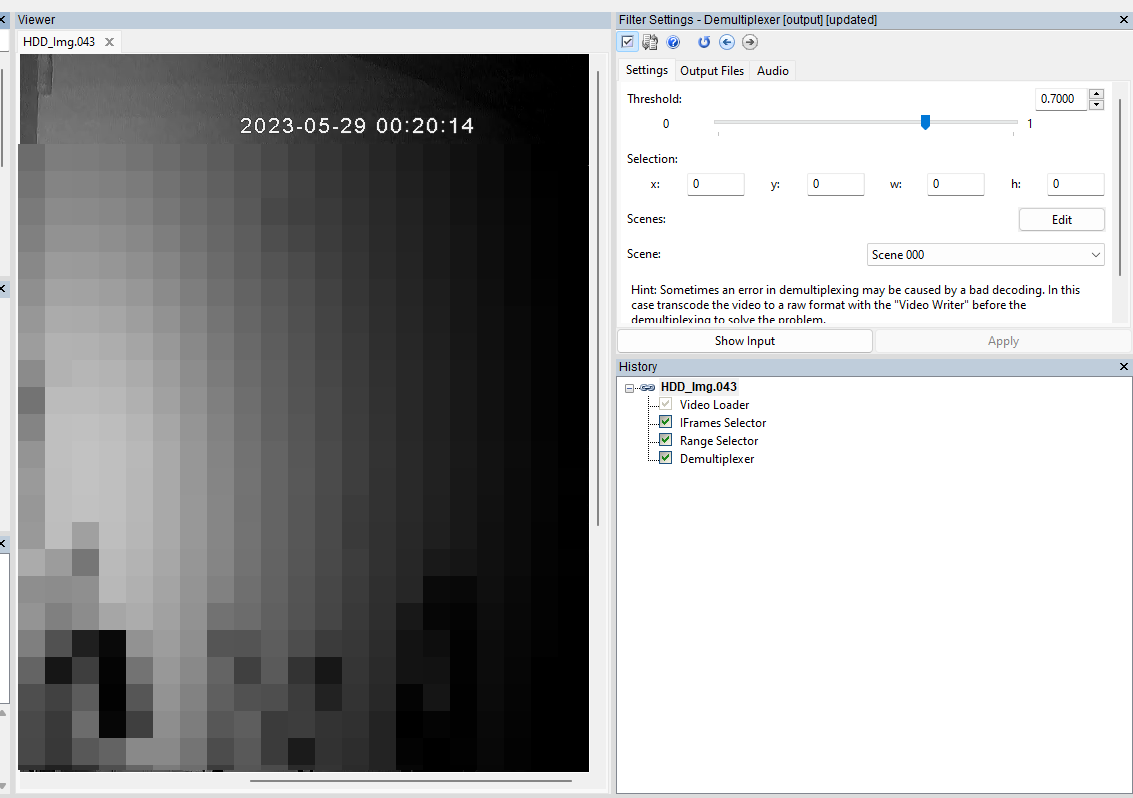
The four camera views are muxed together in time. This means that P-Frames from one camera are trying to reference I-Frames from another camera. This results in image corruption. The I-Frames, however, do not need to reference any other frame, so they are intact with no distortion.
By using the IFrame Selector, it’s possible to only select those frames. After trimming off the frames related to cameras 3 and 4 (black video), using the Range Selector, we can use Demultiplexer to separate cameras 1 and 2.
We now have some useable, single-camera, actionable video. All just from a raw HDD fragment.
It is only the I-Frames, but this may be all you need to narrow down where your incident occurs or what was captured by the system. Further work on video reconstruction may then be confined to that section, saving a lot of time.
It may also be enough to make the decision that the footage is not relevant, so no more time is required in the recovery of the data.
Conclusion
Finally then, what if you have some data, but you can’t do anything? You have tried all the options for open-box acquisition using the internal Hard Disk Drive.
Remember that if you use one of our tools with an up-to-date SMS, and you come across a format not supported or are unable to decode the audio or timestamp, just send it to us via the Amped Support Portal.
Coming up in the next post in the series will be the remote acquisition using a mobile device.


