
We’re back with another massive update to Amped FIVE and this time we’re super excited to be introducing a brand new tool!
![]()
Copy and Verify
One of the core principles of working with digital data in a forensic capacity is ensuring that data remains unchanged during investigation and analysis. At Amped Software, one of our core values is that all of our products are forensically sound. Steps we take to ensure this include using only filters to apply enhancements, generating detailed reports providing the ability to reproduce and audit analyst actions and making sure the original file remains untouched during an import or conversion.
I’ve no doubt that if you work within the video forensics field you’ll already be familiar with the woes of acquisition and the importance of generating and comparing unique hash values for your digital data. Hashing and verification is something we’ve already provided within Amped FIVE through the Verify filter set, but we also realize that integrity of digital data must be ensured from the moment any digital data is captured all the way through to copying to workstations, during analysis, and to the final presentation.
Let’s propose a scenario; you’ve been tasked with retrieving video from a stand-alone DVR as part of a case. At scene, the video is saved onto some sort of removable storage, be it a hard drive, CD, DVD, SD card or USB drive in its native format, placed in an evidence bag, signed, sealed and delivered back to the office. You then need to review the video and perhaps perform an analysis, which means the data must be transferred to a write-blocked forensic workstation. This is your chance to head over to FIVE and run the Copy and Verify tool!
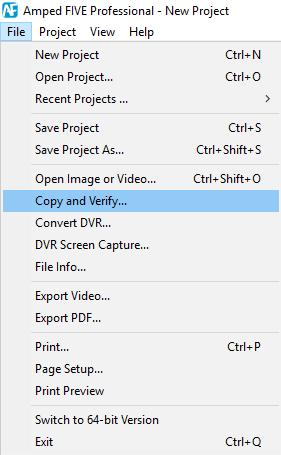
Copy and Verify, found under File, allows you to navigate to your removable media, folder or file, and seamlessly copy the files while simultaneously creating and comparing hash values.

Let’s go through how it works – in this instance I’ll be using a USB drive but it could easily be applied to CD-Roms, DVDs, SD cards, etc. and even specific folders or files.
Firstly, I’m going to navigate to my Source, which will be the USB drive with the assigned driver letter ‘J’. I can then choose a destination on my PC to copy the files into, for instance if you have a particular case folder this evidence needs to be added to, but here I’m sticking with the default desktop option. Using the default option will mean the Copy and Verify tool will automatically create a folder with a date and timestamp as part of the naming convention.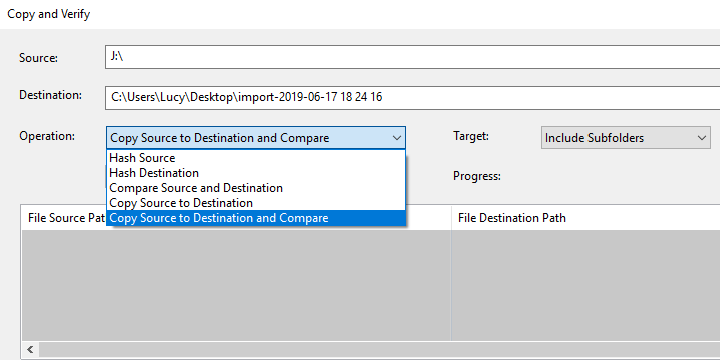
Next, I want to select the Operation I want to perform and here there are a few to choose from:
- Hash Source – This will create hash values for the files that have been selected in the Source bar.
- Hash Destination – Like Hash Source, this will create hash values for the files selected in the Destination bar.
- Compare Source and Destination – This allows you to compare hash values between the source and destination, for instance, in the event you have already copied the files but wish to compare them.
- Copy Source to Destination – This will copy the files to your chosen location but without comparing the hash values
- Copy Source to Destination and Compare – This is the default option upon opening Copy and Verify and will copy the files from the Source to the Destination whilst creating hash values for each and comparing them.
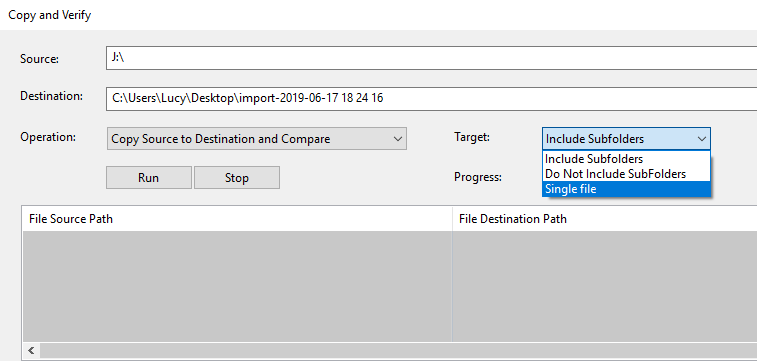
Using the drop-down Target menu, you can choose whether or not to Include Subfolders or target a single file, particularly useful if the storage media has files unrelated to the case. Make sure to select Single File before navigating to the Source folder so the file view is enabled upon clicking Select a Drive, Folder or File.
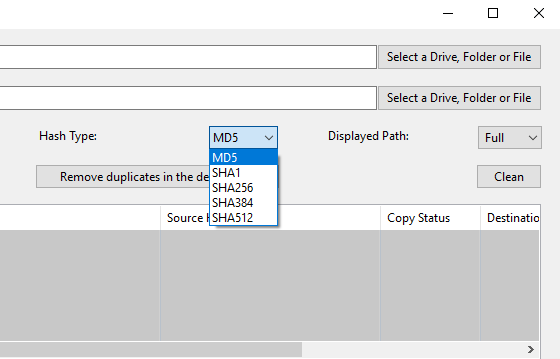
MD5 is the default hash algorithm, but you can choose from SHA1 up to SHA512.
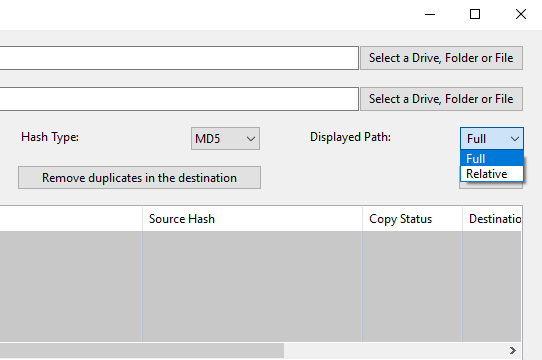
The Displayed Path options, Full or Relative, determine how the file path is shown in the Copy and Verify tool. Using the default Full file path display, the entire file path will be visible in the tool, as opposed to only the shorter, file name and extension viewable after selecting Relative, as demonstrated below.
![]()
![]()
The Full file path display option is at the top and the Relative at the bottom.![]()
Clicking Remove duplicates in the destination will discard any duplicate files and clicking Clean will clear the tool of the previous task, allowing for further operation.
![]()
Clicking Run will start the process of copying, verifying or comparing depending on the Operation mode selected and clicking Stop will cease any running operation following the completion of the process on the current file. So, let’s click Run!
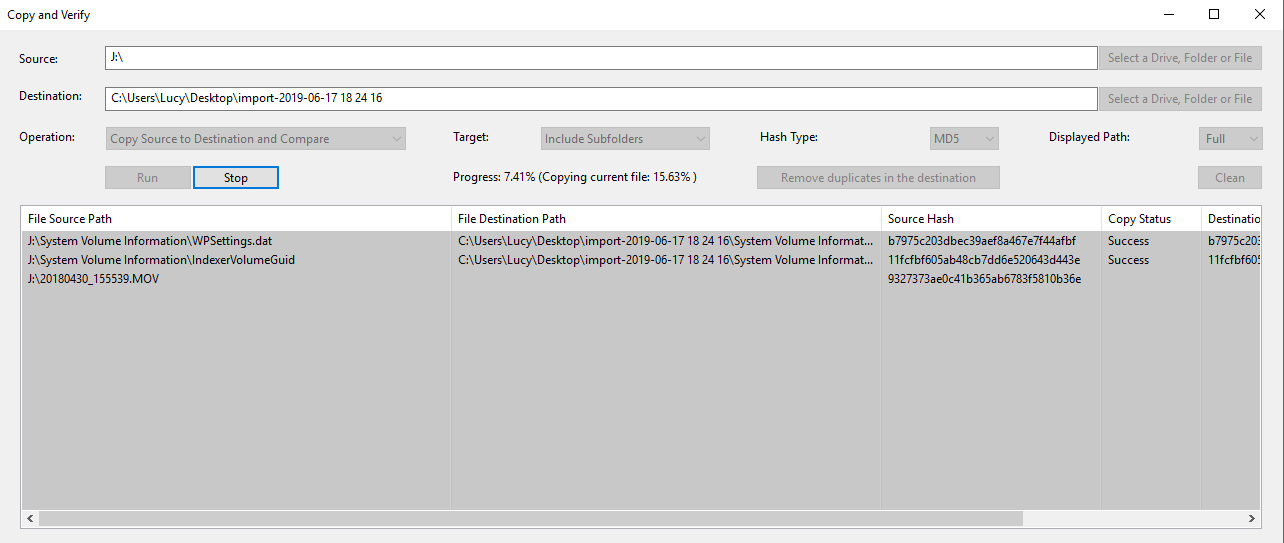
You can see I’m now copying the files from the removable media to my desktop and the tool updates me on the progress using a percentage for each file over the size of 200mb. Once the files are copied, the Copy Status is updated as to whether or not the process was successful or if there was an issue (for instance in the event the operation was stopped or there was an issue with unstable or corrupt removable media, as an example).
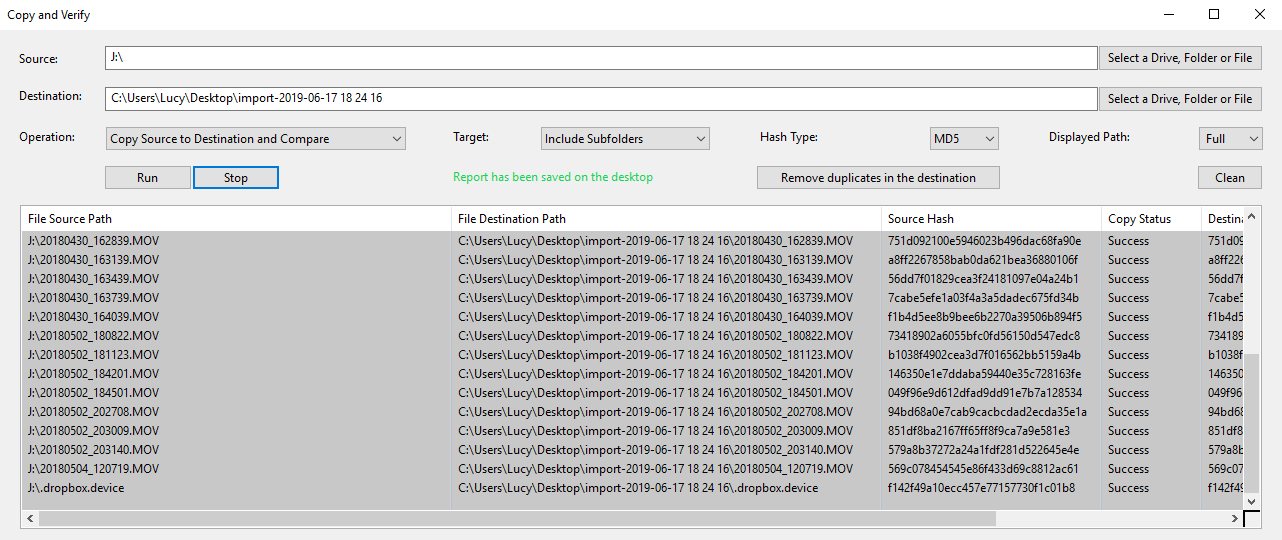
In this case, I haven’t stopped the tool from its operation and my removable media is healthy so we can see below that all the files are now in the destination folder, the Source and Destination hashes have been created and compared and a report has been produced.
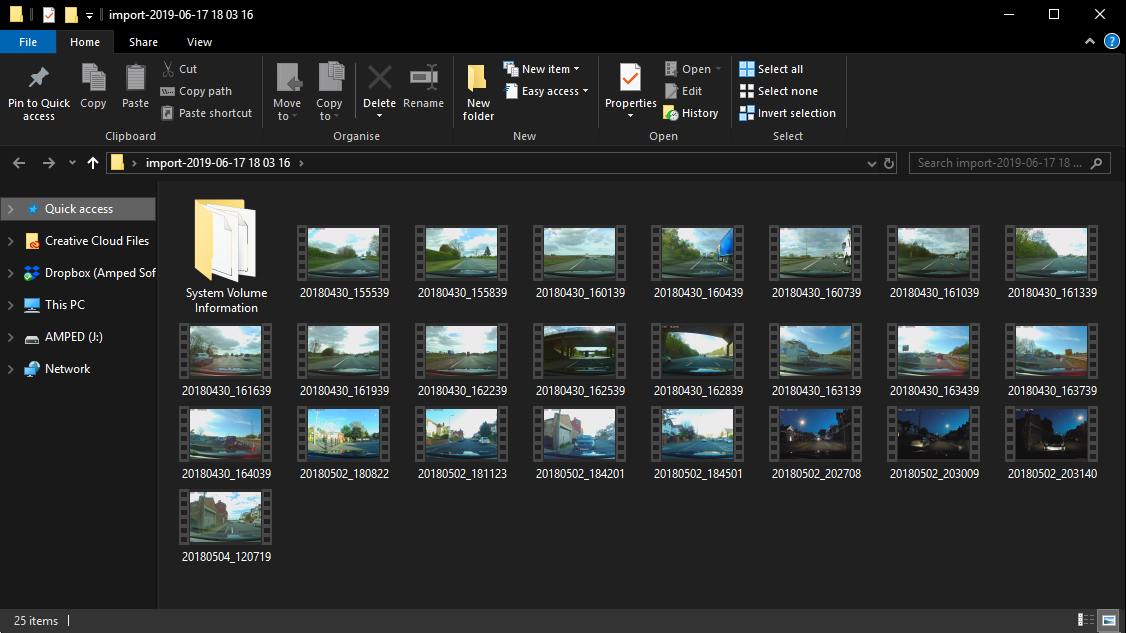
We can also see our files in the folder that the tool created on our desktop. In this case, I’ve copied some car camera footage and I’ve also chosen to copy the system volume information. If you don’t need this, then selecting Do Not Include Subfolders, as mentioned earlier, will mean only the files will be copied.
The report is generated during each operation and is saved in the Destination location in TSV format, easily opened in Excel.
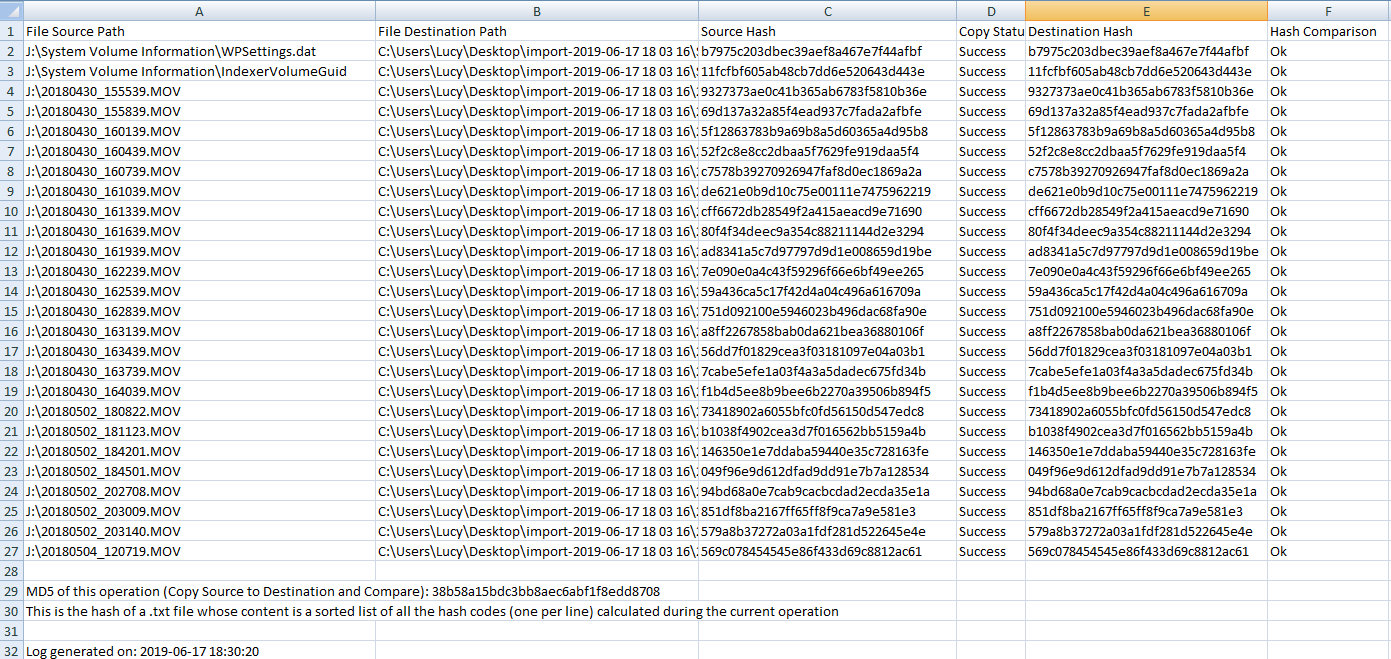
This is fantastic if you need to store these results as part of your SOP or departmental processes, or if you need to provide the results for continuity during a case.
The Copy and Verify tool means your evidence verification can be done straight from Amped FIVE, cutting down on the amount of third-party tools or process and, more importantly, saving you time and making your workflow even more straightforward!
Other New Features
It doesn’t stop there! Check out what other features we’ve updated in this release:
Compatibility
We’ve updated the Milestone Archive decoding library to the latest available version, improving the compatibility with more recent exports from the Milestone XProtect versions.
Filter Updates
We’ve now made the cut point configurable in the Unroll filter using the parameter Start Angle.
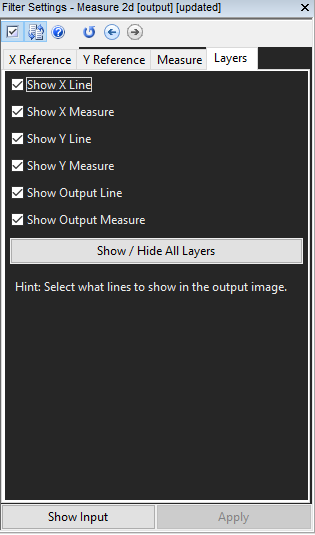
We’ve added the ability to hide lines and measurements in the Measure 1D/2D/3D filters. Simply navigate to the Layers tab in the Filter Settings to reveal the new options.
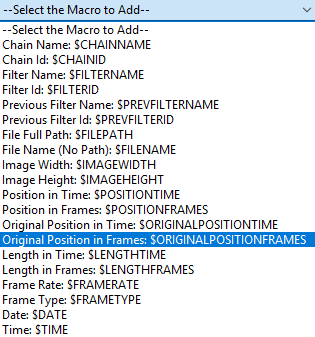
You’ll find the Add Text filter now has new macros, $ORIGINALPOSITIONTIME and $ORIGINALPOSITIONFRAMES, allowing for the referencing of original frames position in the video, and we’ve enhanced our $POSITIONTIME macro to support timestamp-based video formats such as Milestone.
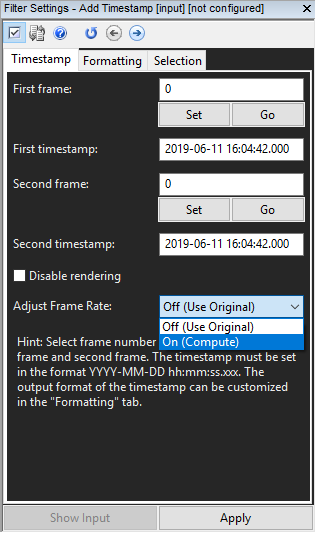
In our Add Timestamp filter, we’ve added a new parameter to adjust the frame rate according to the user-defined start or end timestamps. Simply select the drop down menu and choose On (Compute) in the Filter Settings as shown below.
If you import multiple videos with different frame rates into our Timeline filter, you’ll now notice that the filter changes the playback speed to accommodate the differing frame rates making your output Timeline video much smoother.
User Interface Updates
We’ve made some well sought-after adjustments to the History Panel – you can now edit the name of a chain by simply double-clicking it within the History Panel, and navigating using the up and down arrow keys now updates the Viewer Panel for easier visualization of filter results. I can already hear the rejoicing from our seasoned FIVE users!
Using a mouse wheel to adjust the Speed and Volume sliders is now more intuitive as opposed to reversed, allowing for a more natural way to quickly increase or decrease the viewing speed or volume of a video in FIVE.
Bug Fixes
There’s always a few that slip the net! Our developers work tirelessly to ensure any bugs you report to us are solved with each release. Here’s what we’ve solved in this update:
- We’ve fixed a bug that was preventing the last frame from being included when using the Export PDF
- We’ve fixed a bug that was causing the video length to be reported incorrectly in File Info.
- The bug within the Bookmarks Panel that was causing partially incorrect text (“null” instead of “frame”) in the default description when using drag-and-drop.
- The issue which was causing the unnecessary rounding of decimal-valued parameters in the Contrast Brightness filter has been solved.
- We’ve fixed a bug that caused very slow response from the GUI when the playback speed was set too high.
- The error in the History Panel after the cut-and-paste of a filter has been fixed.
- We’ve fixed a bug within the Video Mixer that was inhibiting playback if inputs belonged to the same chain.
Don’t Delay – Update Today
If you have an active support plan you can update straight away by going into the menu “Help” > “Check for Updates Online” within Amped FIVE. If you need to renew your SMS plan, please contact us or one of our authorized partners.


