

Dear loyal readers, welcome to this week’s “How Do I Do This?” blog post! When dealing with CCTV recordings, one rather common issue is that everything looks “slightly blurred”. It could be because of poor camera lenses, poor focusing, or it could even be a compression artifact. The only sure thing we know is how annoying this is. Keep reading to find out how Amped Replay can help you to improve the details of a video!
In Amped Replay, go to the Enhance tab and activate the Sharpen filter. Drag the slider to adjust the strenght of the filter. Done!
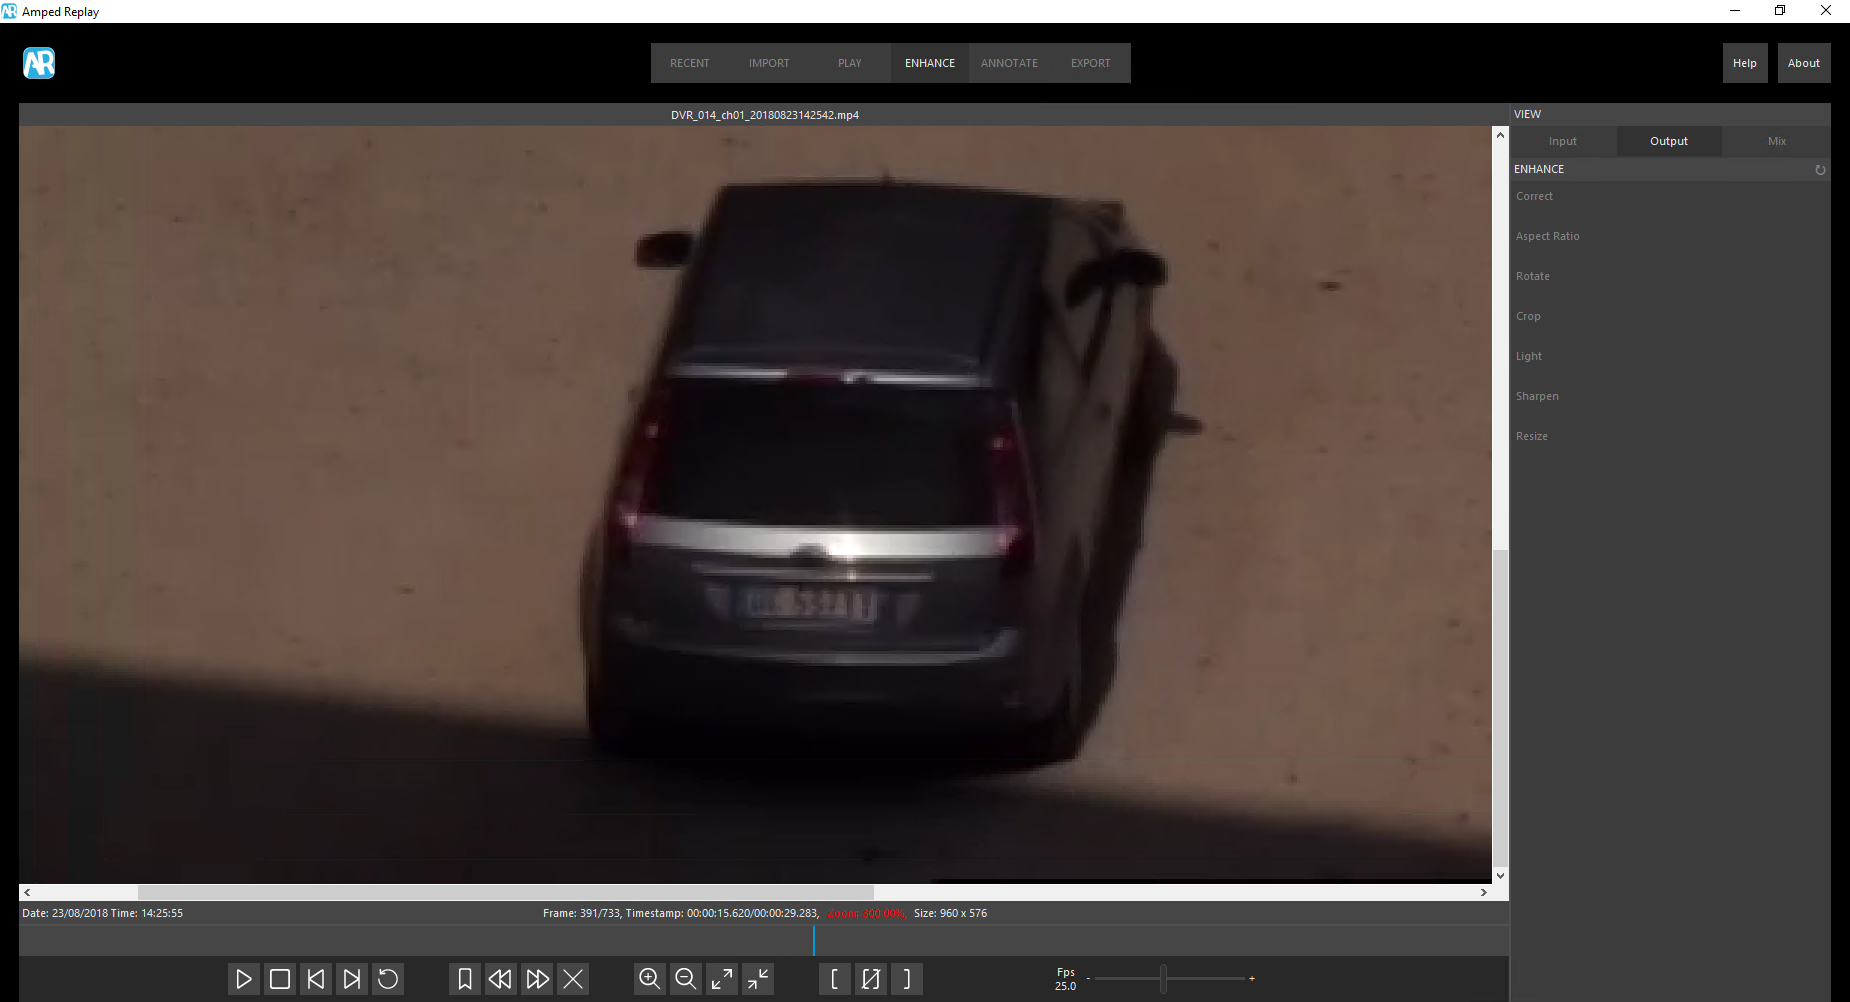
Let’s jump to the facts with an example. We’re given this recording of a car, and we’re interested in the license plate. As you can see, the image is a bit blurred, kind of “foggy”, and also dark.
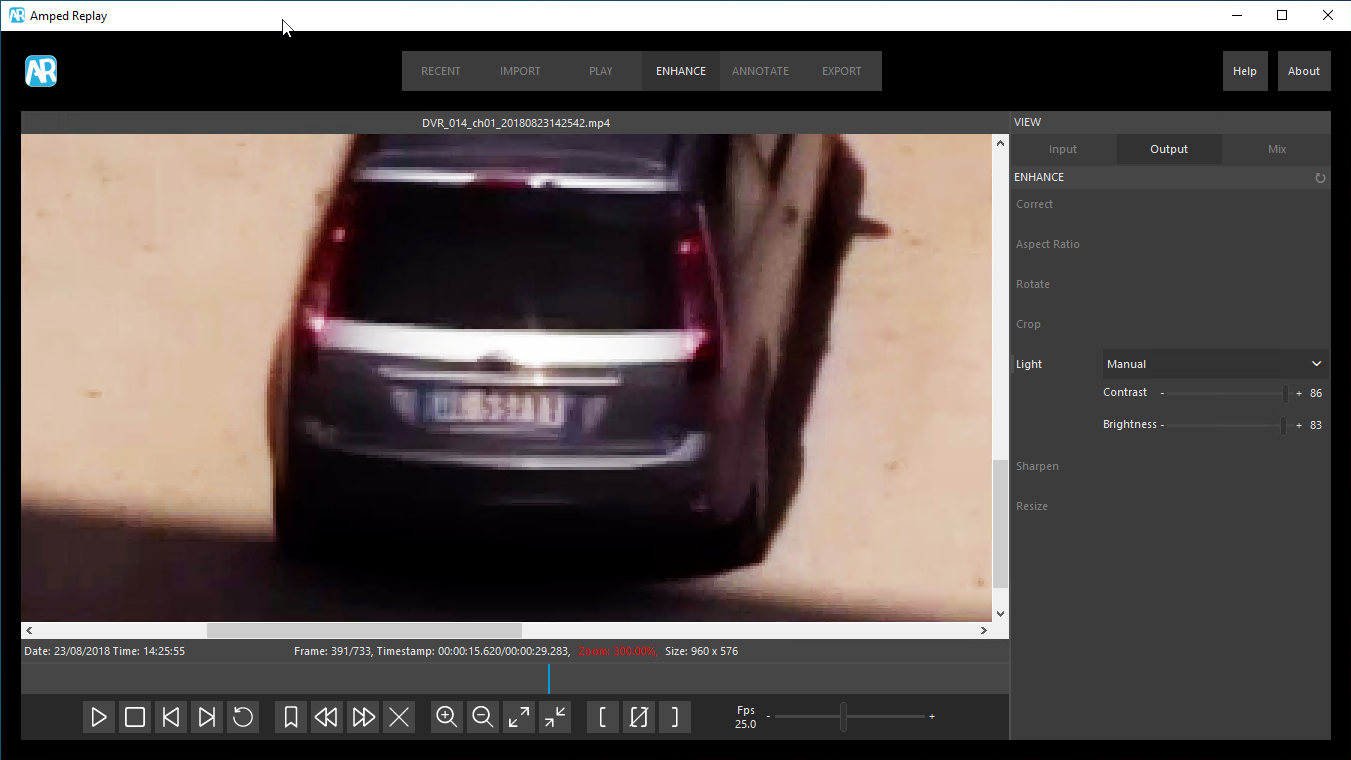
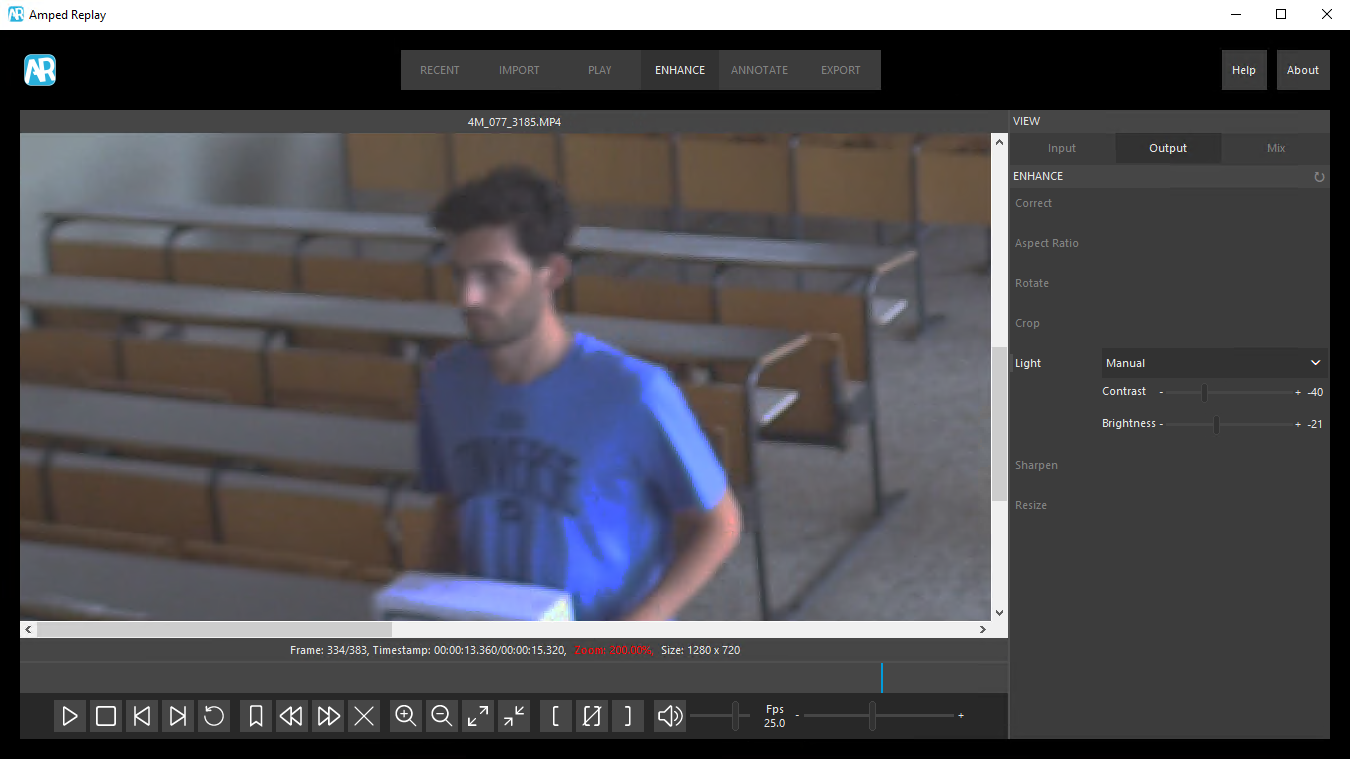
As to the darkness, we’ve learned just one week ago how to improve contrast and brightness with Amped Replay, which basically boils down to activating the Light filter and configuring it. Here’s the result in our example.

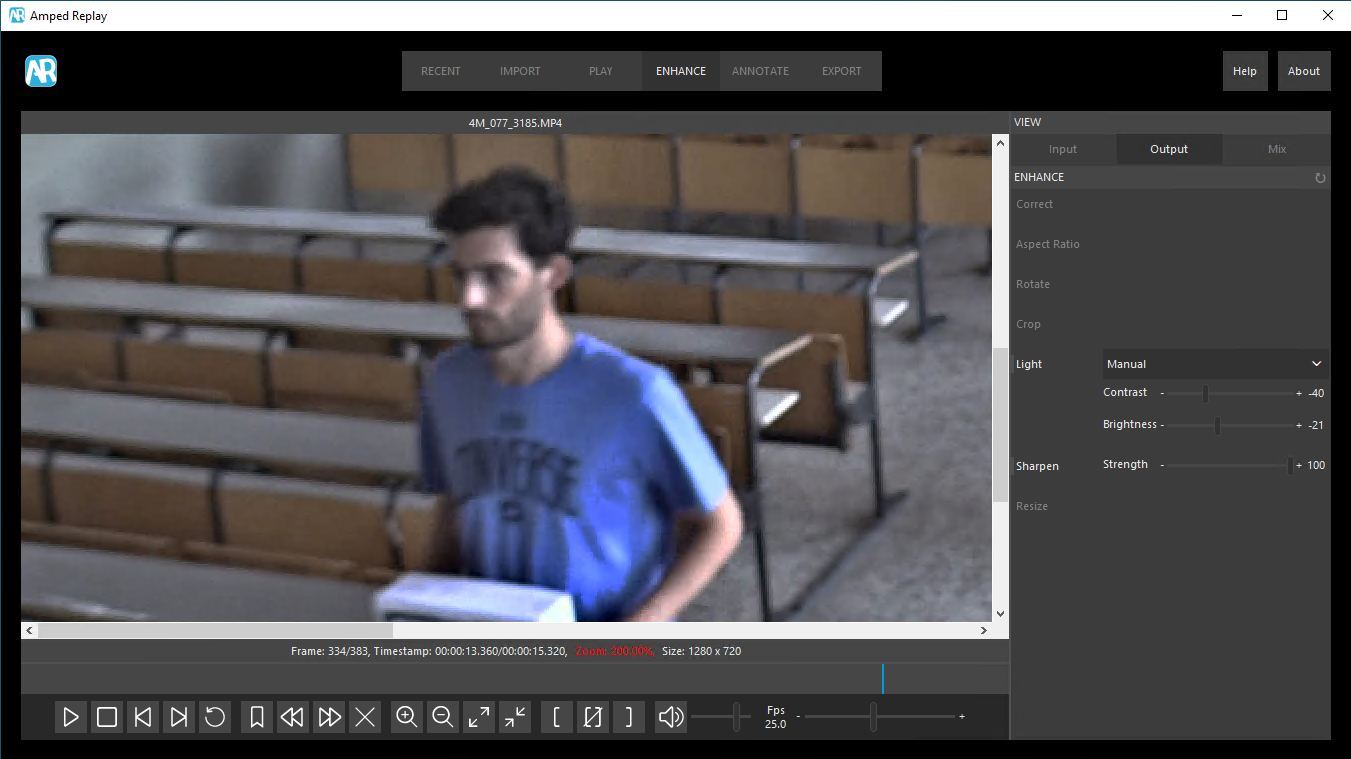
Much better, indeed! But the slight blur, as expected, is still there. Here comes into play the Sharpen filter. Sharpening means making transitions (edges and variations in general) more pronounced. It helps to make things “stand out” from the surrounding pixel context. Let’s activate the filter and see how it behaves with the default settings, using an image comparison view:
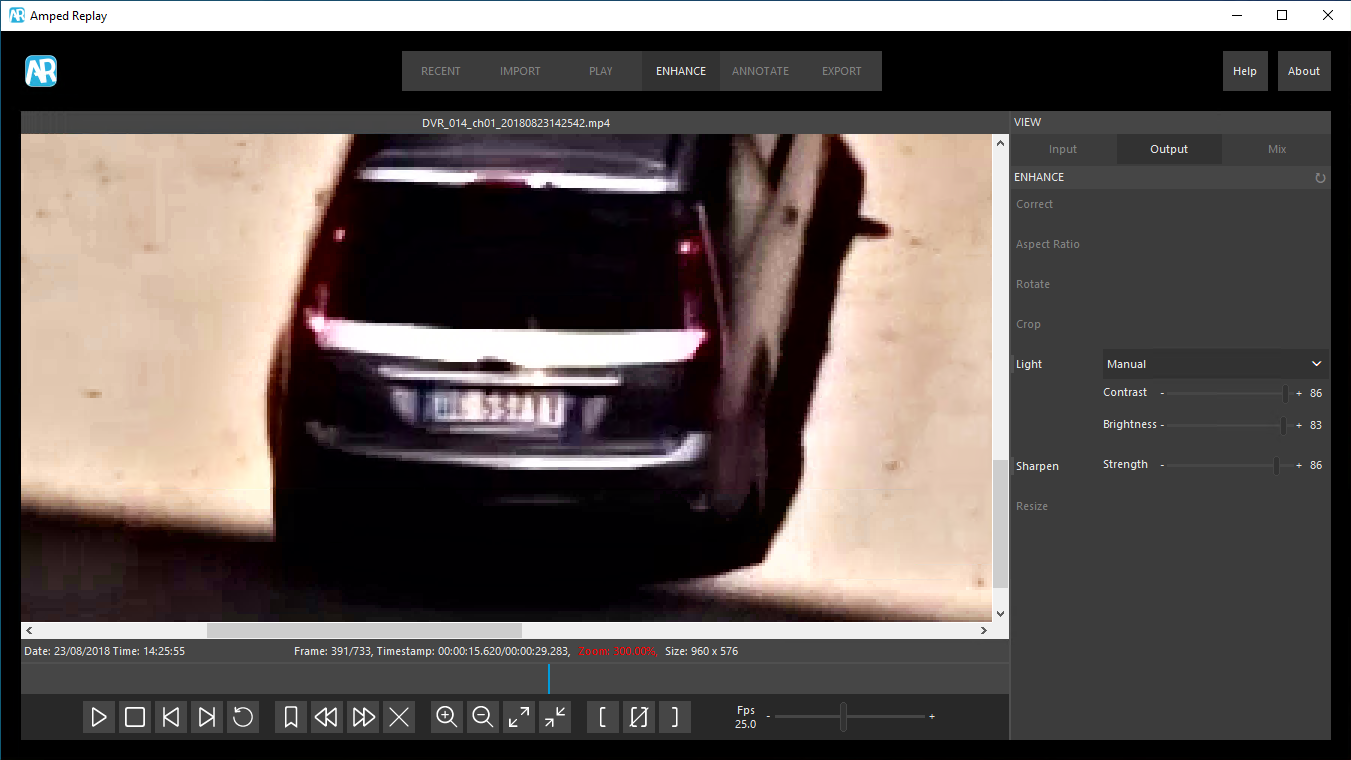
Nice improvement, isn’t it? You can of course play around with the Strenght slider and find the best balance. In this specific case, even moving the strength to the maximum value retains good results.
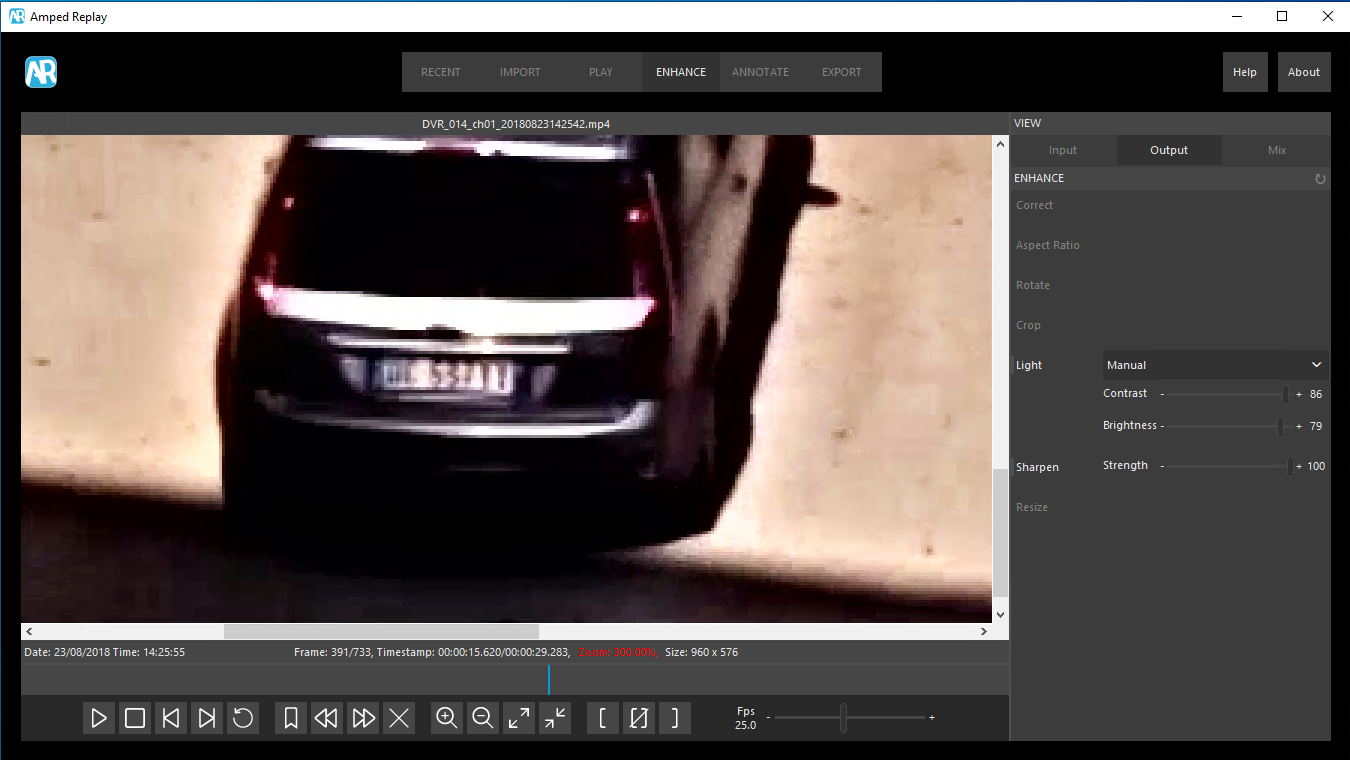
The sharpening filter sometimes causes an increase in the brightness, so we decided to lower a bit the Brightness slider in the preceding Light filter, so as to avoid pixel saturation (that is, pixels turning totally white). Remember you can use the mouse wheel to edit a slider’s value, so you can keep your eyes on the image and constantly monitor the result.
Just one recommendation: the Sharpen filter should be used prudently when dealing with faces. Indeed, the sharpening process could make some details such as the nose look exaggerated compared to their real appearance, as exemplified below.
That’s all for today! We hope you’ve found this issue of the “Amped Replay Tutorials: How do I do this?” series interesting and useful! Stay tuned and don’t miss the next ones. You can also follow us on LinkedIn, YouTube, Twitter, and Facebook: we’ll post a link to every new tutorial so you won’t miss any!


