
Dear friends, welcome to this week’s “How do I do this?” pill to ease your video pain! As we said in the previous post, CCTV surveillance video files often come in rather odd extensions. So odd that you’ll hardly be able to tell apart video files from different stuff. But luckily, Amped Replay will identify potential video files for you! Keep reading to find out more.
Here’s the usual spoiler: just open Amped Replay and click on the Import tab. Files will automatically be filtered and only potential footage will remain.
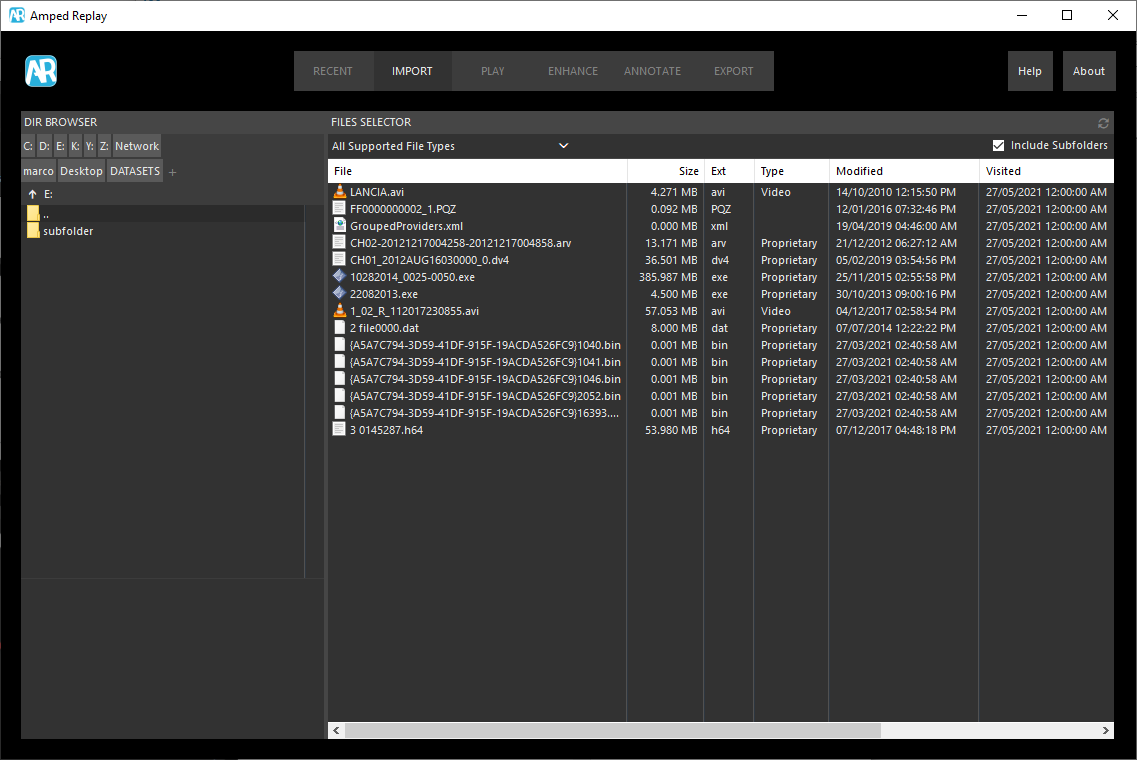
Imagine you’re given a USB pen and you’re asked to “review the available footage”. You open it, and that’s what you find.
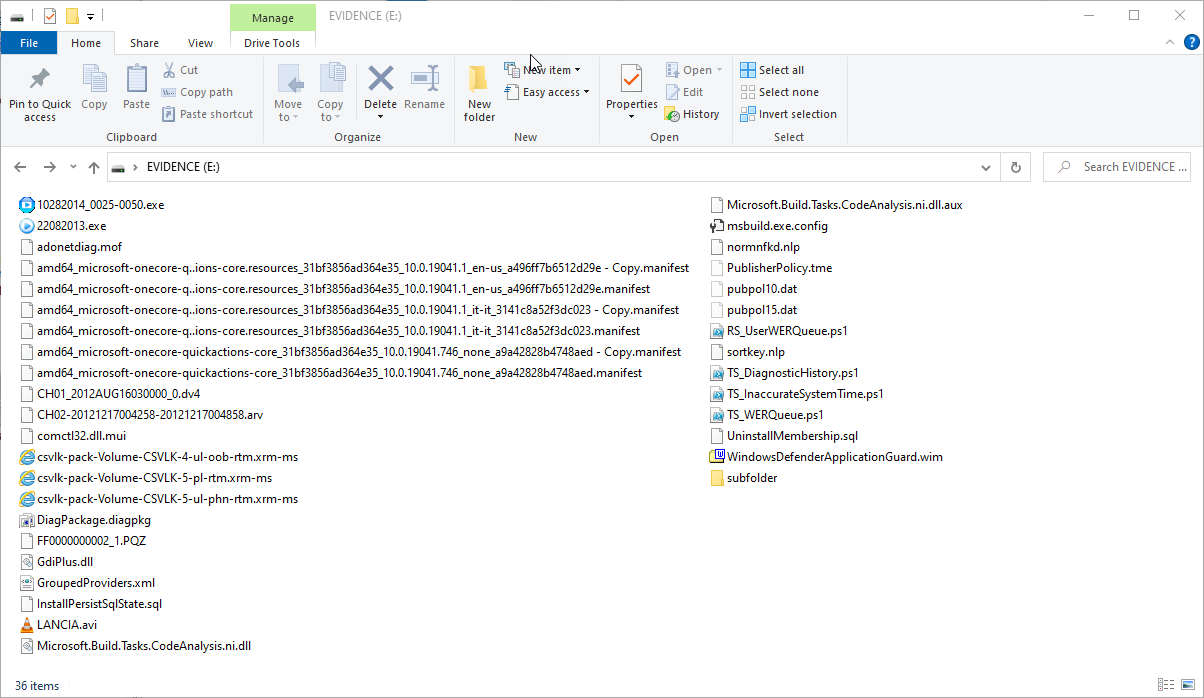
Apart from a few AVI files (which often won’t play in VLC or other consumer players, anyway), it’s pretty hard to understand which files may actually contain some footage. Noticeably, there is also a subfolder, possibly containing even more assorted files.
Now, let’s look at how you’d handle this situation in Amped Replay. You open the program and go to the Import tab. On the top left, you can click on a device letter. When you hover over one of them with the mouse, also the device name will appear.

Just click on the device’s name and you’ll see the filtered list! Amped Replay compares all file extensions against a HUGE list of known standard and proprietary format extensions, and keep only supported files. There’s a checkbox on the top right allowing you to scan also all subfolders.

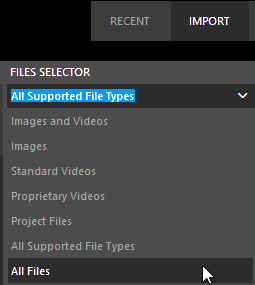
You can change the filtering rule by clicking on the dropdown menu, at the top of the Files Selector panel:
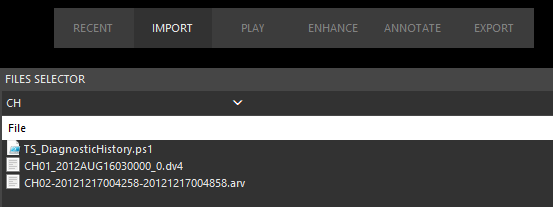
Besides choosing one of the available entries, you can type any text in the box and Replay will look for files that contain such text. In the example below, we’ve typed “CH” in the bar so all files containing “CH” in the name are listed:
If you right-click within the file list, you’ll be able to toggle the “Full view”.

And the Full View shows details for all files (size, modification date, etc.) including an informative “Type” column that discriminates standard extensions from proprietary extensions.
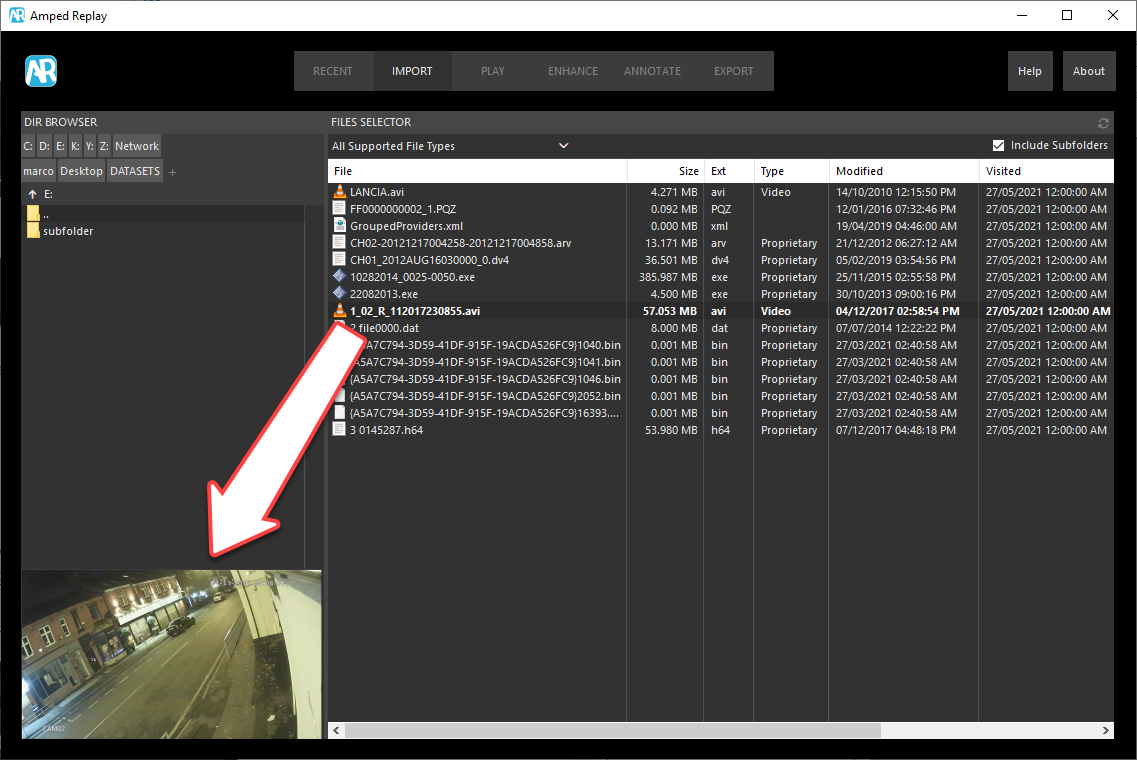
When you click on a file marked as “Video” in the Type column, Amped Replay will show you a thumbnail. For proprietary video files this is not possible, since we’ll first need to decode them.
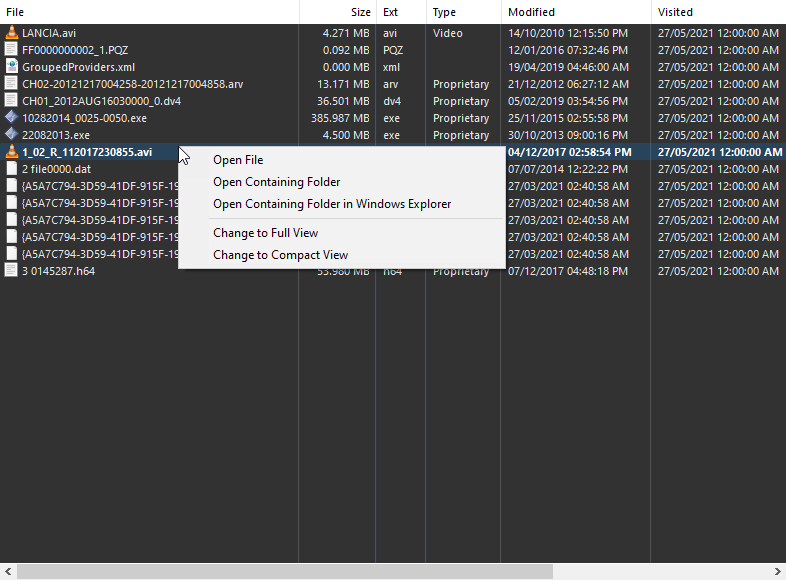
The interaction between Amped Replay’s Import panel and Window’s File Explorer is very easy: at any time, you can right-click on a file and choose to open its containing folder in Windows Explorer or navigate Replay’s tab to that specific folder.
That’s all for today! We hope you’ve found this issue of the “Amped Replay Tutorials: How do I do this?” series interesting and useful! Stay tuned and don’t miss the next ones. You can also follow us on LinkedIn, YouTube, Twitter, and Facebook: we’ll post a link to every new tutorial so you won’t miss any!


