Dear friends, welcome to this week’s tip! Today we’re showing the difference between two Amped FIVE filters that often get confused: Convert Frame Rate and Change Frame Rate. We’ll see that they’re similar in the name, but they do something quite different. Keep reading to find out more!
The concept of frame rate is one of the essentials of video analysis. All in all, a digital video is nothing but a sequence of still images (frames) played in fast sequence. The frame rate simply tells how fast the frames should follow one another. Common values for smartphones are 25 or 30. They are considered to be enough to provide a perceptually smooth illusion of motion. CCTV systems, instead, often adopt lower values to reduce the amount of information to be stored. Values as small as 6 are not uncommon. Some devices even use variable frame rate (VFR) to adaptively adjust the frame rate based on what happens in the scene (e.g., when someone enters a room) or based on the available bandwidth (e.g., a wifi connected camera may lower the frame rate when experiencing poor signal).
Now, if during your work you just need to see things at a slower speed to examine the video, you can simply move the Speed slider in the Player bar. That will slow or accelerate playback in Amped FIVE. But it will not add anything to your processing chain and, thus, it will not affect the exported result.

But if speed is important for your case, you’ll need to make sure you’re playing the video at the correct, “real” speed. As simple as it may appear, this thing alone can be hard to do. Sometimes information in the video stream conflicts with information in the container. Sometimes the audio track timing interferes with the video track and fools the player, etc. We have a dedicated blog post that’s certainly worth reading!
If by visual inspection, or after analyzing the file info, you find that the video is being played at an incorrect frame rate, you’ll need to fix it in a formal way (which means, adding a filter to the chain so that everything is permanent and reported). How do we instruct Amped FIVE that the video should be played at a different framerate than the one detected by the video decoding engine? The Change Frame Rate filter is what we need, which lives under the Presentation category.

There are two ways you can change the frame rate. First, you can explicitly set the value manually (alternatively, you can pick a value from the drop-down list). Second, you can set the expected total duration of the video, in which case Amped FIVE will simply divide the number of frames by the duration in seconds, thus obtaining the new frame rate. In other words, by setting the Total Time you’re telling Amped FIVE that the video must last that long.
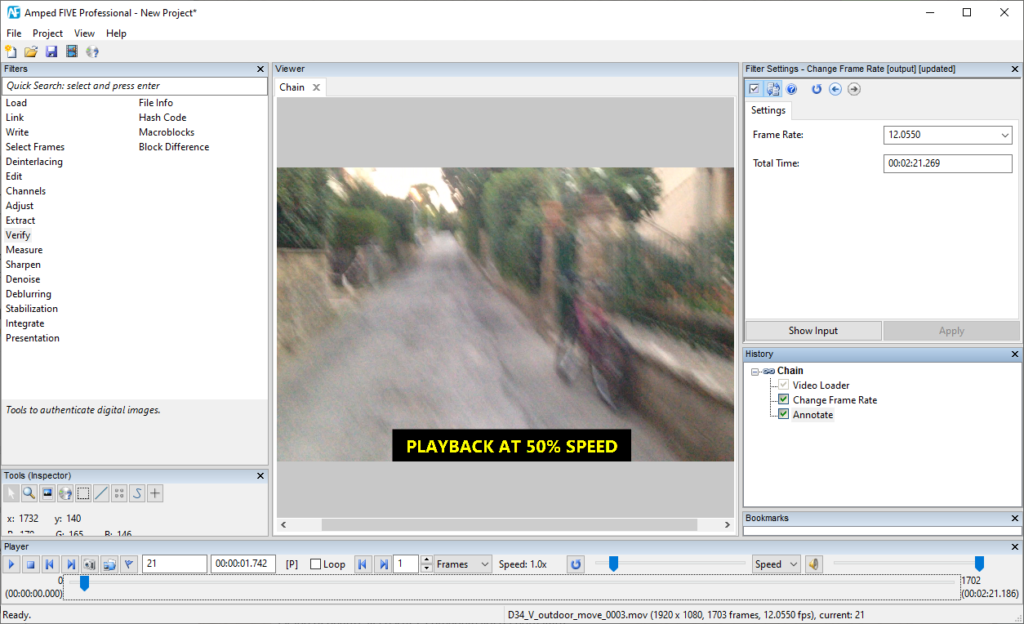
The Change Frame Rate filter is not only useful to correct a wrongly detected frame rate. But it’s also great when you want to export a video where all frames are maintained, but things happen in “slow-motion”. You just need to halve the Frame Rate value, and the video will play at half the original speed. Remember to make it explicit that you’re showing an artificially slowed down version of the video, e.g. using the Annotate filter:

The important concept behind the Change Frame Rate filter is that all original frames are maintained. Only their playback time is adjusted.
But now, let’s look at a different situation. We have two videos of the same event, we have checked that both of them play at the correct speed. But they were captured by two devices having different frame rates. We want to show them together, e.g. with a Multiview or Picture in Picture filter.
Since the frame rates are different, we can’t combine the videos as they are. However, using the Change Frame Rate does not seem like the right solution, since each video alone is already playing at the proper speed. In this case, applying the Convert Frame Rate to one of the two videos is the best solution.
When you apply the Convert Frame Rate filter, frames will be dropped or duplicated so as to match the desired target frame rate (we use the so-called “sample and hold” technique). This way, the processed video will maintain its original playback speed and duration. We can meaningfully combine it with the other video of the (now) same frame rate. If you feel more comfortable with the idea of having some duplicated frames rather than some dropped frames, you’ll be better served using the Convert Frame Rate filter to increase the frame rate of the video having the originally lower frame rate.
And that’s it! After reading this tip, we hope you’ll be able to clearly distinguish the cases where you need the Convert Frame Rate filter from those where the Change Frame Rate filter is necessary. However, if you have doubts about this or any other topic, remember our Support Team is here to help!


