Dear loyal readers, here we are with this week’s tip! Today we’ll be showing how to export and clear projects in Amped Replay. We’ll see how to remove one single project from the cache, how to make a batch cleaning of the whole cache, and more. Keep reading!
Automatic project management is one of Amped Replay’s most loved features. Whatever you do on your project file is automatically saved, so that you can close the software at any time and, once you’re back, your project will be in the Recent tab. A double click on it and everything is restored.
Second after second, you’ll end up saving hours of work thanks to this intuitive system. However, all of this implies that Amped Replay stores something on your computer while you’re working. These files are located in the project’s cache folder, which is normally located in C:\Users\YourName\Documents\Amped Replay\cache
Now, we understand there could be cases where no traces of a project should remain on the officer’s computer, e.g. because of confidentiality reasons. In such cases, Amped Replay allows you to clean up a project quite easily: a right-click on the project row will open a menu with several options, among which you have Remove Cache Folder.

Amped Replay will ask for confirmation and, once obtained, it will remove all project files from the computer. Of course, the project will disappear from the Recent Projects list.
There could be cases, instead, where you only want to clear all the work you did on a video and start from scratch. In those cases, the option Reset Project and Reload will do. All enhancement filters and annotations will be cleared, but the videos (including their converted version, if present) will be maintained, potentially saving you lots of time (you don’t have to convert again).
The Recent Projects list will limit to the latest 50 projects you’ve been working on, but when you remove one, older projects will appear again in the list (they’re still cached, nothing is deleted if you don’t command it). Of course, this could cause the project cache folder to get beefy in the long run. The current size folder is always shown in the bottom bar, along with the available space on your drive.
Easy to guess, the Free space blue writing is clickable, and provides the solution should you need to save some storage. A click on it will show the following:
This dialog lets you decide how dramatic your action will be. The checkbox is motivated by the fact that the largest amount of memory is consumed by converted files, while the enhancement and annotation settings are only a few kilobytes worth (and they’re normally less sensitive compared to pixels). For example, of the 2.9 GBs occupied by my cache folder, only 4.4 MBs were due to settings, all the rest was due to converted files. However, you can un-check the box if you want to clear everything.
The two buttons on the left and center determine whether the deletion should affect all projects or only the older files (those that are no longer listed in the Recent Projects).
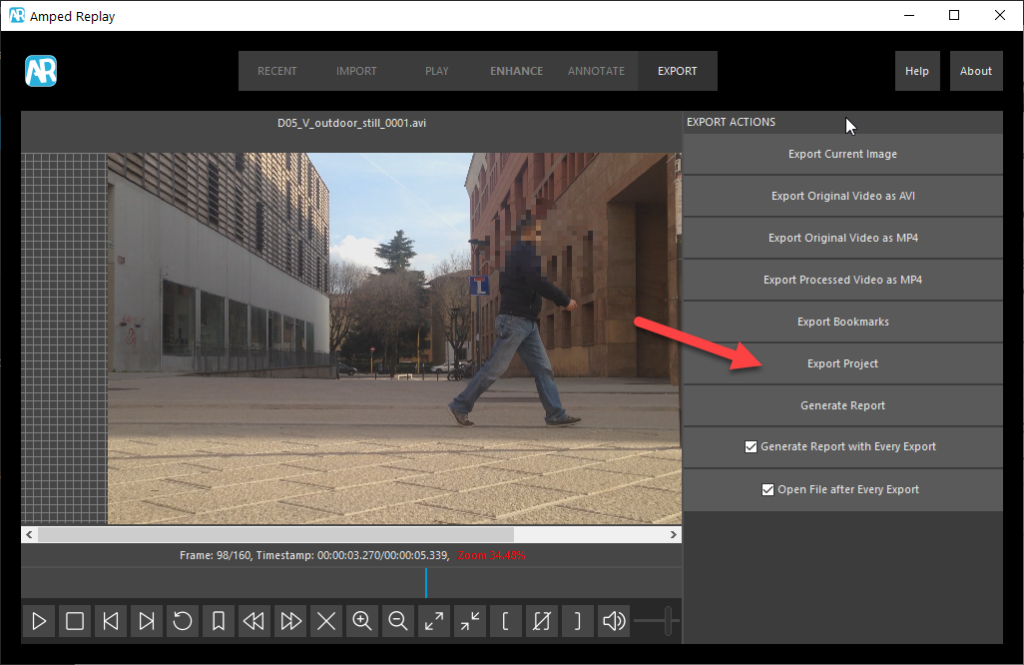
It may be the case that, before removing a project from a computer, you want to store it on an external drive to take it away with you. There’s no need to go hunting for the project’s cache folder: you can simply export the project (i.e., all the enhancements, annotations, bookmarks, case notes, etc.) from the Export tab.

Of course, you will also need the original video to be able to open the project, and so Amped Replay asks you if you want to include it in the output location you provided:
If you choose Yes, you’ll find these files in the output location:
With these files, you’re good to go! You can now proceed to erase the project’s cache from the computer without losing your job. Hopefully, what you’ve seen today is a witness to our efforts to make Amped Replay the video forensic solution that combines soundness and simplicity!


