Hello, Tip Tuesday’s loyal friends! With all the enhancement and restoration tools featured in Amped FIVE, it can easily happen that you are undecided about which filter is better to use in a specific case, or which filter configuration is the best. This week’s Tip will show you how to visually compare the output of different chains and hopefully settle the question quickly.
As usual, we like using a sample case when presenting a Tip… so let’s imagine where we need to zoom in on this picture to read the text in the bottom slide, and we’re unsure which Resize algorithm better meets our needs (we’ll use resize as an example, but the principle applies to any other dilemma you may have):

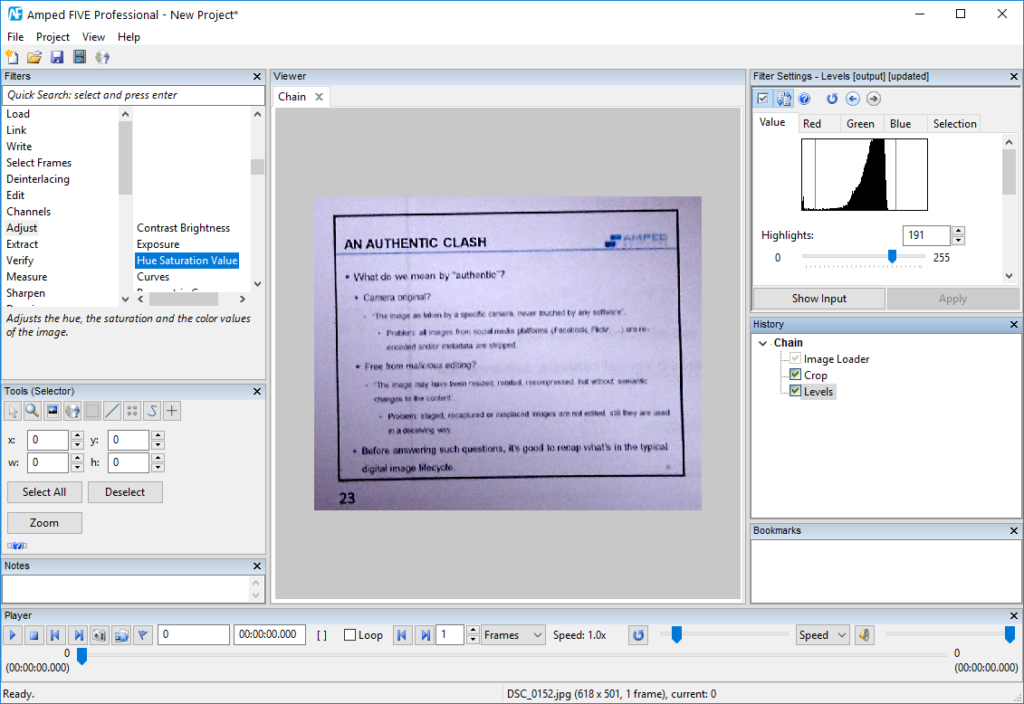
Under the Edit category, Amped FIVE features many different resizing algorithms: most of them are available as different configurations of the Resize filter, and an additional one is available in a dedicated filter, the Smart Resize. Which resize algorithm will serve us best? This is a good case where Amped FIVE’s “splittable” Viewer panel comes in handy! First, we’ll load the image, crop the part of interest, and adjust the levels a bit.
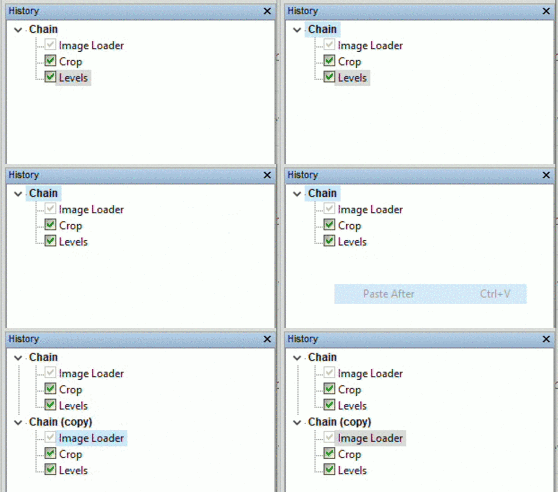
Now we can copy-paste this little chain several times by just right-clicking, as shown below:
We’ll then use a different resize filter configuration at the end of each chain copy, always setting a resize factor of 2. We’ll rename chains so to match the resize algorithm name, for easier navigation:
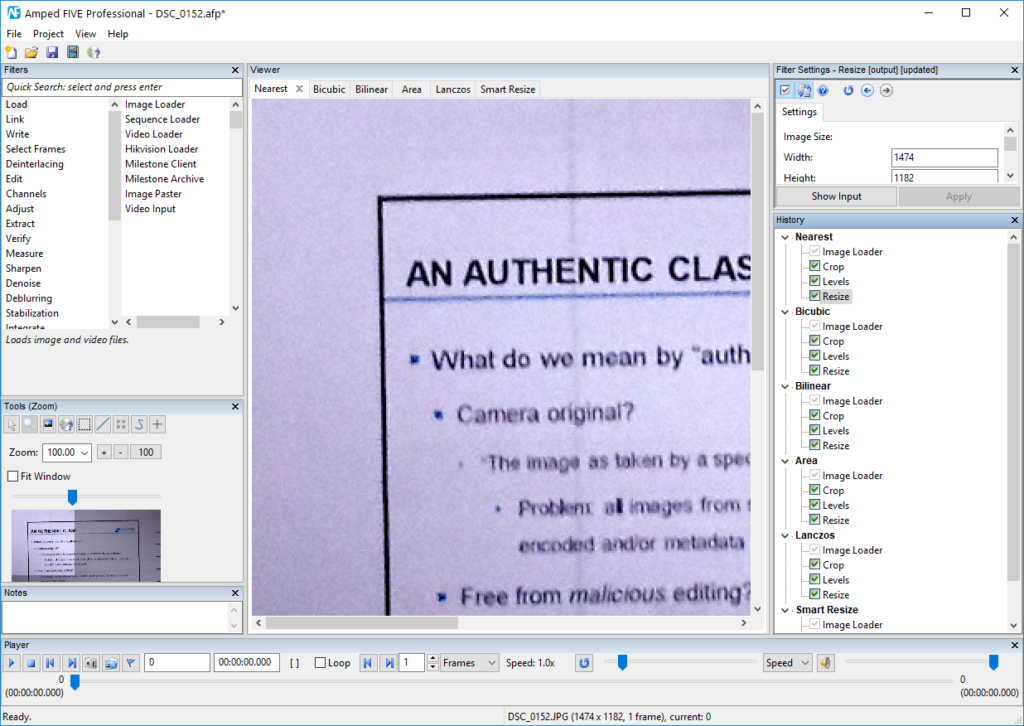
Good! We can click on each of the tabs on top of the Viewer pane and switch across different chain outputs. Remember that, for a fair comparison, you have to manually set the viewer to use the same zoom level for all chains. Since we’re evaluating the impact of resizing algorithms, we don’t want the viewer to add any additional zoom, so we’ll set the zoom level to 100 for all chains, one at a time:

Clicking on different tabs and watching the output change is already an excellent way to compare filters, but it is sometimes preferable to have all the outputs on the screen for simultaneous inspection. Amped FIVE lets you do that quickly: simply drag and drop each chain tab to different angles of the Viewer panel. You’ll see that tabs “attach” to corners, allowing you to split the viewer in multiple panes.
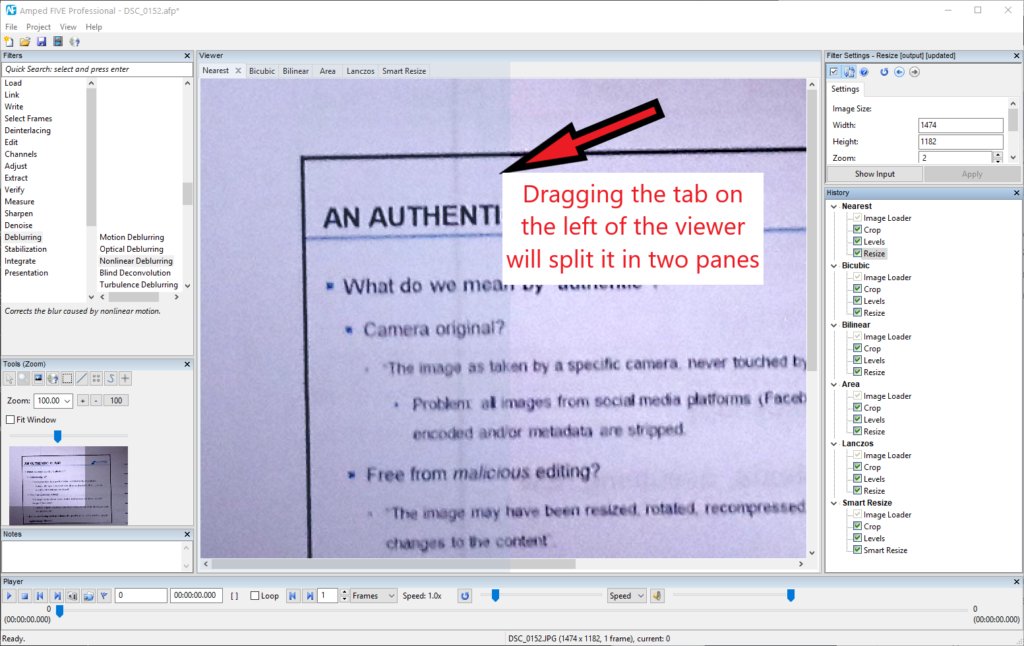
You can keep adding panes at will… it really depends on your screen size. I’m lucky to have a 21:9 display with high resolution, so I can arrange all my chains and view their output together:
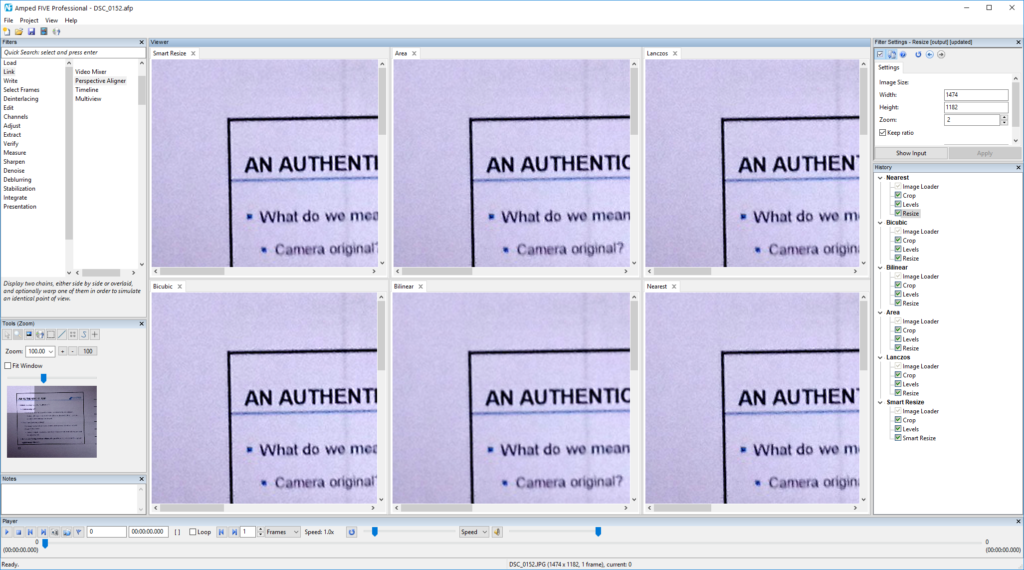
As to our question about which resizing algorithm performed better in this case, the answer is undeniably subjective (which is why we wanted to visually compare results); I would opt for the Smart Resize filter in this specific case.
Although we used a rather simple example to show the benefit of splitting the Viewer in multiple panes, remember this trick can prove helpful in much more complex situations, or even when you are tuning a highly parameter-dependent filter (e.g., the Motion Deblurring filter) and you need to compare two possible configurations.


