Hello dear Amped Blog readers, welcome to this week’s Tip Tuesday. Today we’ll be dealing with one of the most sneaky kinds of fakes: recaptured images. A recaptured image is a “picture of a picture”: you display your (possibly forged) image on a screen, or you print it on paper, and then you take a picture of it. This apparently naive approach is much more clever than it seems: the obtained image will be a “camera original” image to all extents, so it will likely pass every test based on metadata/format analysis. Are we left alone against this subtle threat? Of course not, Amped Authenticate is here to help. Let’s find out how.
To help the discussion, let’s use a practical example. I’ve taken this image with my Sony Xperia Z1 Compact and added a hot-air balloon using GIMP to make my picture livelier.

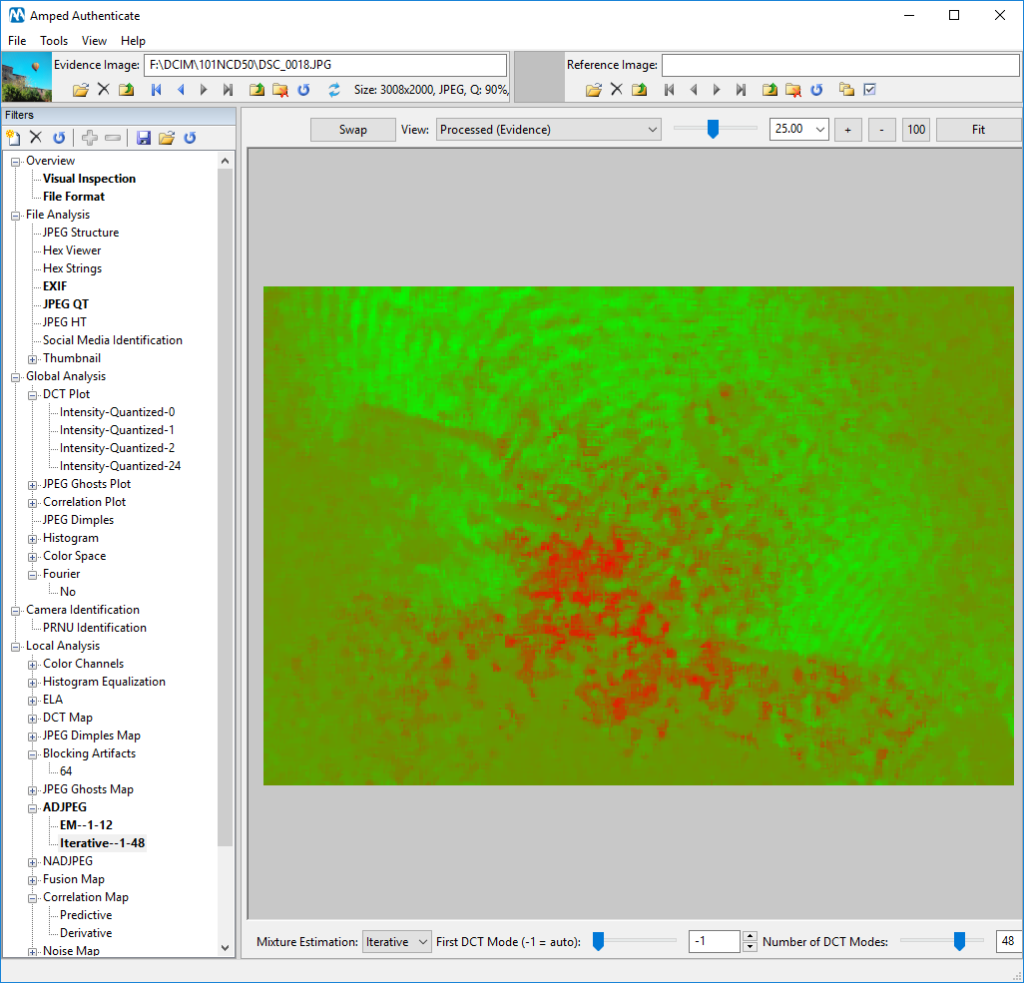
This image falls short in passing an Authenticate screening: we get warnings in the File Format and a rather tell-tale map with the ADJPEG filter.
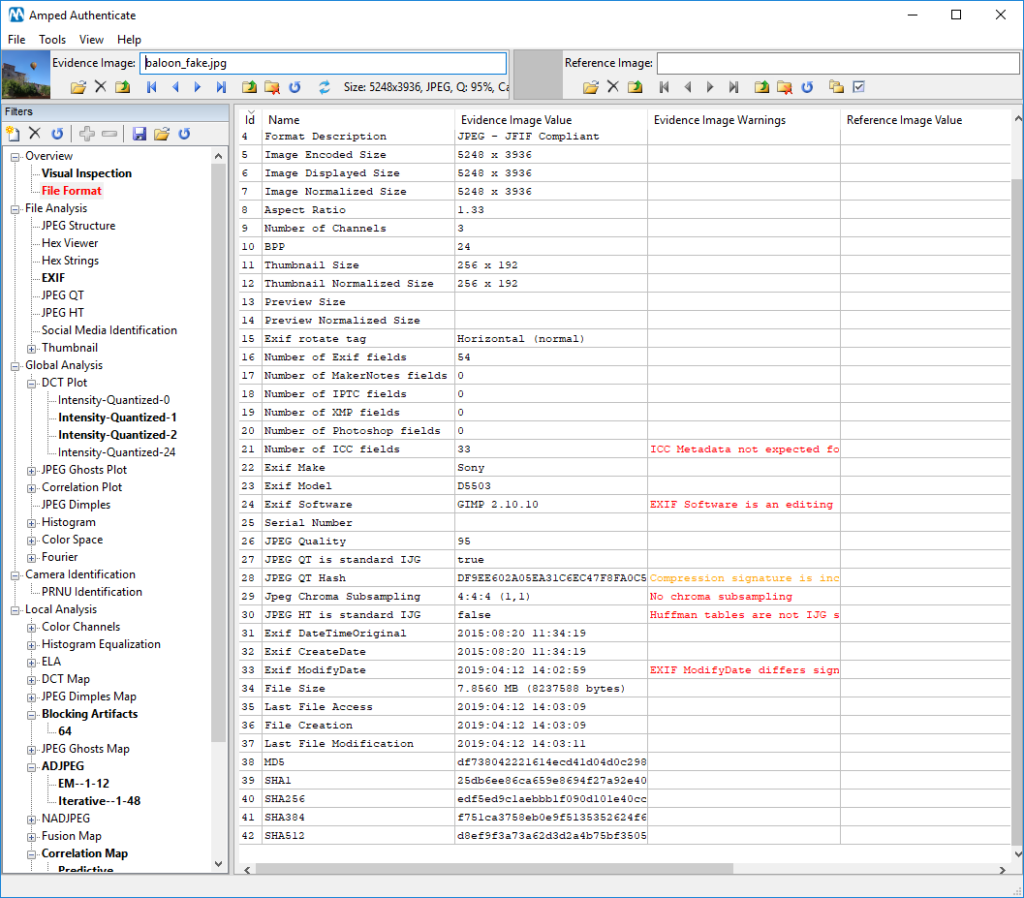
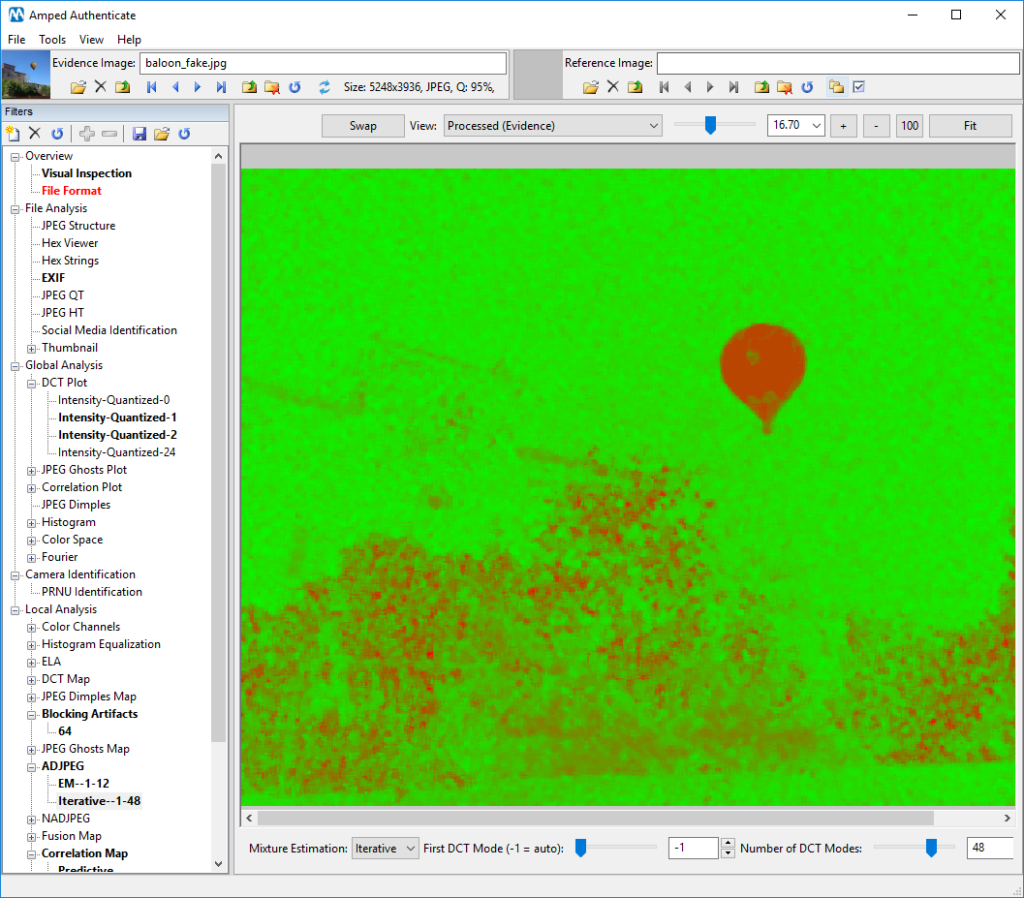
But what if I grab my Nikon D50 and take a picture of the screen? Here is what I get:
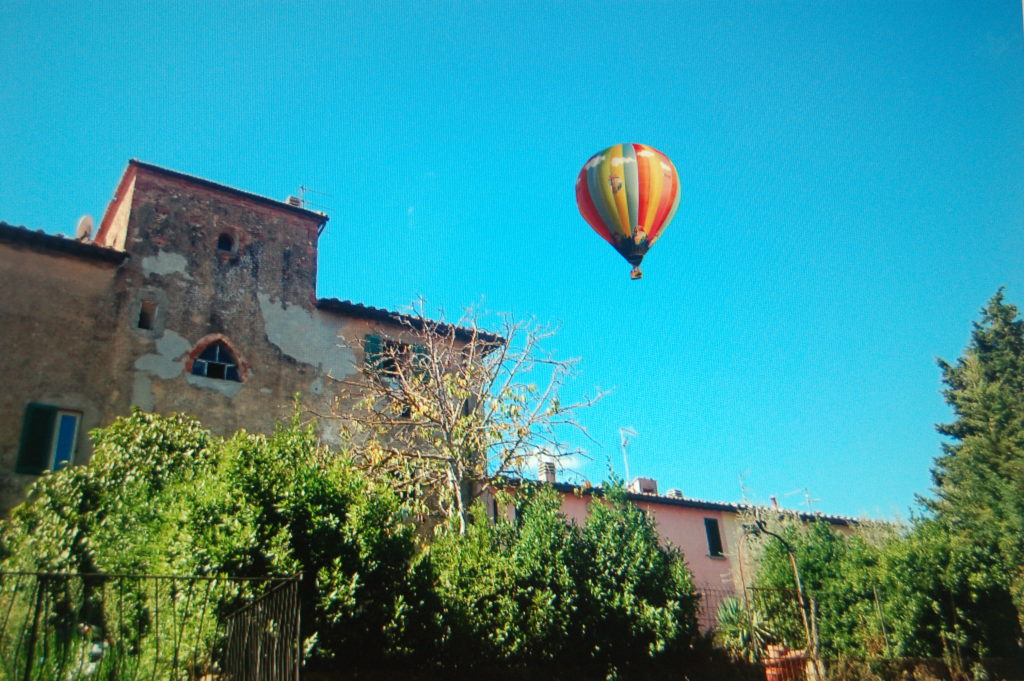
This image will show no warnings in the File Format filter, and that’s normal: it is a 100% camera original image generated by my Nikon D50.
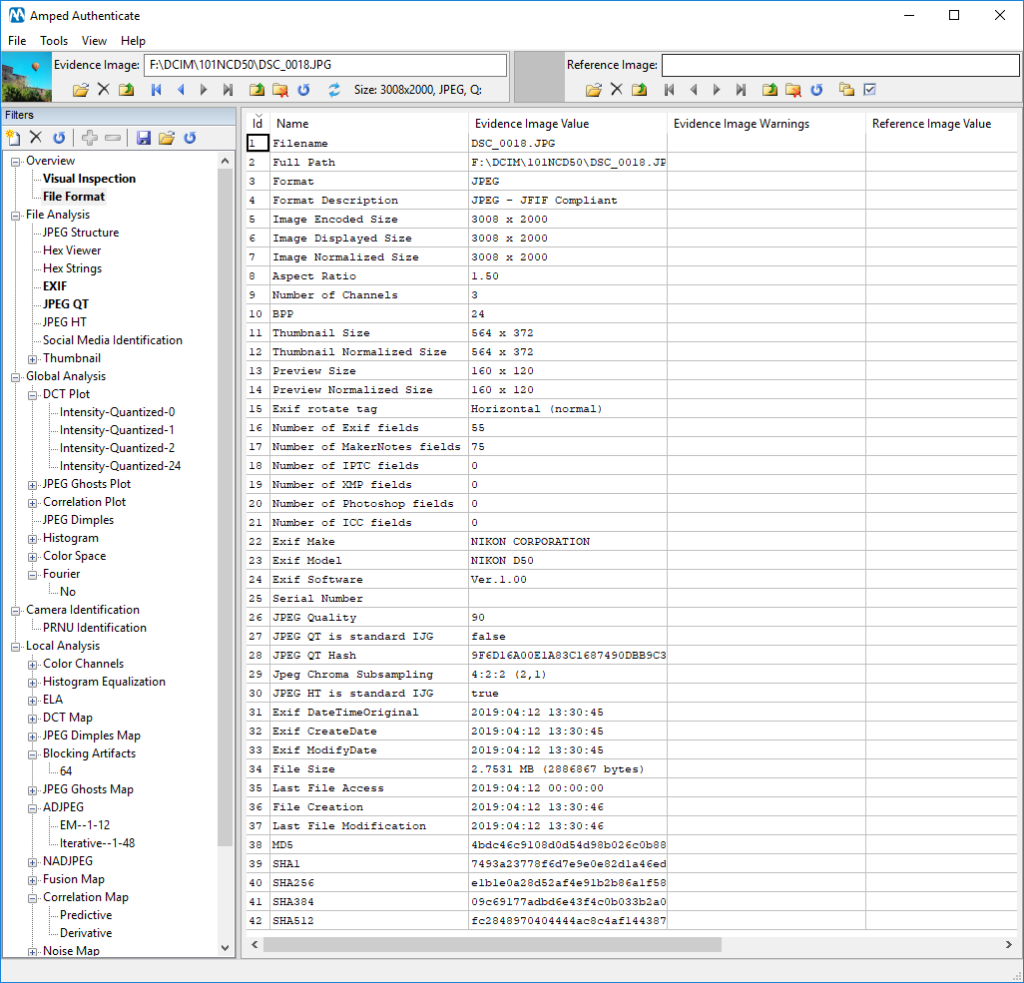
The ADJPEG filter no longer detects any trace of forgery, and this is also normal: double compression artifacts will never survive through a recapture process.
And so? Was it that simple to create the perfect fake? Well… there are a couple of things we left behind during recapture.
First, we have image metadata! If you go to the Exif filter and read carefully, you’ll find a somewhat

Given the distance of depicted objects from the camera (over 10 meters, at least), and given that objects in the image are not that blurred… how is it possible that the picture was taken with the focus set to 0.5 m? Such a short focus distance, combined with a distant subject, is a good hint of recapturing.
However, we know metadata are not always reliable: they can be changed/erased easily, and they are stripped out by most social media and messaging apps. What else can we do to defend from recaptured images?
We have another ally: the moiré effect, that is, that kind of “rippling” artifact introduced by the interference between the grid of pixels of the display and the grid of pixels in our camera sensor (Wikipedia has a nice explanation and some examples).
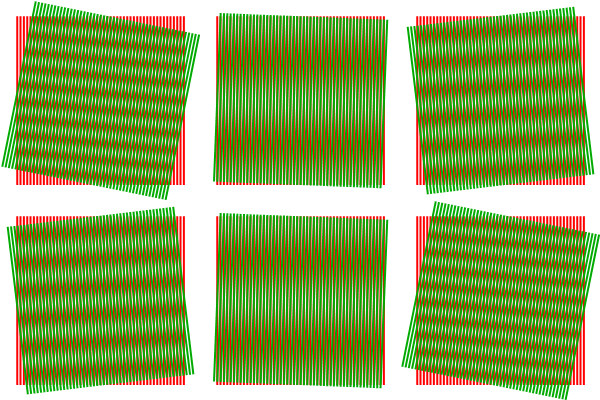
Sometimes, the moiré effect is so evident in recaptured images that you don’t even need a tool to spot it. Sometimes it is less marked, and that’s where Amped Authenticate’s Fourier tool comes into play.
The Fourier tool just shows the full-frame Fourier transform of the image, which helps to highlight periodic patterns of the image. In a “normal” picture (regardless of possible local manipulations) the Fourier transform is commonly like the one below.

In a recaptured image, the moiré effect, manifesting itself as a regular pattern, will cause the Fourier transform to show a lot of bright dots, as shown below.

Authenticate will also help you spot local peaks if you turn the Autodetect Peaks option on:

Thus, if you happen to see such a “strange” population of peaks in the Fourier transform of an image, you should consider recapture as a possible cause for that.
Of course, there could be other reasons that lead to peaks in the Fourier transform, for example:
- Periodic content in the image: if the image contains a grid or a repetitive pattern, that could be the reason for peaks in the Fourier transform, as you can see in the example below: the microwave window pattern is responsible for peaks.
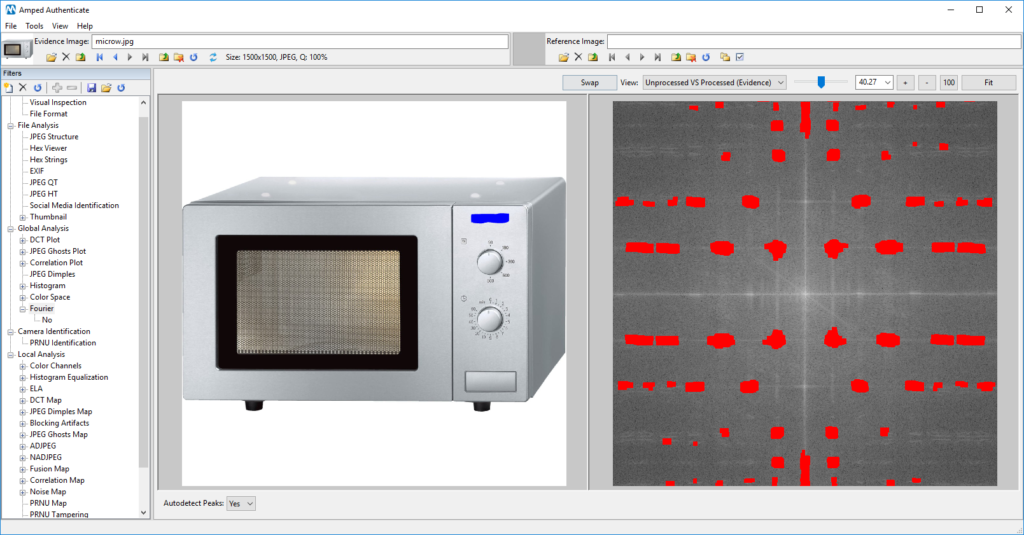
- Presence of JPEG Dimples in the image: if the image is affected by the JPEG Dimples artifact (click here to read more about it), you may find a regular grid in the Fourier transform. Since Authenticate has a dedicated filter to detect the presence of such an artifact (JPEG Dimples, under the Global Analysis category), you can easily tell whether peaks in the Fourier transform could be due to this.
This week’s take away is: think twice, because forgers may have photographed twice!


