Hi Amped Blog readers, welcome to this week’s Tuesday Tip! Although we do our best to make you love our Amped FIVE, we are still aware that you may have better things to do in your life than enhancing videos… so, what really makes us happy is to help you get the job done in the least amount of time! That’s why this week we’ll focus on how Amped FIVE’s Motion Detection filter can save you lots of time during triage.
If you ever attended training or read some books on forensic video enhancement, you may have noticed that much is said about evidence discovery, acquisition, processing, and reporting… but one thing that often gets overlooked is triage. What if you are given 12 hours worth of footage from a petrol station CCTV camera, and you’re asked to determine whether a given vehicle passed by? Do you have to sit for hours looking at frames flowing at 10x speed (provided your workstation can play at 10x, which is seldom the case with high-resolution videos!)? There must be a better way!
If you’re an Amped FIVE user, there is indeed a much better way: you can use the Motion Detection filter, available under the category Select Frames. This filter works by generating an estimate of the background scene (using a user-defined amount of frames), and detecting when significant changes occur in the video. When a significant change occurs, an “event” is triggered.
Of course, the background scene updates while the video plays and, since we’re not interested in minor changes due to compression and sensor noise, a denoising filter is internally applied to minimize their impact.
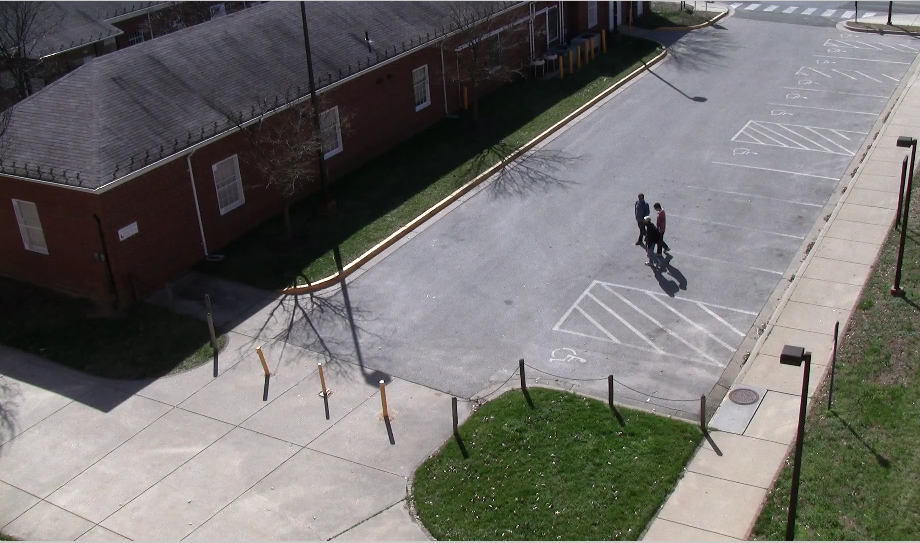
Let’s experiment with this filter using the sample case below, taken from the VIRAT Video Dataset (http://www.viratdata.org/). We’re asked to provide information about possible cars that enter the parking lot.
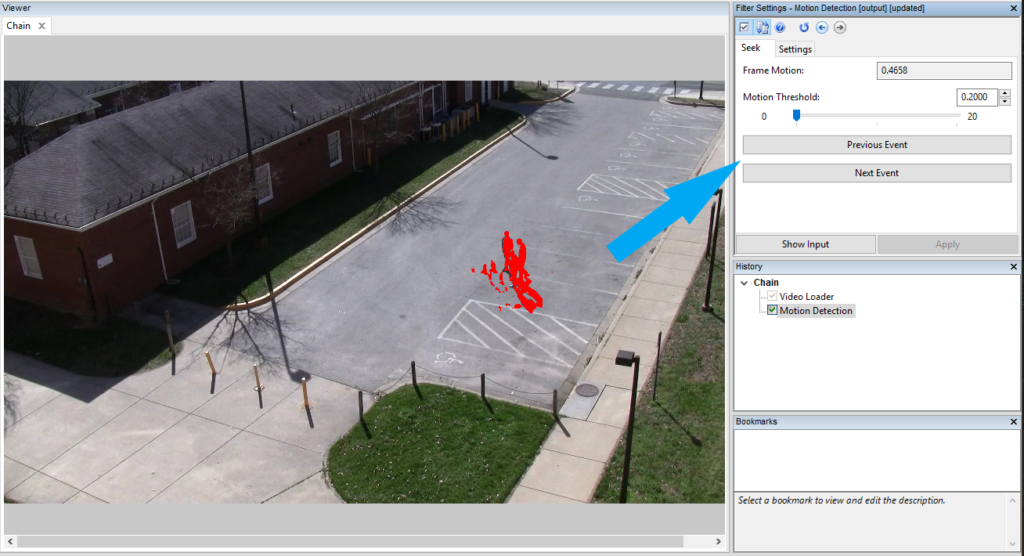
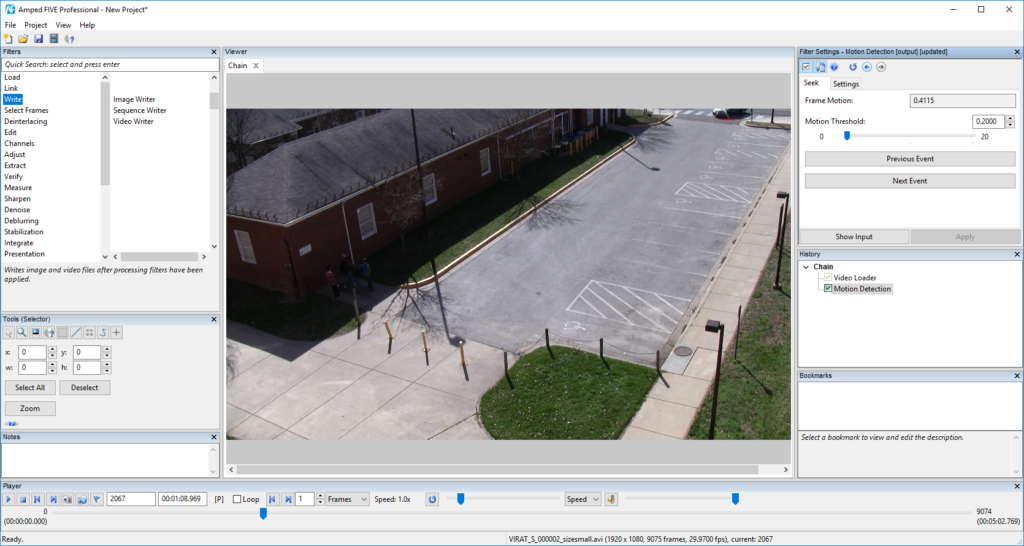
After selecting the Motion Detection filter, from the Seek tab in the Filter Settings panel you can navigate from one event to the other. Notice that detected changes are marked in red in the frame, so you know what’s causing the event detection.
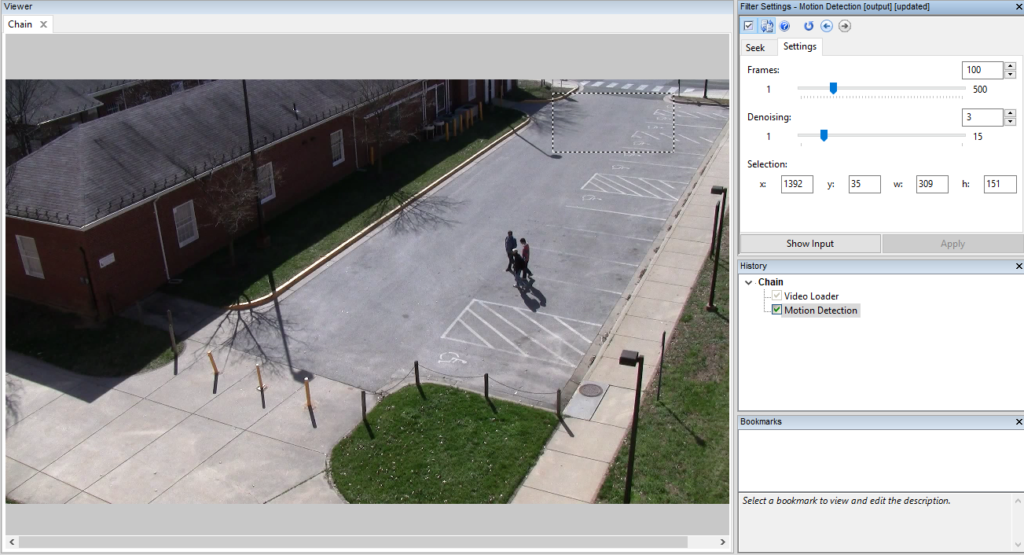
Now, given the geometry of the scene, we can reasonably assume that every car will enter from the farthest side of the parking lot. Luckily, the Motion Detection filter can be instructed to look for changes in a specific region only: we just need to click on the Settings tab in the Filter Settings panel and draw a rectangle, as shown below:
Now we go back to the Seek tab and click on the “Next Event” button… after a few seconds, we are taken to this point of the video, where indeed a car is about to enter the parking lot!
It’s just that simple!
Two more tips about this filter:
- If you find that useless events are being triggered by small objects / spurious variations, try increasing the Motion Threshold to ignore minor changes.
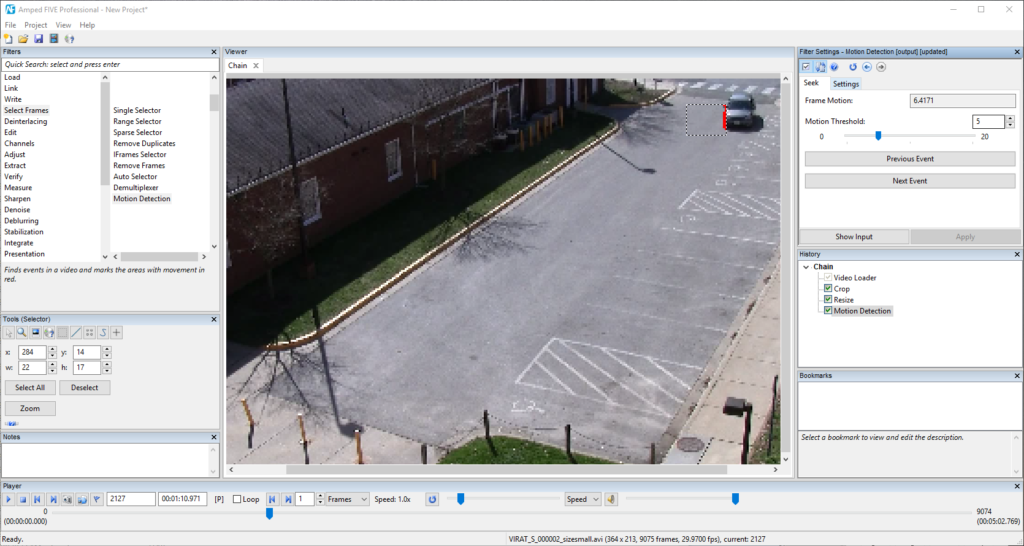
- If you feel processing is slow, you may want to crop part of the frame and resize it to a lower resolution (use the Nearest resizing algorithm to save more time): usually, we don’t need details during triage! Once the interesting events are found, you can remove/disable the Resize filter in the History panel: details are back, your time is saved!
For example, the case above can be efficiently tackled with even down-scaling the video to 25% of the original resolution and raising the Motion Threshold to 5. We are showing below the first two detected events with such settings: just as we wanted, the first one shows the car entering and the second shows the car leaving, while minor events due to people walking are ignored.