The quick just got quicker!
In the latest release of Amped Authenticate, 7644, one of the stand-out new features was the implementation of the Command Line Interface.
Utilizing the command line is a great way to automate tasks. I use it a lot to create batch files in order to complete some required and regular processes.
Amped Authenticate has a number of automation tools and methods to quickly analyze large amounts of files. These speed up the process of analyzing, sorting and listing evidential images. However, starting these processes requires user interaction. This means that you would have to open Authenticate and then run the required operations yourself.

Not anymore!
The new CLI gives you much more power, with the ability to call the program and run a number of common analysis tasks. When completed, you will be left with the sorted images and any reports requested.
The syntax itself is very easy to understand:
Usage: ath [/i <str>] [/s <str>] [/w <str>] [/k <str>] [/o <str>] [/b] [/c] [/x]
/i, –input-path=<str> Path of the image file or the folder to analyze
/s, –settings-file=<str> Path of .aas file containing settings and filter to load
/w, –warning-path=<str> If set, the path where the files will be moved into after the analysis, if the files contain an issue or a warning (only if batch_format_analysis is enabled)
/k, –ok-path=<str> If set, the path where the files will be moved into after the analysis, if the files do not contain an issue or a warning (only if batch_format_analysis is enabled)
/o, –output-path=<str> Output filename of the result of the file format analysis (only if –batch-format-analysis is enabled)
/b, –batch-format-analysis Analyze only the file format
/m, –minimal-output Minimal output format (valid only for file format analysis)
/x, –exit-on-finish Exit the program after the execution
Let’s look at an example…
You may have a program that is able to script certain functions and can call other external programs. This may be a piece of software that extracts images from raw data or drives. You then need to analyze these images with Authenticate.
Remember that running a full analysis on each image may not be necessary and this is a great example of when creating your own analysis settings file can save you a lot of time. I wrote about this in a previous article.
By placing the following command into your script, the Authentication side of your required process is fully automated.
authenticate.exe /i "C:\inputfolder " /o “C:\outputfolder\report.tsv” /b /x
What have we automated?
We have called Authenticate, we have set the input folder (/i), and we have set the output location (/o). The process is run in batch mode (/b), and when completed, Authenticate has closed (/x).
There are many other examples in the Program Reference Manual, located under HELP within the software.
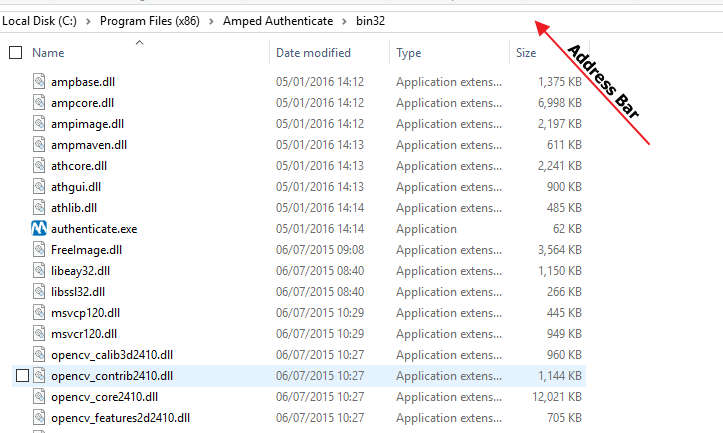
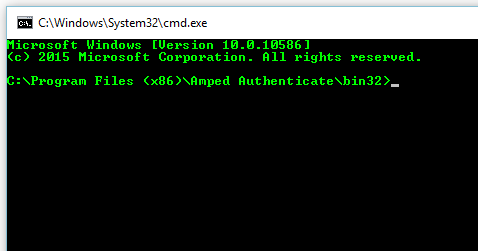
Authenticate users with the latest version can try this now in the command line. Navigate to your Authenticate Folder within Program Files. You need to be in either the bin32 or bin 64 folder. In the address bar type cmd, then press enter.

You are now running the Windows command prompt from within this folder.

Use the command I used earlier as a test. Remember to add in your own input and output folder locations.
You are now free to automate some of the tasks required.
Another example to highlight how this can help would be using a batch file.
@echo off
TITLE Spreadys Authenticate Batch
color 0a
echo.
echo ****************************************
echo Authenticate Batch Drag and Drop
echo ****************************************
echo IMPORTANT:
echo You may need to edit this .bat file
echo before the first run, in order to set
echo your Authenticate.exe location
echo.
echo ****************************************
echo.
path=%~dp0

cd "%1\..\"
md Authenticate_Result

REM Set Authenticate Folder
cd "c:\Program Files (x86)\Amped Authenticate\bin32"

REM script for selecting all files and batch processing
authenticate.exe /i "%1" /k "%1\..\Authenticate_Result\OK" /w "%1\..\Authenticate_Result\Warning" /b /o "%1\..\Authenticate_Result\Report.tsv" /x

REM script for analyzing all files in Warning Folder
authenticate.exe /i "%1\..\Authenticate_Result\Warning" /o "%1\..\Authenticate_Result\Analysis.html" /x

echo COMPLETED
pause
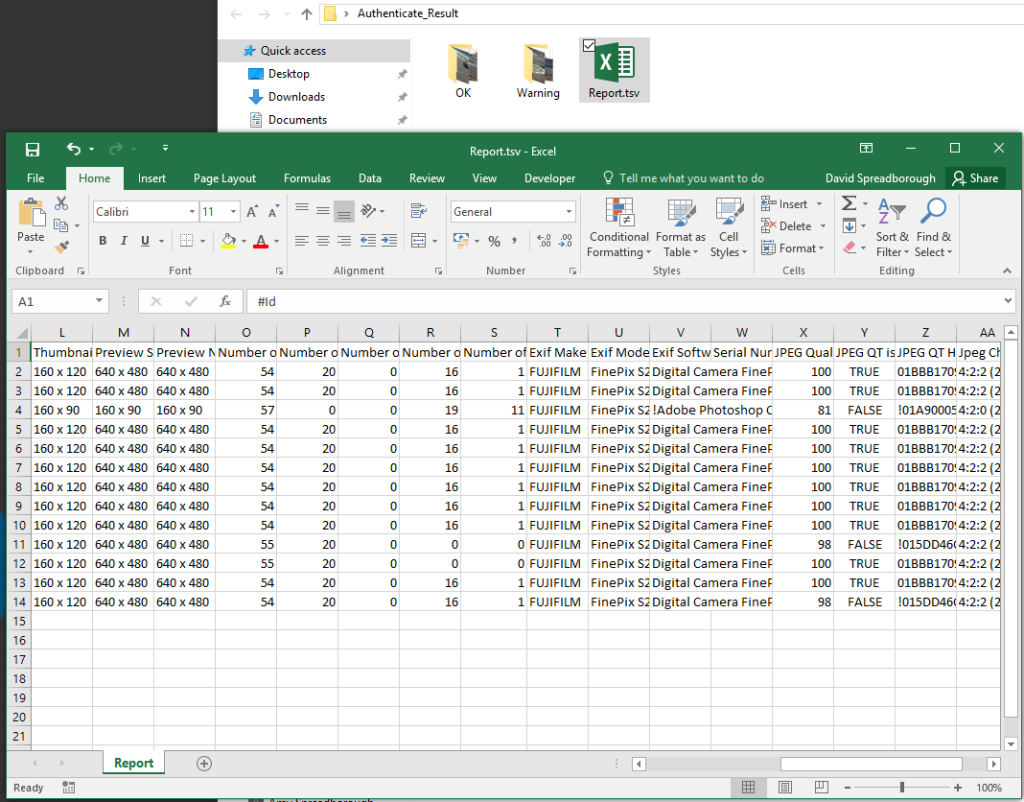
This .bat file sits on my desktop. When I drop a folder of images onto it, the files are analyzed in batch mode and automatically sorted. All files that appear ‘Camera Original’ get placed into a folder called OK. All files that have irregularities get placed into a folder called Warning. A full batch report is compiled that lists all the files and their data.

Authenticate will automatically close and reopen. This time, all the files that had Warnings are fully analyzed and a html report is compiled.
With a single drag and drop I can scan, sort and analyze a directory full of images.
If you wish to copy the batch text and place it into a notepad file, remember to save it as a .bat
Update Now!
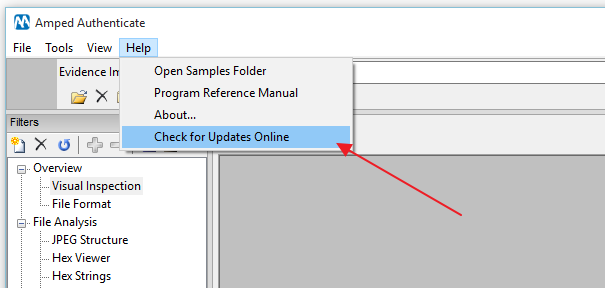
If you have an active support plan you can update to the latest version of Amped Authenticate by going into the menu “Help” > “Check for Updates Online”.

If you need to renew your SMS plan please contact us or one of our authorized partners.


