
Dear Tip Tuesday readers, welcome! Today we’re beginning a mini-series covering some of Amped FIVE‘s filters that are very useful when dealing with a noisy video (which, alas, happens so often): Frame Averaging, Temporal Smoothing and Motion Smoothing. We’ll see the advantages of each filter and when you should choose one over the other. Today we start with Frame Averaging… keep reading!
During our training, we mention several times that the first necessity when doing video enhancement is… to see what’s in the video. Thanks to Amped’s powerful video conversion engine, loading the video is as easy as dragging it into the software interface. So we’ll consider this done, for the sake of this tip. But then, after loading the video, you just “see” this.
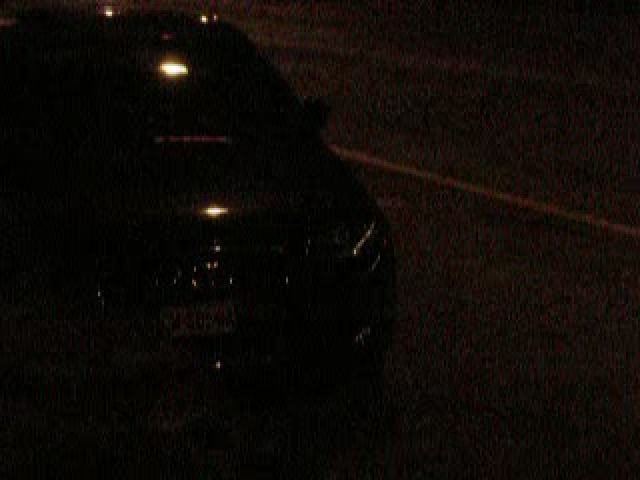
It is not uncommon to start from something that is so dark where you can’t figure out what’s in the video. In cases like these, we recommend boosting up the brightness, e.g. using the Exposure filter.
Of course, there’s no free lunch: you’ll boost the visibility of elements in the video, but you’ll also boost the noise. Indeed, using the Exposure filter is like trying to imagine how the video would have been if the camera’s sensitivity (commonly referred to as “ISO sensitivity”) was higher. Unfortunately, since the beginning of photography, higher sensitivity always implied stronger perturbation (which happens with human sensitivity as well, if you think about it).
But there’s one good point: objects in the video persist from one frame to the other, while noise fluctuates randomly. The idea, then, is that we can trade temporal resolution for spatial definition. You average together some frames so that noise will be reduced. This is the idea behind several filters under the Integrate category: Frame Averaging, Temporal Smoothing, and Motion Smoothing.
Frame Averaging, on which we’re focusing today, is the simplest of all. It will create a single frame where each pixel value is averaged across all frames. It stays on the most extreme side of the trade-off: you totally lose temporal resolution (you end up with one single still image), but you also have the strongest reduction in noise.
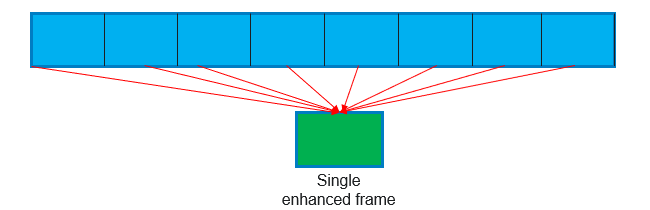
Doing so, the noise will reduce a lot, while static objects will remain much cleaner. The “trick” is that, in practice, the ISO noise can be reasonably modeled with the beloved (by engineers) “Additive White Gaussian Noise”. This kind on noise alters pixel values by making them sometimes higher, sometimes smaller, but in a balanced way, with no preference for higher or lower. So, after taking the average, the noise contribution mostly cancels away, while the actual pixel value remains.
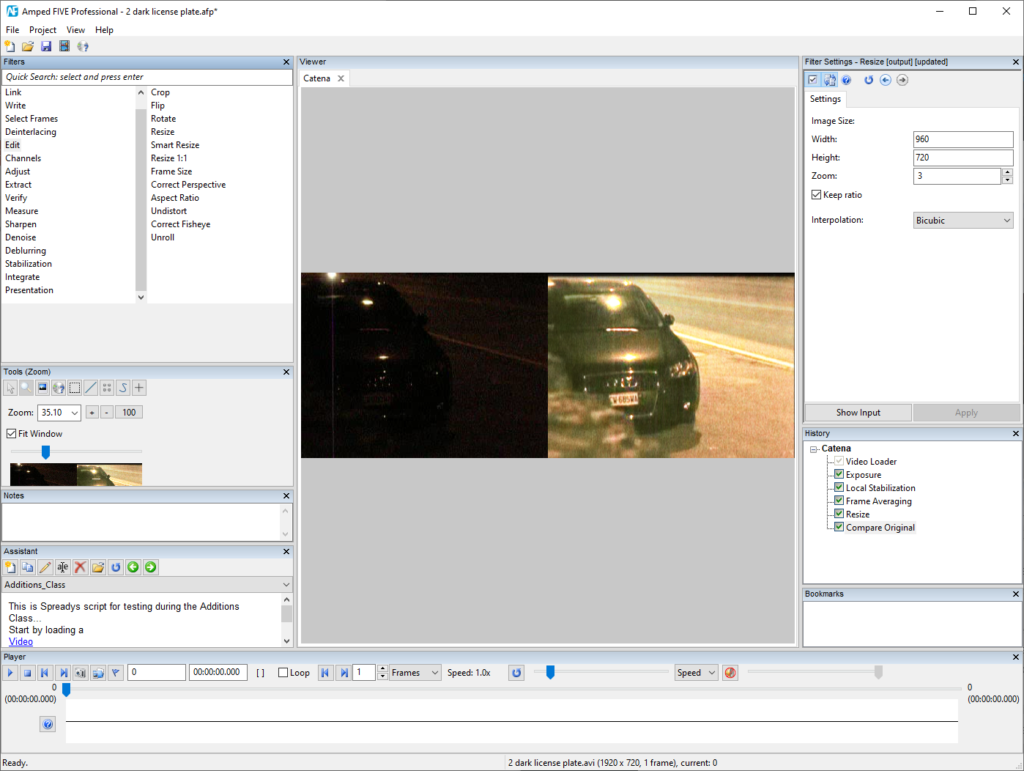
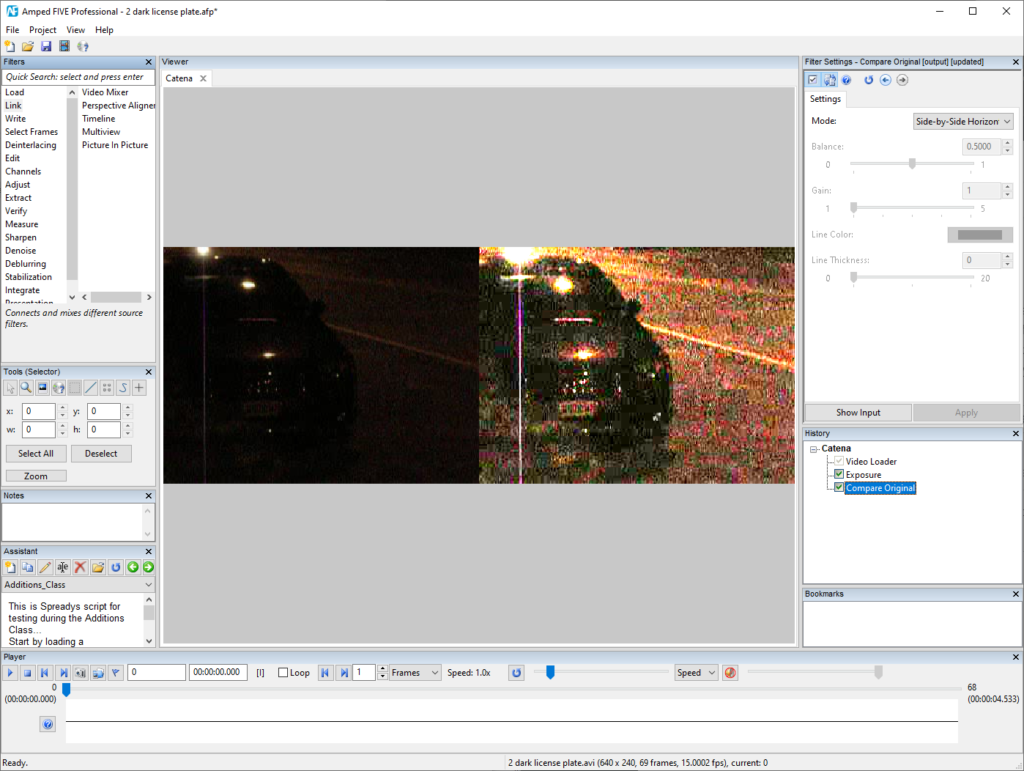
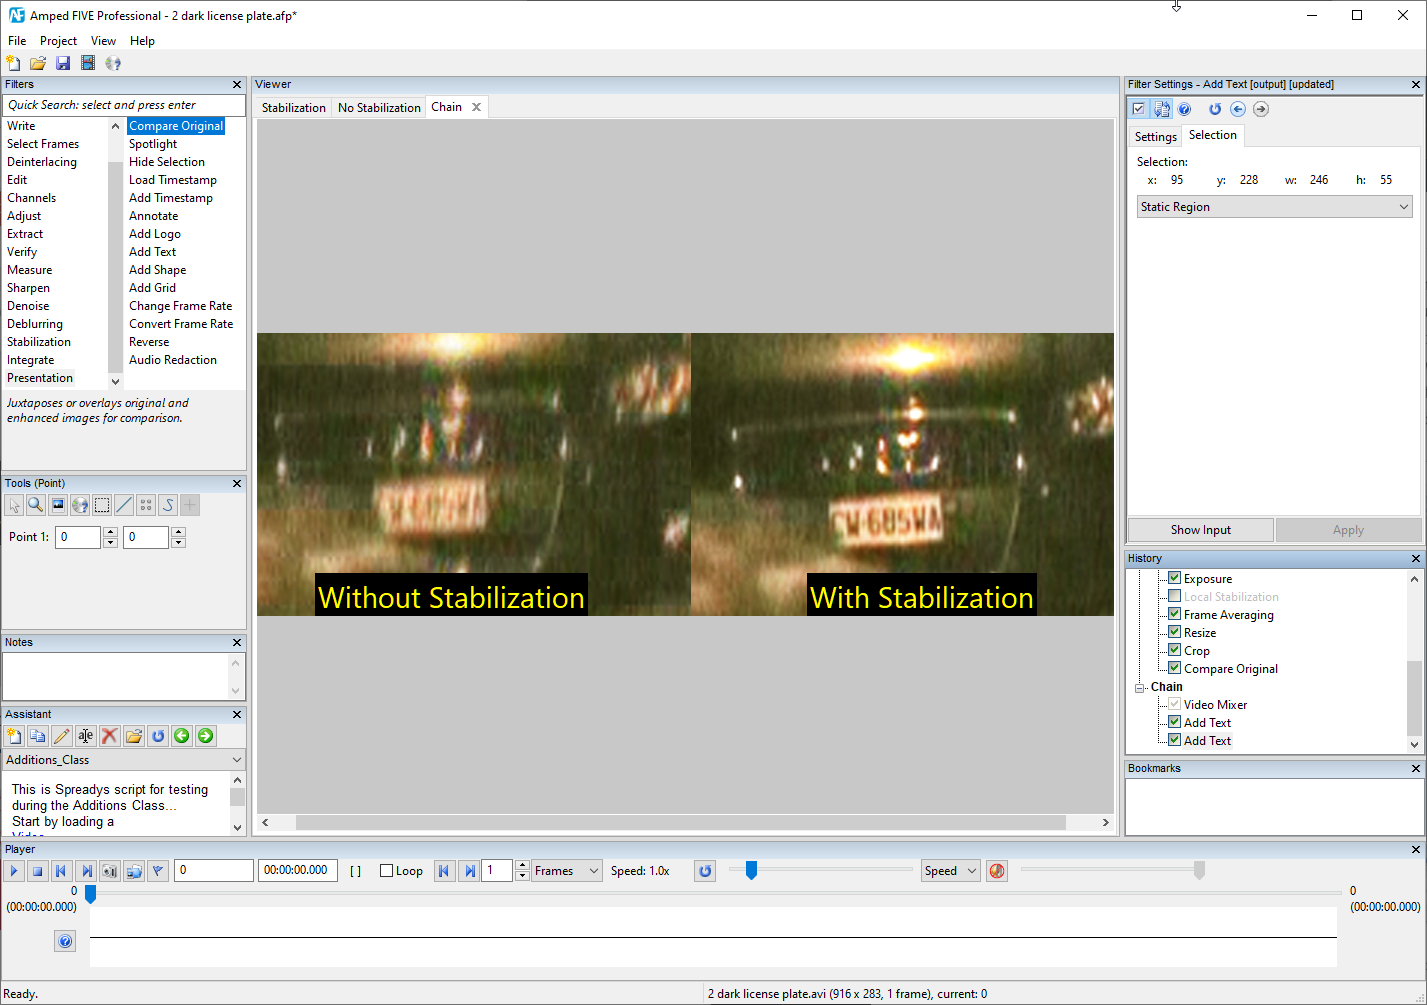
Of course, all of the above holds if your pixels of interest stay still across the averaged frames, otherwise their value will blend with those of neighbors and you’ll get a blurred image. That’s why it is fundamental to stabilize the video, when necessary, before using Frame Averaging. In the example shown above, the camera was hand-held, so it fluctuated a bit across frames. Here you can see the difference between stabilizing the license plate (like we did) and not doing so:
Another important point to consider when dealing with Frame Averaging is frame selection. When you fire up Frame Averaging, all the currently available frames will get averaged. That means you’ll normally have to select only a range of frames to be averaged, which you can easily do with the Range Selector filter. Of course, the more frames you select the longer the filter will take to complete processing, but this filter isn’t a time-eater.
So, to sum up: if your video is very noisy and you don’t need temporal resolution (i.e., you’re only interested in something static in nature, like a license plate or a vehicle shape), this is the typical flow:
- Select a range of frames where the object is visible/present;
- If there are a few frames in the range which are counter-productive (e.g., something covers your object), use Remove Frames to take them out;
- If the object of interest is not static, use Local Stabilization to make it such;
- Fire up Frame Averaging and wait for the magic to happen!
Next week we’ll see what to do when temporal information is of the essence: e.g., if you’re working on a video of a scuffle you can’t give up temporal information, you need to see movements. In such cases, Temporal Smoothing and Motion Smoothing will help you better. See you next week!


