Dear Amped blog readers, welcome to this week’s tip! Today we’re dedicating some room to a simple yet very effective trick that can make Amped Authenticate reports more comprehensive and clear. We’ll see how we can effectively add screenshots to our project and comment on them, in such a way that they appear in the report helping to build up the story. Keep reading to find out more…
“Reporting is important”. How many times have you heard this mantra when reading best practice manuals or when attending training, including our own? And it’s true, indeed: even the most brilliant and clever analysis will likely fall short in reaching the audience if it’s not reported clearly and convincingly.
When you work on image authentication, this is even more true than usual. Sometimes, you’re asked to “reverse engineer” the digital history of an image. Amped Authenticate tools provide you with data and statistics, but then it’s up to you to build up a “plausible story”, one that explains what happened with the image in your hands. Not surprisingly, this kind of analysis requires a bit of intuition, background information, and subjective evaluations. And all of these need to be properly reported.
Since the latest update, Amped Authenticate features the Projects functionality, which allows the user to bookmark relevant findings, possibly organize bookmarks into folders, and finally generate a report of the analysis. Quite often, when working on an image we may need to compare it with reference material, gather background information on the web, etc. As long as you need to compare the pixels or metadata of your evidence file with those of a reference image, you can simply do it by loading both images in Authenticate’s GUI: every time you add a bookmark, both the currently loaded evidence and reference images are bookmarked, so you’ll see the comparison in the report as well.

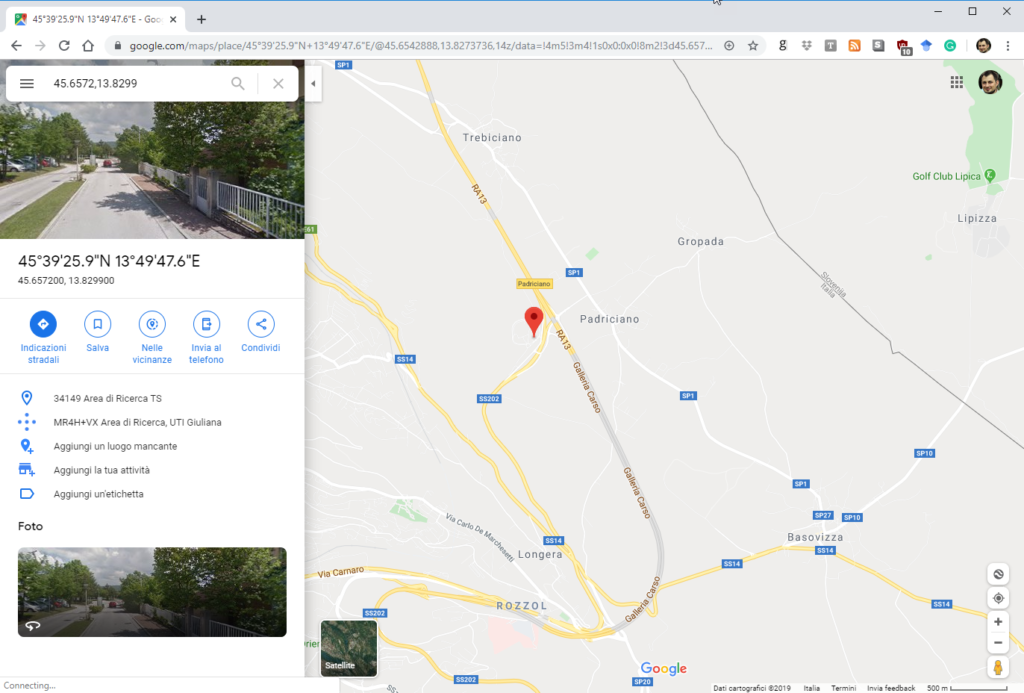
But what if you’ve used, say, the Show image location on Google Maps tool, and you want to add in your report the obtained map?
Of course, you can generate your report in the DOCX format and add it manually later. The problem with this approach is that, in case you need to regenerate the report, you’ll have to manually add the map again. Is there a better way to go? Yes, and it has always been under your nose!
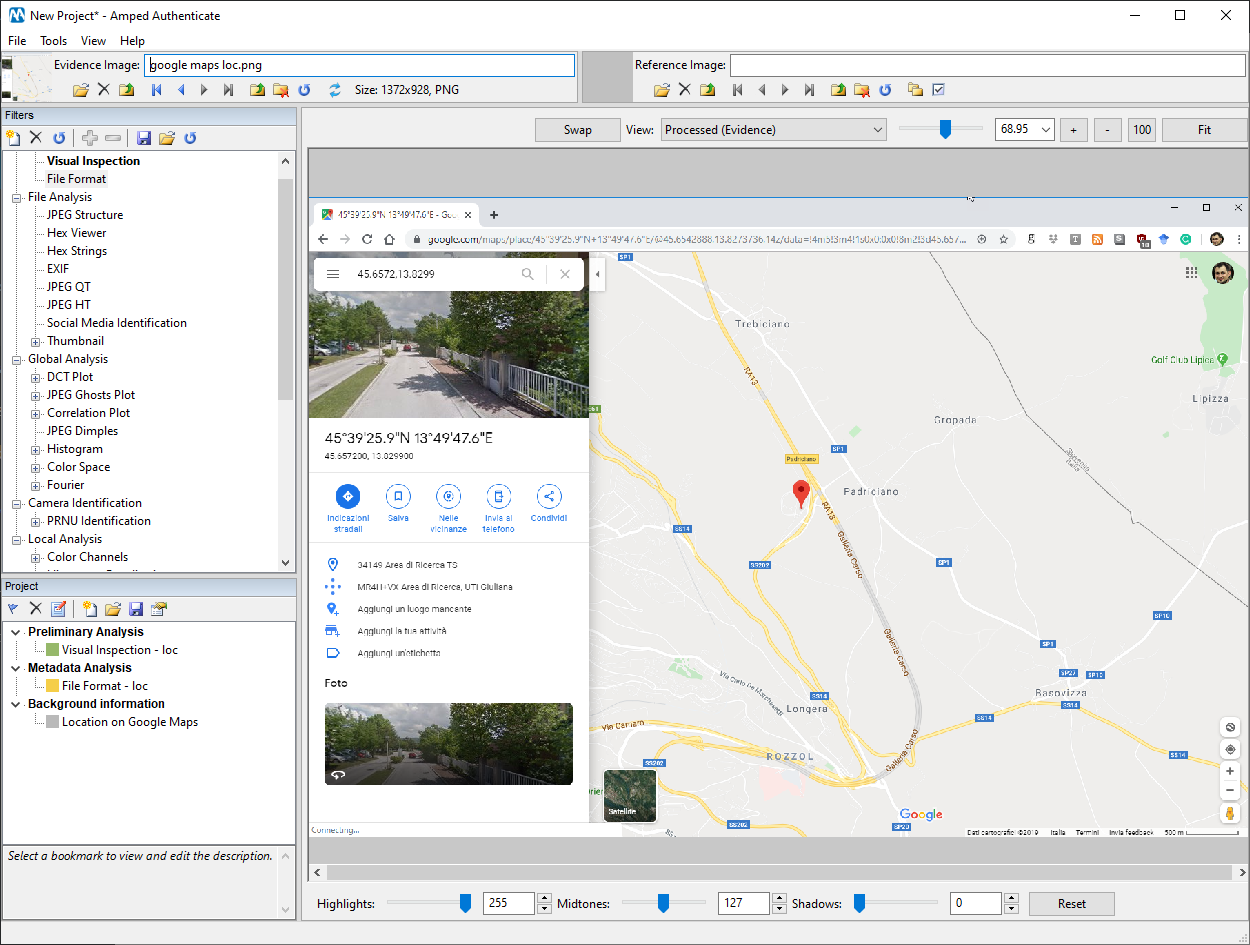
Authenticate’s projects do not force you to work on a single evidence image: you can load one image and add a few bookmarks, then load another evidence image and keep adding bookmarks to the same project. Each bookmark is indeed linked to the image you are working on at the time you add it, as we’ve seen above. So, once you’ve found your map on the web, take a good screenshot of it, save it somewhere in your project’s working directory, and drag it into Authenticate. Then, choose the Visual Inspection filter and add a bookmark. You may call it “Location on Google Map”.
When you’ll generate the report, this screenshot will be treated as one of the images that are part of your project, so it will appear in the report along with the associated bookmarks comments.
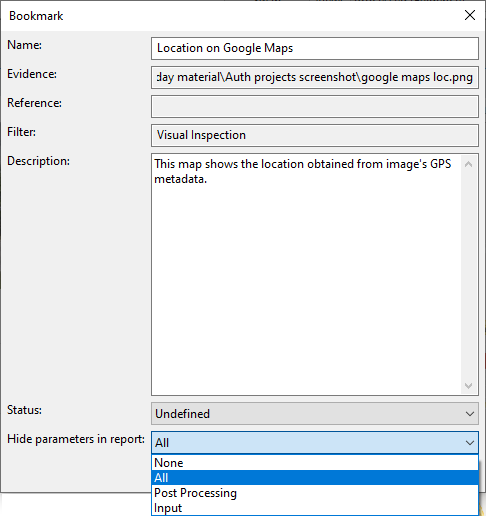
Since these “additional” images normally do not require any processing to be documented, you can hide the Visual Inspection filter parameters in the report, just to make it lighter. To do so, just double click on the bookmark’s name and select “All” from the Hide parameters in the Report menu, as shown below.
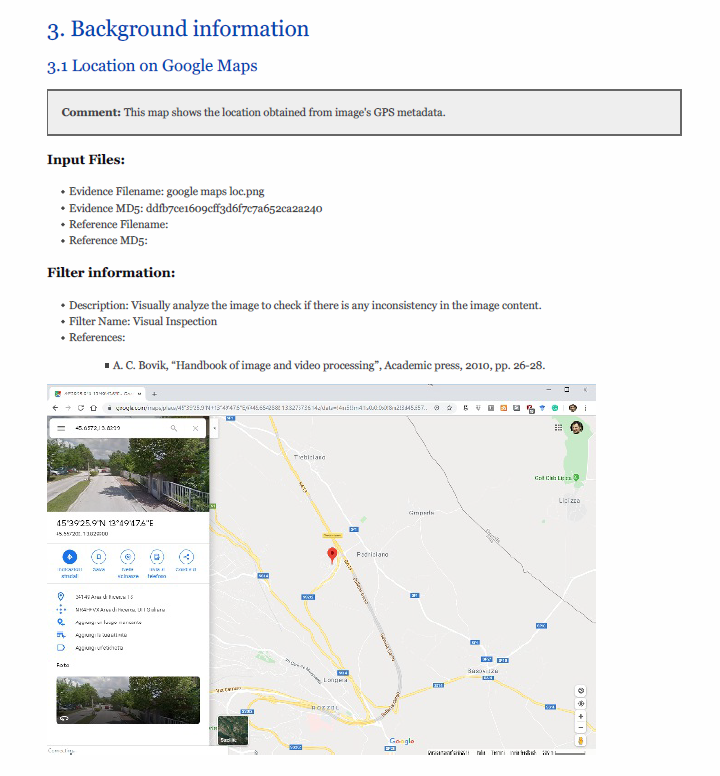
And that’s it! This is how your map will look like in the report:
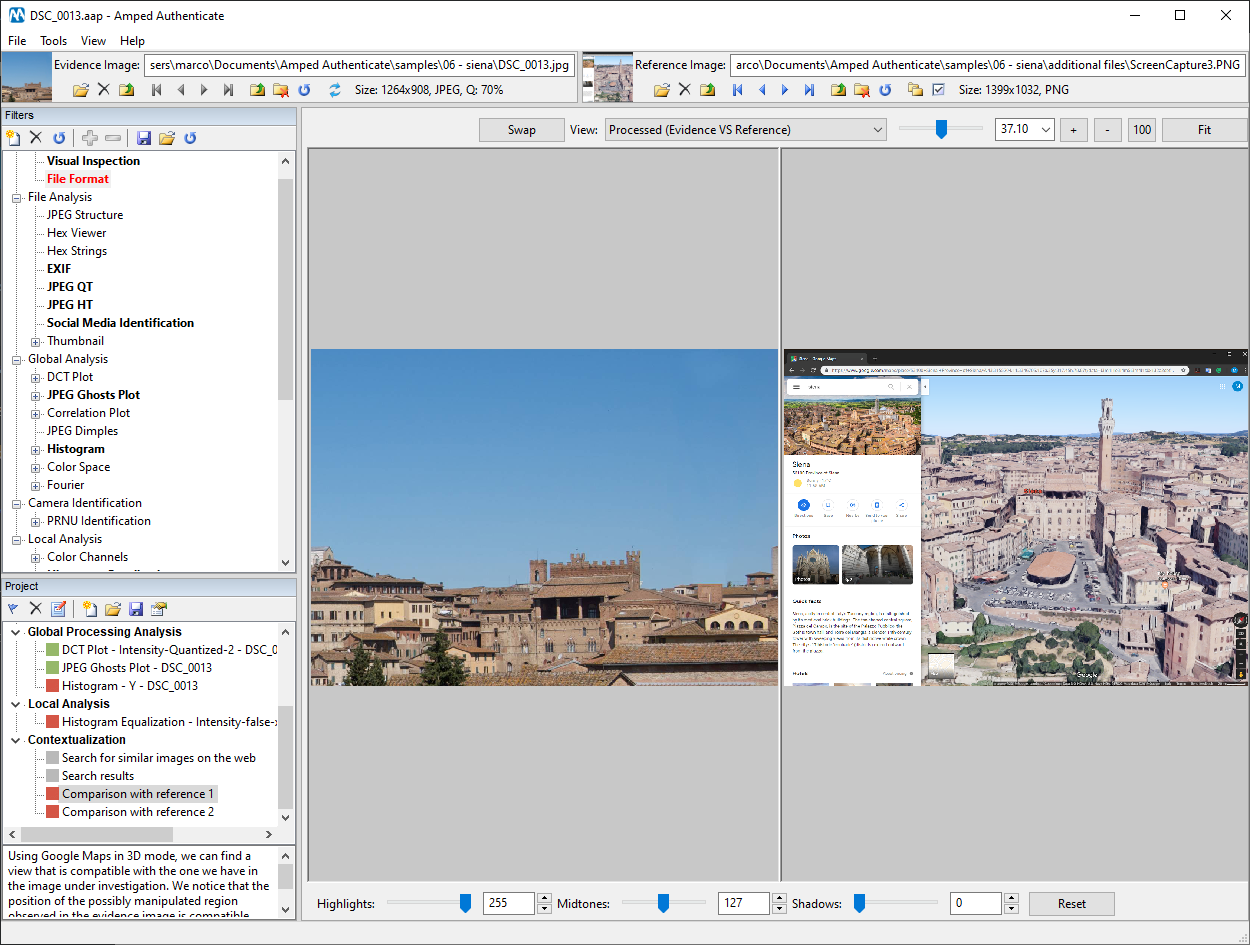
Using the very same approach you can add any kind of screenshot to your report. If you’re an Amped Authenticate user already, you have the effective example “06 – siena” ready in your Samples folder (normally installed in “Documents\Amped Authenticate\samples“). There we show that you can even compare your evidence image with a screenshot to obtain a very effective result.