

Yes, you have read the title correctly! One of the most requested and anticipated features has now been built into Amped FIVE. We have been working on Undo / Redo for some considerable time. So it is fantastic to make it available to you in this release. Along with the Undo / Redo feature and new encoding options, there are many other new tools and functions to introduce. So let us not delay any longer, let’s go!
See the new features in action!
Undo / Redo
Usually, when we release a major new feature, it can take a little time to explain it. In the case of Undo / Redo, however, it is an extremely easy concept that most computer users should be aware of. You probably already know what the keyboard shortcut is!
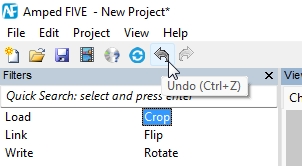
In the Quick Access Shortcut Bar along the top, you will now see several new icons. The last two arrows are Undo and Redo. Yes, they are linked with the keyboard shortcuts of Ctrl+Z and Ctrl+Y.
Users have always had the option of resetting filters. But, with the addition of many new analysis, measurement, and presentation filters in FIVE, having the ability to go back a step is a huge increase in flexibility.
Although the new functions are available across all of FIVE’s filters and tools, nowhere is the benefit seen more clearly than within the Annotate or Speed Estimation 2d filters. If you add an arrow or an object in the wrong place there is no need to delete it and start again. Just Undo it. If you decide it was in the correct place after all – just Redo it.
To give you a visual hint of what is possible, when the icon is dark grey, the tool is active, whereas it is inactive when light grey.
Video Writer: New Codecs
We are always listening to our users here at Amped. One of the common requests over the last year was for more Codecs to be implemented within the Video Writer to support various presentation methods.
The Codec you use determines the quality and compatibility of your final video exhibit. We have developed several options to assist you with both aspects.
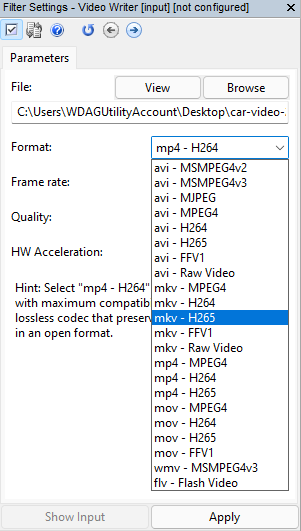
First – H265
This Codec is implemented within the AVI, MP4, MKV, and MOV Container Formats. Although it is a relatively new Codec, H265 will undoubtedly overtake H264 in the years to come as the most common output format. Most of you will probably be already receiving H265 videos as evidence. The reason why so many surveillance manufacturers are using it is that the improved compression saves space and bandwidth.
It is early days for presenting video evidence with this Codec. But you know us here at Amped – always leading the way!
Then We Have FFV1
Now, this is a clever Codec that is being used more and more for archiving and as an intermediate file that requires further processing.
To show you how good it is, if we loaded a 30-second test chart video with an original size of 1.3MB and then used Video Writer with the Raw Video option, the resulting file has a size of 405MB. The Raw Video option has a colorspace change for compatibility reasons. So, even though it is not compressed, the YUV output has a very small change.
This can be seen when evaluating video compression changes within Video Mixer.

A Sum of Absolute Difference (SAD) of 0 would be lossless. A sum under 2 is often referred to as Visually Lossless.
Using FFV1 it is completely lossless and with a file size of only 53MB!

The two inputs can also be analyzed and have their frame MD5 hash calculated and compared. The value is displayed in the Tools > Inspector. This would be another method of proving that the converted video has no visual change from the original.
For evidential archiving and preservation, with no pixel value loss from the original, this huge file size reduction will surely make your Digital Asset Manager very happy.
As a lossless intermediate Codec, the speed of writing and file size is also a huge benefit. A good example is Demultiplexer. Writing all the individual Camera Scenes out, previously required a careful Codec selection based on the need. Having a lossless option will now be a huge benefit for users.
A similar issue may arise with a corrupted video index. Having the ability to now write a new file, with no pixel loss and with huge space-saving, will ensure you can carry on your chain without running out of hard drive space!
Video Writer: GPU Acceleration
Encoding video involves many different components. One of the final stages can be sped up by utilizing the power of the Graphics Processing Unit, (GPU), within your PC.
NVIDIA GPU
In this release, we have added support for NVIDIA GPUs within the Video Writer.
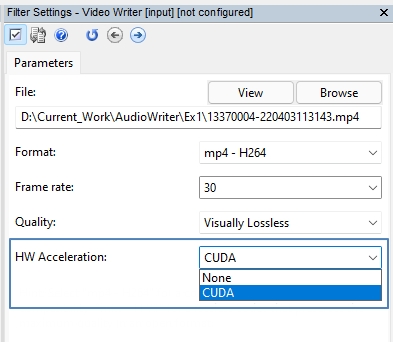
When writing out to either H264 or the new H265 Codec, users can take advantage of the increased speed available within their NVIDIA GPU. Simply select CUDA from the Hardware Acceleration dropdown within the Filter Settings.
The complexity of your individual filter chain will ultimately affect the speed at which the frame is passed to the encoder. You may find that single chains can be written many times faster. However, with complex filter chain mixes, the speed increase may be minimal.
There is one other important consideration when writing a new file, and that is repeatability. To ensure forensic rigor, we must be able to repeat what we have done. This must be reproduced by another person, and any process must be valid and explainable.
HW Acceleration
If file writing is assisted by HW Acceleration on your workstation, then you are utilizing the architecture of your specific graphics card. The consequence of this decision may affect repeatability on another workstation.
To help you understand this further, let us look at a typical scenario:
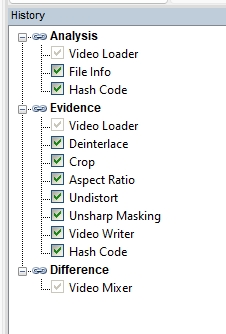
Our Project contains an Evidence Chain where we have processed the original video. At the end of the chain we have the Video Writer and Hash Code Filters.
It is possible then to only share the original video and Project file (12kb), and for another person to have the entire project reproduced on their workstation, including the writing of the new file for evidential presentation. They can trust that what they have produced is the same because the Hash Code filter at the end of the Evidence chain is able to compare the new file against the calculated Hash value.
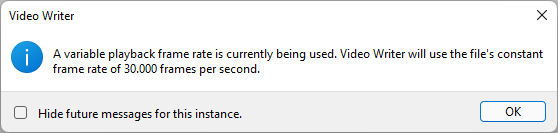
If this is something that your department or agency often does, then you may want to avoid using HW Acceleration. Moreover, if an incompatible graphics card is detected when the project is re-opened, the following message will appear:
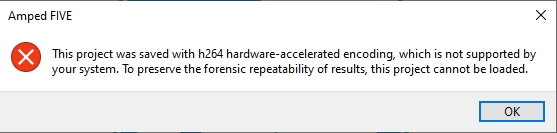
If the sharing of project files and multi-user access to the project is not often required though, the increased speed that HW Acceleration offers will undoubtedly speed up your workflow.
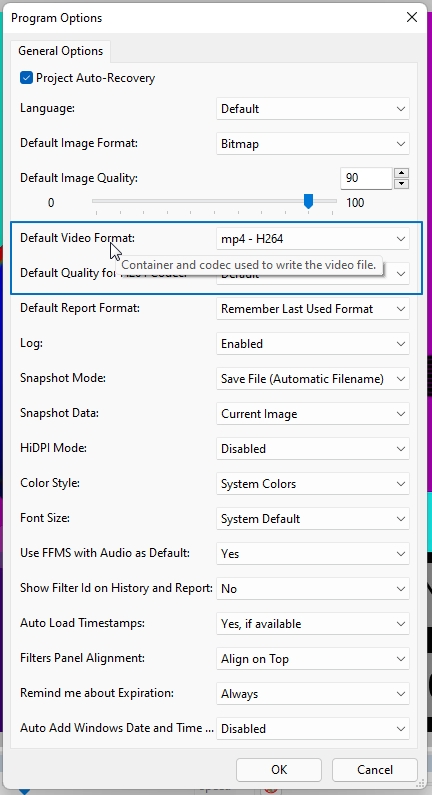
Video Writer: Change to Default Option
It is now important to note that the default Container and Codec option has changed to mp4-H264. This will be the new default for fresh installs of Amped FIVE. But if you’re upgrading from a previous installation, it will be up to you to decide.
You can check or change the current default within View > Program Options.
Player Panel: Timestamp Playback
Over the past year, we have been researching and developing tools to playback, analyze and present timing information. You may remember that the addition of PTS-based playback was added in Revision 21826.
We have now added Timestamp-based playback and included a new configuration tool along with a visual indicator on what method has been selected.

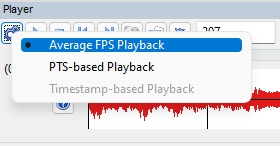
Three Methods Included
The icon at the end of the Player Panel controls your playback method. Three methods are now included.
- Average FPS: The speed of the video will be controlled by dividing the total frames by the duration.
- PTS-based: The speed of the video will be controlled by the Presentation Timestamp found within frame data.
- Timestamp-based: The speed of the video will be controlled by either the decoded, adjusted, or added Timestamp.
If there is no timestamp, the option will be greyed out.
When either PTS-based or Timestamp-based Playback is selected, The Play button will change to indicate the Playback mode.
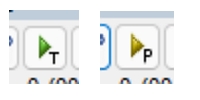
Green (T) = Timestamp-based
Yellow (P) = PTS-based
If the Timestamp does not have all the required data, meaning that it requires adjusting with the Adjust Timestamp, a warning message will appear to inform the user that interpolation or refinement may be required first. To refresh your knowledge on this powerful filter, take a read of this dedicated post.
Remember, that along with everything else in the Player Panel, this is controlling the playback method. So, just like the Playback Speed slider or the Audio Volume, the timing here does not affect the output. To help you remember this, the Video Writer filter will show a warning if you try to write a video while using the Timestamp or PTS Playback mode.
If the output must be changed, then it is possible to use the Change Frame Rate and Convert Frame Rate filters. If the timestamp details are required to calculate the correct frame rate then this can be achieved using the functionality within the filters and also the Time Calculator within the Tools Panel.
Player Panel: Frame by Frame Audio Playback
Nudging forward or backward frame by frame is one of the most common functions performed by video technicians and analysts. In this update, we have added the playback of the audio sample for that specific frame.
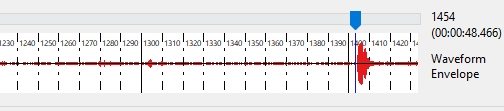
Either when using the frame Fw or frame Bw buttons, or the shortcut keys (J & L), users will now hear the audio sample linked to that video frame. This makes the syncing up of visual markers to the audio so much easier!
Text Macro
Many Text Macros can be added either with the Add Text filter or from inside the Annotate filter. A new Macro has been added: $IMAGERESOLUTION
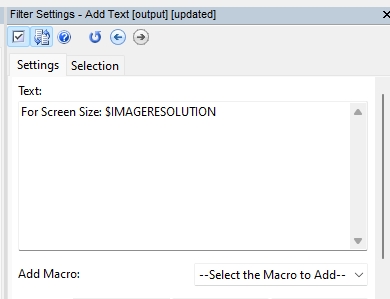
The other Macros are still there for adding in Height and/or Width individually, but if you simply want to add the size of your video, then this is a quick alternative.
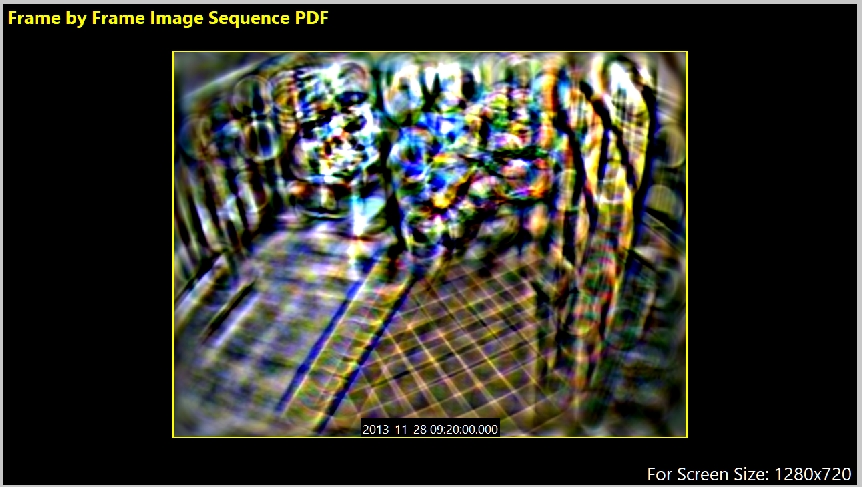
Visually adding your Presentation size is becoming more and more important to ensure the viewer is watching your demonstrative evidence in the size you intended.
Export PDF
Using the example above, we have an important and highly beneficial change to the Export PDF Tool: File > Export PDF
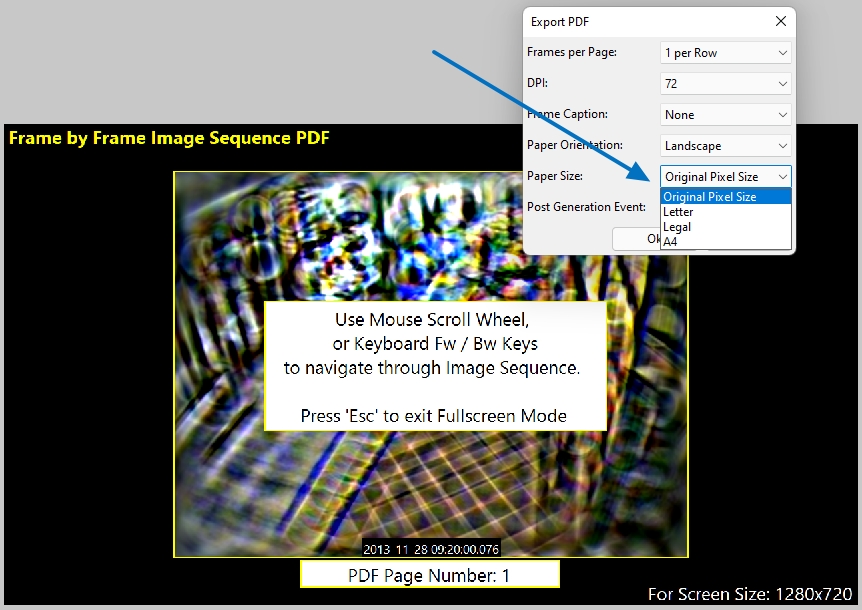
Within the Paper Size dropdown, you now have the option to export at the original pixel size.
As a consequence, users are now able to export lossless PNG images embedded within the PDF format with no change in the desired presentation size.
By utilizing Annotate, users can quickly and professionally create frame by frame, annotated image charts and sequences to present their visual evidence with no loss in quality and in a universally supported format.
History Panel
The History Panel not only lists every item loaded, but it also shows the filter chains that follow each Loader. It is now possible to copy a loader directly into the same folder, another folder or at the top of the History Panel.
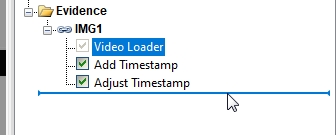
Loaders can only be copied, they cannot be cut and pasted. Therefore, there is no need for any use of the Ctrl key. Simply click and drag to where you desire. Keep an eye on the blue bar that indicates if it’s going inside or outside the folder. You will also notice your mouse cursor change to show a small “+” icon, indicating a copy action.
Hint: When working with chains, you must remember to use the Ctrl key to allow copying, otherwise it will move the chain in the same way as using Cut/Paste.
Timestamp Filters
Many filters have a Selection tab, which allows you to select a placement position within the image or frame. The default is Whole Image.
The Add Timestamp filter, the Load Timestamp filter, and the Adjust Timestamp filter have all now been changed to the standard Selection options found in most other filters.
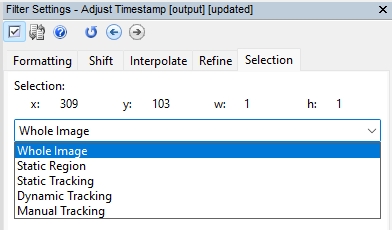
It is now much easier to use the Static Region option and then select your X, Y, W, and H parameters within the selector tool to place your timing information in the area you require.
Convert DVR
There are several additions to this powerful conversion tool. The default Transcode option has changed to MP4 – H264.

Remember that you can change these on a case-by-case basis to suit your individual requirements.
Next, we have a new Codec option.
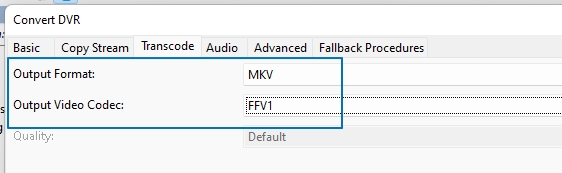
Many files that required Transcoding had to either be compressed or have a huge file size. With FFV1 added to the Codec options, you will quickly have completely lossless converted files.
One last new addition to Convert DVR is the new shortcut within the Quick Access bar.

Convert DVR is now available to you in multiple different ways. Via this new shortcut, from the File Menu, within the Video Loader filter and of course automatically when a proprietary file is loaded.
Advanced File Info
Advanced File Info is such a powerful tool for so many use case scenarios. The dynamic linking between the visual image, the encoding structure, and the frame data makes detailed inspection very easy. We have added some extra functionality to help speed up your data analysis workflow.
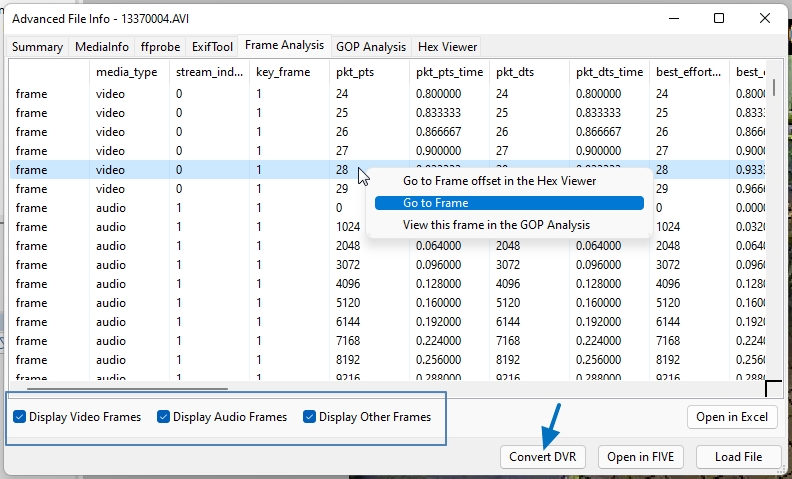
At the bottom of the Frame Analysis tab, you will now see further display options that will allow you to visualize different data types without having to export the data.
Next, you will see a Convert DVR Button. You may have loaded a proprietary media file into Advanced File Info and then wish to go directly into Convert DVR to either convert just that file or concatenate all within the directory. This button allows you to do just that, without loading into FIVE first.
Copy and Verify
One of the first stages of an investigation is the movement and integrity checking of exhibit copies. This allows users to work on files knowing they are bit-for-bit copies of the native exhibits and the copy process can be verified.
A small, but significant, change has been made here with the addition of a minimize button within Copy and Verify.
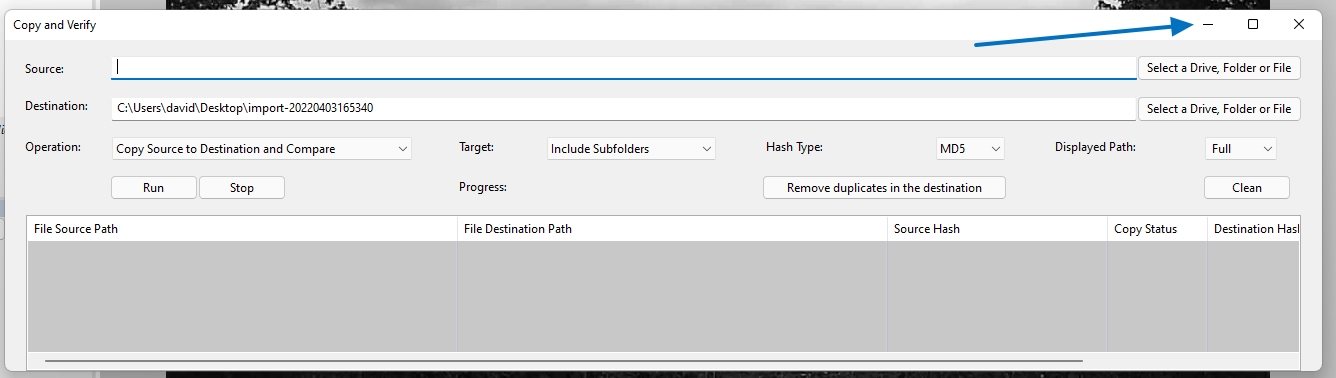
This allows you to copy and hash one set of files whilst starting to structure your project on another set. Again, it is something that helps to speed up your workflow.
Generate Report
Following on from one of the first stages of an investigation, we have one of the final stages: the writing of the technical processing report. It is a fundamental step that ensures all technical analysis and processing can be reviewed, repeated, and reproduced.
In this update, it is now possible to customize the destination folder and filename.
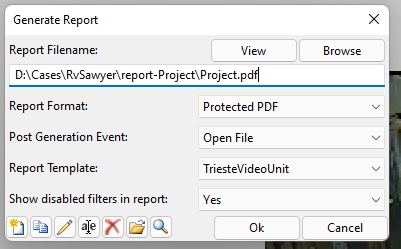
It is such a small change, but so helpful, as it avoids having to rename or move the project folder afterward.
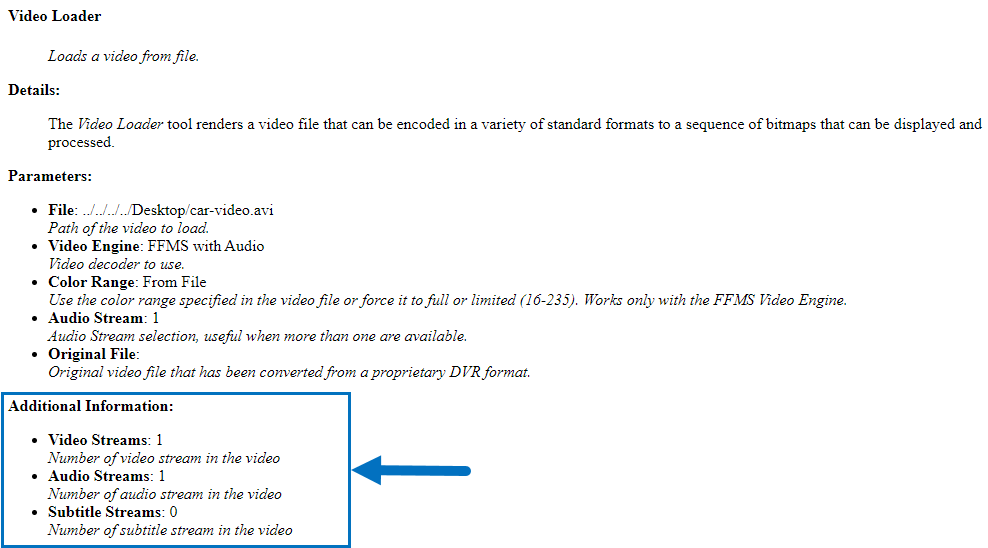
Moreover, in the report, we’ve moved some of the filter data to a dedicated “Additional information” section. This normally includes data that are not determined by the user but simply provided by the filter, as in the example below:
Inspector Tool
The Inspector Tool, the first one in the Tools Panel, gives you the information surrounding the Pixel, the Frame, and the Chain being viewed. There are two enhancements to this tool that will assist users. Firstly, when hovering over a pixel and moving frame by frame, you will now observe the RGBY values changing for each frame. Secondly, to assist you when working with multiple viewers, the chain name is now displayed in the Details section.
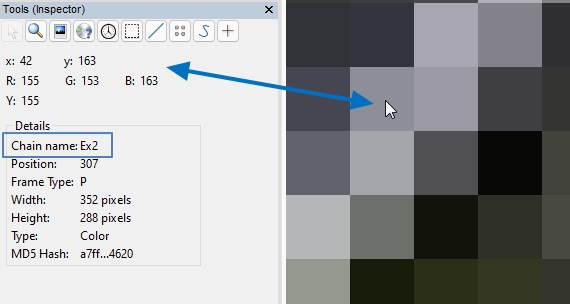
And at the bottom you can find the Frame Hash value that we mentioned earlier when we spoke about comparing lossless video codecs.
Bugs
Finally, we have the bug fixes. A big one was the failure of Batch Conversion when using Custom Command in Convert DVR. Custom Batch Conversion is now possible again!
- Hash Code: removed unnecessary recalculations which were affecting performance during playback.
- White Balance: Corrected calculations if a frame is either all black or all white.
- Copy and Verify: fixed a drag and drop bug causing the dropped file or folder to be loaded into FIVE instead of being accepted by the source or destination textboxes.
- Convert DVR: fixed a bug in Fallback Procedures which was causing an error when Custom Command is set and multiple files were converted in batch.
- Export Video: fixed a bug that was inhibiting visualization of the Codec List.
- File Info: fixed a bug causing the file details not to appear in the generated report.
- Demultiplexer: fixed a bug that was causing the scene outputs to be always created with default extension.
Don’t Delay – Update Today
If you have an active support plan you can update straight away by going into the menu About > Check for Updates within Amped FIVE. If you need to renew your SMS plan, please contact us or one of our authorized partners. And remember that you can always manage your license and requests from the customer support portal.


