
“All I want for Christmas is…” another huge update to Amped FIVE! It only seems like yesterday that we published the last update to Amped FIVE, announcing the release of many time-based tools and filters. Here we are again, bringing several very popular requests into the software, with another very important update.
To start with we have Blank Video, allowing the creation of video frames to be used for titling, or to fill gaps caused by missing frames in a timeline.
This update though has a large emphasis on audio. Digital Multimedia Evidence (DME) now often consists of both video and audio. It is becoming much more common to have CCTV, and private video surveillance, to include an audio stream. In-car systems may have multiple audio streams to playback sound better from different parts of the vehicle.
We have been monitoring this increase in connected audio and have therefore developed several new filters specifically to assist in its management.
Let us take a closer look at these and many more!
Blank Video
Found within the Load category of filters, Blank Video has been built to allow flexibility, and when selected, the filter will open inside a new chain.
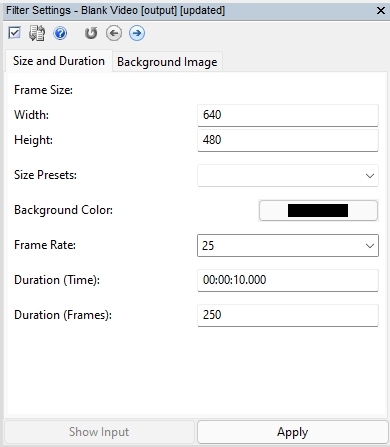
The first tab deals with the “Frame Size and Duration” of your video. The regular options are available to you, including our list of presets, all linked to standard presentation sizes.
After setting the desired color and frame rate, users can choose between a time or frame duration. As is usual in FIVE, if you select one, the other will dynamically change accordingly. The frame rate you choose will be dictated by your workflow.
The “Background Image” tab allows you to use a predefined image template that you may have created for a specific title or reason.
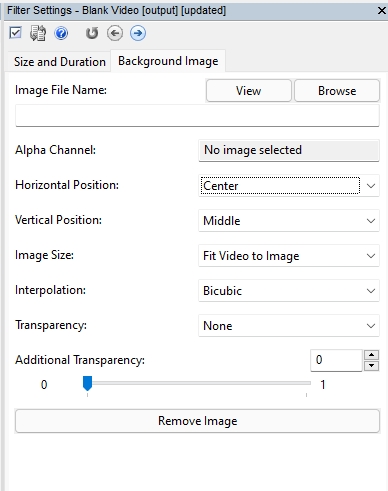
The default setting for Image Size is to “Fit Video to Image”. If you have a 1920x1080px image title page, then the video will be set to that size. If you do not want this, then the dropdown menu provides all other options, such as Pad/Crop or Resize.
The “Background Image” does not have to take up the entire video frame. It can be used in a similar way to the Add Logo filter or the Add Image option within Annotate. Providing the function here saves you from using separate filters if you only require a title.
A typical scenario for the use of Blank Video is for separating and introducing different videos within a timeline. To understand this more, let us look at this common case history.
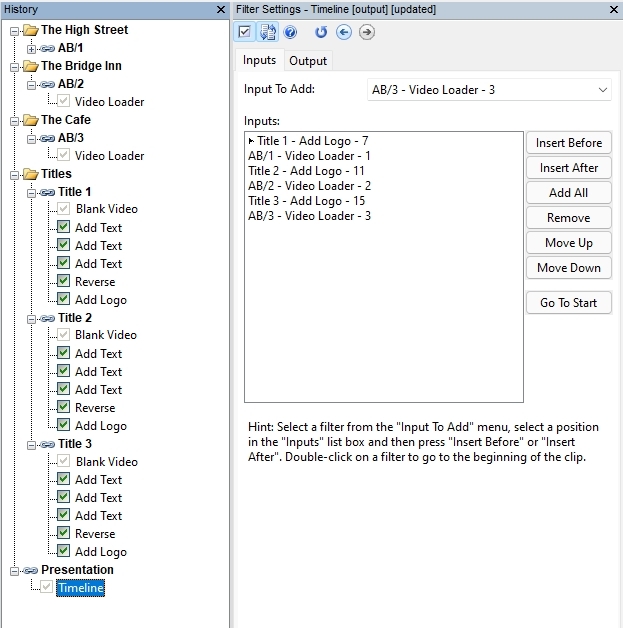
Here we have three folders, containing the video exhibits from three locations. Each folder could contain multiple chains, with any necessary filtering within those chains. We then have a folder called ‘Titles’.
Using the Blank Video filter, it is now possible to create a title to introduce each specific video. Also, using various filters, you can create some quite elaborate titles. Using Annotate for instance, these can even be animated. For this example though, we have kept things fairly simple.
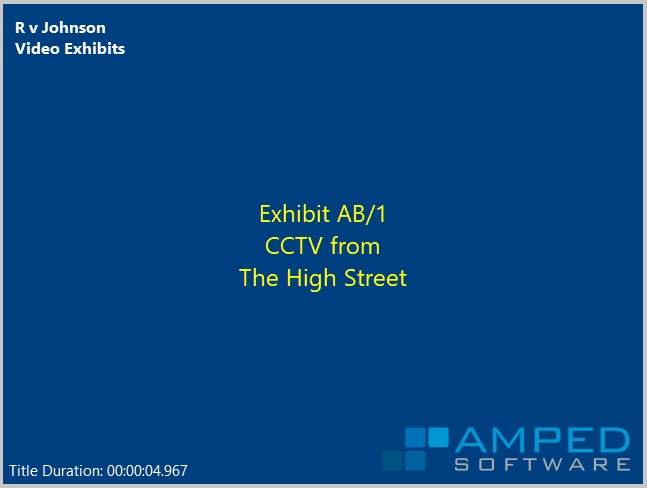
Blank Video gives us the background size, color and duration of the title. We have then added the case text (Top-Left), the title duration macro (Bottom-Left), and the exhibit text (Centre), all with Add Text filters. We have reversed the video, with the Reverse filter, so the timer becomes a countdown. Finally, we have added the logo, with Add Logo. We could have used multiple items within a single Annotate, but for the purpose here, multiple filters have been used.
As we need three titles for this case, it is easy to copy and paste the chains twice, and then only make changes to the exhibit text. No need to do it all again, copy and paste is super quick!
Finally, we can load all of the titles, and the final video exhibits, into a timeline.
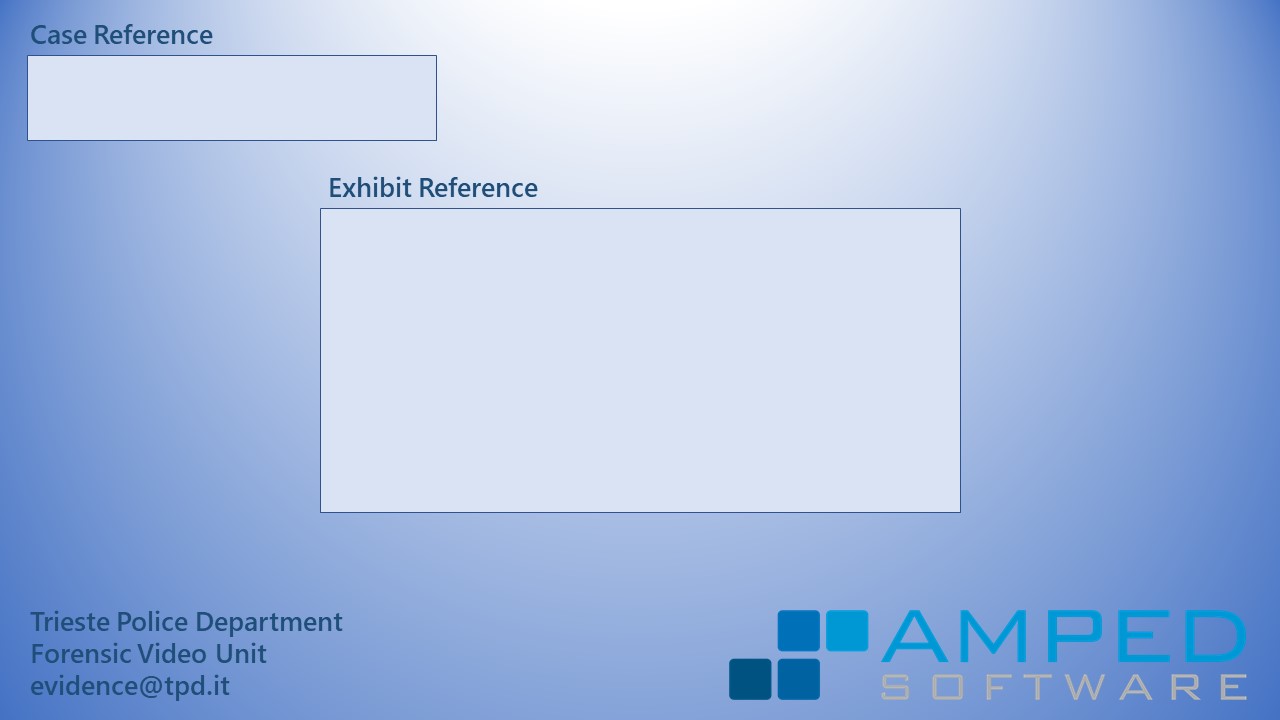
Remember, to save you even more time, it is worthwhile creating a nice template image with specific areas for the changing text, and at the size indicated by your agency or organization presentation standard.
One last thing on Blank Video. It can also be used for single frames. If an image sequence is missing frames for any reason, you can create a single frame video and drop that into the timeline to ensure correct timing is retained, or to notify the viewer that there is a missing frame at that point. Also, during the creation of image sequences with multiple different exhibits, having the ability to create some blank areas to use for annotating or with Picture in Picture is very useful.
Video Loader
Here we have some very important changes. Let us start with the new Audio tab.
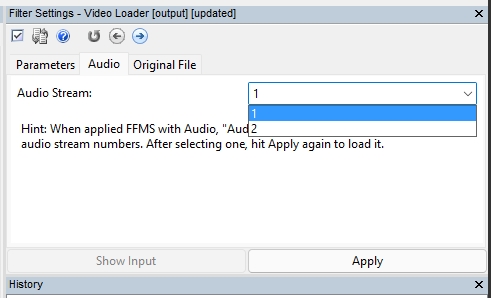
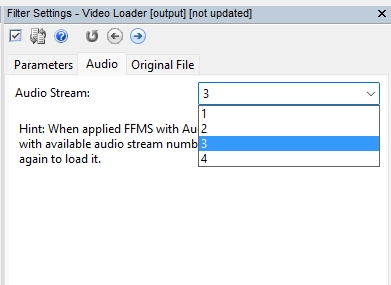
Many video files have associated audio streams and some of these have multiple streams. Some dashcams for example have a stream for the inside of the vehicle and a stream for the outside. The Audio tab allows you to select which stream you wish to decode.
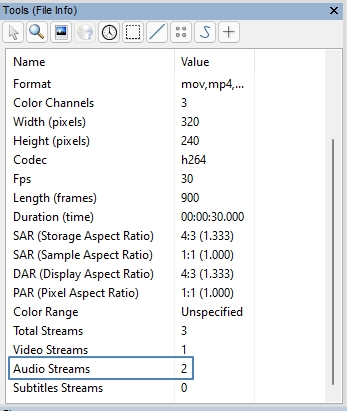
You can identify multiple streams, either by navigating to the tab and selecting the dropdown or by observing the Audio Streams component within the File Information tool.
Next, we have some changes to the “Original File” tab within Video Loader.
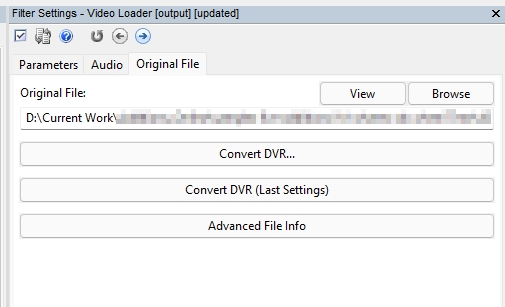
The “Original File” parameter is populated when a proprietary multimedia file cannot be directly decoded. In that instance, the user is prompted to select Convert DVR and use the Amped Conversion Engine to extract the video from the proprietary container. This results in the creation of a new file, or multiple files, depending on the data. The filename and path will be documented here.
To assist you in your analysis workflow, we have now provided direct access to Convert DVR, and also the Advanced File Info.
There may be occasions where you wish to change or compare another conversion method. For instance, you may have selected a Stream Copy into the AVI container when first prompted to use Convert DVR, but after reviewing now wish to test and compare differences between the MKV container. It is now possible to load the original file back into Convert DVR directly from this tab.
Furthermore, having direct access to the Advanced File Info is another great time saver. Very often, analysts must compare the data between the original file and the cleaned and converted, standard multimedia file. Users can now quickly load the original directly into Advanced File Info and compare that against the data of another open Advanced File Info window.
To help you navigate between Advanced File Info windows, we have made a small and connected change here. The top of the window now displays the filename.
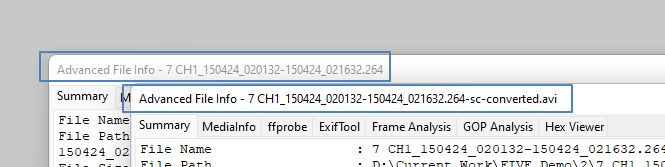
This will make it much easier when you have two or more windows open and you are comparing data.
Audio Loader
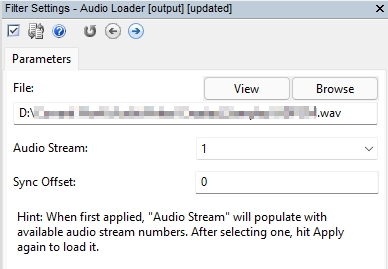
We have already seen the new Audio tab within the Video Loader, allowing you to select an associated Audio Stream, but what if you have the media as a connected file due to a system exporting their video and audio separately? Within the Load category, you can now find the Audio Loader filter.
As with all Load filters, it can be used via drag and drop, or by selecting the filter and then navigating to the audio file by using the Browse button and Windows Explorer. The audio file will be loaded into a new chain.
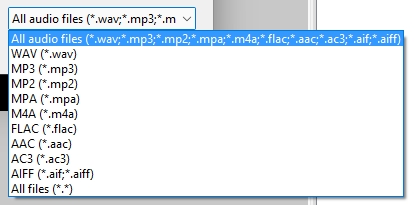
All common audio formats and codecs are supported. Even if your format is not listed, by using ‘All files (*.*)’, and then selecting your audio file, you may find that the codec is supported.
When an Audio Loader is used with a supported file, a holding image will be displayed in the Viewer window and the waveform will be visualized in the player panel.

The filter parameters allow the selection of a specific audio stream if multiple are detected. The filter also allows the manual adding of a Sync Offset. This value, in milliseconds, may be identified in a proprietary player, a video content management system, or even in the file’s metadata. If known, it can be entered immediately here.
Hint: With thousands of format and codec variations, you may find an audio file that is not immediately supported. Simply log into the support portal, upload a sample file to us, and our format wizards will get to work!
Audio Writer
It only makes sense to follow the Audio Loader with an Audio Writer. This filter, found within the Write category, allows you to write the decoded audio stream to a separate file.

The file path will automatically populate with the default project path settings, in the same way as other Write filters.
Users then have the option of which format to write. Stream copy will use the original streams codec and place this into the appropriate container for that codec. For instance, PCM-based audio will be placed into the .wav container. If WAV is selected, the output will be an uncompressed PCM-based file. If MP3 is selected, the output will be a compressed MP3-based file.
Your choice of format will be dictated by the reason for exporting.
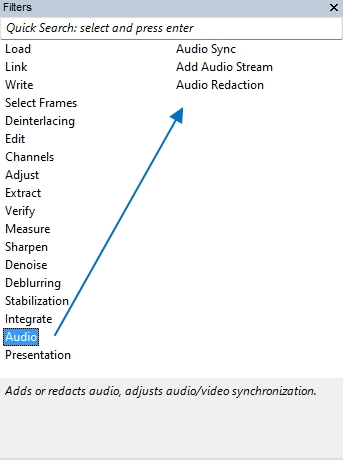
Add Audio Stream
Whereas the Audio Loader placed an audio file into a new chain, the Add Audio Stream filter will place an audio file into an existing chain. This new filter can be found within the new Audio category of filters.
If the video already has an audio stream, the presence of this filter overrides the original and replaces the audio with the new stream.
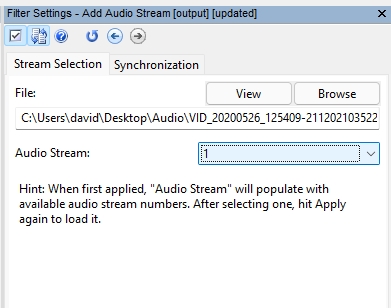
As you will see from the Filter Settings, the common ‘File’ view is presented, along with the option to select a specific stream from within the file. We then have a very important, Synchronization tab.
When dealing with video and audio, the two forms of multimedia are linked by the timing inside their original container. If those are separated, the timing links may be lost. As a consequence, it is often necessary to re-sync them again. Synchronization can be completed by entering a value, or by visually matching waveforms. Often, however, it is a mix between the two.
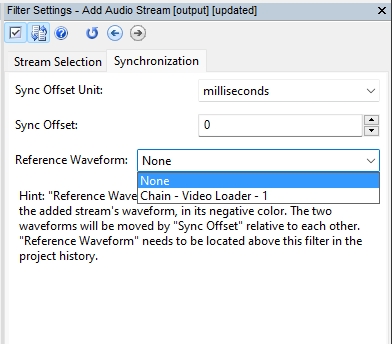
Within the Synchronization tab, you can select the required Sync Offset Unit of Frames or Milliseconds. You can move up and down the delay value either by entering a value or by using the up and down arrows. Remember, you can also click inside the value box and use your mouse scroll to move up and down.
Hint: If you scroll while holding Shift, the values will change by larger amounts.
Next, we have the Reference Waveform. You are able to select any other Chain with a decoded Audio Stream. When used, you will see two waveforms in the Player Panel.

The Reference Waveform is in blue. The newly added stream is in red.
Let us summarize before we move on. In the example above, the audio stream from the original video has been written to a new file using Audio Writer. This file has been processed using an external, audio-specific application, and then a new file was created.
This new file has been added to our chain, replacing the original audio, using the Add Audio Stream filter.
As can be easily seen from the dual waveforms, even though both are the same duration, they are not in sync. The new audio starts much earlier than the original.
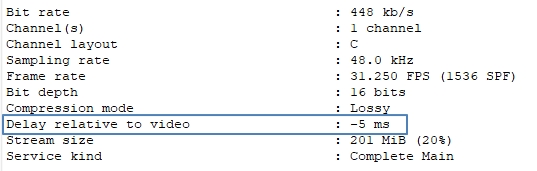
In multimedia forensics, there is always a cause to a problem. Part of the fun is finding it! In this case, we can identify it within the Frame Analysis of the original file.
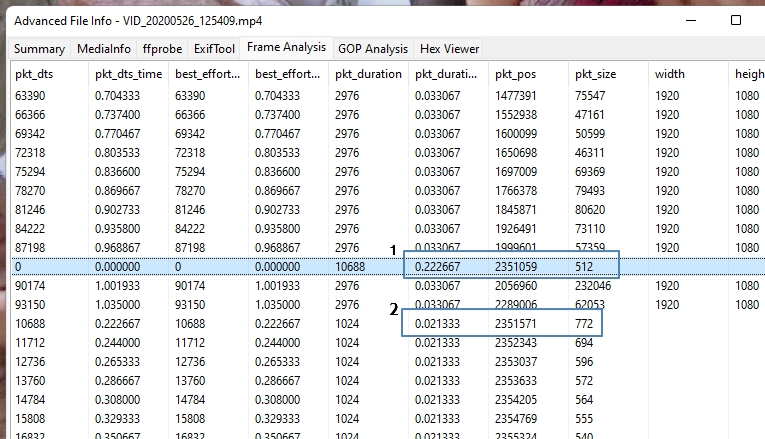
Take a look at the first audio packet, numbered 1. It has a small, 512-byte size but a large, irregular time duration, 0.222667ms.
Now compare this with the next packet, numbered 2. It has a larger data size, but a much smaller time duration, 0.021333ms.
This situation is fairly common. The first packet has no audio data inside it. When we remove the audio from the video timing, this data disappears and this causes the sync problem.
Some simple math gives a sync offset of 201ms. Entering this into the Sync Offset parameter gets our new audio synchronized again.

It is worth increasing the Envelope/Waveform height and length to do any small adjustments. You will see the new audio shifting forward and backwards dynamically. Remember the shortcuts to better visualize the audio. If you cannot remember them, no problems. Simply right-click the Audio Panel.
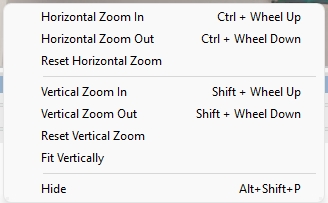
To help you even more, we have now set the Audio Panel to load the Envelope/Waveform to “Fit Vertically”, after decoding.
If you have exported the original audio using Audio Writer, and then wish to add the audio back to the same chain using Add Audio Stream, remember to de-select the Audio Writer filter from the chain.
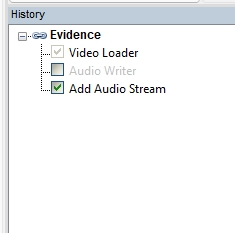
If you do not deselect, the Write filter will be the active media file, rather than the original video.
Hint: When exporting your report, change the disabled filters view to ‘Yes’.
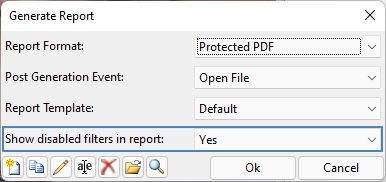
This then preserves and presents the full forensic workflow within your report, including the disabled Audio Writer filter, and all the filenames of the media created.

Audio Sync
Again found within the new Audio category, this filter solves the problem of having a file where the video and audio are out of sync within the same container. This often happens with poor export functionality from surveillance systems.
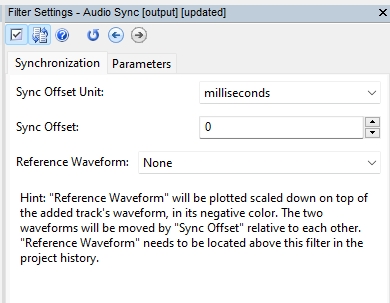
The usage is the same as the “Synchronization” tab detailed within the Add Audio Stream filter. The Reference Waveform option here is very useful. You may find that a transcoded export from a DVR/NVR has retained synchronization, but the native evidential export has not. Obviously, you should not use the transcoded file for the imagery analysis, but it can still be useful, and used to help correct the synchronization of the audio. Therefore, in the Reference Waveform dropdown, you may select the chain with the transcoded file and use that to correct the sync.
The “Parameters” tab gives you the option of color for any inserted frames.
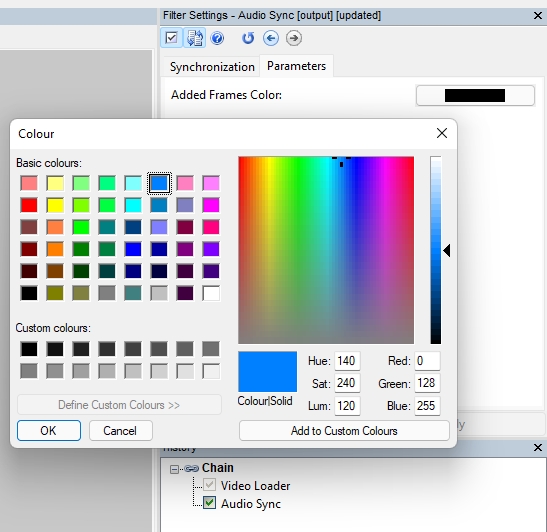
Inserted video frames are important to ensure that no audio or video is trimmed without user assessment. If you have a negative delay, the inserted frames will be at the beginning. If positive, the inserted video frames will be at the end.
Audio/Video Muxer
This next filter is what we refer to as a “linker”. It links two individual chains together in a new chain. Therefore, you can find the Audio/Video Muxer inside the Link category.
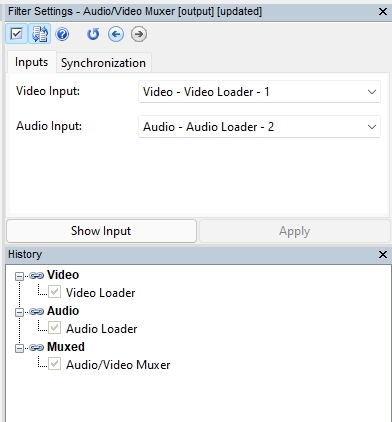
With the filter selected, two filter positions within two chains must be selected.
In the simple example above, Video Loader is selected in the first chain, and the Audio Loader in the second. However, you do not need to use an Audio Loader for the Audio Input. You may also select two video loaders, and if the second one has an audio stream, then the audio stream will be muxed with the Video Input.
A good example of the filters use is perhaps a high-quality cellphone video with no audio and a low-quality version that does have audio. Using this filter, you can place the audio with the better quality video.
As you would expect, this filter also has all the synchronization capabilities already detailed in the previous filters.
A great little trick has been built in for when you drag over a video file and an audio file with the same filename, but a different extension.
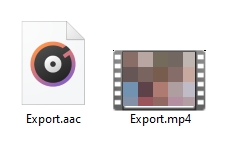
Amped FIVE will load both files into new chains and automatically apply the Audio/Video Muxer with the added loaded chains.
Audio Redaction
The Audio Redaction filter has now been moved into the new Audio Filter Category.
The functionality to add text and a countdown to the frames within the Freeze Frame filter was very well received. Therefore, we have added a similar function within Audio Redaction.
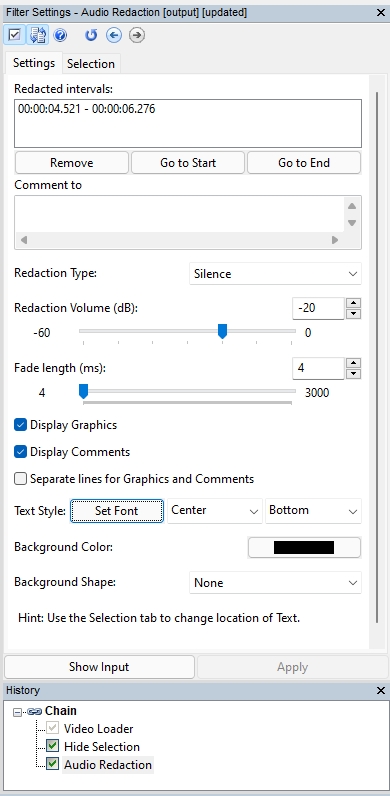
Display Graphics and Display Comments are checked on by default. After redacting an area, these are now displayed over the imagery using the font parameters specified. A “Selection” tab is available to specify a different region for the overlay if required.

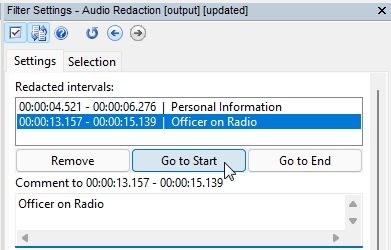
The comments can be changed for each redacted interval.

These individual comments do not have to be placed onto the imagery. Users can simply uncheck Display Comments from the filter settings and they will then only appear in the filter and any exported report.
You may also notice the Go to Start and Go to End Buttons.
These will take you to the start or the end of each selected interval.
Demultiplexer
We have introduced some very powerful changes to this commonly used filter to solve several challenges.
To start with we now have region selection.
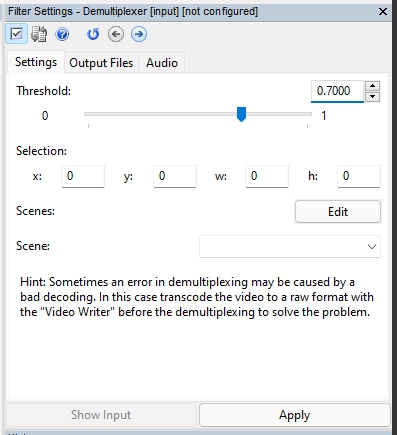
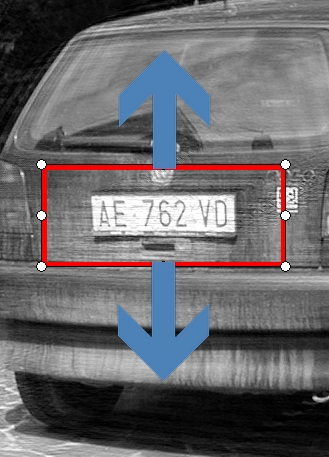
By selecting an area in the video frame, only the pixels in this area will be used to identify similarities in the camera view. Common examples are the text of a camera number, or even the barcode at the top of a digitized analog multiplex recording.
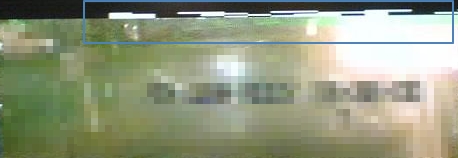
Hint: Remember that there were two main types of Multiplex Barcode; System/Camera and then a more complex one which included Date/Time. If you are going to use the barcode from an analog recording, ensure you select the portion that changes for the camera view.
In the following example, we have selected a small area, just covering the camera number on a multiplexed video, and increased the difference threshold. The result is four correctly separated camera scenes.

Using a selection makes the processing much faster and more accurate to smaller scene changes.
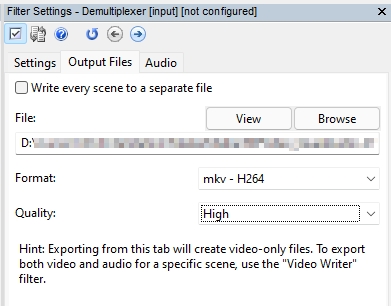
The Output Files tab allows you to write every scene to a separate file. To protect users from writing an incorrect audio stream to a video scene, this tab will only pass the video to the writer.
We have added a ‘Hint’ here to remind you of this.
Next we have a new “Audio” tab.
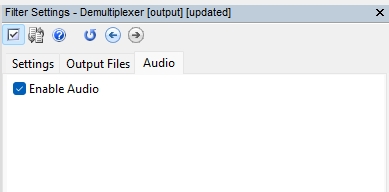
This simple checkbox then allows for audio passthrough from the Video Loader. So, if you have Audio Stream 3 linked with Camera 3, you can select the audio stream in the Video Loader and link it to your demultiplexed camera scene.
By finishing the chain with the ‘Video Writer’ filter, the demultiplexed video scene will be muxed with the selected Audio Stream, and written with the selected codec and container.
Hint: Audio Stream identification. Some systems place metadata relating to the Camera ID within their audio stream. This is great, and can really help when linking everything together. If you are dealing with multiple video files, with multiple streams of audio relating to different cameras, it is worth checking everything. How the multimedia was originally exported may affect the stream ID’s on each file. We have also seen systems where the audio cables are not in the correct audio input jack. The result of this is the audio from Camera 1 is linked to the video of Camera 2. Again, it is for this reason that we do not automatically mix audio and video scenes.
Annotate
We have added some keyboard hotkeys to assist you in your design of annotations. When adjusting a shape, you now have access to constrained adjustments using the Shift or Ctrl key.

When you select Shape for instance, if you hold Shift down whilst you click and drag your area, it will retain a square ratio.
If you then hold down the Ctrl key and move either the top, bottom, left, or right node, the shape will only change on either the vertical or horizontal axis, whichever is used.
Next, we have two new checkboxes.
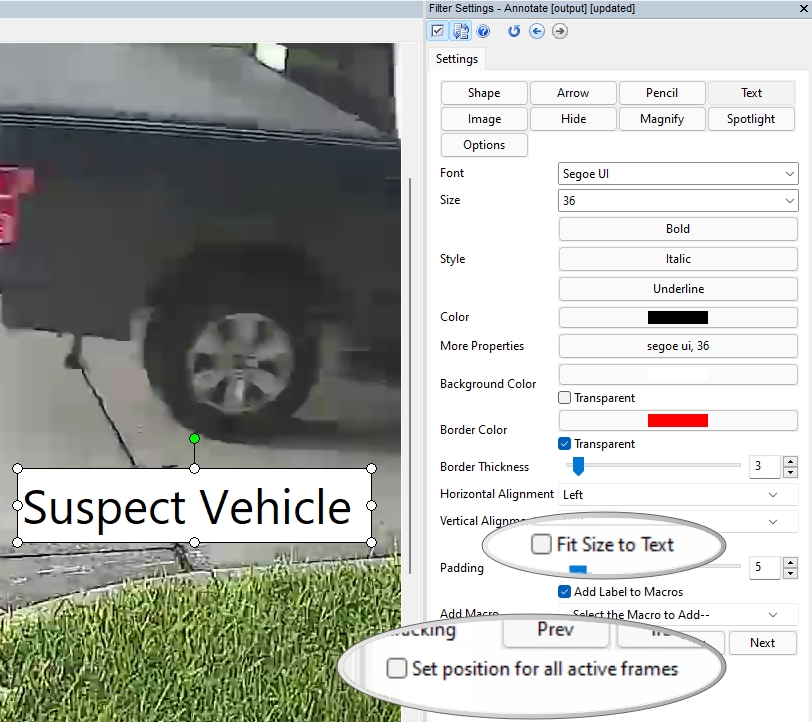
“Fit Size to Text” is a really handy switch to change your selected area to the same size as your text. When used in conjunction with the padding slider, you can quickly make your text annotations neat and tidy without having to manually adjust the shape nodes.
“Set position for all active frames” is another helpful checkbox. If you will not be using any tracking on your selected annotation, then checking this will avoid any unwanted position changes through your frame range. It is available for all annotation types.
We have also made a small change to the Text macros within Annotate. If you select the PTS Time or PTS Duration Macro, on a file that does not use a PTS to control timing, then “N/A” will appear in the presented Text box.
Player Panel
The Player Panel has many functions. Not only does it facilitate the navigation of video, but also the visual representation of the Audio Envelope/Waveform and any annotations.
We have changed how the last frame is presented in the panel to improve the playhead bar accuracy. This ensures the frame-accurate representation of the image in the viewer, the audio at that moment in time, and the annotation for that frame.
Snapshot
The Snapshot button (Ctrl+I) is such a great little tool for quickly grabbing images for use elsewhere.
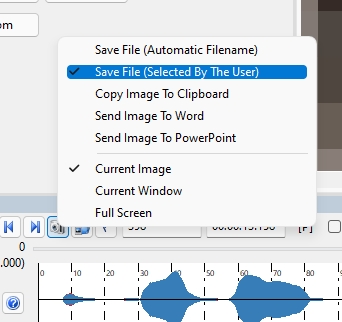
We have made a small change if you select a JPEG file as your output format. The quality of the JPEG is now linked to the quality settings configured in your Program Options.
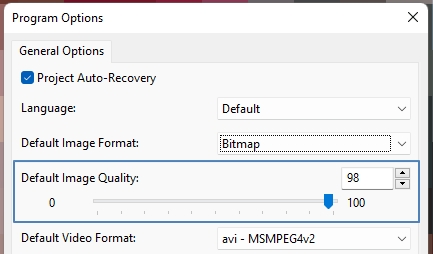
In the case above, even though the default image format is set to Bitmap, the image quality value will be used if a JPEG is selected when using Snapshot.
Report
One small final thing: If Image Writer or Sequence Writer is used, and a lossless format is selected, the quality settings will no longer be displayed in the report. Quality settings will only be displayed if lossy codecs are selected, such as JPEG.
Bugs
- Quick Search: fixed a bug to improve text handling, ensuring filters can be searched on any part of the filter name.
- Audio Redaction: fixed a visual bug which was causing redactions from another chain to appear over another chain that had been just imported by drag and drop.
- History Panel: fixed a bug which was inhibiting the loading of an assorted group video and audio files after a single drag and drop operation or after Convert DVR.
- Video Writer: fixed a bug which was causing an error while writing an MP4 file, when the source audio stream originated from a MP4-incompatible format.
- Convert DVR: fixed a bug which was inhibiting deletion .clean files when “Strip and Delete Temporary Files” was selected.
- Convert DVR: fixed a bug which was causing the last converted filename to be proposed as default in the dialog every time, even after program restart.
Don’t Delay – Update Today
If you have an active support plan you can update straight away by going into the menu About > Check for Updates within Amped FIVE. If you need to renew your SMS plan, please contact us or one of our authorized partners. And remember that you can always manage your license and requests from the customer support portal.
Happy Holidays from the Amped Team!


