
Today we’d like to start with a huge THANKS to all you, loyal followers of the Amped Replay: How Do I Do This? tutorial series! We started nothing less than 25 weeks ago, and now it’s coming to an end. This post wraps up and concludes the Amped Replay tutorial series. We’ll briefly walk through a complete video processing workflow. You’ll see how Amped Replay helps investigators stick to a forensically sound and lean process. Keep reading!
Just follow Amped Replay‘s top bar! Import your video, Play it and pick up the relevant frames, Enhance them where needed, Annotate the resulting footage, and Export it to get the output video and a report!

Let’s walk step by step through the most common issues you may face working on a case. As we move on with the story, you’ll find links to dedicated articles for each step.
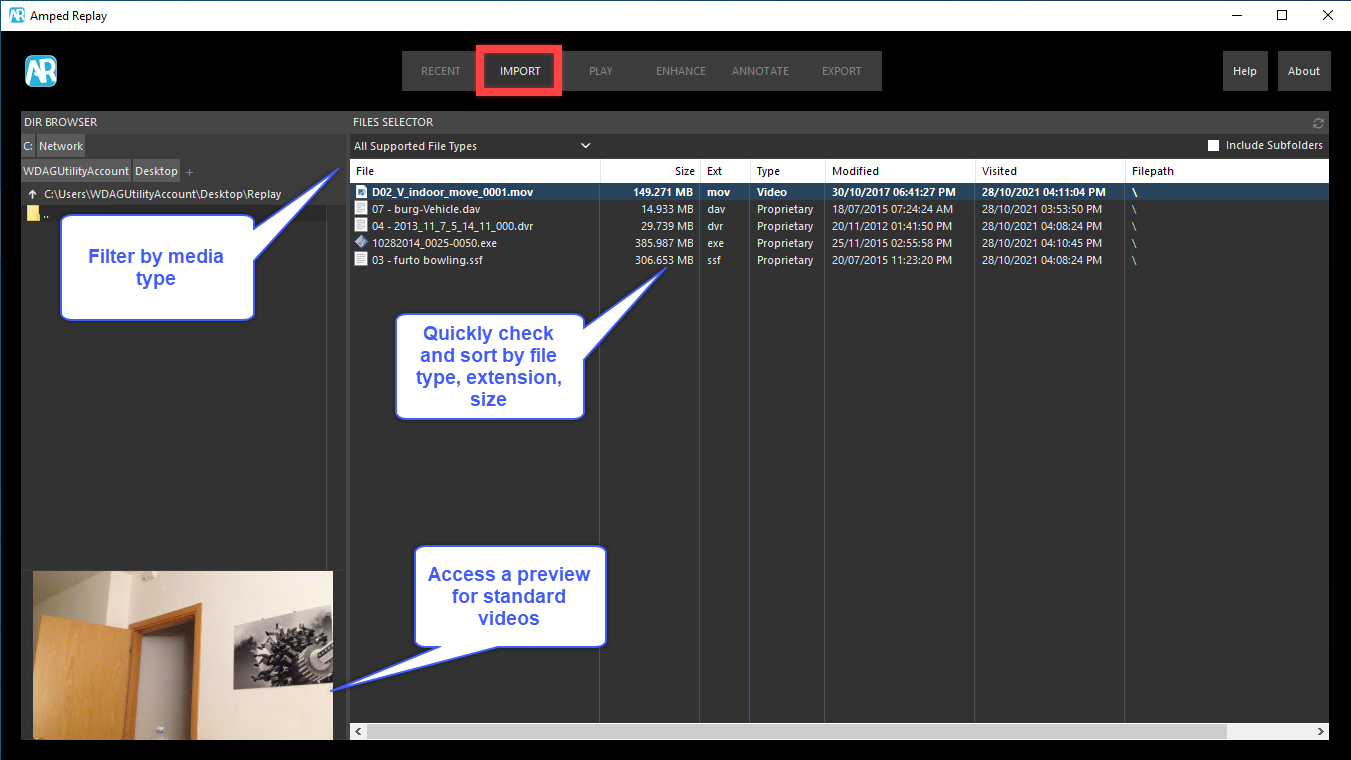
First and foremost, you’ll probably need to find the CCTV recordings on a storage device. Once you’ve located them, you’ll need to play videos, including those in proprietary formats that wouldn’t be reproduced by standard consumer players. You may also need to convert unplayable DVR videos to standard videos that anyone can see while keeping the best possible quality.
Now that Replay has loaded and automatically converted the footage, you’ll probably want to view and show the date and time of the recording (timestamps). This helps both put events in a context and perhaps tune the playback speed so that it reflects the real flow of the events. After a first review, you may need to bookmark relevant stills and comment on them, or perhaps isolate and export a range of frames out of a very long recording. Most of the mentioned actions are accessible from the Play tab of Replay (showing timestamps over frames requires using the Text tool, from the Annotate tab).

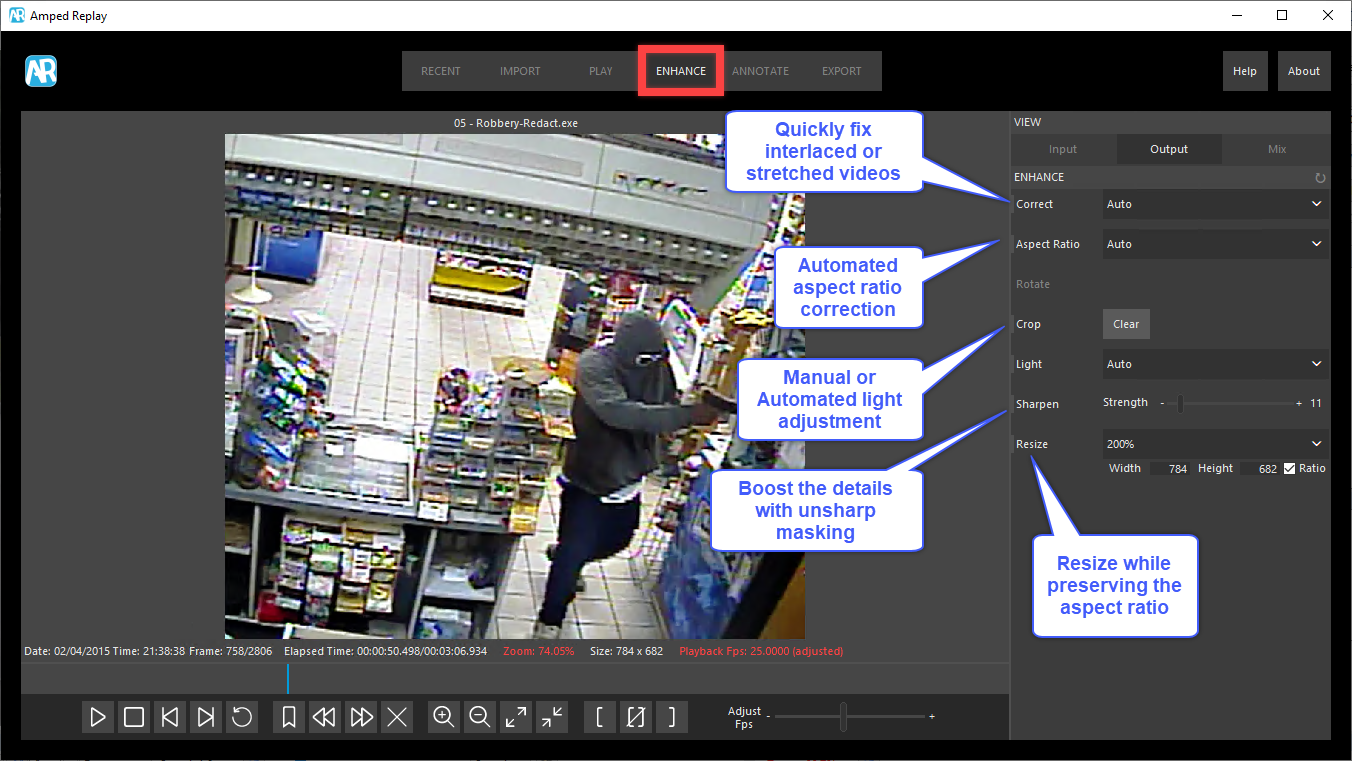
And then comes the need to fix the most common video artifacts and issues. We may need to correct the jagged-lines effect due to video interlacing, fix a video that appears stretched, or simply bring a surveillance video to the correct aspect ratio. Just activate the Correct and Aspect Ratio filters, and Replay will typically fix these issues automatically for you. Now that you’re looking at the correct pixels, you may want to crop or rotate the video, improve the brightness and contrast (you can often see in the dark!), enhance the details, and enlarge (or, more generally, resize) frames so as to view better the elements of interest and produce a decently-sized video.
Once the enhancement is completed, it’s time for annotating! With Amped Replay you can quickly add shapes, arrows, text, add an image or logo, redact sensitive regions by pixelating or blurring them, magnify a suspect… and all of this can be done while tracking moving objects or subjects.
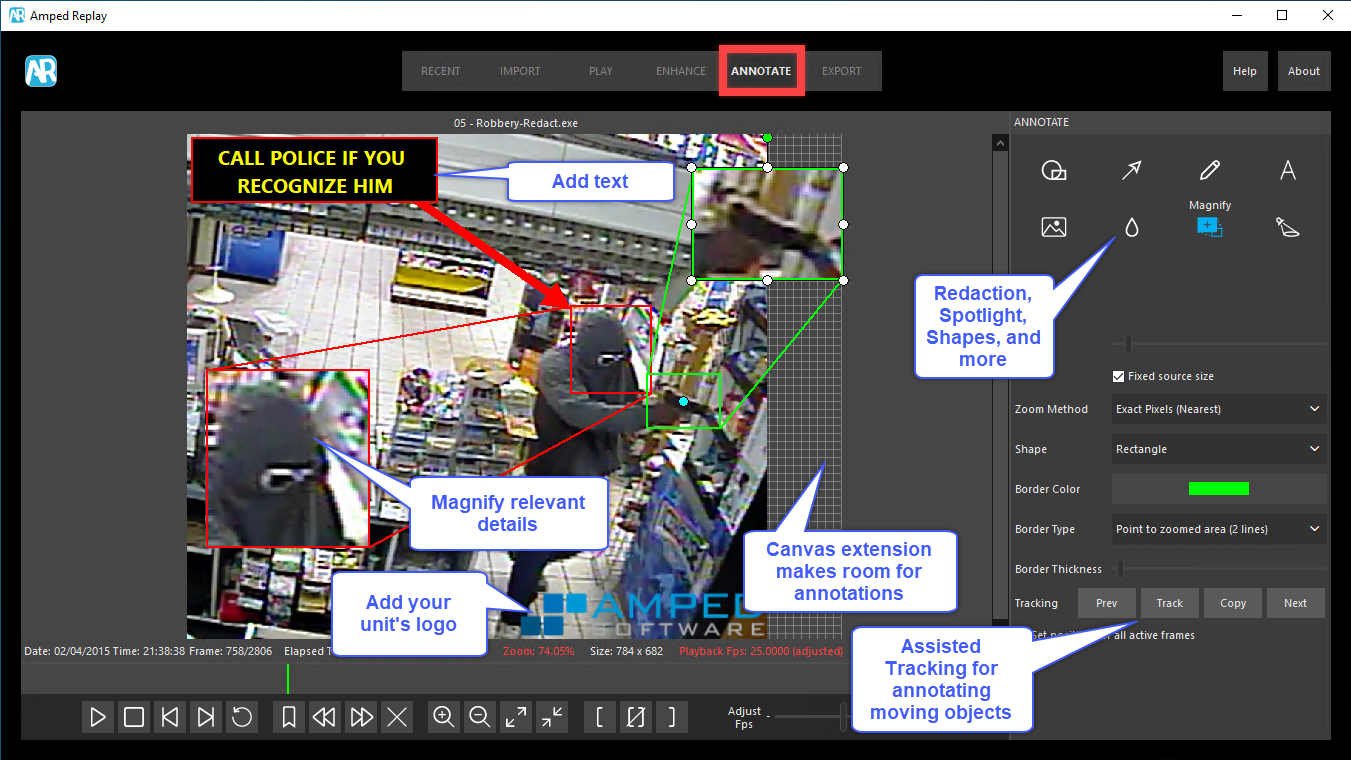
You can learn more about how to Annotate with Amped Replay from our YouTube channel. A few of our tutorials are dedicated to annotations, including features often very used for video redaction!
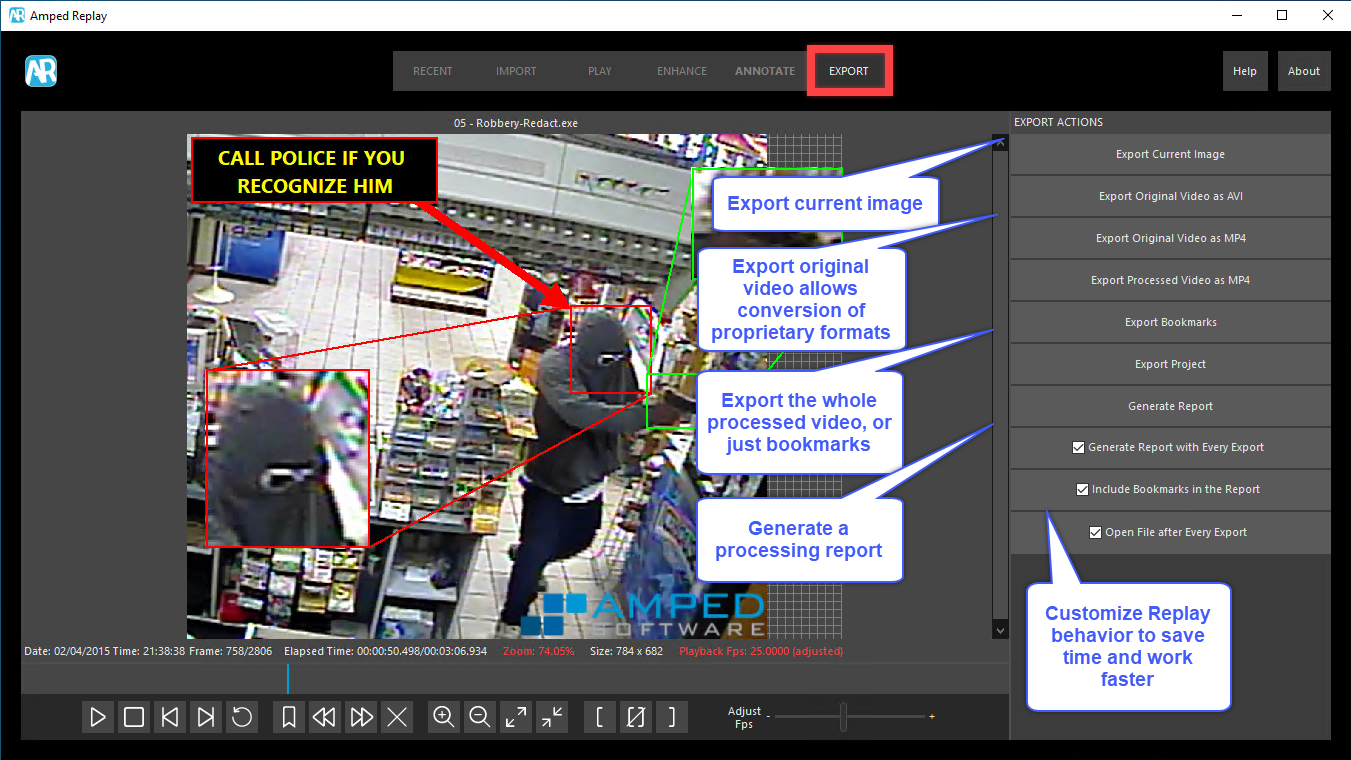
Finally, you can save the currently displayed image or export the processed video, and eventually, generate a forensic report that contains all the needed information to protect you and document your work.
And that’s all, folks! Why would you risk combining together different pieces of expensive software, or mess around looking for a potentially malicious proprietary player, when you can reliably convert, playback, enhance, annotate and export all within a single and user-friendly tool? Look again here above: it’s just amazing to see how Amped Replay guides you step by step through the whole process.
We really hope you’ve found the Amped Replay Tutorials: How do I do this? series interesting and useful! As a last treat, here’s the list of posts of the series in chronological order:
- Introducing the new “Amped Replay Tutorials: How do I do this?” Blog Post Series!
- How Can I Play an Unplayable Video From a CCTV Surveillance System?
- How Can I Find Which Are CCTV Video Files on a USB Drive?
- How Can I Convert an Unplayable Video from CCTV whilst keeping the Best Quality?
- How Can I View and Show the Date and Time of a CCTV Video File?
- How Can I Trim a Small Part of a Large Video Without Losing Quality?
- How Do I Adjust the Playback Speed of a Video?
- How Do I Play a Video Frame-by-Frame and Comment Relevant Stills?
- How Do I Correct a Jaggy (Interlaced) Video?
- How Can I Correct a Stretched Video That Has Half of the Lines?
- How Do I Fix the Aspect Ratio of a Video and Avoid Objects Being Stretched?
- How Can I Rotate a Video or Image in Amped Replay?
- How Can I Crop a Video or Image in Amped Replay?
- How Can I Improve Contrast and Brightness of a Video in Amped Replay?
- How Can I Improve the Details of a Video in Amped Replay?
- How Do I Resize the Frames of a Video and Zoom with Amped Replay?
- How Can I Add Shapes, Arrows, and Text to a Video With Amped Replay?
- How Can I Add an Image or Logo to a Surveillance Video in Amped Replay?
- How Can I Redact (Blur or Pixelate) a Video With Amped Replay?
- How Can I Magnify or Spotlight a Detail of the Video With Amped Replay?
- How Can I Zoom, Blur, or Spotlight a Moving Object in Amped Replay?
- How Do I Save the Current Image in Amped Replay?
- How Can I Export a Processed Video in Amped Replay?
- How Do I Generate a Report of My Work With Amped Replay?
We’ll soon be starting a new weekly appointment on our blog, so stay tuned! You can also follow us on LinkedIn, YouTube, Twitter, and Facebook. We’ll post a link to every new article so you won’t miss any!


