
Welcome dear friends, here we are with one more post of the How Do I Do This? series. Today we’ll show the “how to generate a report” functionality available in Amped Replay. As usual with Replay, it’s all very easy but also rich. So read below to learn how to do it and what you can get with just two clicks.
In Amped Replay, go to the Export tab and choose Generate Report to save a snapshot report of your work so far. When you export an image or video, a report is also generated automatically by default.
There are many differences between video forensic software and “general consumer” programs, one of these includes reporting functionalities. The wide majority of actions you take during your video analysis must go to a report to allow reproducibility, documentability. Also, to help you remember what you did (and, possibly, why).
For this reason, good software for forensic video analysis must always include some important information in every report, such as:
- The software name and version;
- The date of the report generation (very important to place your analysis in the time context of the investigation);
- A case identification code;
- The name of the analyst;
- A textual explanation of what was done/found;
- A full and detailed list of how the input data has been processed, either directly by the user or by some automated feature.
Points 1. and 2. are automatically handled by Replay’s report generation code, so you don’t have to worry at all.
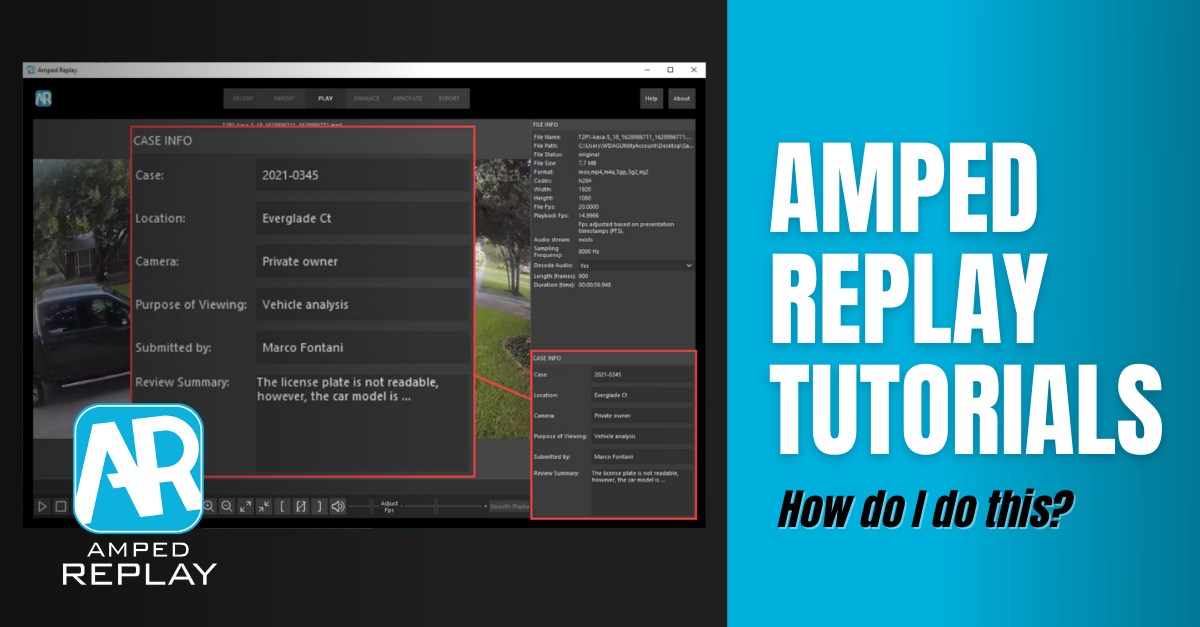
As to points 3. to 5., Amped Replay addresses all of them in a very friendly way. Whenever you load a file, straight from the Play tab you’re presented the Case Info panel, where you can enter textual data that will automatically be saved. You don’t have to fill all the fields, just use those that fit your unit’s standard operating procedures.

All the Case Information data you provide are printed at the beginning of Amped Replay reports, after the Software Information section and the input File Information section.
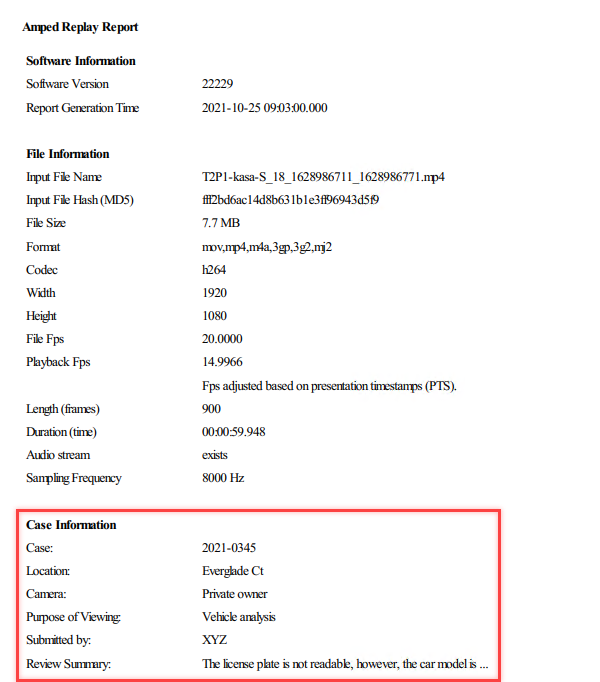
As you may have noted, in the File Information section above we have two Fps values, File Fps and Playback Fps. This indicates that Replay automatically adjusted the playback speed, lowering it down from 20 fps to (roughly) 15 fps, using information from the presentation timestamps (PTS). This decision, although automated, is reported both in the GUI and in the report. Here’s a good example of how Replay combines ease of use and forensic soundness.
Now, let’s turn to the enhancement part. We want to understand whether there are one or two subjects sitting in the front row. We locate a preferred frame to work on and apply some enhancement filters (you can find a dedicated blog post for each of them in this list), reaching this result.
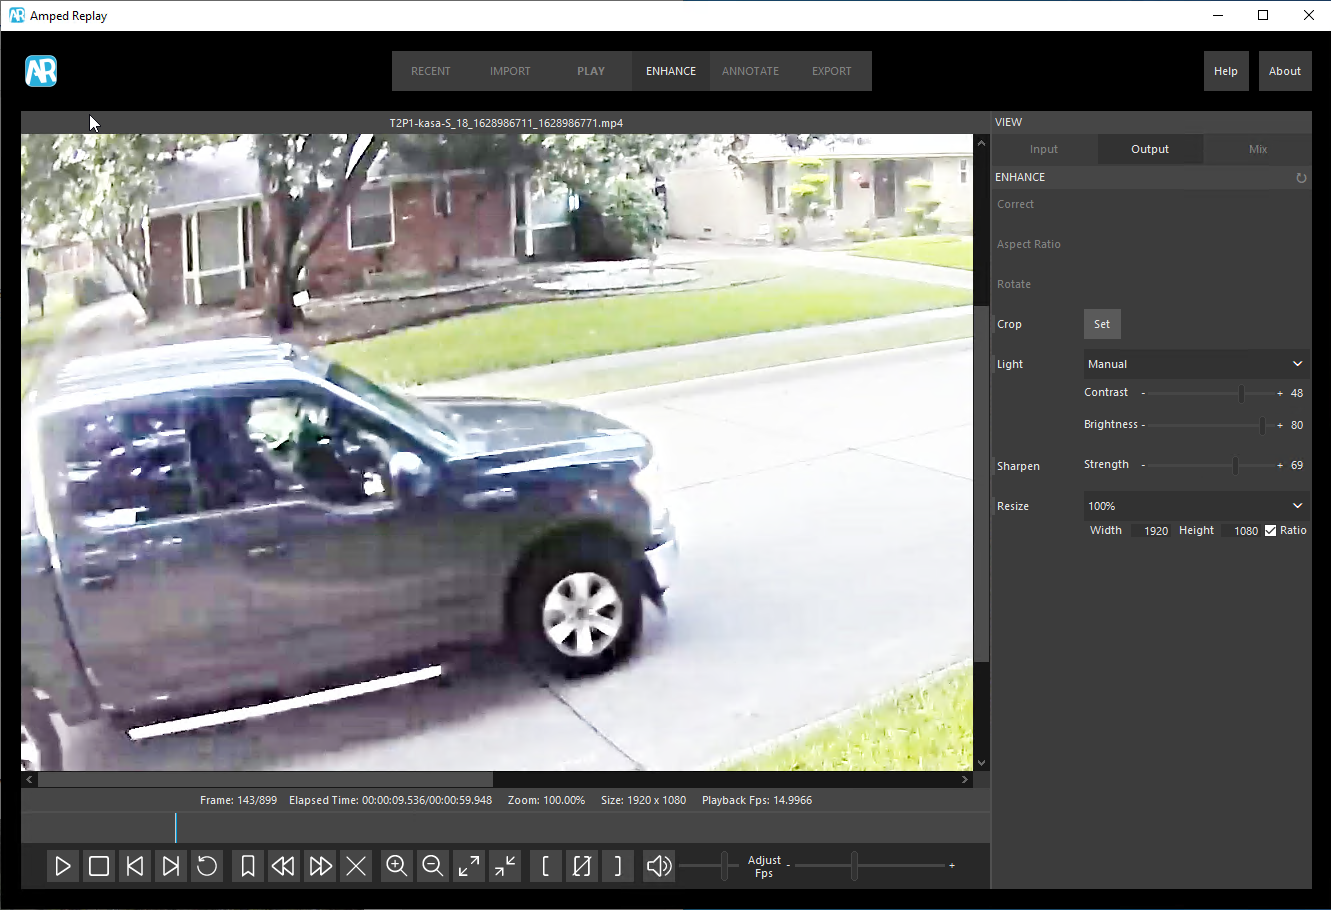
Although it’s not crystal-clear, apparently there’s just one subject in the front row. So we can click twice on the bookmark button and add a comment.

We can then optionally add some annotations, and then we’re ready to export what we’ve done. Now, there are essentially two ways of generating a report in Amped Replay. Both of them are available in the Export tab:
- By explicitly clicking on the Generate Report button (red box below)
- By exporting a still image, a video, or the currently selected bookmarks, while Generate Report with Every Export is enabled (green box)
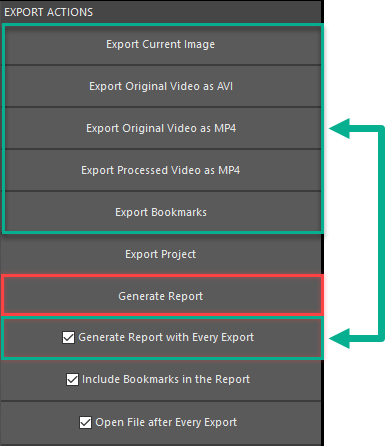
The main difference is that Generate Report can be used even without generating any output. That doesn’t mean though that the report will not contain visual content. You will still have the first and last frames of the input and processed videos reported. You will also have the first and last frame of what “would be” the output video, plus all the bookmarks with their comments. Below you’ll find an example. Notice that since we selected a range of frames, the first and last frames of the “output video” are the first and last frames of the range, as expected.
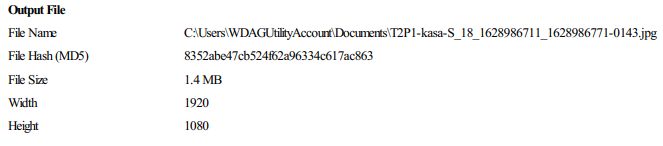
Instead, when you generate a report as a “consequence” of a file export, you’ll get something very similar to the above. But the report will also contain details about the generated files. Let’s say we use Export Current Image to save frame 143 to a file. If Generate Report with Every Export is enabled (as it is, by default), we’ll get a report that’s in all similar to the one shown above. But it contains also this section about the generated file:
The section is even richer if you exported a video instead of an image.
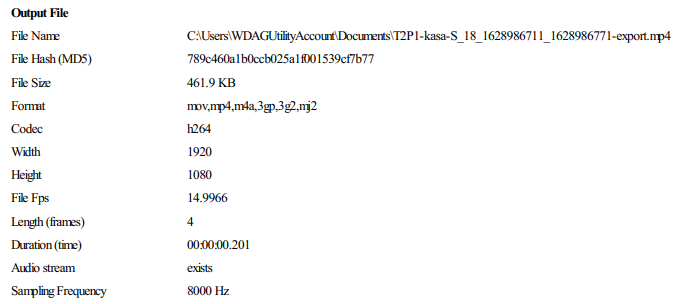
It is very important to provide details and the hash code of the produced media. So as to facilitate integrity verification at a later stage. Also to make it easy to compare the main properties of the input and output files. For example, the output’s File Fps is now (roughly) 15, since we’ve used Export Processed Video as MP4, and so the adjusted playback was employed. As you can see, the default hash algorithm is MD5. You can customize it by editing the admin-settings.ini file, as explained in a previous post.
That’s all for today! We hope you’ve found this issue of the “Amped Replay Tutorials: How do I do this?” series interesting and useful! Stay tuned and don’t miss the next ones. You can also follow us on LinkedIn, YouTube, Twitter, and Facebook: we’ll post a link to every new tutorial so you won’t miss any!


