
Dear friends, welcome to this week’s appointment with the How Do I Do This? series! Today we’ll be showing how you can export a processed video with Amped Replay. It’s very easy to do, but we want to share some extra tips, so keep reading!
In Amped Replay, go to the Export tab and click on Export Processed Video as MP4. Done!
Before we start, let me make a brief recap of the video exporting options we’ve already discussed in the past. To help you with the fact that surveillance videos are almost always stored in a proprietary format that won’t play in standard consumer players, Amped Replay allows not only to view unplayable video files but also to convert unplayable files to standard videos that anyone can see. As explained in the linked post, conversion involved using the Export Original Video as AVI (for better pixel fidelity) and Export Original Video as MP4 (for better compatibility) buttons in the Export panel.
Using Replay’s conversion is better than surfing the web looking for the correct proprietary player. Doing so hides many and many pitfalls. You may be downloading some malware, spyware, or trojan when you pick executables and DLLs from third-party sites. On top of that, many proprietary players won’t playback the video correctly 🤦♂️!
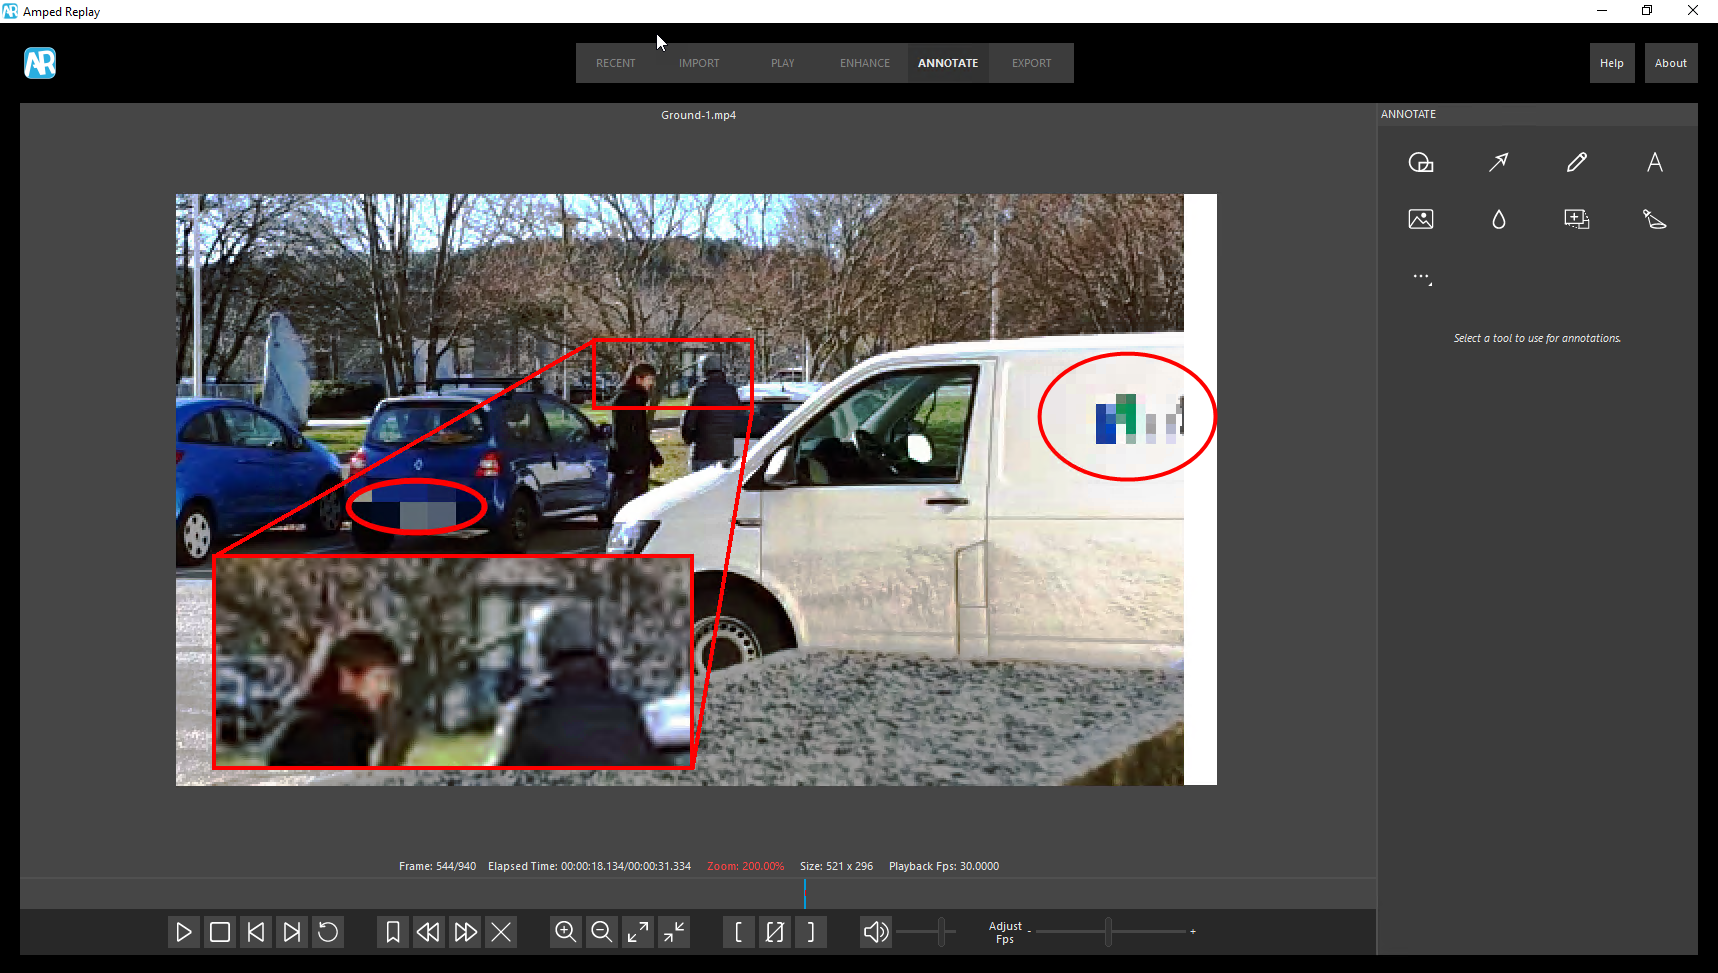
Okay, all of the above was about viewing and converting the original video. Today, we’re facing a different task. We have worked on a video, perhaps we’ve applied some enhancements and annotations. Now we want to save the result.
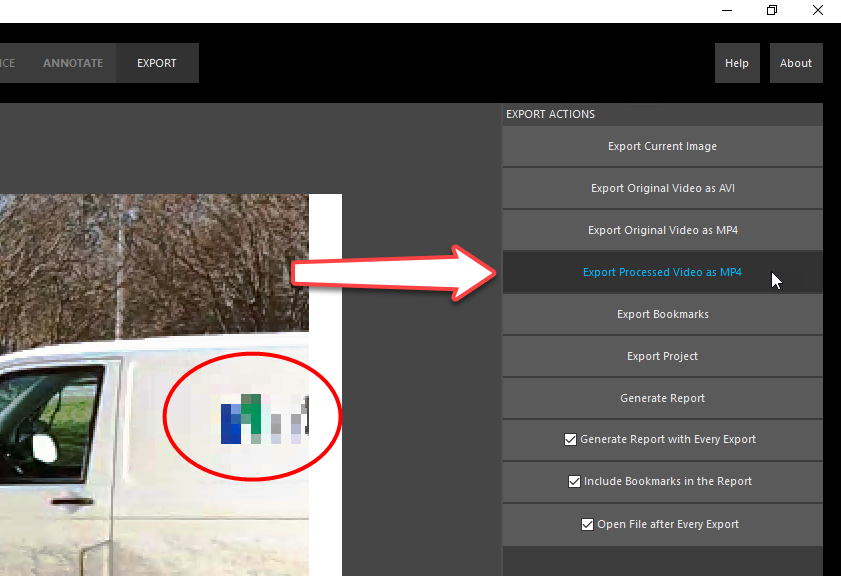
Without much fantasy, we need to move to the Export tab and click on the Export Processed Video as MP4 button. You will be prompted where you want to save the file (the default location is your Documents folder).
Generating an Export Report
Notice that you have some checkboxes below the buttons. Generate Report with Every Export (active by default) will make sure that Replay creates a detailed, forensic PDF report of your work, as shown below.
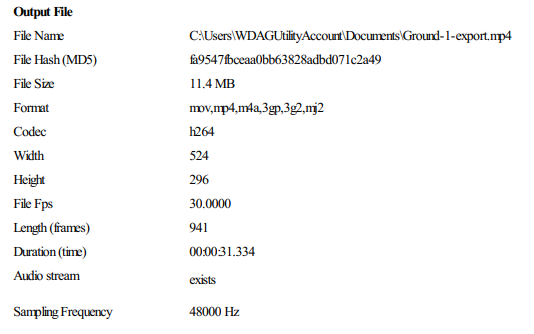
Notice that the report also includes information about the output file, including its hash value. You can customize the hashing algorithm as explained at the bottom of this post.
Open file after every export, instead, will just load the exported video in your system’s default video player.
Changes to Playback Speed
There are cases in which Export Processed Video as MP4 is the best option even when you did NOT apply any enhancement or annotation to the video. How is that possible? It’s all about playback speed. We have explained on this blog that playing back a video at the correct Fps (Frame per second) speed is very important. And we’ve shown how you can customize the speed manually in Amped Replay. But Replay may also be adjusting the playback speed automatically, either based on date/time timestamps or on the container’s presentation timestamps (PTS). When this happens, you get notified straight in the Play panel:

In the example above, the correct speed is HALF the speed reported in the file container! Now, if you want such Fps adjustment to be present in your exported video (regardless of its manual or automatic setting), you have to use Export Processed Video as MP4. If you would use one of the Export Original Video options, you would get the file at the original speed indicated in File Fps. All in all, changing the playback speed is a processing step!
That’s all for today! We hope you’ve found this issue of the “Amped Replay Tutorials: How do I do this?” series interesting and useful! Stay tuned and don’t miss the next ones. You can also follow us on LinkedIn, YouTube, Twitter, and Facebook: we’ll post a link to every new tutorial so you won’t miss any!


