

Dear friends, welcome back! If you’ve been following the “Amped Replay Tutorials: How do I do this?” series for a while, then you already know the power of Amped Replay’s annotations. There have been step-by-step guides on how you can add shapes, arrows, and text to a video, how you can add an image or logo, how you can redact (blur or pixelate) someone or something, and how you can magnify or spotlight a detail of interest. However, in every post we always dealt with static objects or with still images, promising that another post would have come entirely dedicated to how you can track all annotations so that they follow an object (or an arbitrary path) on the video. Today, we’re keeping the promise and explain how to zoom, blur or spotlight a moving object!
In Amped Replay, you can use Manual tracking (drag the annotation while the video plays), Assisted Tracking (activate it from the right panel), or Keyframing (press the “U” key to toggle a ketframe).
Let’s start by saying that Amped Replay, the forensic video player for everyday policing, provides not one but three ways of tracking annotations:
- Manual tracking
- Software-assisted tracking
- Keyframing
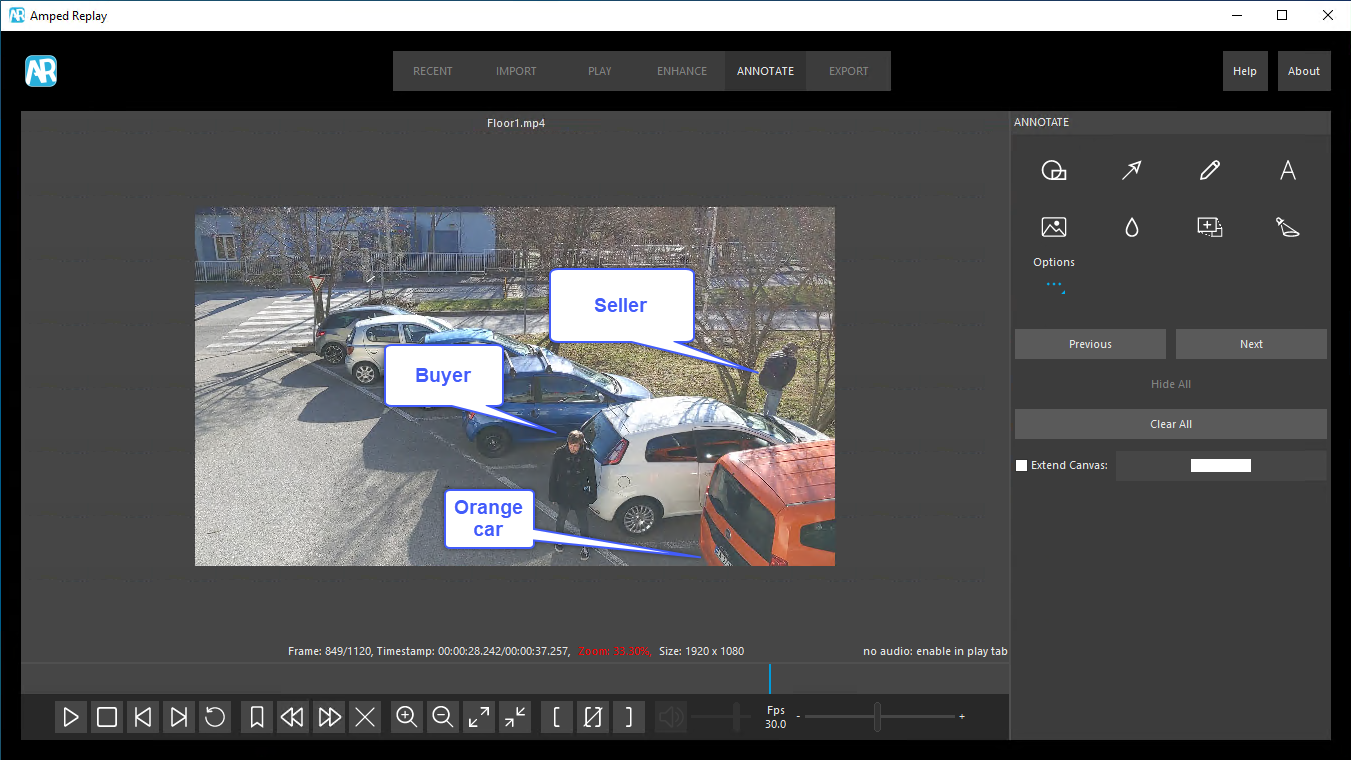
Before giving a quick description of how to use each of them, let’s get an example to work with. We have this video of a possible drug dealing (it’s a toy sample, of course). We want to do three things:
- Magnify the face of the seller (the guy with sunglasses)
- Pixelate the face of the buyer
- Pixelate the license plate of the orange car that appears at the bottom right, towards the end of the video.
Ready? Let’s go!
Manual Tracking
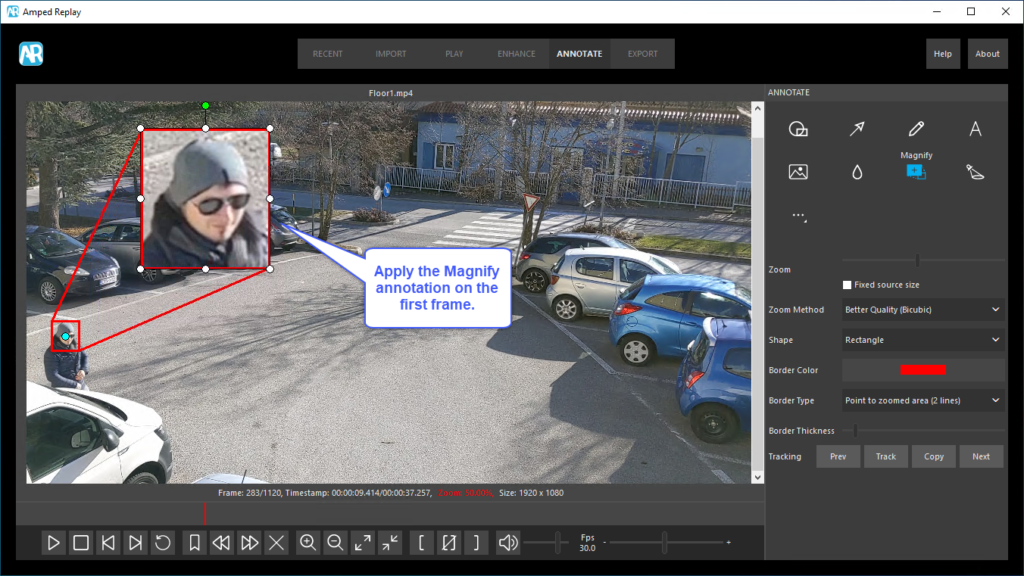
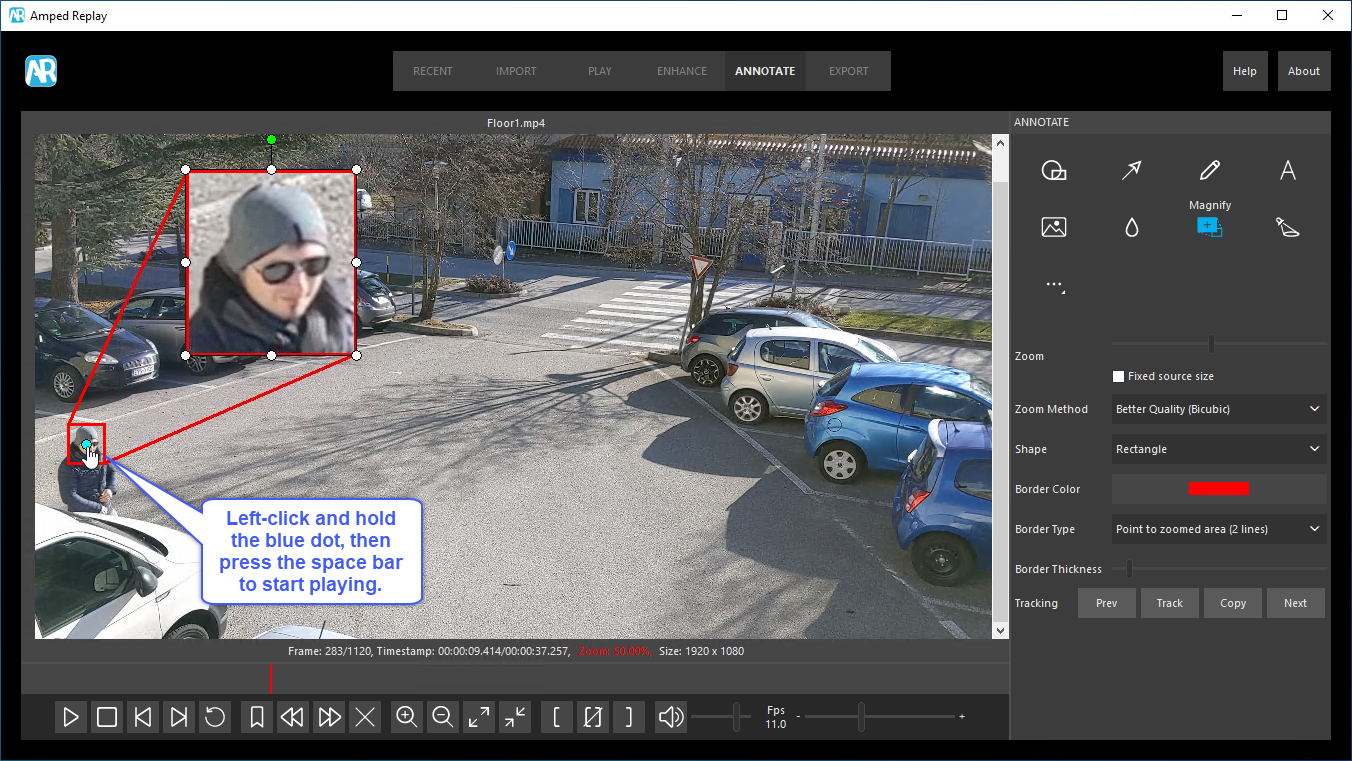
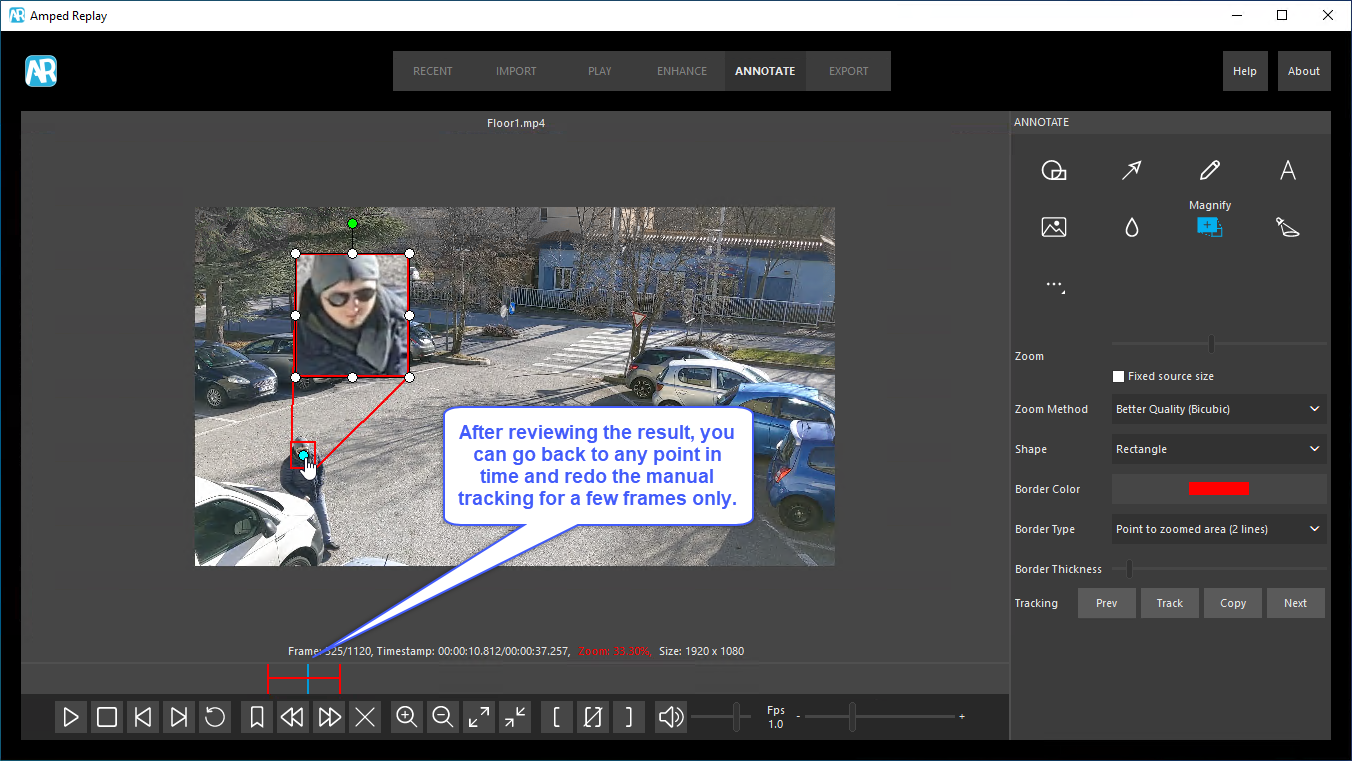
Manual tracking allows you to simply select an annotation and dragging it while the video plays. By doing so, you’re letting Replay record the position of the annotation in every frame.
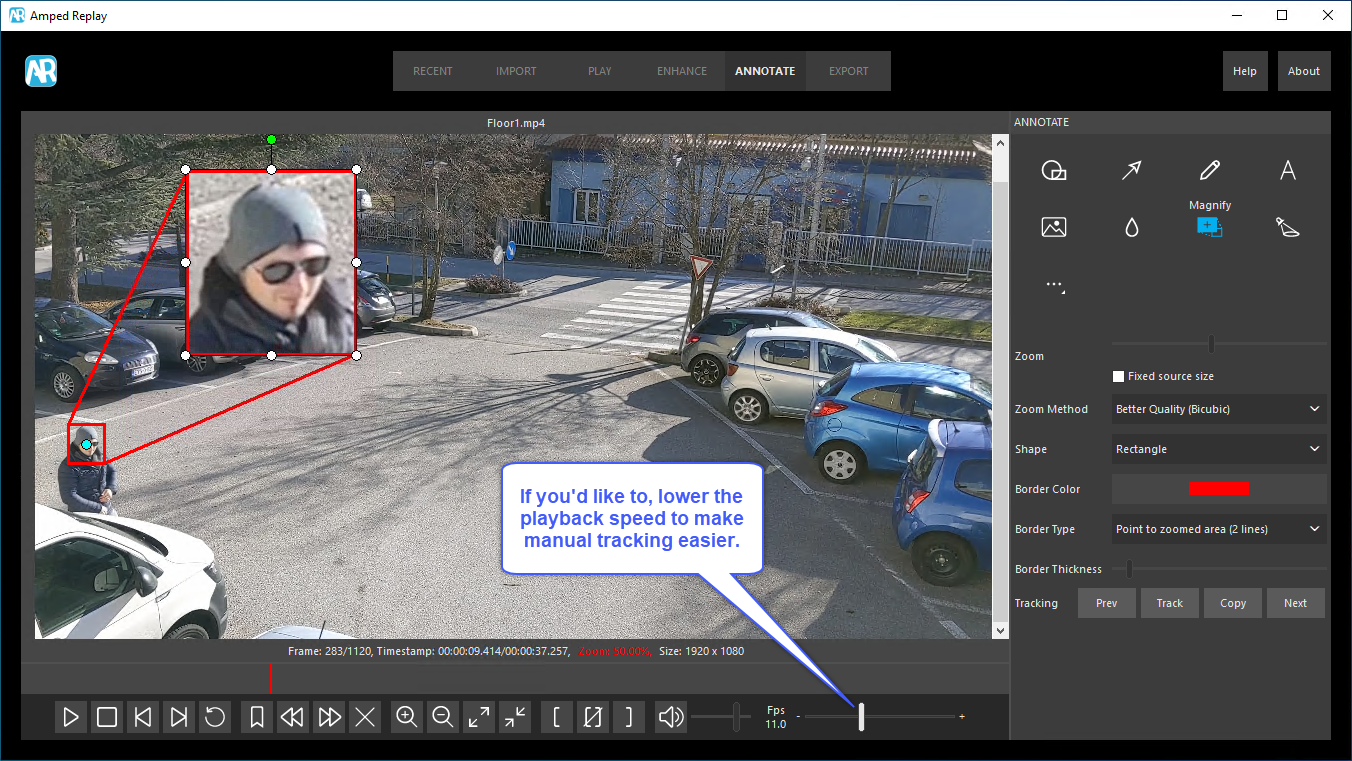
If the object is moving quickly, it may be hard for you to follow it while the video plays at its natural speed. In such a case, you can slow down the playback speed as much as you like. After you’ve finished tracking, you can restore it to the original value (just double click on the text next to the fps slider). Let’s use this tracking mode for zooming on the face of the seller, with this step-by-step guide:


Manual tracking can be considered the backup choice when the other two tracking modes do not work for you. Also, compared to software-assisted tracking, it’s typically faster to apply since the computer does not compute much, you’re doing the tracking.
If you want more details and some examples, take a look at this blog post entirely dedicated to manual tracking!
Software-assisted Tracking
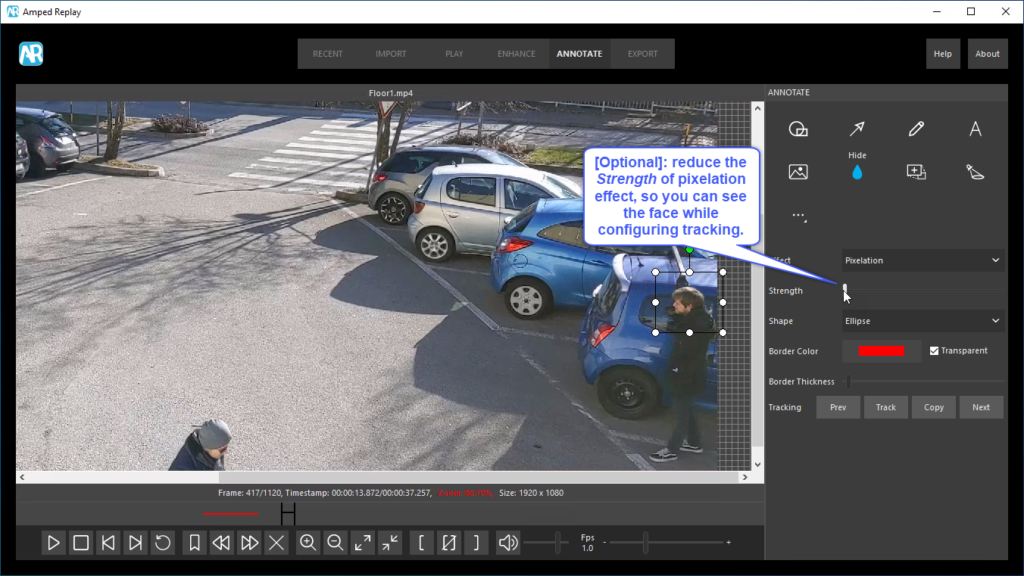
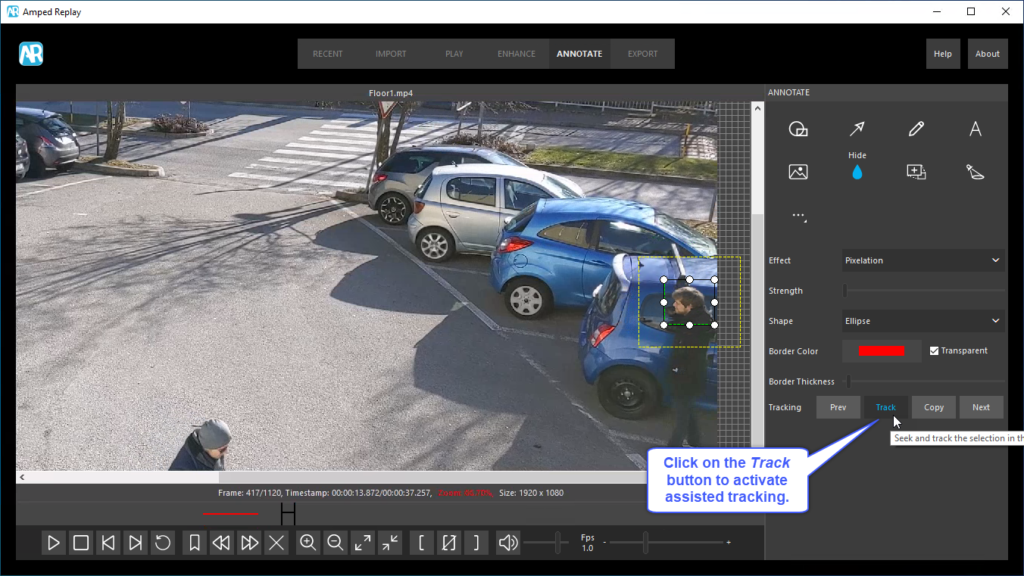
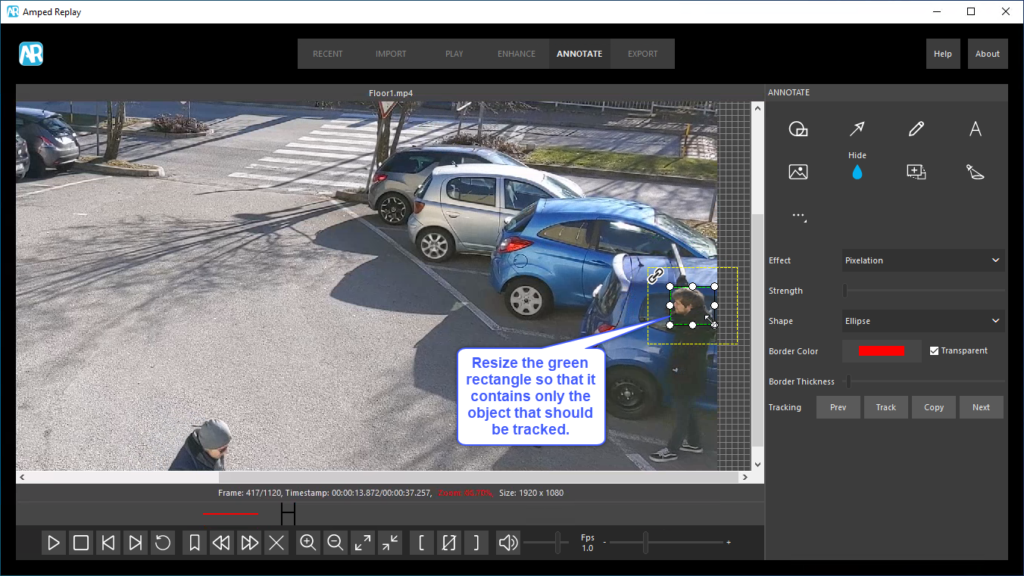
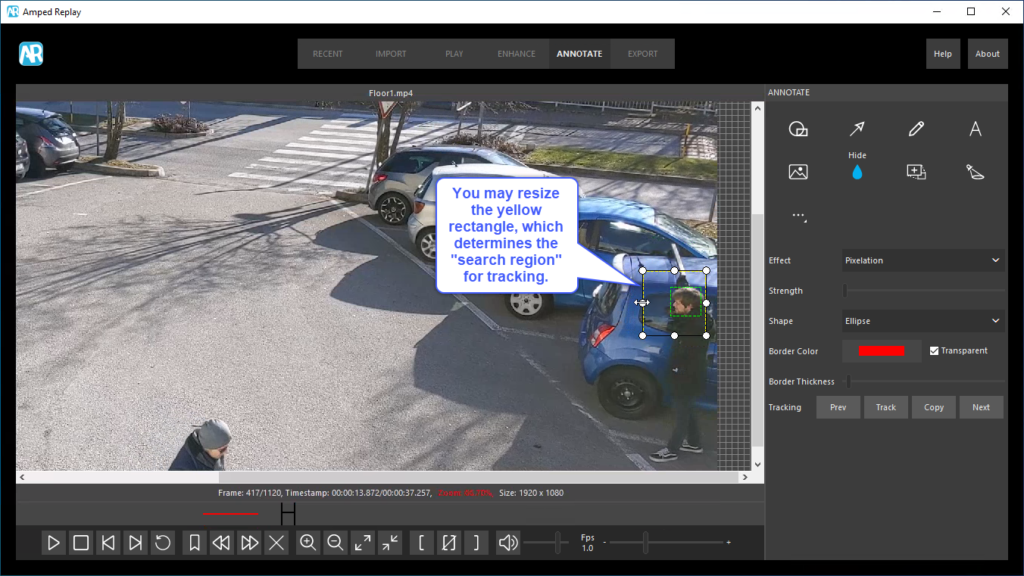
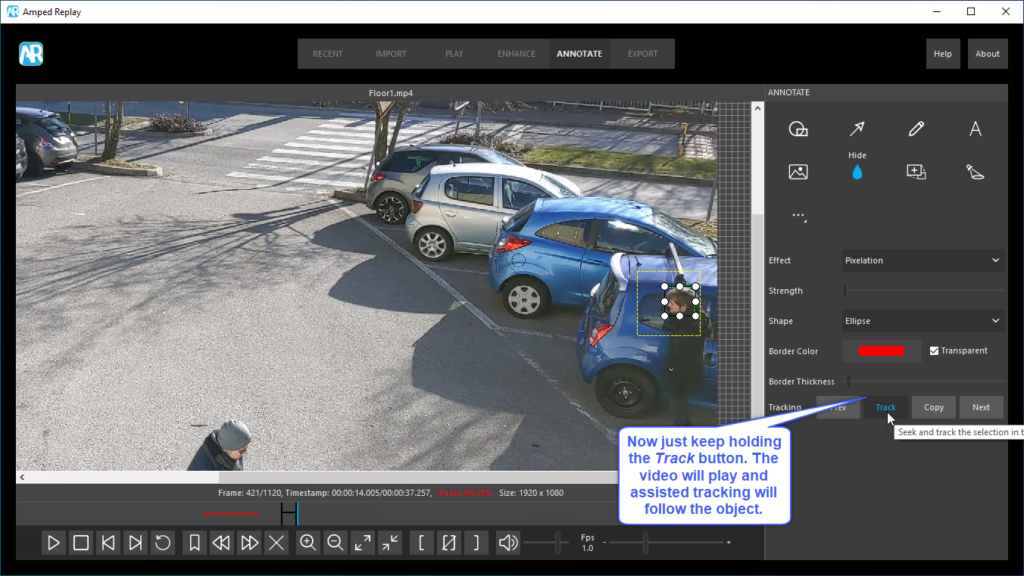
Software-assisted tracking lets Replay do most of the job. You simply draw the annotation object, then activate and configure tracking and keep holding the Track button. To configure tracking, you just need to set the size of two rectangles. The green one must contain the object that should be tracked, with as little background as possible. The yellow one denotes the “search range”. You can shape the rectangle so to limit the search to the direction towards which the object is moving.

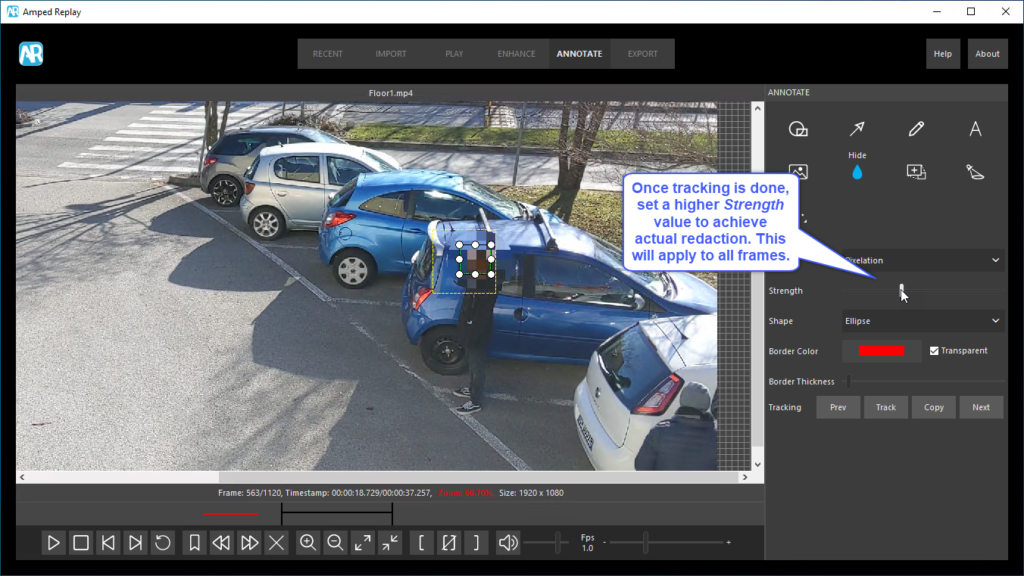
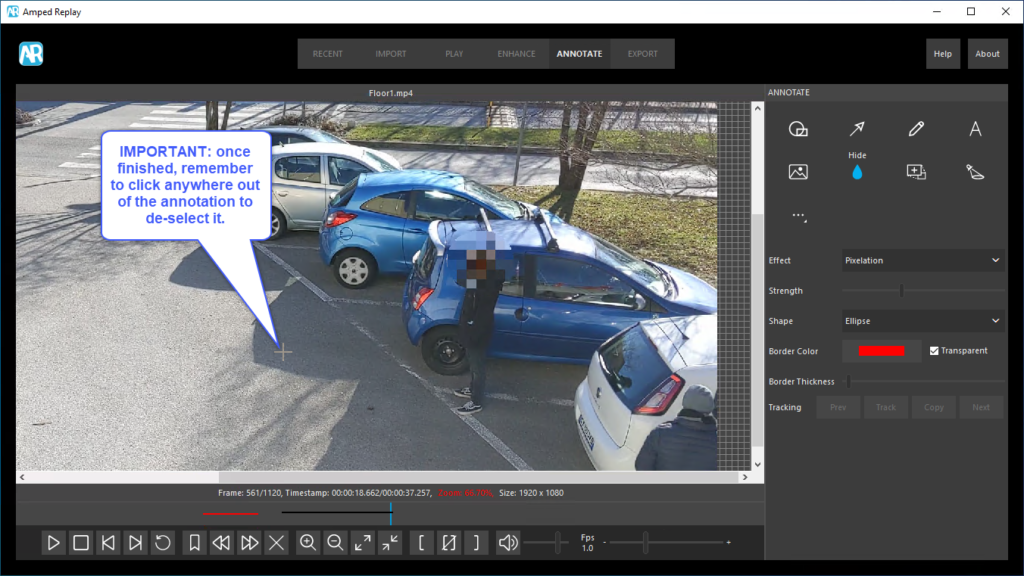
Let’s see it at work, we’ll use it to pixelate the face of the buyer.


We’ve published a blog post dedicated to software-assisted tracking a few months ago, where more details and some “pro-tricks” are given, check it out!
Keyframing
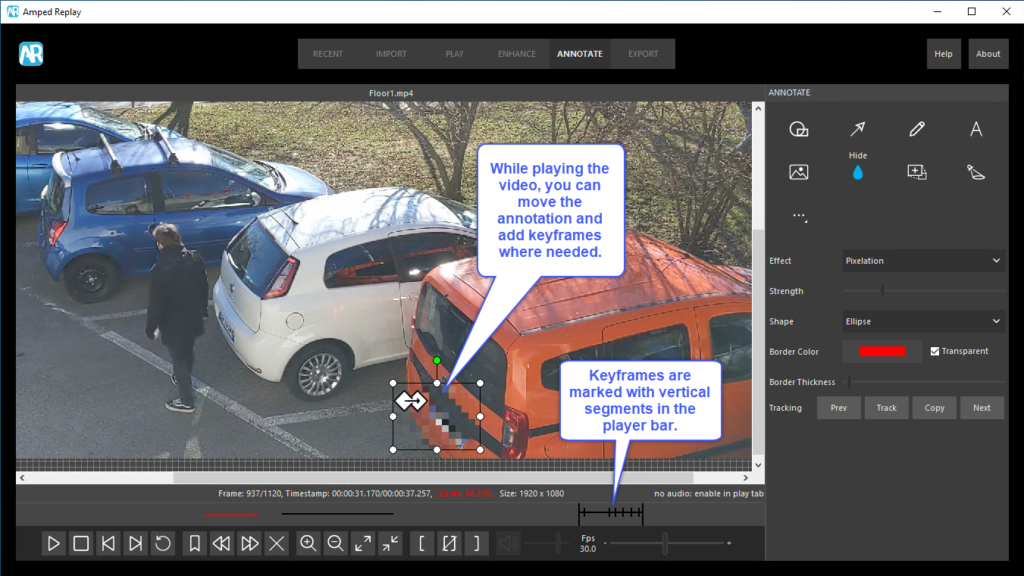
Keyframing is a very handy feature. For a given annotation, it allows you to mark two or more keyframes in a video, so that the annotation’s position will be linearly interpolated across all frames in between. In the graphical example below, you only need to set the circle size in four frames. The rest of the work is done by the computer.
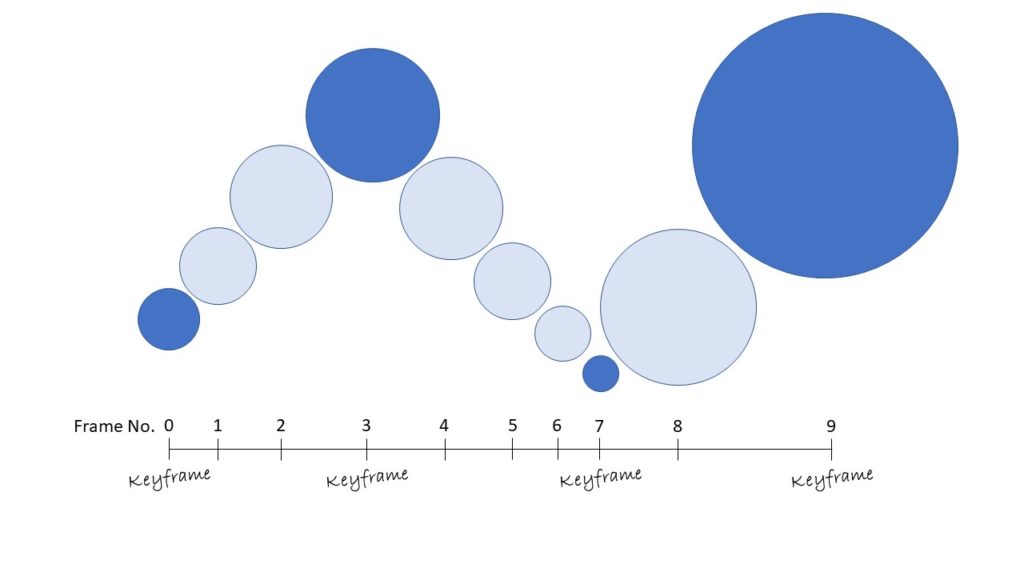
Keyframing works very well for objects that move in a rather constant way, or for cases where the camera is moving regularly. In those cases, setting as little as two keyframes could be enough! When the movement is less regular, you can still add more keyframes to have a finer interpolation. Moreover, a feature that is unique to Keyframing is that it will interpolate not only the position but also the size of the annotation, as explained in the graphic above. This can turn very useful when an object is approaching or stepping away from the camera. You may need to resize the redaction/zoom/shape to keep fitting the content properly.
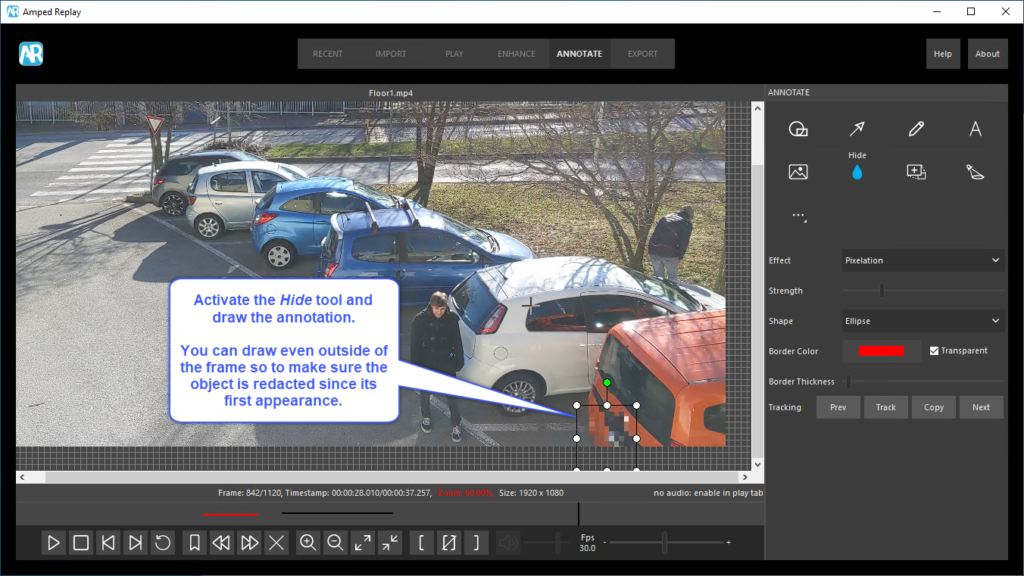
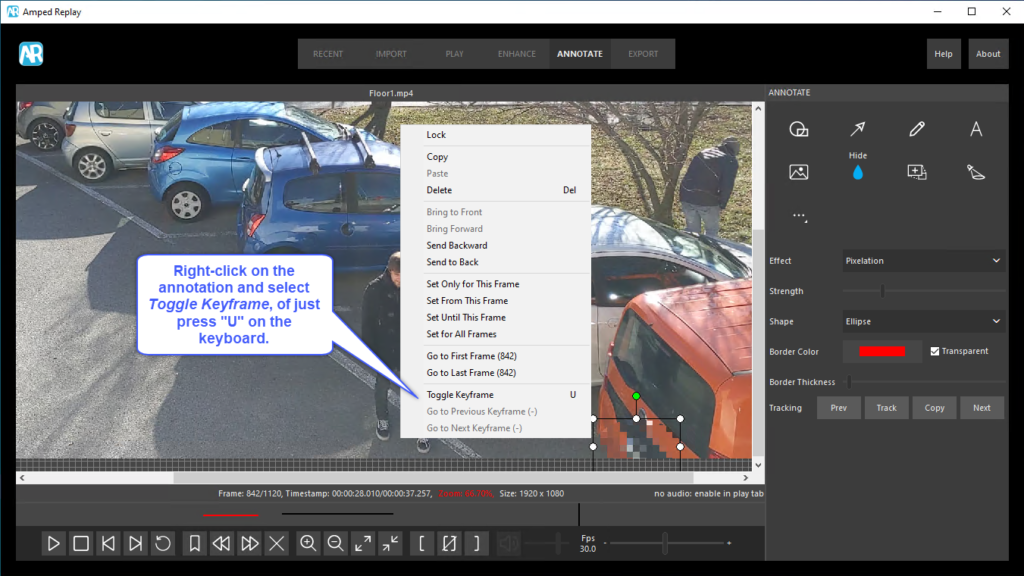
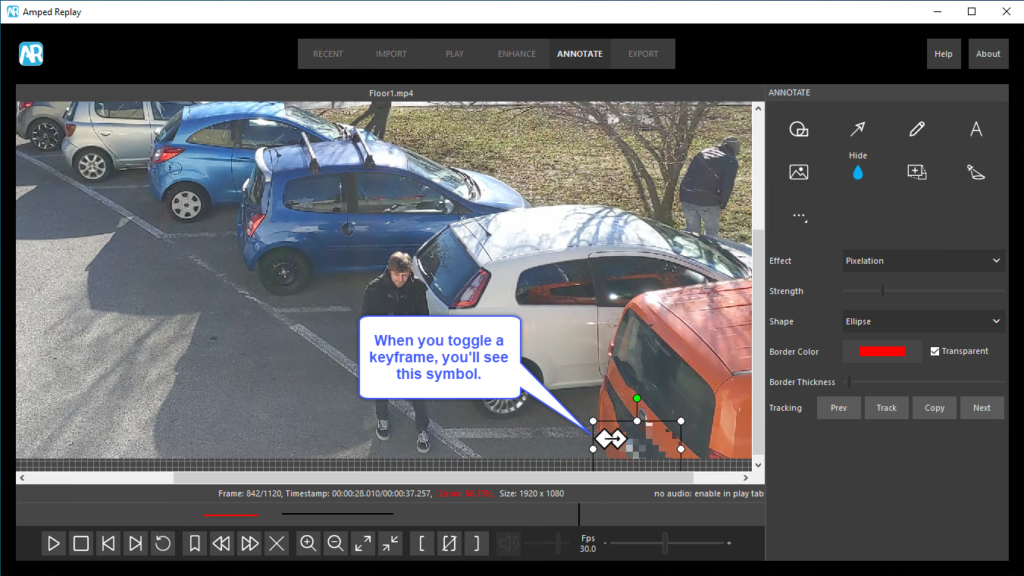
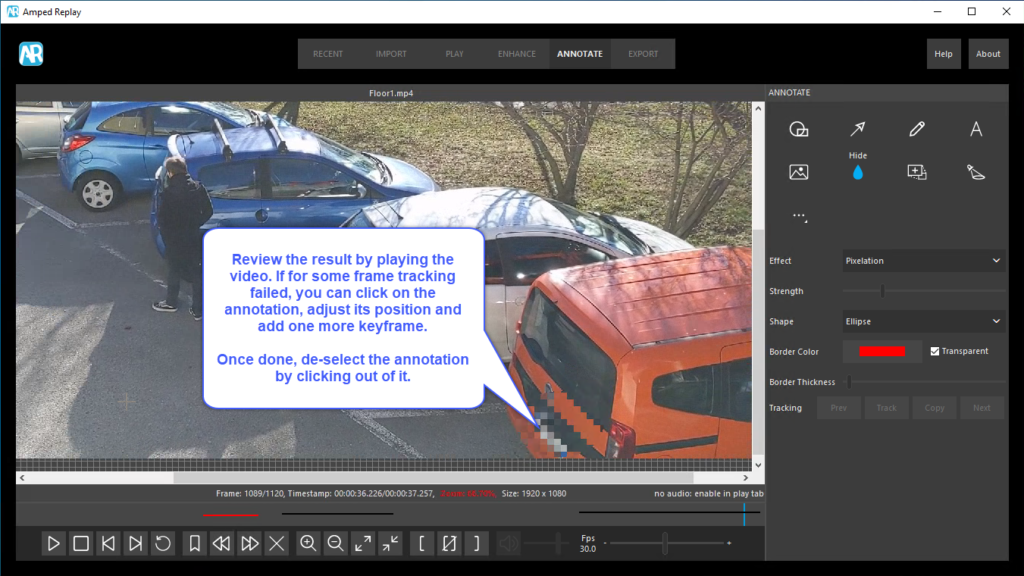
Let’s use keyframing to redact the orange car’s license plate in our example:

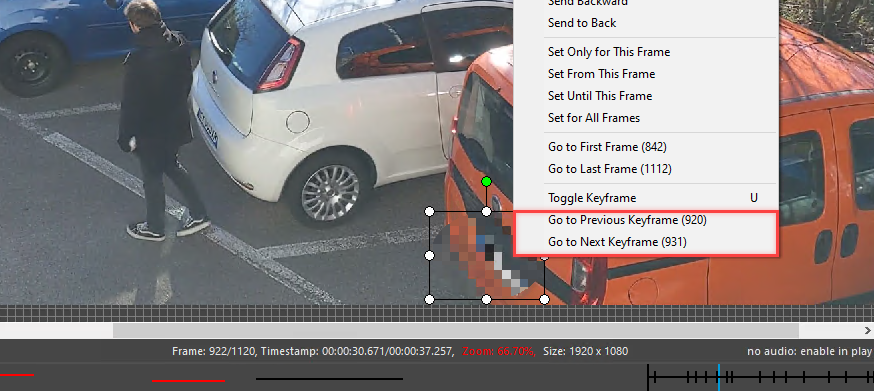
Amped Replay provides a quick way to navigate through an annotation’s existing keyframes. Just right-click over the annotation object and choose Go to Previous Keyframe or Go to Next Keyframe.
Mixed Tracking
The greatest thing is that for a single annotation you can mix multiple tracking methods. For example, you may use keyframing from frame 100 to frames 200 and then use Manual tracking to adjust the annotation’s position from frame 150 to 160. The same holds for Software-assisted tracking. This provides an excellent way of fixing minor glitches without having to redo the whole job.
Locking Annotations
We believe your time is valuable and we don’t want you to waste a single minute. That’s why we implemented a way to Lock an annotation object. When locked, an annotation cannot be changed in any of its aspects: the position, the shape, and the persistency are fixed. This saves you from unwanted changes, as we explained in a dedicated blog post.
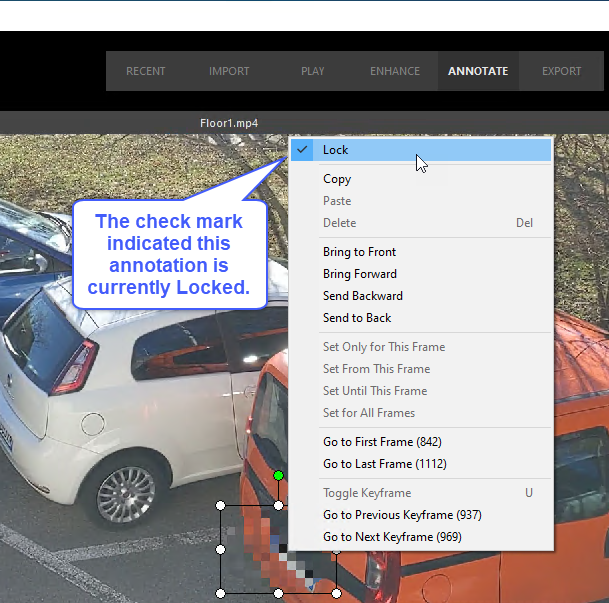
If you then think there’s something to be changed, just click again on the Lock button to toggle off locking, and you’re good to go.
Conclusion
That’s all for today! We hope you’ve found this issue of the “Amped Replay Tutorials: How do I do this?” series interesting and useful! Stay tuned and don’t miss the next ones. You can also follow us on LinkedIn, YouTube, Twitter, and Facebook: we’ll post a link to every new tutorial so you won’t miss any!


