
Dear friends, welcome to this summer edition of the “How do I do this?” blog series! Today we’re looking at how you can rotate a video or image. It’s an operation that is apparently trivial but may hide some pitfalls, keep reading!
In Amped Replay, go to the Enhance tab and activate the Rotate filter! You can pick one of the default rigid rotations, or manually set the amount.
Among the many operations you can do when enhancing a video or image, rotation is often considered very simple and perhaps less relevant. However, you should always keep in mind that, whatever processing you make, the “end user” of your enhanced footage will be a human. And humans perceive images through their eyes and brain, and they’re not used to see very tilted things.
Want an example? Take a look at this image: does it look right?

Let’s now look at it after a 180° rotation:

Even if you had spotted something wrong in the first image, it’s surely much easier to spot it in the rotated version. This is because we obviously don’t see faces upside-down very often.
All of this was to say: if you’ve got a license plate that is upside down, or perhaps vertically oriented, it’s a very good idea to bring it to a more “natural” orientation. It couldn’t be easier with Amped Replay! All you need to do is clicking on the Enhance panel and activate the Rotate filter.
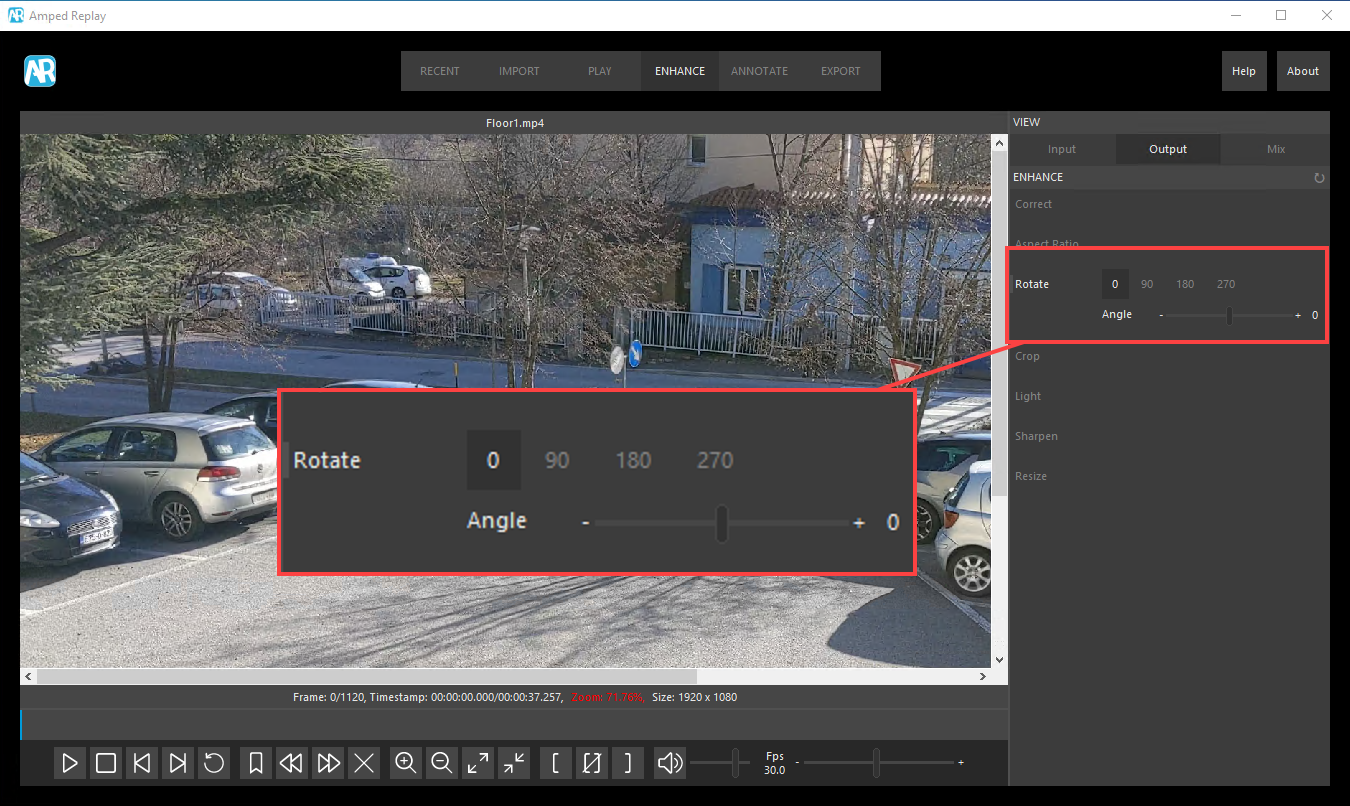
As you can see, there are two ways to use this filter. First, you can choose one of the pre-set “rigid” rotation values (90, 180, or 270 degrees, counter-clockwise). Second, you can drag the slider and rotate by a custom amount.
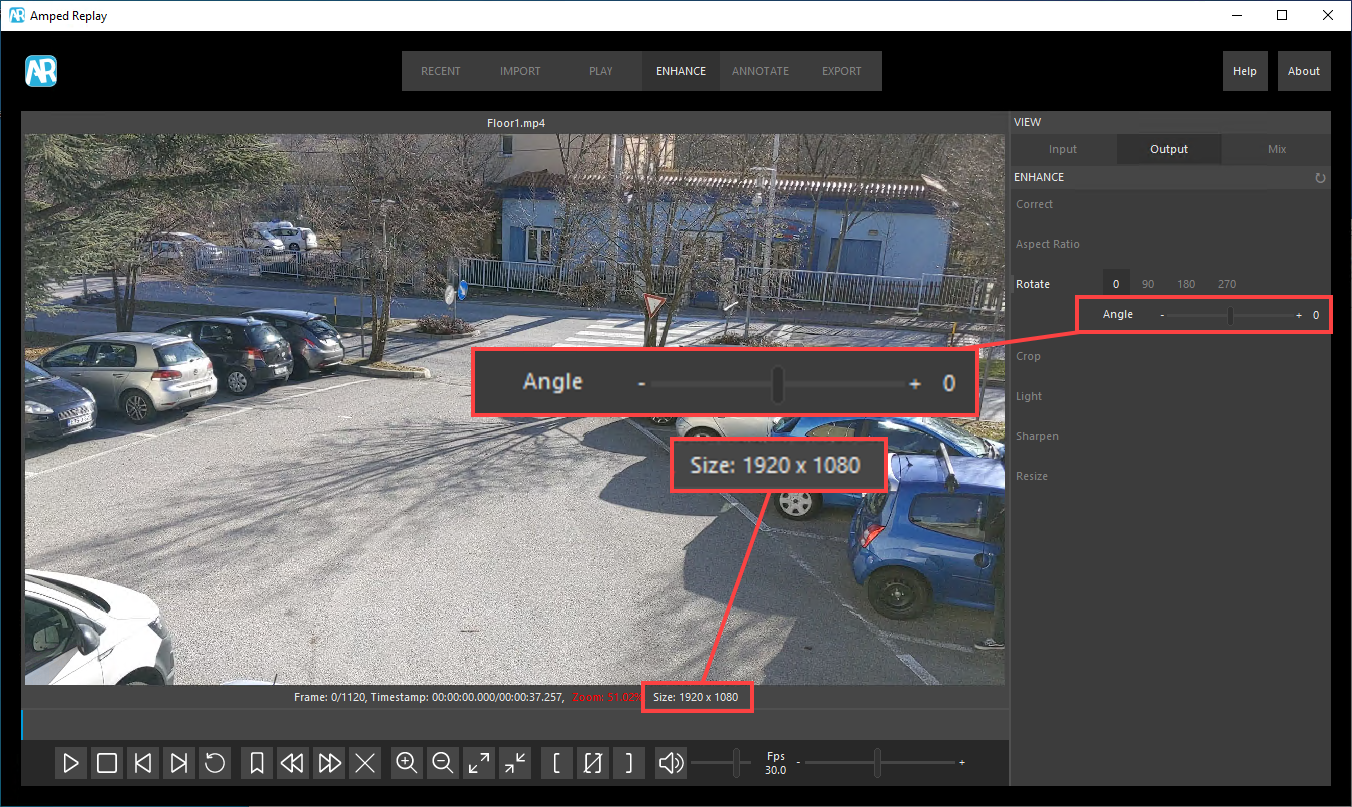
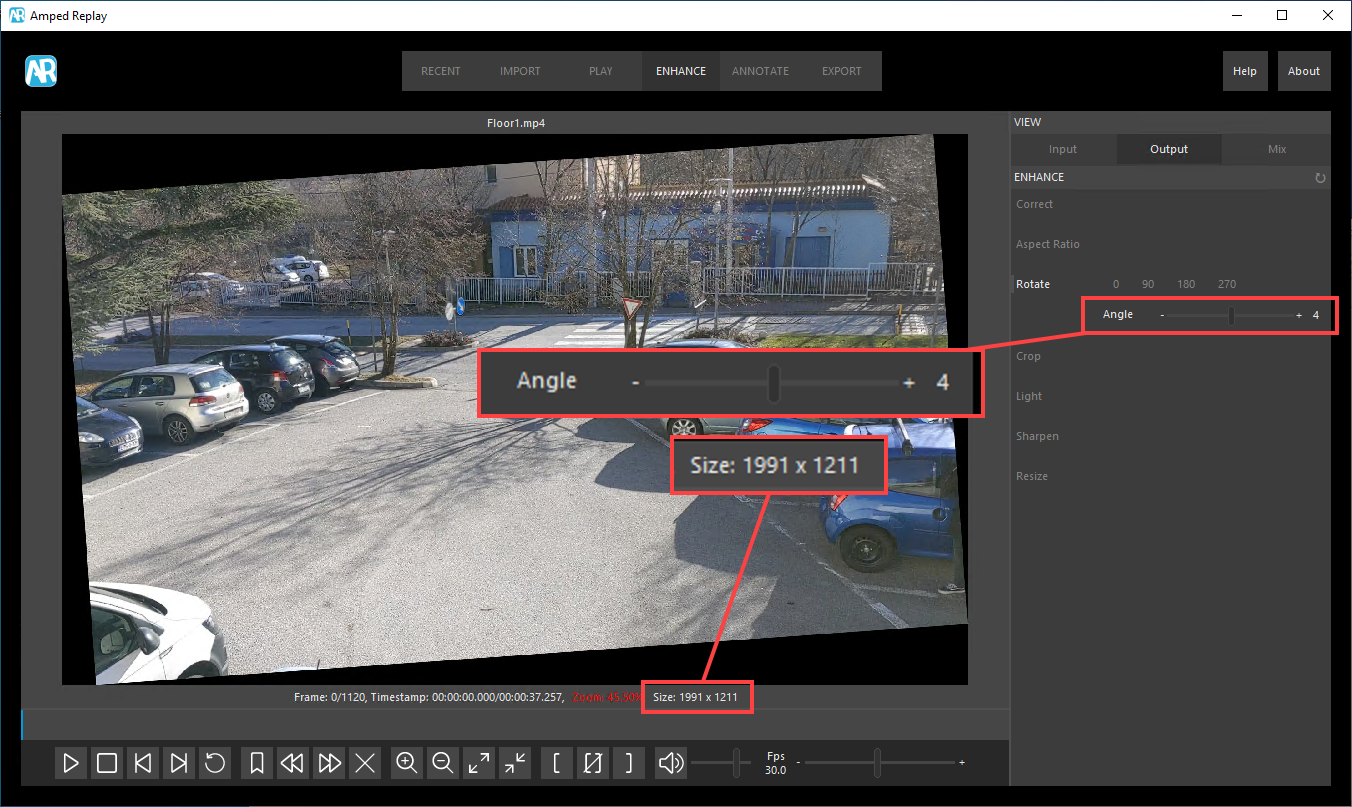
Just keep in mind one thing! If pixel accuracy is important for your case, limiting to the pre-set rigid rotations has the advantage that pixel’s values will not be changed in any way. Pixels will just be “re-ordered”. On the contrary, when you set a custom value such as 3, 42, or 189 (the actual value is irrelevant), pixel values will be re-computed because interpolation is needed. Moreover, while using rigid rotations ensure that you maintain the original pixel size of the video (possibly swapping width and height, of course), when you rotate by a custom amount Replay will create a black frame around the picture, so that the pixel size will change, as shown below.
So, once more, it’s all a matter of what your final goal is. If you’re preparing an export for media release, you don’t really need pixel accuracy and you can rotate by whatever value. If you’re doing some forensic processing, instead, it is probably better to avoid tiny rotations that don’t make a real difference in interpretability.
That’s all for today! We hope you’ve found this issue of the “Amped Replay Tutorials: How do I do this?” series interesting and useful! Stay tuned and don’t miss the next ones. You can also follow us on LinkedIn, YouTube, Twitter, and Facebook: we’ll post a link to every new tutorial so you won’t miss any!


