
Dear friends, here we are with a new post of the “How do I do this” series! Have you ever found yourself dealing with a 1-hour long video where the only thing of interest happens for 5 seconds? As long as the file is sitting on a local drive, that’s usually not an issue. But what if you need to send the file to a colleague? Is it possible to trim only the relevant part of a video without lowering the quality? Keep reading to find out how Amped Replay lets you do this quickly!
Use the “square brackets” buttons in Amped Replay‘s player bar to set the start and end of the range. Then, go to Export and choose Export Original Video as AVI. Done!
Compactness is definitely not among the merits of digital video. Depending on framerate, resolution, and compression, a single minute of video can eat up hundreds of MBs. When everything is stored locally or accessible through a fast local area network, this could seem less than an issue. However, there are times when your video needs to travel or when it is appropriate to trim only the part of footage where the incident happens to avoid maintaining superfluous sensitive information.
Trimming a video is something any video editing software lets you do easily. However, in most cases, you’ll go through a recompression process. Pixels will be decoded and re-encoded after the trim, thus leading to a quality loss. You may try and reduce the amount of compression. But then find that your clip is actually larger in file size than the original! Recompression (known as transcoding) is therefore something you definitely want to avoid, unless you think changing the encoding algorithm is useful for the sake of better compatibility, as we discussed two weeks ago.
When dealing with video for forensic purposes, preserving the best possible evidence is of paramount importance. Failing in doing so may invalidate your whole work, especially since lawyers are getting tech-savvy, and they’ll question everything you did.
Now, we know there are cases where carrying out enhancement and analysis on the originally recorded pixels is unfeasible. In such cases, you are allowed to pick up the pixels in some other way, trying to minimize the quality loss. But if all you need to do is trimming part of the video, then that’s not a good reason for losing pixel originality!
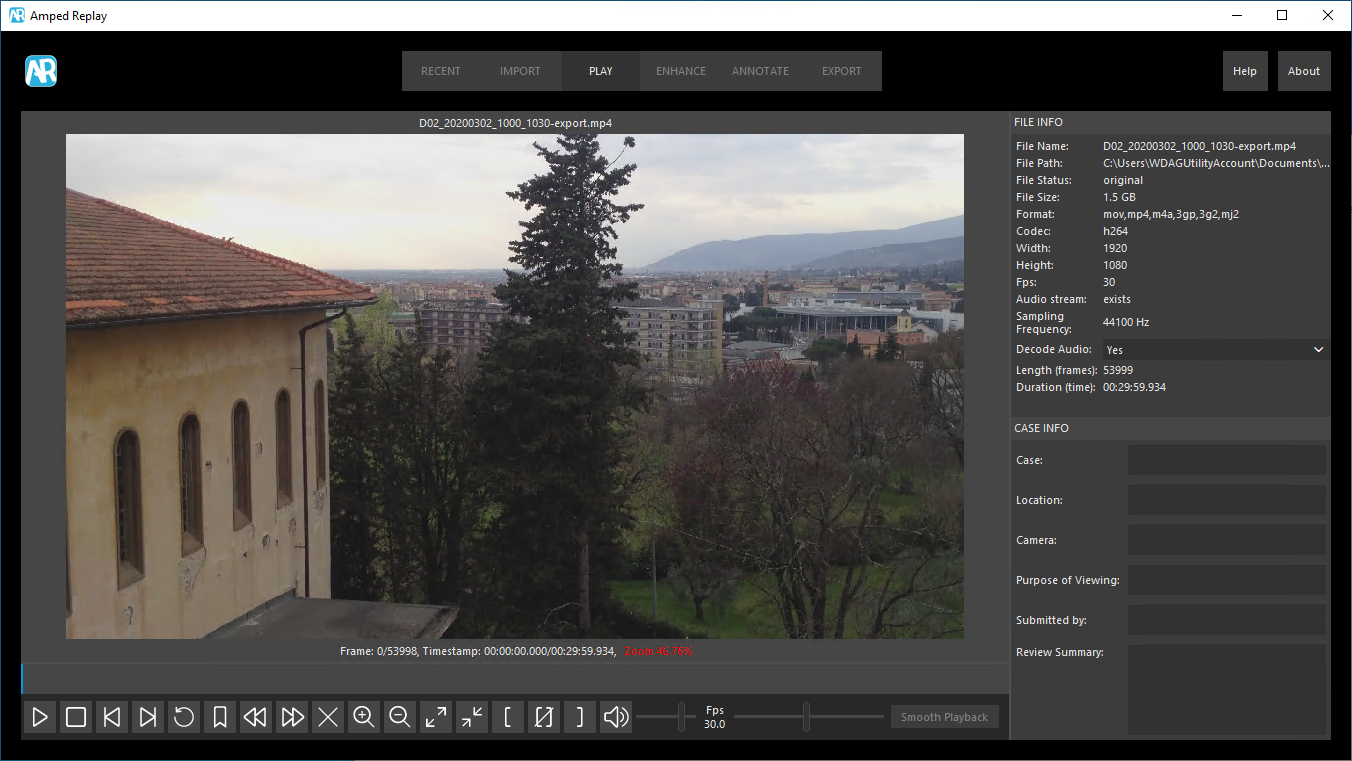
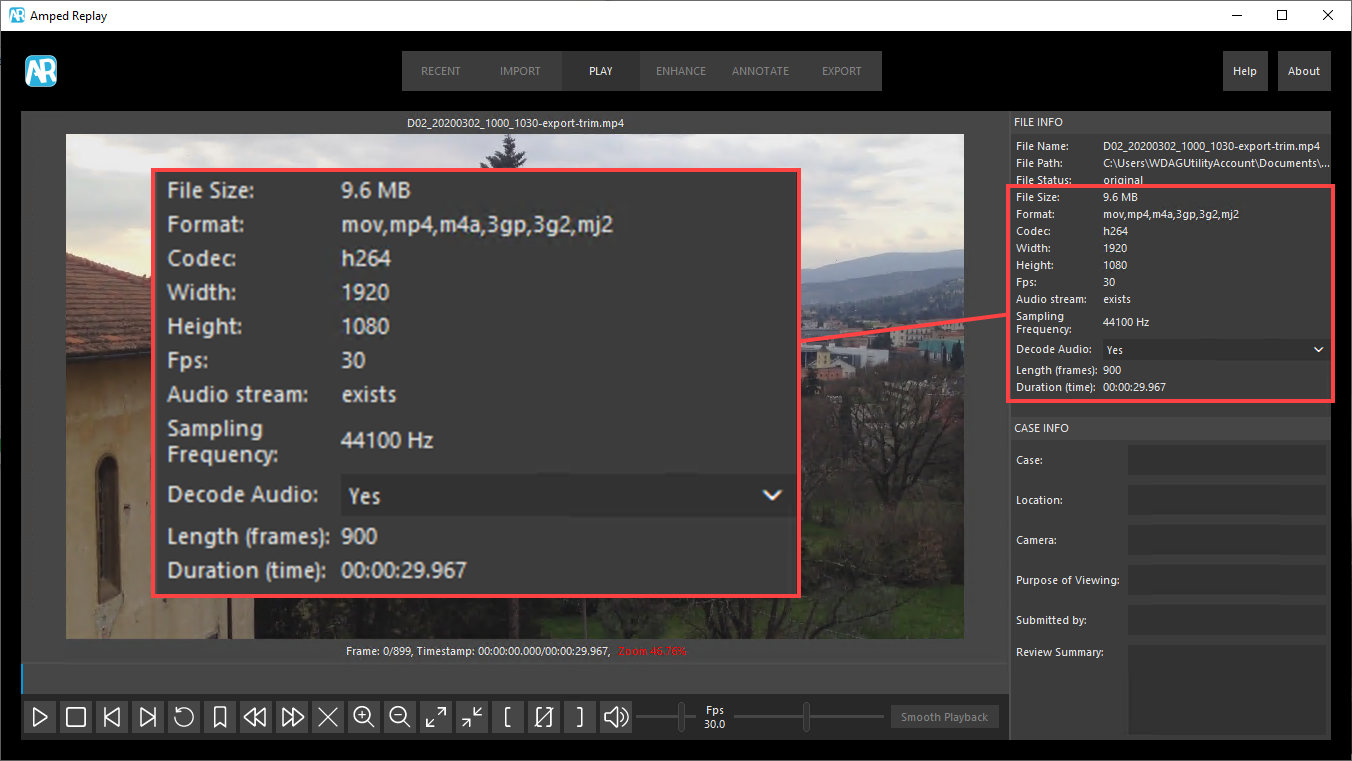
Luckily, Amped Replay has you covered! Let’s say we have this beefy 30 minutes video (54k frames), which is 1.5GBs large, and we need only from frame 11.400 to frame 12.300.
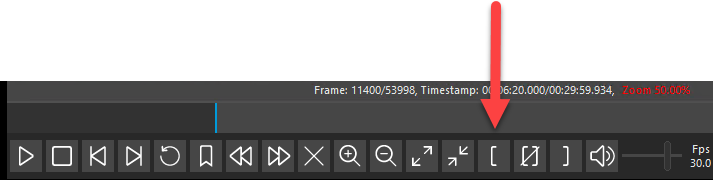
Using the mouse, we drag the player head close to frame 11.400, then we can navigate frame by frame using the dedicated buttons or hitting the J (previous frame) and L (next frame) shortcuts. Once we reached frame 11.400, we click the Start range button:
Then, we move to frame 12.300 and click the End range button.
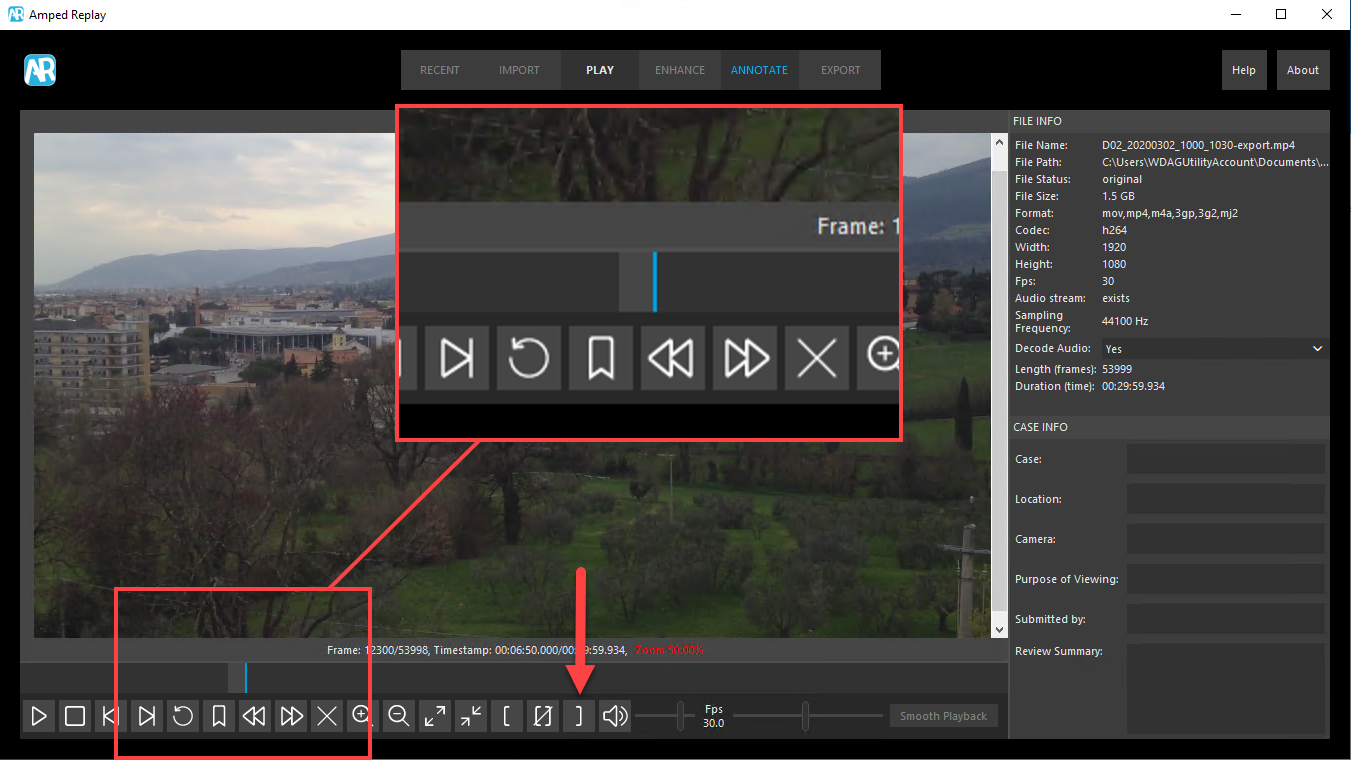
As you can see, after this process, the player bar shows the selected range in light gray, while the excluded range is marked in dark gray. You can toggle the player bar to display only the narrowed range or the full video by clicking on the button between the Start range and End range. If you instead want to clear a start or end range assignment, just click again on the same start (or end) range button.
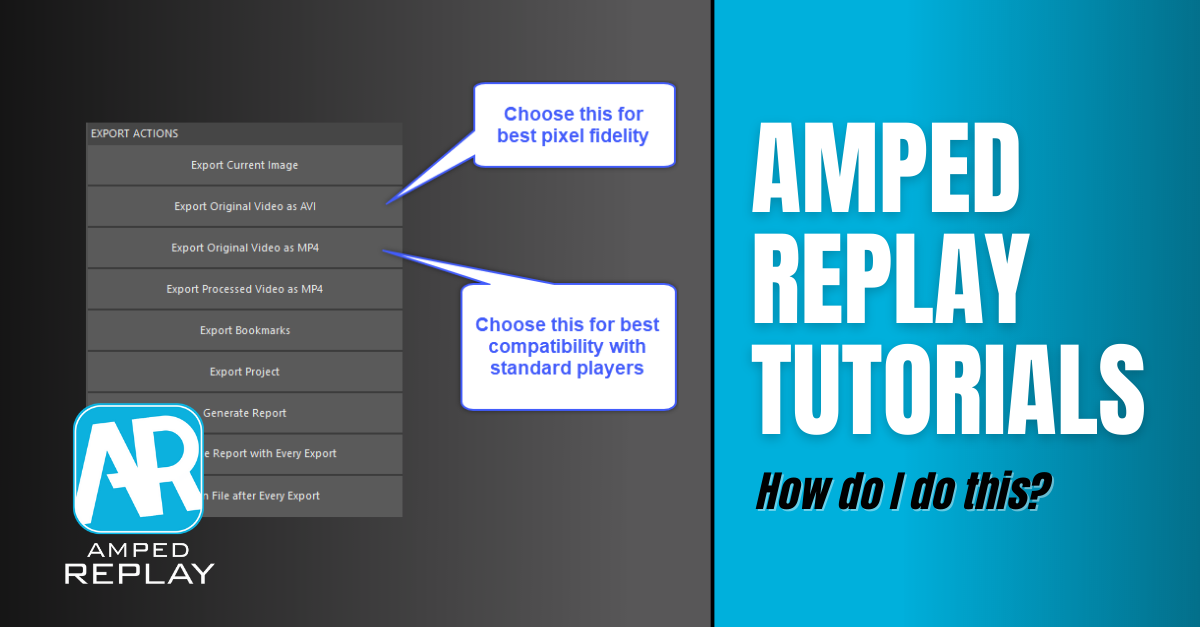
Once you’ve selected the part you want to extract, it’s time to move to the Export tab. If we care about preserving the original pixels, we’ll go for the Export Original Video as AVI button. If instead, we prefer transcoding the video to H.264 and put it in an MP4 container (which means: extremely wide compatibility). We’ll rather choose the Export Original Video as MP4.
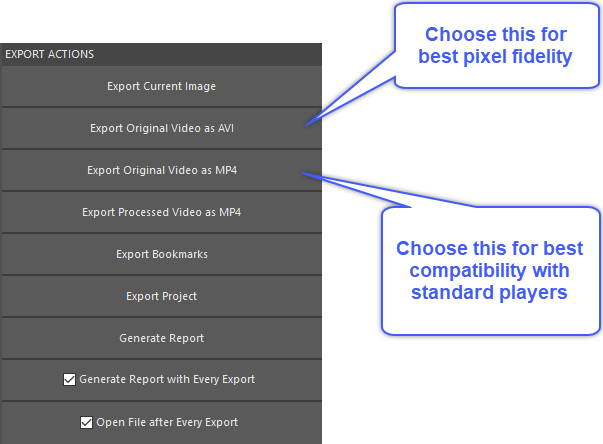
What’s the difference? When you use Export Original Video as AVI, Replay will do what we call a “lossless trim”. It will extract the frames you wanted without re-encoding them. To do so, we need that the exported range starts with an intra-coded frame (keyframe). If your selection does not start from a keyframe, Replay will automatically include some extra frames at the beginning, going backward until a keyframe is found. Let’s now load the exported video and see what we have:

First of all, it’s just 13 MBs! Instead of the expected 900 frames, you see we have 1122 frames. This is expected for the reasons explained above. You can’t do a lossless trim starting from an arbitrary frame, it must be a keyframe, so Replay included some extra frames at the beginning. If you’re trimming to remove disturbing content, remember to check that the trimmed video is actually OK. This way of exporting is extremely fast since it only copies data without any pixel processing. The most important issue here is that the visual information within your range of selected frames has retained integrity. The pixels have not changed from the original video file to the trimmed clip.
Conversely, when you use Export Original Video as MP4, the video gets transcoded. It means you’ll get exactly the desired range. But you’ll necessarily end up with (slightly) different pixel values. As we can see below, the so-exported video has exactly 900 frames, and the size is also slightly decreased.
That’s all for today! We hope you’ve found this issue of the “Amped Replay Tutorials: How do I do this?” series interesting and useful! Stay tuned and don’t miss the next ones. You can also follow us on LinkedIn, YouTube, Twitter, and Facebook: we’ll post a link to every new tutorial so you won’t miss any!


