Here we are again with another update to Amped Replay, the CCTV converter and video player designed for today’s investigators. Image and video annotation is one of Replay’s key features so we have concentrated our efforts here to increase the tools’ simplicity and speed. We introduce keyframing, dynamic text size and enhanced reporting.
Let’s take a closer look!
Keyframing
Giving users various tracking methods, from manual to assisted, allows full flexibility when moving objects around the video area to hide, spotlight, or mark a vehicle or person.
With this update, we have introduced full keyframing, with size and location interpolation. Those people who have used video editors before may be aware of keyframing, but for those who have not, I’ll explain.
Adding a keyframe to an annotation, like a circle or an arrow, stores the parameters for that object at that frame. The parameters stored are the size and the location. A user can then add another keyframe at another frame and the object will automatically interpolate between this and the previous keyframe.
The benefit of this is that a user may only have to add 3-4 keyframes to track an object instead of frame by frame.
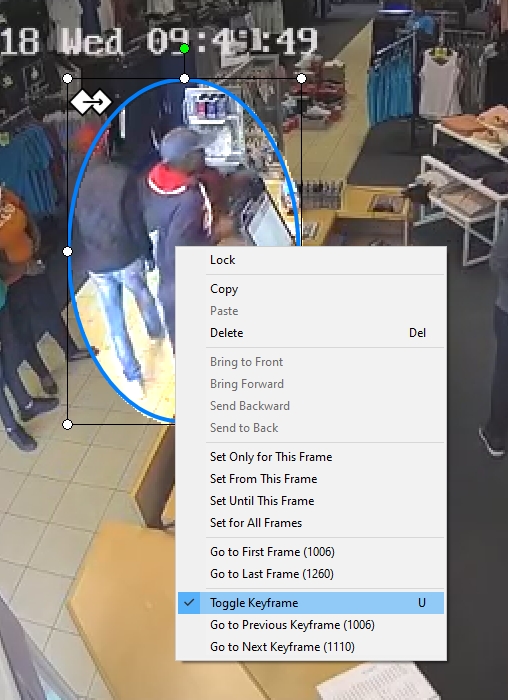
Keyframes can be added by the right-click options on the annotation or by utilizing the shortcut key ‘U’.
When this is activated you will also visualize a keyframe marker in the top left of the annotation.
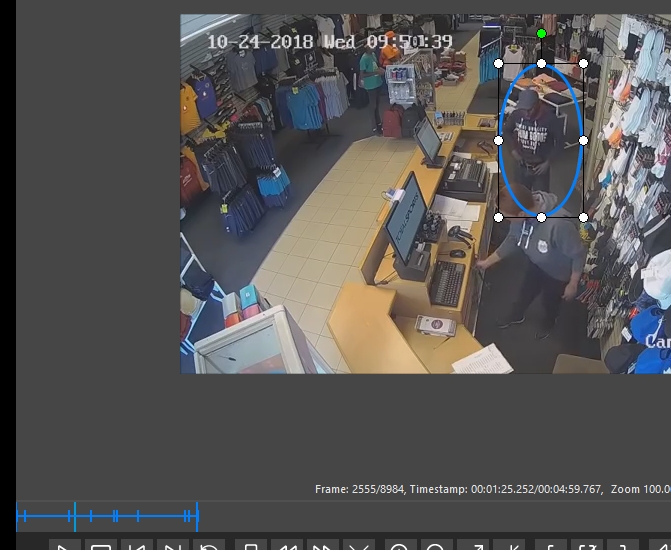
As you go through, adding keyframes where necessary, these will not only be marked within the annotation control box, but also in the Playbar.
The small lines within my annotation are all my keyframes as I have tracked the suspect. This method is really quick and easy and helps immensely in those times when assisted tracking cannot clearly identify the tracked object or person due to the light, color or other issues in the video.
Keyframing is a bit of an art, and knowing the keyboard shortcuts (spacebar (Play/Pause) and U (add Keyframe) will really help, along with dropping the video speed while working.
May I suggest something like:
- Left thumb – Play/Pause
- Left finger – U
- Right hand on mouse – move annotation.
If you are left handed just swap!
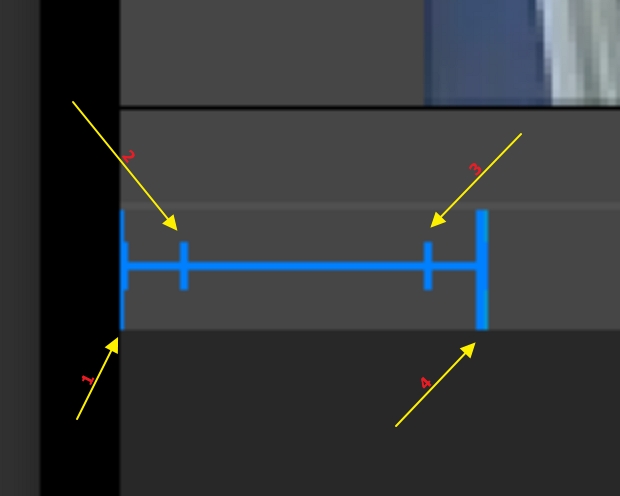
A handy tip is knowing when to keep the annotation static. Let’s take a closer look at these 4 keyframes in the Playbar.
- The first keyframe is the start point and then the suspect moves a little. He stops at point 2.
- Another keyframe is used here to hold the position.
- Just before the suspect moves again, I place another keyframe but I have not changed its parameters (size or location).
- He continues moving to point 4.
The annotation will move between 1 and 2, stay static between 2 and 3, and move again between 3 and 4. Practice makes perfect and you will be whizzing through tracks in no time!
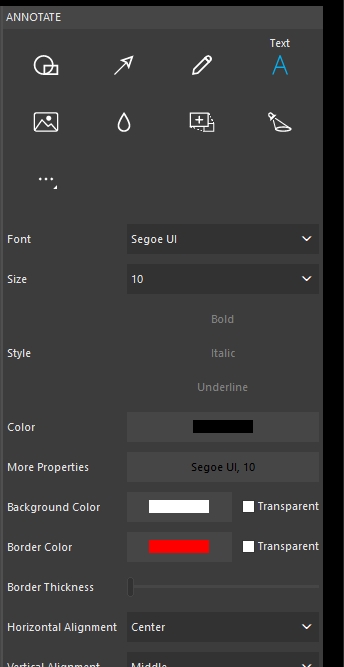
Annotate Text Size
The starting font size is now dynamic. So, on a full HD video the default text size will be bigger than on a standard definition video.
If you do need to change the size, however, the addition of the Size dropdown within the main Text tool interface is a welcome addition to speed up the workflow.
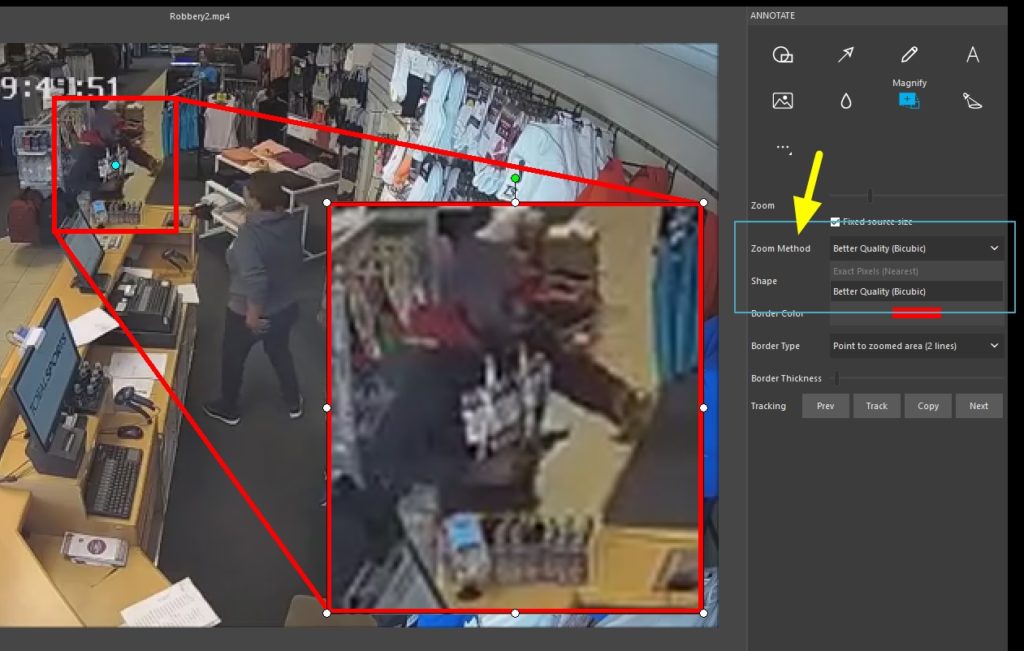
Annotate Magnify Zoom Method
As highlighted and marked in the image below, the Magnify tool now has a user-selectable Zoom Method.
It is important to understand these methods.
Exact Pixels (Nearest)
When making the selected area larger, the resize method used is known as ‘Nearest’. This simply duplicates the values of the ‘nearest’ pixel. As a consequence, you are simply making the original pixels bigger! This is the default setting.
Better Quality (Bicubic)
The resize method used here is known as ‘Bicubic’. When the area is enlarged, this method smooths the transition between original pixel colors by calculating new pixel colors to fill the spaces left behind in the zoom process. It is more pleasing to the eye, but it is not the exact representation of what was recorded.
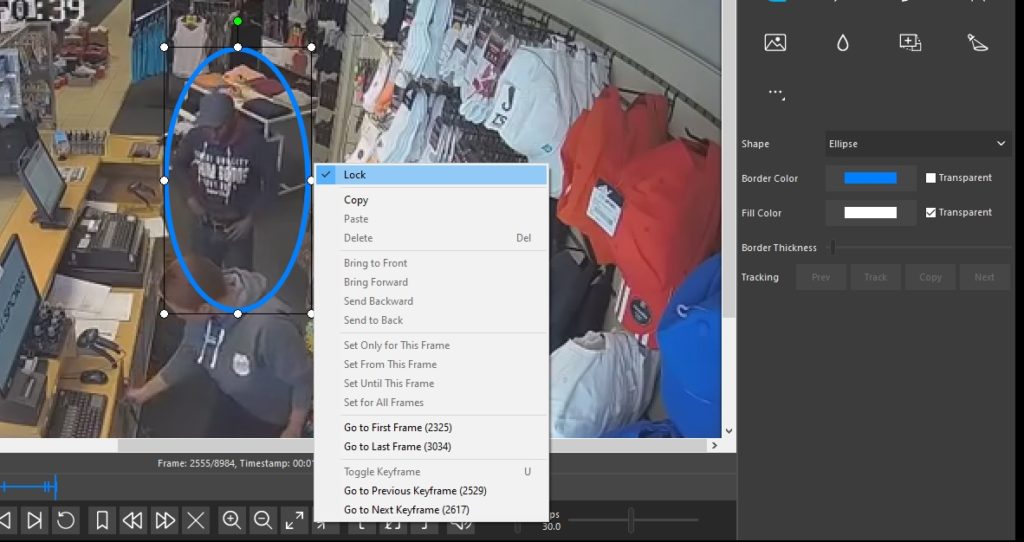
Annotation Locking
One last thing on annotations…
The Lock option now inhibits any changes to the start/end frame and disables the tracking buttons within the Annotate tool.
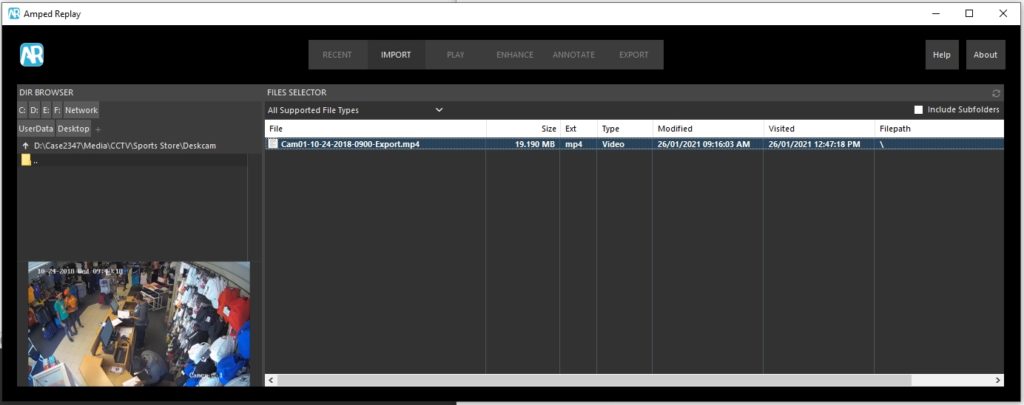
Import
The Directory Browser and File Selector is a fantastic way to navigate your media files prior to review. We have improved the handling of long file paths and long filenames in this release to better support those units where the files are stored on network drives and may have been automatically given new, and rather long, filenames!
Report
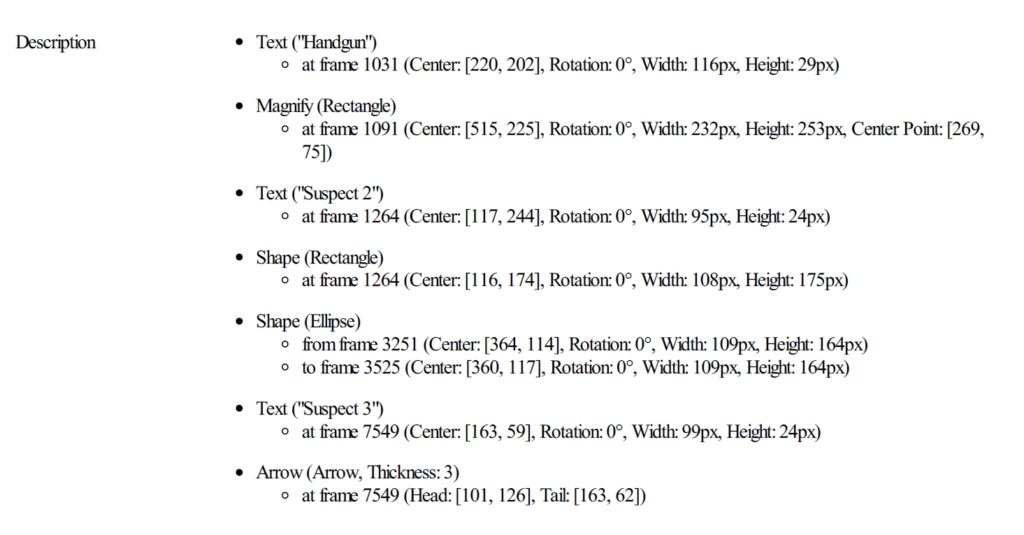
The reporting of annotations now includes all parameters within the PDF for full forensic transparency.
Sliders
Whenever you need to adjust values using a slider, you may find it easier to increase/decrease values using the up/down or fw/bw buttons on your keyboard. These new keyboard links certainly make it easier to do fine control.
Bugs
Thanks to the users who take the time to report on bugs. Some problems slip through from time to time so we always make these top priorities.
- Fixed a bug that caused the MD5 shown in the report to be computed only on 4 MB of the input file
- Fixed a bug that caused an error message to be occasionally shown after manually browsing the filesystem into drives other than C:
- Fixed a bug that was causing an error when an SMI/SRT subtitle file was used as an input file
- Fixed a bug that caused a wrong panel to be shown temporarily when the output path was set by a command line parameter
Conversion Engine
Finally, and as always, we have added more proprietary decoders for video, audio and date/time information. The powerful Amped Conversion Engine, the driving force behind the outstanding DVR/CCTV support of most Amped applications works behind the scenes in Amped Replay, ensuring a user can play the majority of proprietary video out there, whether the video has come from a DVR system, a body worn camera, drone, or any other video capture device.
The user does not have to make decisions on the conversion process as it is automated immediately from file selection. Simply choose your file and the conversion process starts, if necessary.
Amped’s unique file analysis procedure ensures changes are kept to a minimum and most files will only require format changing – the video itself remains untouched –granting a fast and truthful conversion. This is vital within forensic software. The importance of this stage cannot be understated as it also removes non-multimedia data that may corrupt the visual image. You do not want to miss frames or have visual distortion.
We work with users worldwide and analyze every video sent to us, ensuring the correct decoding. Remember that this support service is included in your standard support and maintenance subscription (SMS). If you cannot play it, it’s a simple procedure for you to upload it for playback support.
Don’t Delay – Update Today
If you have an active support plan you can update straight away by going into the menu About > Check for Updates within Amped Replay. If you need to renew your SMS plan, please contact us or one of our authorized distributors. And remember that you can always manage your license and requests from the customer support portal.
Video used in this blog post: Armed Robbery in South Africa: https://www.youtube.com/watch?v=-CwyHfoM5_0

