
Dear friends welcome to this waiting-for-Santa tip! Less than a week has passed since the latest Amped Authenticate update (if you’ve missed it, take a look here!). We’re already providing a tip to make the most of the new Video PRNU tool! In particular, today we’ll deal with a case where we need to check whether a video comes from a device, but we only have reference images of it. We’ll see that, with the latest Authenticate update, this is very easy to do!
Camera identification is certainly one of the hottest topics in multimedia forensics. The possibility to link an image or video to the device that captured it can largely impact an investigation. Amped Authenticate features the PRNU Identification filter for camera identification of images for quite some time now. But since update 19348 it also now provides PRNU for videos!
Now, let’s imagine that you have a video that must be attributed, you have a hypothesis about the possible source device. But you also have a problem, you don’t have the device in your hands. That means you can’t use the device yourself to create a video to be used as a reference. However, you happen to have several pictures that were found on a computer the belonged to the device’s owner. Can you still use PRNU to check the video against the images? Yes!
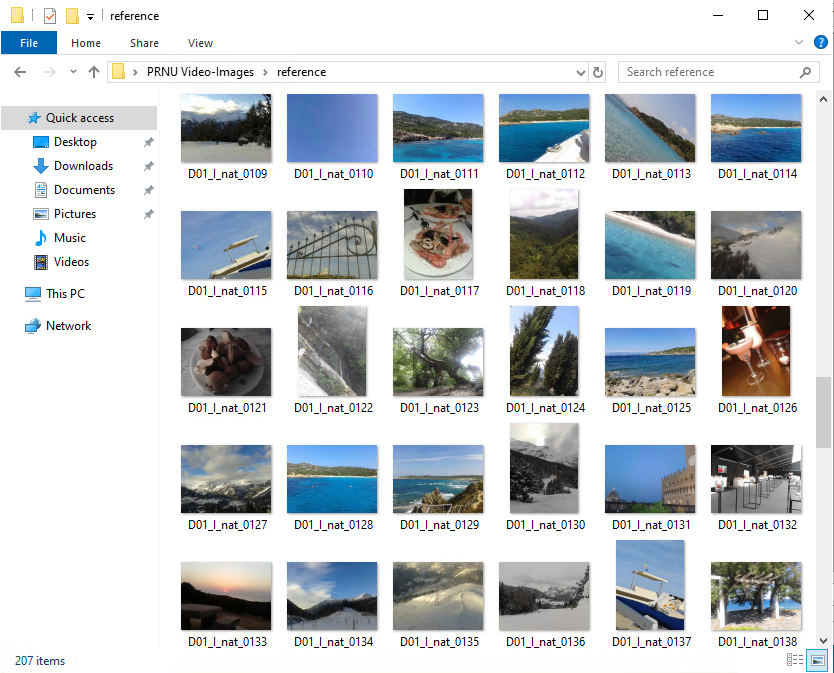
First, let us create a Camera Reference Pattern (CRP) from the images and one from the video. For the images, you just need to put all images you want to use as reference in a folder.
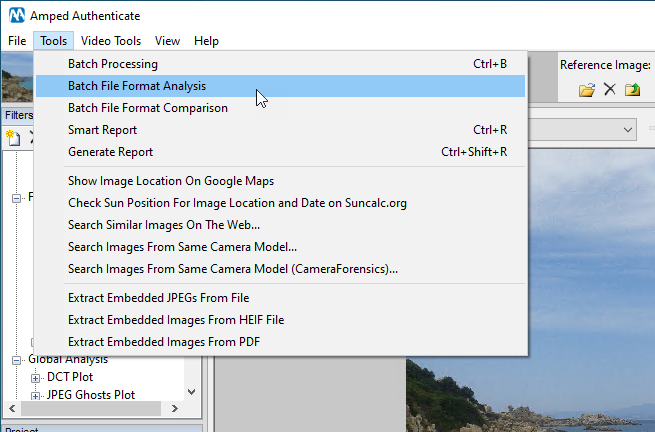
Before using images for the CRP creation, it may be a good idea to run a Batch File Format Analysis, to make sure their properties and metadata show no anomalies. To do so, simply load any of the images and then click on Tools > Batch File Format Analysis.
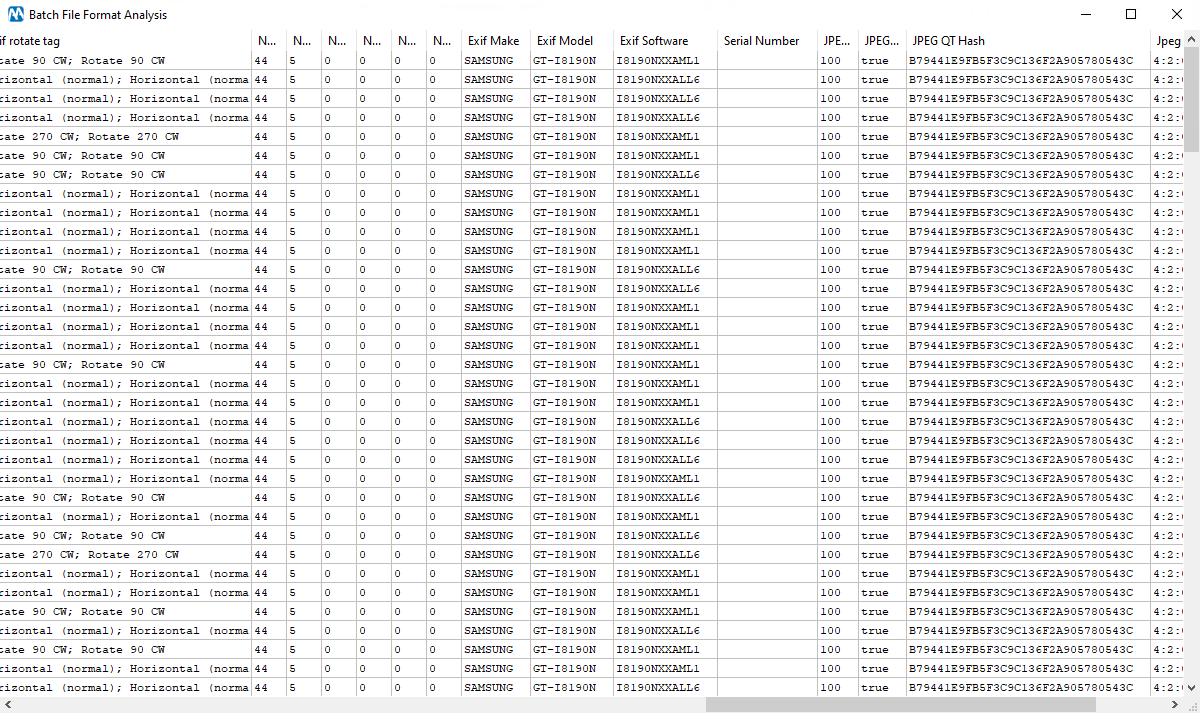
In a few moments, we obtain a table with a row for every image. Comparing the Exif Make, Exif Model and Exif Software is a good triage step before you start working with PRNU.
Okay, everything seems fine. Let’s now click on the PRNU Identification tool and select the Create PRNU Reference Pattern button. Since we’re going to do a mixed (image-video) PRNU matching, it is good to have the most robust CRP possible from images. Thus, we instruct Authenticate to use all the available images in our reference folder by setting “0” in the last parameter, and click Ok.
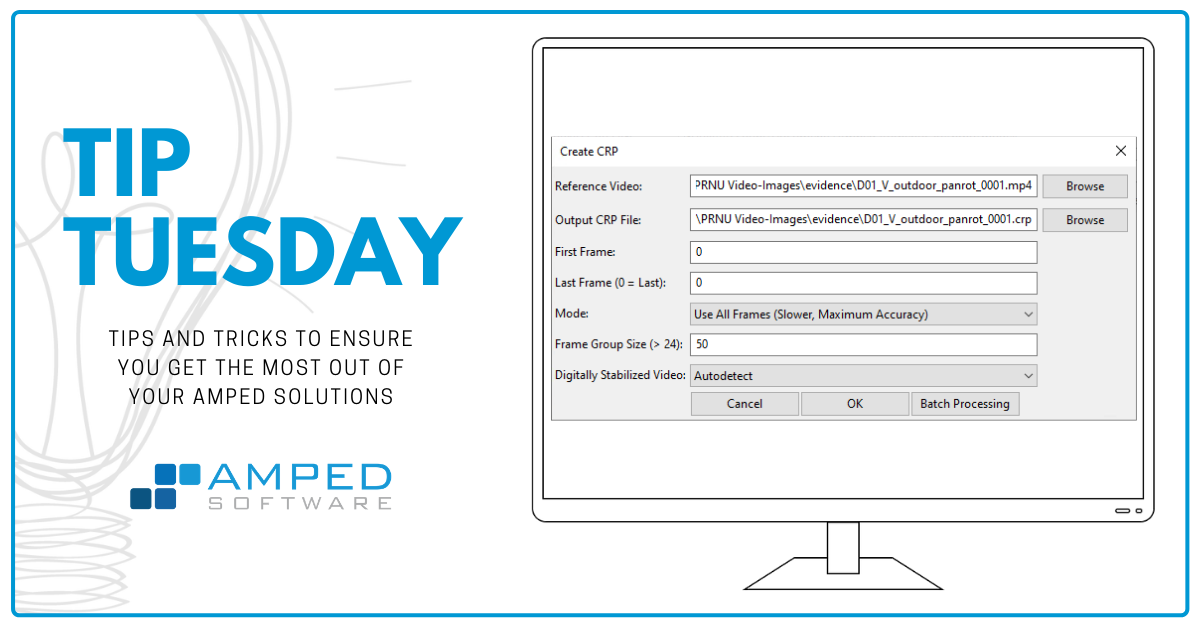
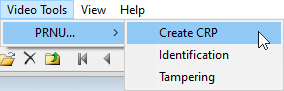
Now it’s the video’s turn! We use the Create CRP tool from the Video Tools menu:
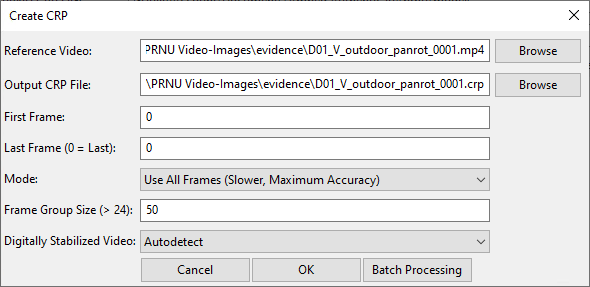
The default configuration is just fine for our needs. The whole video will be processed, extracting the PRNU noise from all frames and accumulating them to form the CRP.
Okay, now we have a CRP obtained from the reference images and a CRP obtained from the evidence video. How do we compare them? We’ve explained the way to go in a blog post this summer, however, we’ll quickly rehearse it hereafter.
To compare two CRP files, there’s a dedicated button in the PRNU Identification filter.
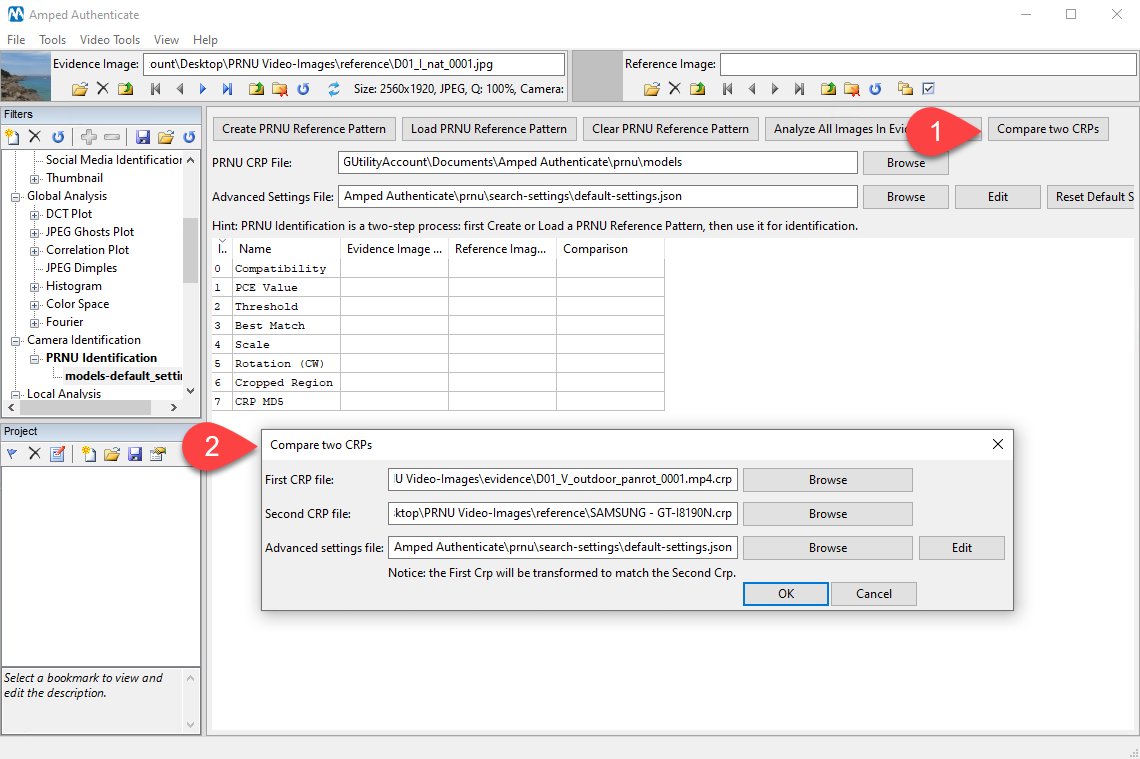
You simply set the CRP of the video as the first CRP and those of the images as the second (warning: the order is important, as reminded by the “Notice…” text in the dialog). Since we’re comparing images with videos, we also need to configure the Advanced settings file. Indeed, most devices use a combination of crop and scale to convert the 4:3 full-sensor picture to a 16:9 lower resolution video.

By enabling the advanced search, we’ll let Authenticate search for the combination of scale and crop that maximizes the correlation between the two CRPs. For example, below is a sensible setting for our case (you’ll find each line explained in the program manual):

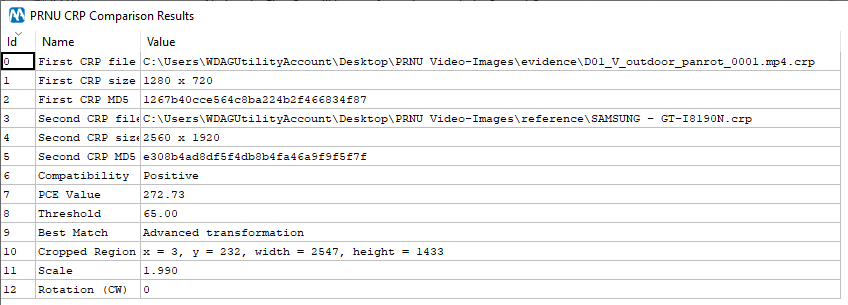
We save the file and click on the “Ok” button in the Compare CRP window. Then, we wait a few minutes (searching for millions of combinations of scales and crops takes a while) and we’re finally presented with this output!
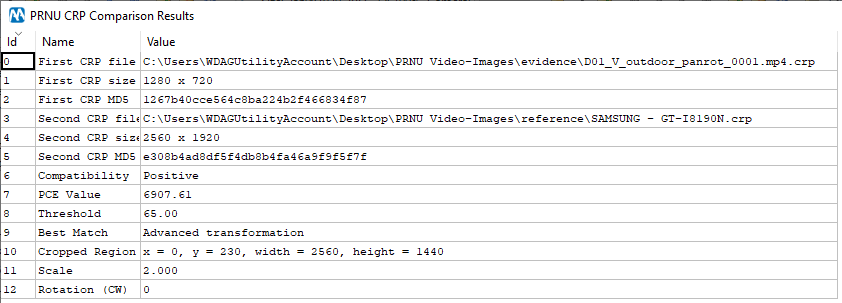
Line 7 shows that there’s a high PCE score (two order of magnitudes larger than the commonly adopted threshold for PRNU analysis). Moreover, what we see in lines 10 and 11 is also reasonable. The CRP of the video had to be upscaled by a factor of 2 and, when “overlaid” on the image CRP, a displacement of 230 pixels on the top was observed. This makes sense: the video width was 1280, which multiplied by 2 makes 2560, just the image width! As to the video height, it was 720, which multiplied by 2 gives 1440. We still miss 480 pixels to reach the image height. 480/2 = 240, which is very close to the y = 230 reported in line 10. It means that this device creates videos by cropping away two (almost) equally sized bars of pixels on the top and on the bottom of the sensor.
It is important to mention that choosing a sufficiently small Scale Step when configuring the Advance Settings File is important. If we had enabled the advanced search leaving the original, default scale value (0.01), we would have still obtained a positive match but with a lower PCE value.
And if we had chosen a step ten times larger (0.05 instead of 0.005), we would have obtained negative compatibility!
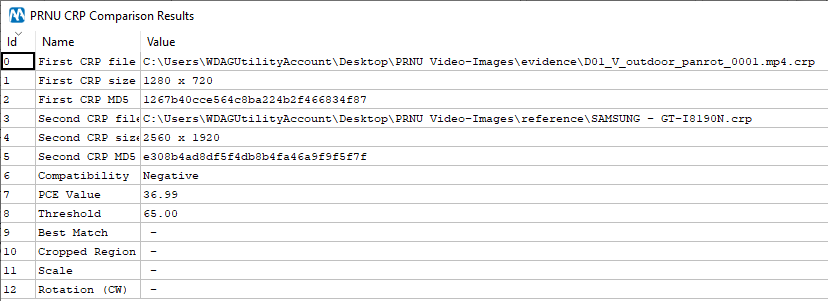
It all means that you can trade time for search precision. Allowing a smaller scale step can potentially lead to a much larger PCE when the two CRPs are from the same sensor.


