Dear loyal summer readers, thanks for being here instead of having a swim! Today’s tip won’t be long, I promise. It covers a feature of Amped Replay that I’m sure is unknown to most. Did you know Amped Replay can be configured to enable/disable some of the software functionalities and optionally show messages on the GUI? This can be extremely useful when deploying Replay to different units having different skill levels. Keep reading to know more about it!
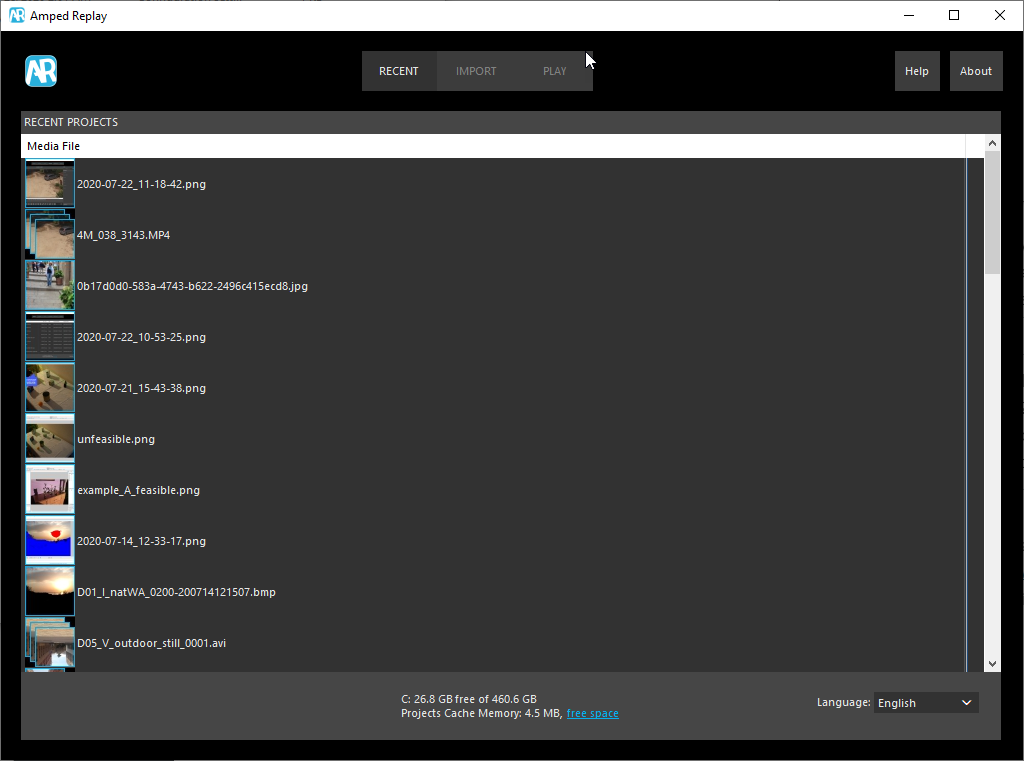
Amped Replay was born to address the growing demand of a tool that could be used by first responders and investigators for quick and easy CCTV playback. Its streamlined interface makes it so easy to load a video, play it, bookmark relevant frames, apply basic corrections, add annotations, and export the result.
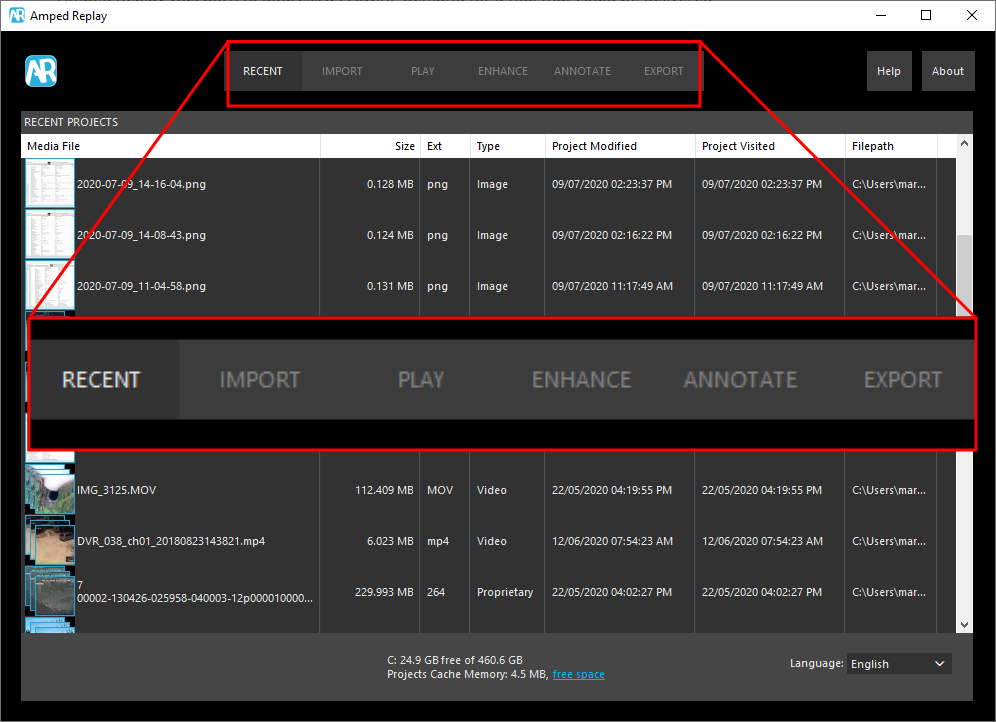
Amped Replay was designed after consultation with frontline investigators and video and image analysts, ensuring that the simple-to-use interface answers the requirements of easy CCTV playback, fast processing, and the output of a court-ready product. It offers basic corrections in the Enhance tab, where filters are arranged in a fixed order (which is normally the most appropriate one). They have a very user-friendly configuration interface. Similarly, the Annotate tab provides powerful and easy annotation features, allowing to add text, drawings, shapes, the ability to redact or magnifying objects, etc.
Hearing our users’ feedback, we acknowledged that some units need to have control over which features should be made available to their officers. For example, there could be units where no corrections or annotation is to be done by first responders under any circumstances. What to do, then?
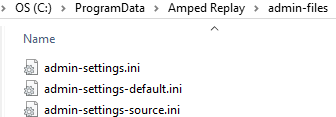
Good news! It takes a few clicks to customize Amped Replay’s functionalities (of course, customization requires administrative privileges on the computer). After a standard installation of Amped Replay, let’s locate the folder C:\ProgramData\Amped Replay\admin-files. Be aware that Microsoft Windows automatically hides the ProgramData folder. But you can easily change the “Show hidden folder” options, or you can just copy-paste the above path in your File Explorer. Once there, you’ll find three “.ini” files:
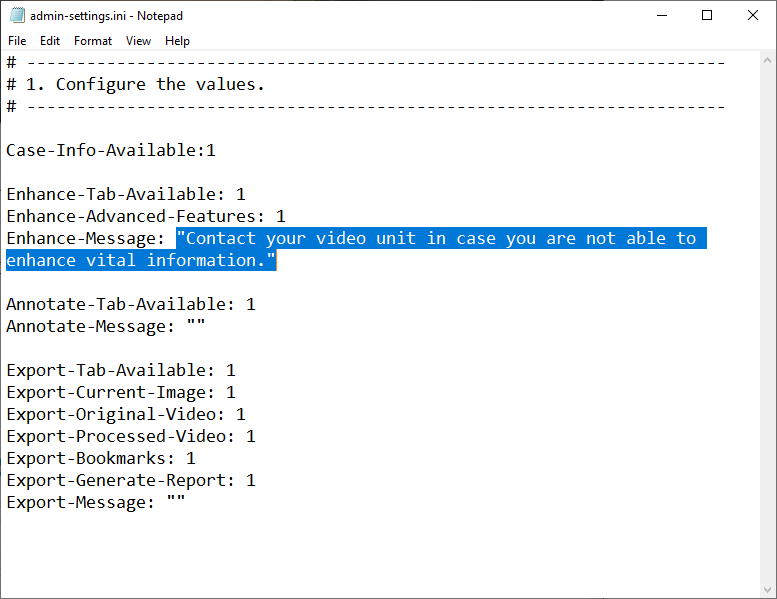
If you want to customize Amped Replay’s features on that specific computer, the admin-settings.ini is the file for you. Just open it with Window’s Notepad or any other text editor. You’ll be presented with a quite intuitive list of features and messages:
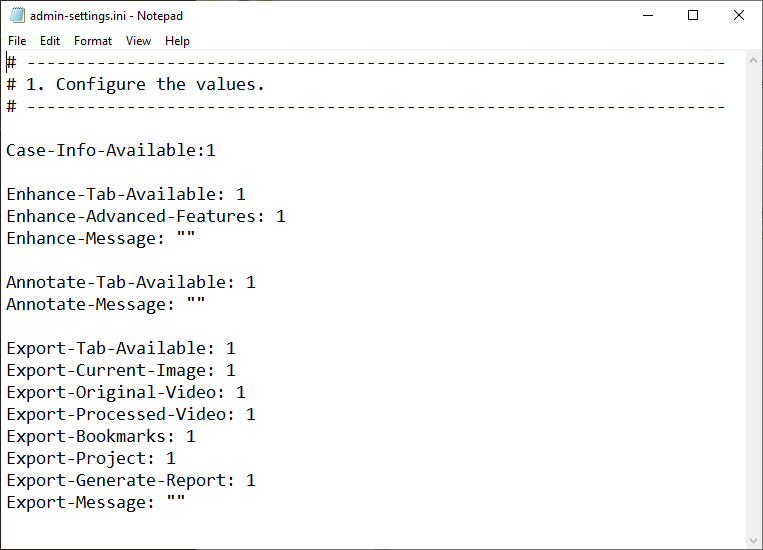
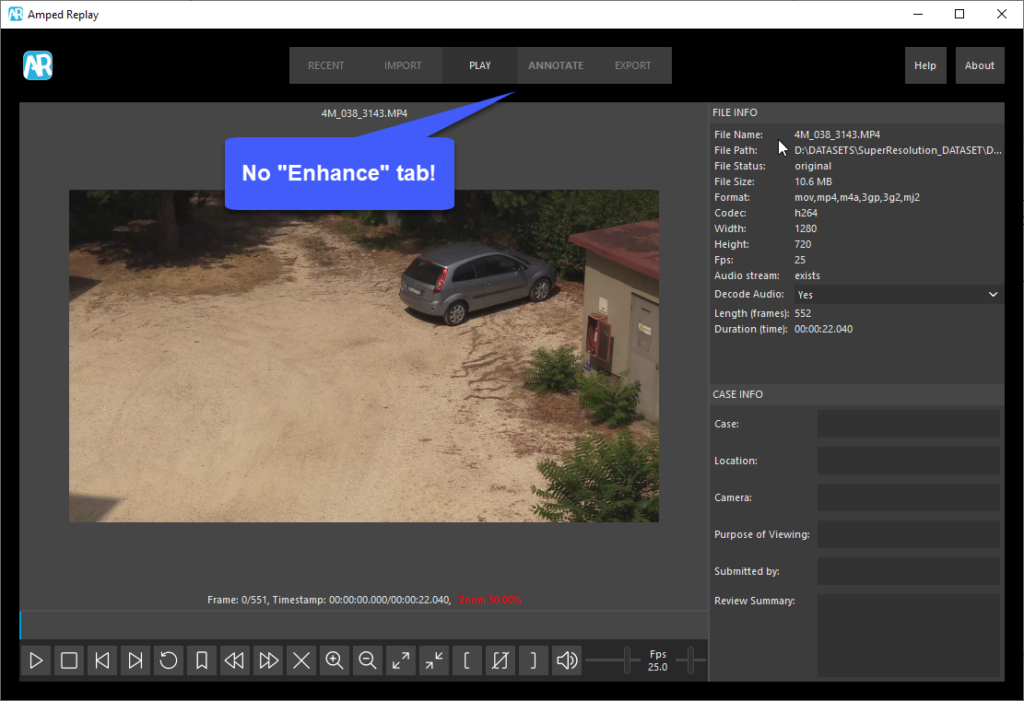
By default, each feature is enabled, as indicated by the “1” after the column. Change from 1 to 0 to disable that specific feature. For example, setting the Enhance-Tab-Available feature to 0 will cause Amped Replay to hide the Enhance tab at the next run of the program:
Similarly, you can disable the Annotate tab by setting the Annotate-Tab-Available to 0. And what about the Enhance-Message entry in the configuration file? It’s designed to show a custom text message to users when they activate the Enhance tab. Let’s try it:
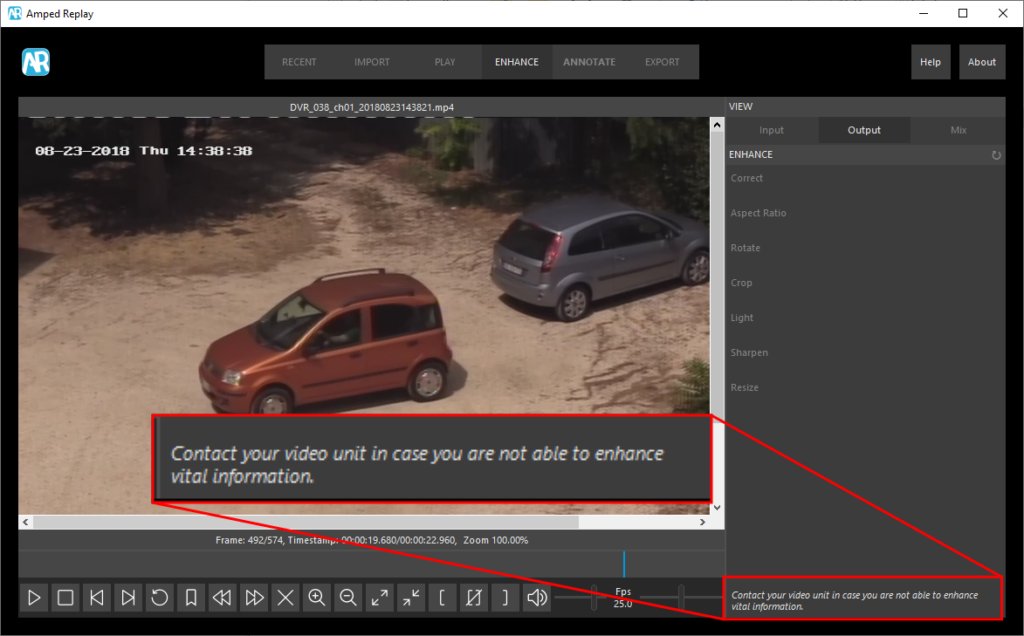
We save the file, close and re-open Amped Replay, and move to the Enhance tab. Here is how it looks now:
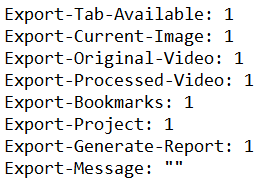
We also have several configuration options that determine which Export options should be made available to the user. We can also set a message to be displayed in the Export tab, just like we did before.
Okay, what we’ve seen until now was to configure Amped Replay on a specific computer. But what if the administrator needs to configure many workstations where the software is installed? Here the admin-settings-source.ini file comes into play. Its content is entirely commented by default:
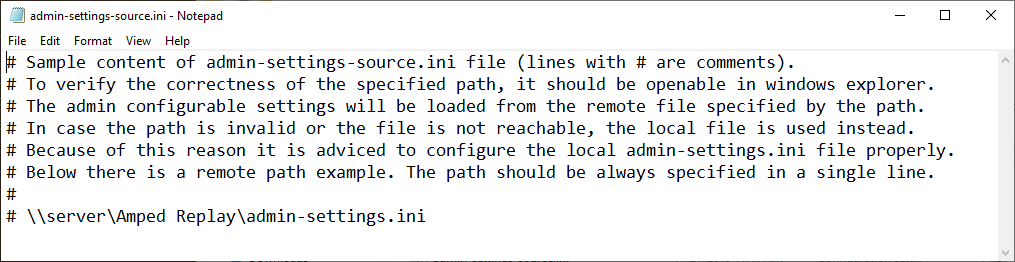
The admin can create the desired admin-settings.ini file (that we’ve described before) and place it in a network-accessible path. Computers in the network will thus use the remote settings file instead of the local one. If for some reason the remote file is not accessible at the moment Amped Replay starts, the local file will be directly used (so it would be advisable to also reasonably configure that one as well, just in case).
We’re aware that customizing the feature list and crafting the proper messages is something that takes time, and administrators surely don’t want to redo it when not strictly necessary. For this reason, when you install a new version of Amped Replay, the admin-settings.ini file will NOT be overwritten. However, there may be new customizable features of Amped Replay that did not exist in the previous file version, and we wanted to provide the complete list to the administrator. This is the aim of the admin-settings-default.ini.
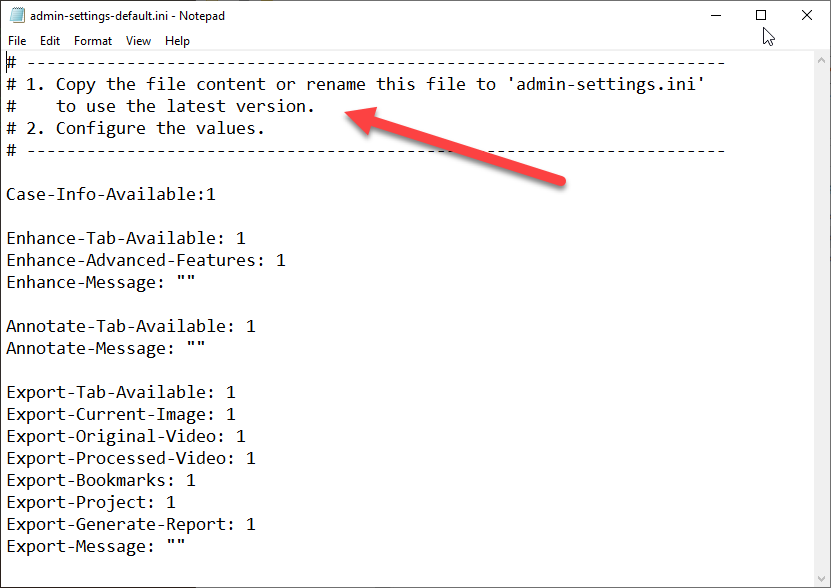
This file (which is not loaded by Amped Replay), will be overwritten at every installation, so to always contain the up-to-date list of customizable options. When they want to, the administrator can copy-paste this file to create a new version of the admin-settings.ini featuring all the available options.
Before we say goodbye, one final note: what happens if some lines of the configuration file admin-settings.ini are missing? In that case, the corresponding features will be enabled by default. This is to avoid users missing new features because of an older configuration file. However, if the whole file is missing, then all features will be disabled! So, if you move the admin-settings.ini away from its folder, you’ll get a “player-only” version of Amped Replay, with only the Recent, Import, and Play tabs present.