Dear friends welcome to this week’s tip! I hope you didn’t miss the latest news about Amped Authenticate! With the last Update 17658, we’ve introduced a brand new filter category, called Geometrical Analysis, which includes the Shadows filter. Today we’ll demonstrate how to choose which shadow constraints to be added and which would not add any value. Avoiding useless constraints will make processing faster and produce more pleasant output images. Keep reading!
If you didn’t read the latest Amped Authenticate update blog post, we sincerely recommend you have a look: it explains the basics of the Shadows filter and how to interact with it. For the sake of this tip, we just recall the basic principles: after loading an image into Amped Authenticate and activating the Shadows filter, you can click on the image to add cast shadow constraints. Let’s start with an example of those available in Authenticate’s samples folder (you can open it by clicking on Help -> Open Samples Folder…). We’ll use the image in folder “16 – shadows/indoor_fake.jpg”.
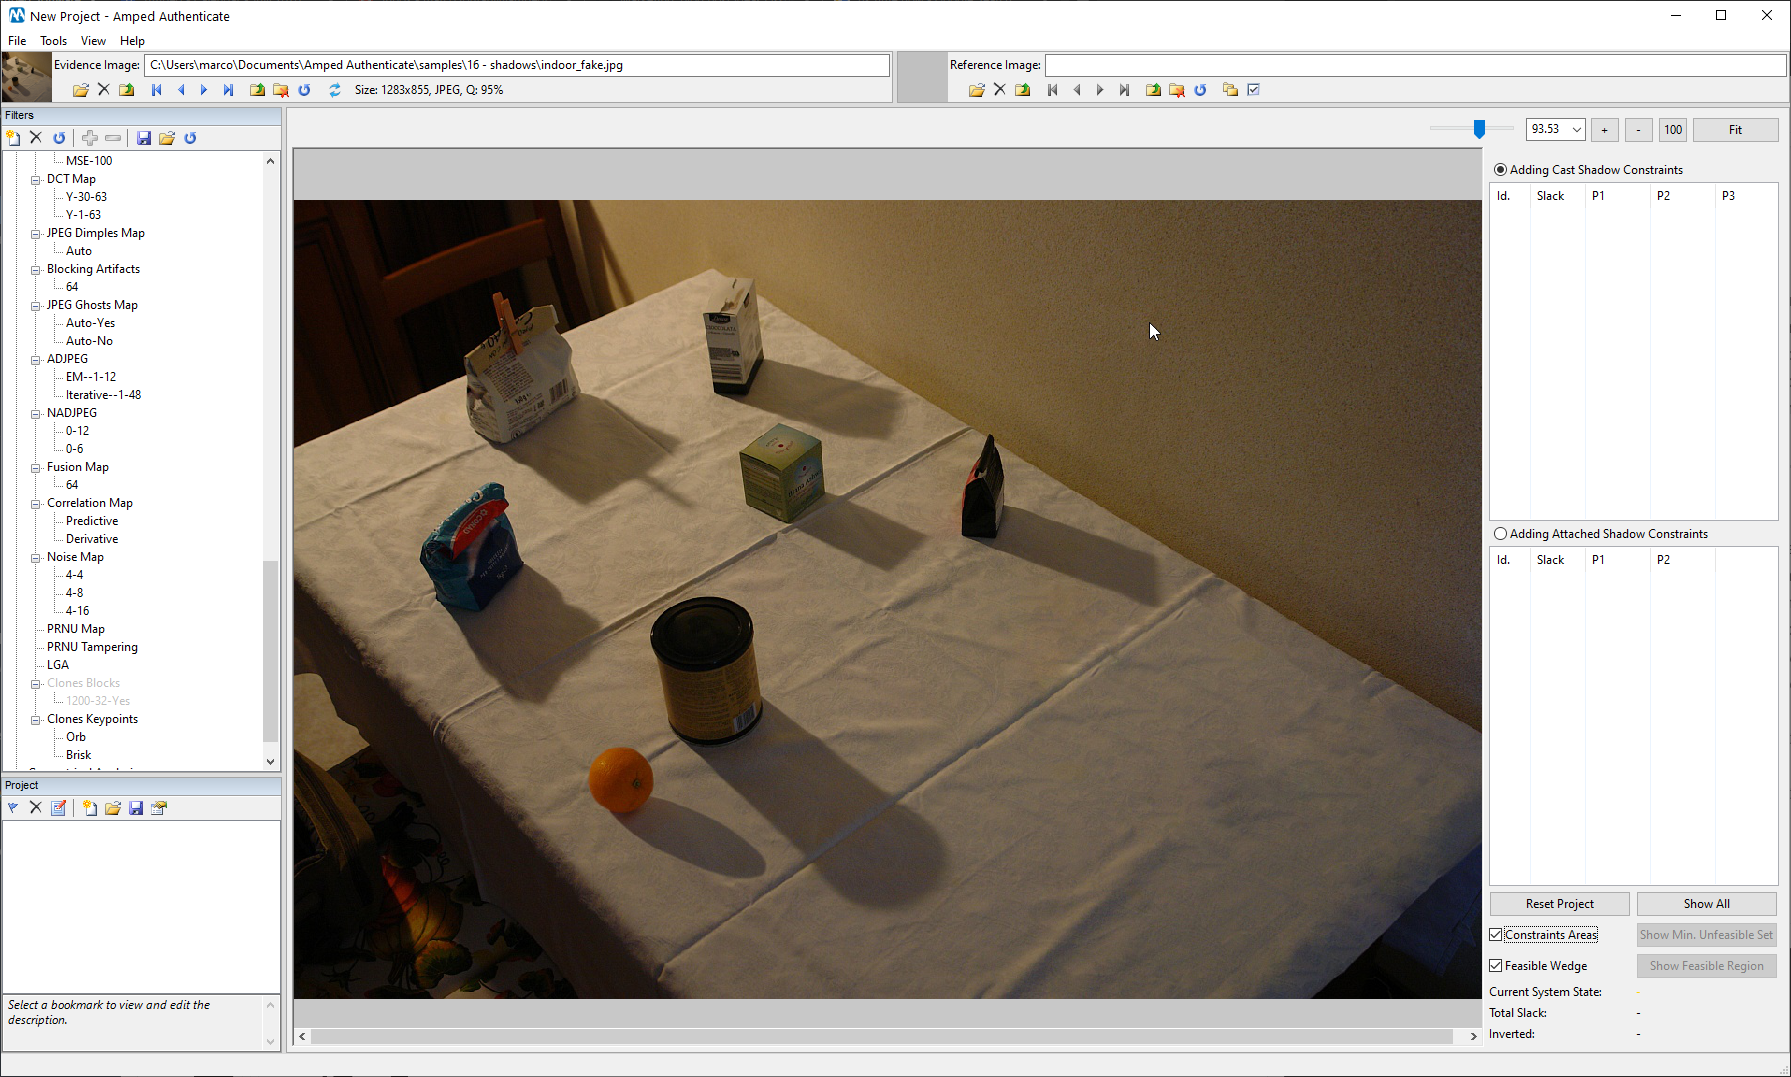
We begin by adding two cast shadow constraints from objects on the right, and we reach this situation:
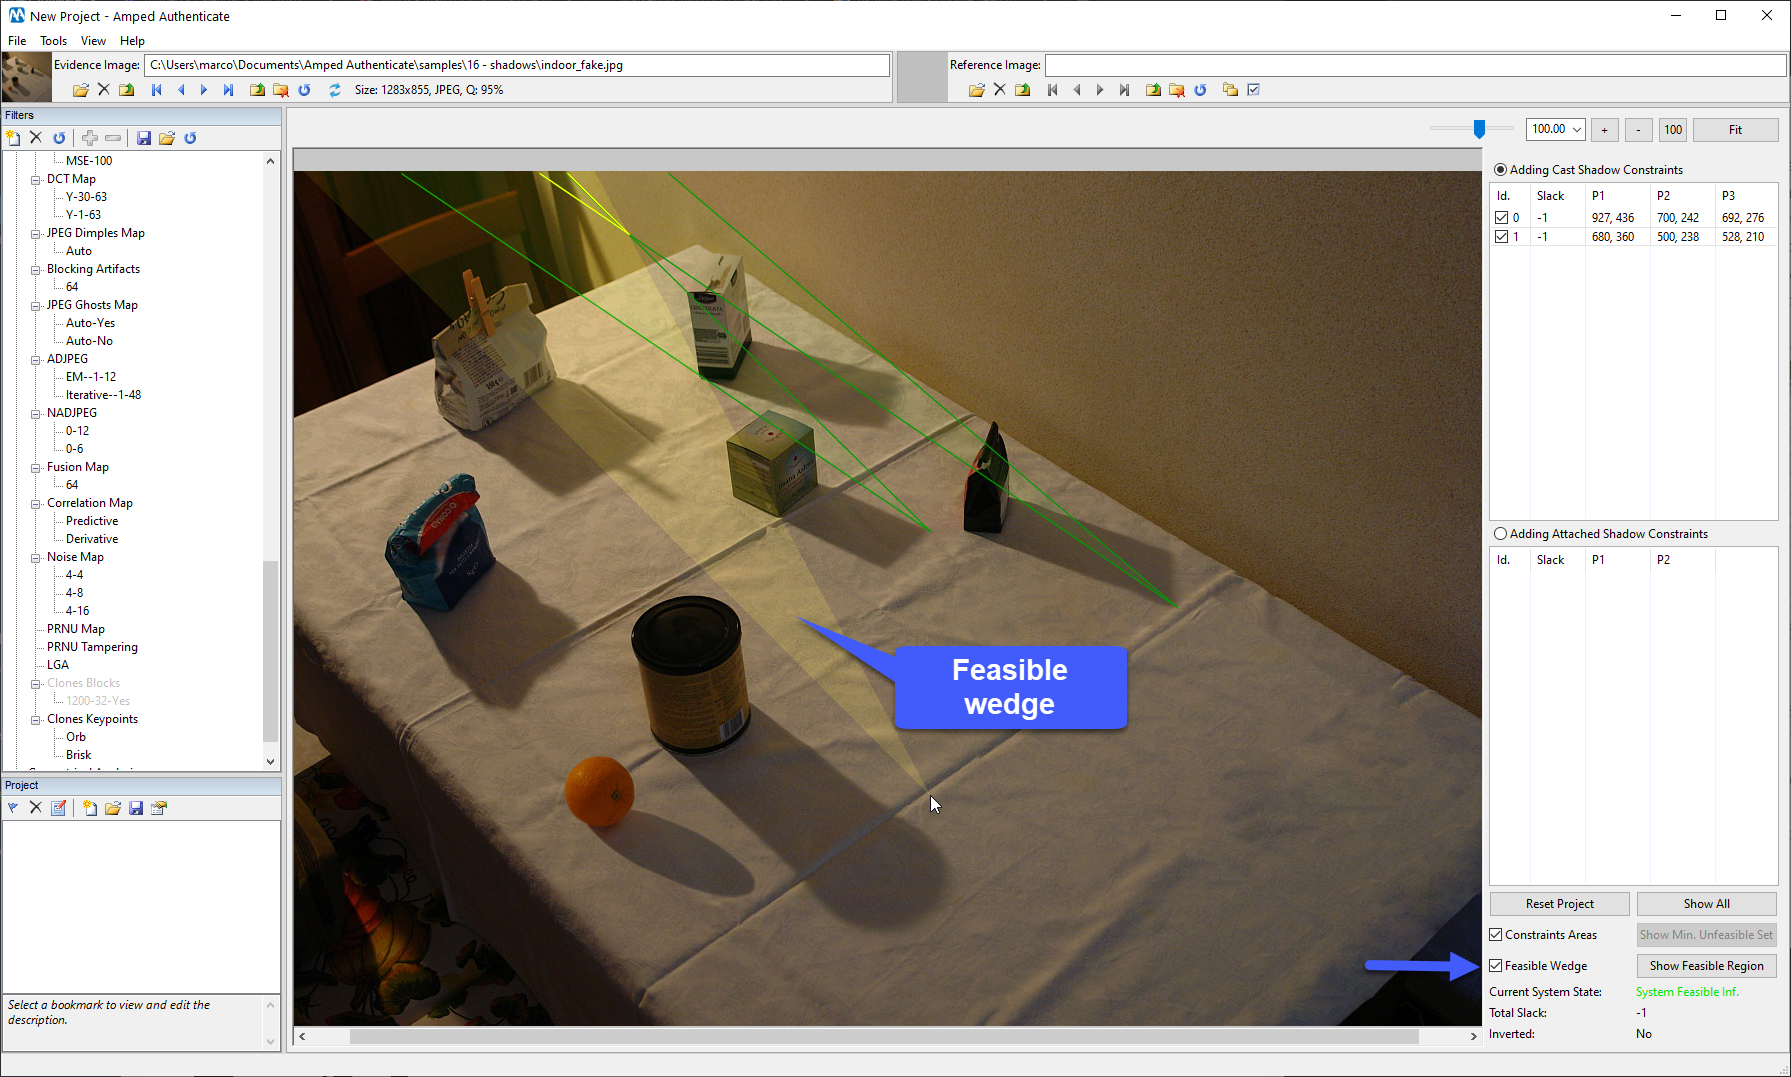
Focus your attention on the yellow wedge, that is, the “Feasible wedge”. You’ll see that, as you move your mouse around, the wedge follows it so as to connect the mouse position to the extrema of the feasible region.
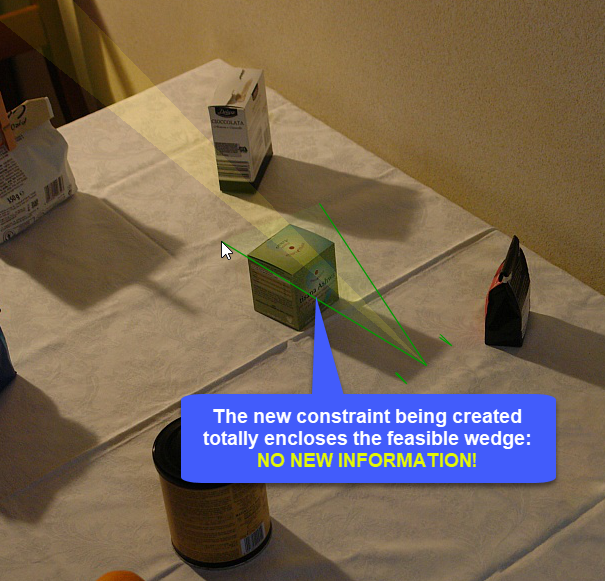
As you add new constraints, the feasible region should restrict, and so the yellow wedge should get narrower and narrower. If it doesn’t, it means you are adding constraints that do not bring any new information about where the light source should be. But is there a way to understand whether a possible new constraint is worth adding? Yes! That’s what the feasible wedge is made for. Let’s continue with the example: if we try to add a new constraint, based on the tea box’s shadow, we see that the constraint we’d be adding entirely encloses the feasible wedge:
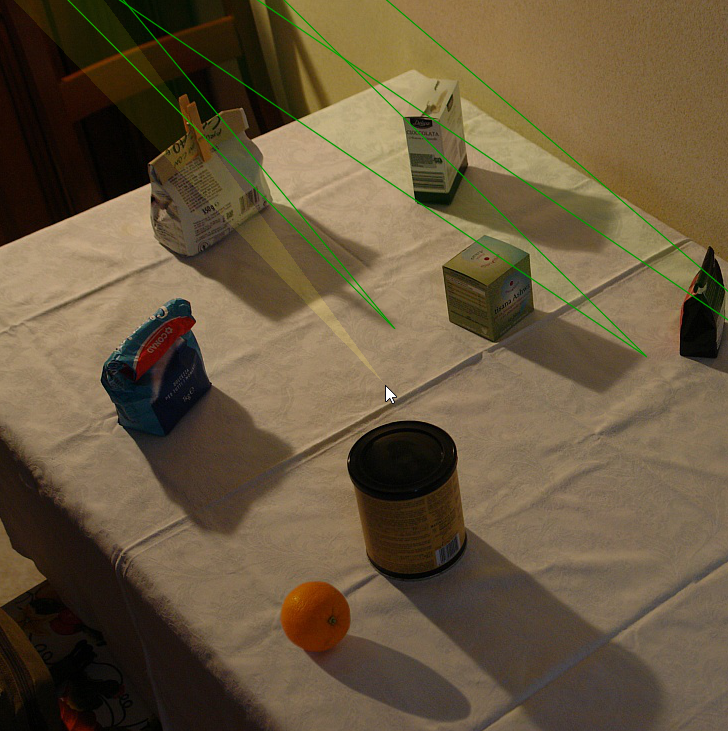
We can avoid adding that constraint (you can right-click to abort selection) and look for one that’s more restrictive, such as the one below:

After adding this constraint, the feasible region (and, consequently, the feasible wedge) becomes narrower, thus confirming that we’ve added valuable information:
And what if the new constraint you’re about to add is NOT contained in the feasible wedge? That could mean two things:
- After adding such constraint, the system may become unfeasible. This means that, among the currently selected constraints, there is at least one that is either erroneously placed or it belongs to a fake object;
- Otherwise, it may happen that after adding the constraint the system remains feasible, but with an inverted solution.
With our example, where the orange has been pasted in, we can easily show an example of case 1:
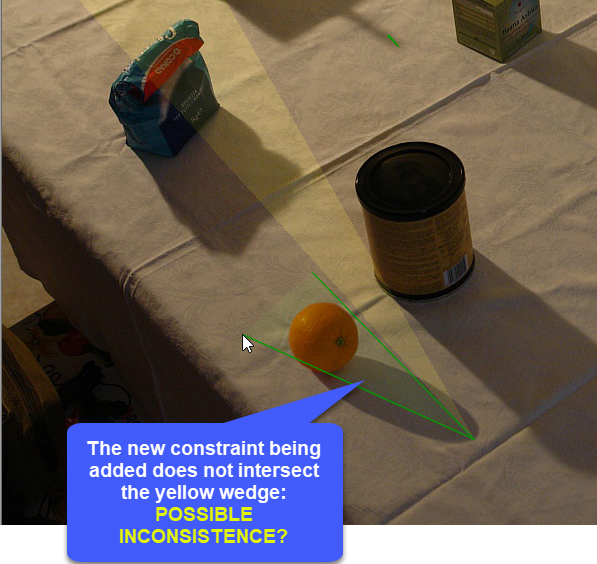
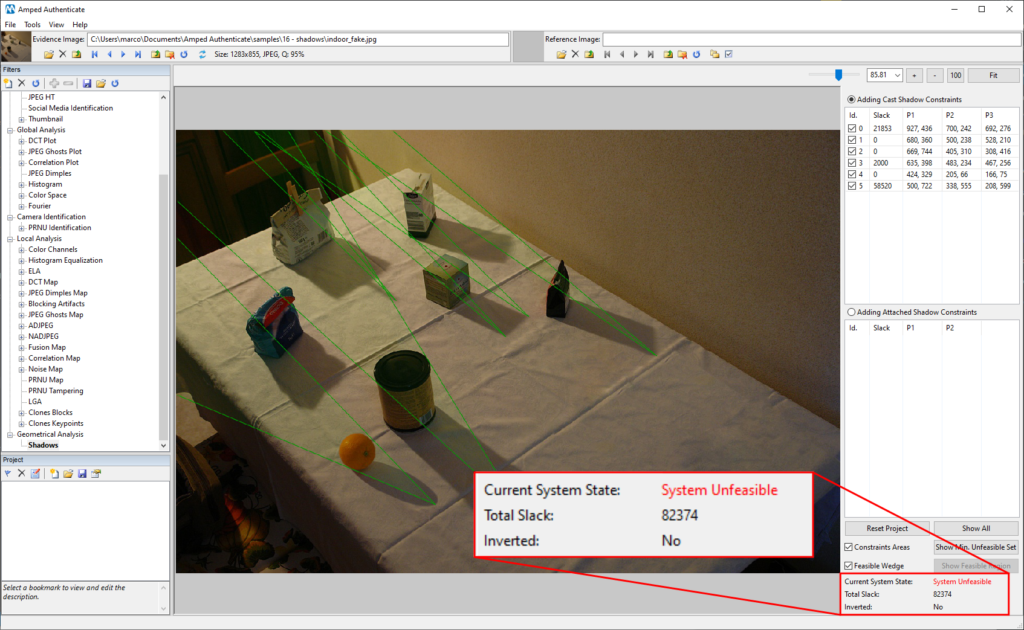
Indeed, after adding such constraint, the system becomes unfeasible:
And that’s it! So, recapping, we’ve shown that when the constraint that is being added fully encloses the feasible wedge, the analyst may ignore that constraint because it would not introduce new information for the solution. In the next weeks, we’ll keep dedicating some tips to the Shadows filter, so as to help our users make the most of it!