
Dear friends, welcome to this week’s tip! Today we continue the mini-series about Amped FIVE‘s Video Input filter. We’ll see that it can be your greatest ally when you’re dealing with reverse projection, that is, when you go to the crime scene to place a height chart or some other reference element. In these cases, the Video Input can save you a lot of time and headaches! Keep reading to find out more.
CCTV cameras have lots of shortcomings, but at least they have a very positive feature: they’re wall-mounted, so you’ll normally find them in the very same position even after weeks. Combined with the fact that most people install DVRs and never touch them anymore, we’re often in a situation where it’s possible to go back to the crime scene and find the very same recording system that captured the crime.
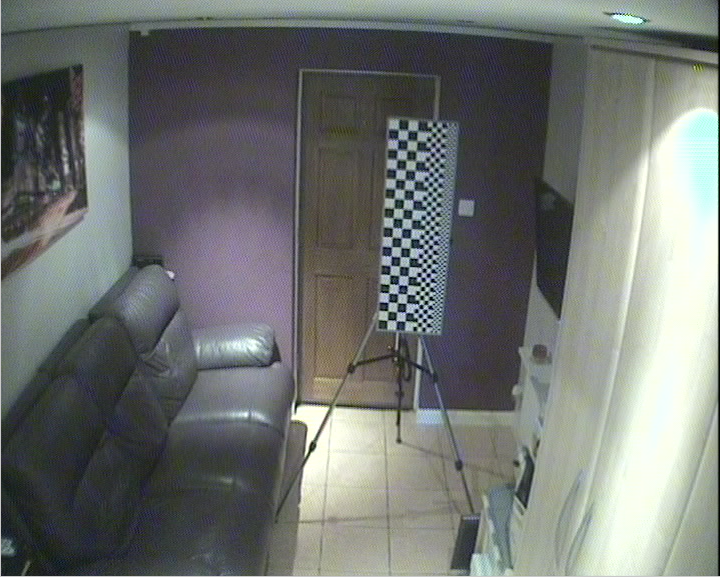
Why is this important? It’s important because you can add to the scene some reference material that was not present during the investigated event, but would have been so useful! Imagine we have this recording showing a thief fleeing after a robbery.

It would be very useful to measure the height of the thief. If you have the chance, you can, of course, let the suspect walk again in the same room and compare the known recording with the unknown, but this is not so common. However, if the camera and DVR are still available and unchanged, we could go back to the scene and place a height chart!
Cool, but now the problem is: how do we combine the evidence video and the reference frame with the height chart? We need to: 1) be sure we position the chart properly, and 2) find the best frame of the evidence video and combine it with the height chart to take the measurement.
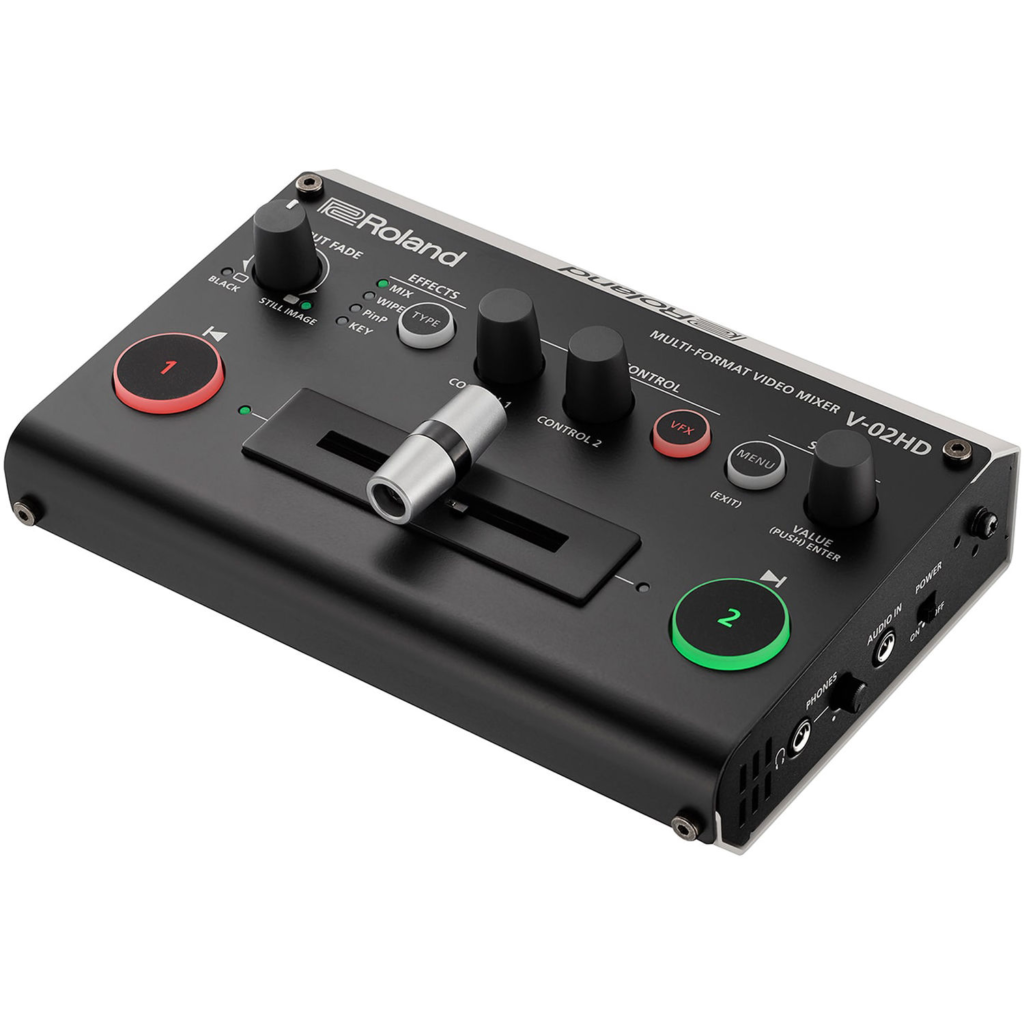
Keeping the evidence frame and the height chart frame side by side in two different windows is clearly sub-optimal… you don’t want to place rulers on the computer display like they do in memes. It’s much better to blend frames together to compare the suspect and height chart position effectively. This can be done with hardware video blenders like the one shown here.
But wait, don’t go out and buy one! If have Amped FIVE, you already own the right tool! You just need to use two filters: the Video Input and the Video Mixer.
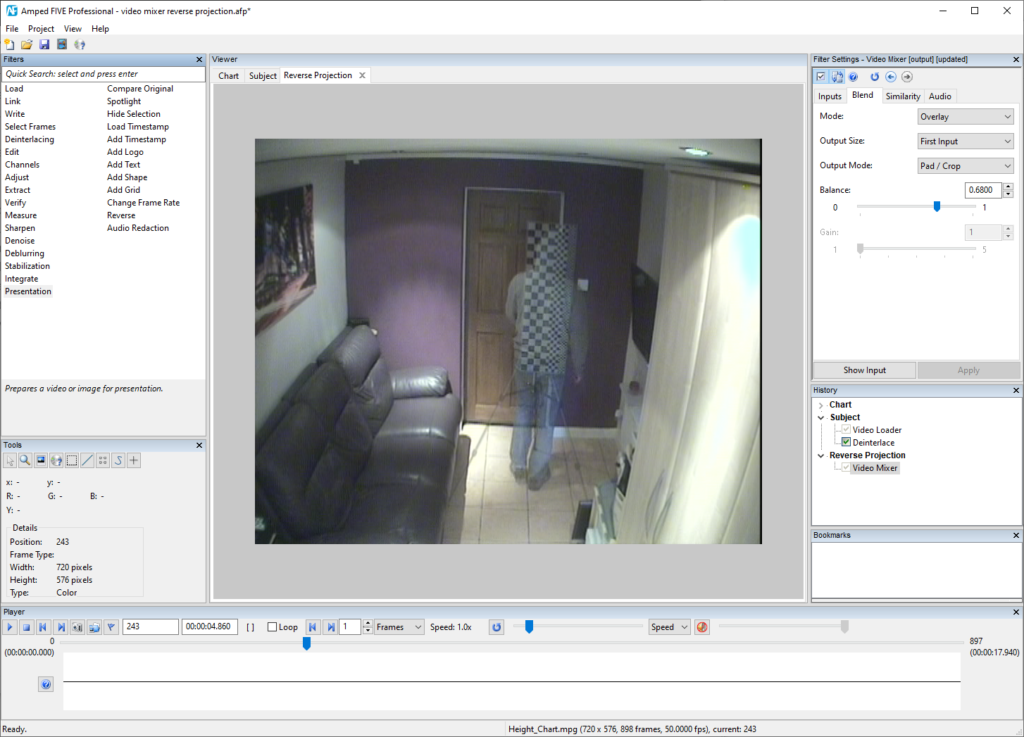
Let’s start from point 1), placing the chart. When you’re on the scene, you connect the DVR video output (or the camera itself) to your video grabbing device, so to use Amped FIVE as a monitor (as we explained in the first tip of this series). Then, you fire up the Video Input filter and start capturing the live feed from the DVR. It’s now time to load the evidence video in another chain and find a frame where the “bad guy” is clearly visible. Now you can use the Video Mixer to blend together the static frame showing the “bad guy” with the live video feed! This way, you can move around and see in real-time the difference, or the overlay of the height chart and the evidence frame, as shown below, with the goal of finding a good position for the height chart.
Once you’ve found the right position, it’s time to make sure the DVR is recording the current scene. Indeed, the actual measurement should not be made on the live feed video, but rather on the recording exported from the DVR. This is needed to ensure the reference and evidence videos undergo the same processing and acquisition chain (otherwise, we’d be comparing oranges with apples!).
You can now use the Video Mixer once again, this time combining the evidence and reference videos acquired from the DVR, so to actually measure your suspect’s height thanks to the height chart!
And that’s it! We’ve presented another case where the Video Input filter becomes so handy! And the mini-series dedicated to this filter is still to be continued, so stay tuned!


