

Dear friends welcome to this week’s tip! Since the latest Amped FIVE release, users can deal with audio much better than before. Today, we’re demonstrating that in some cases you can effectively use the audio waveform as a guide to synch in time two video tracks. Keep reading to find out more!
Case Study
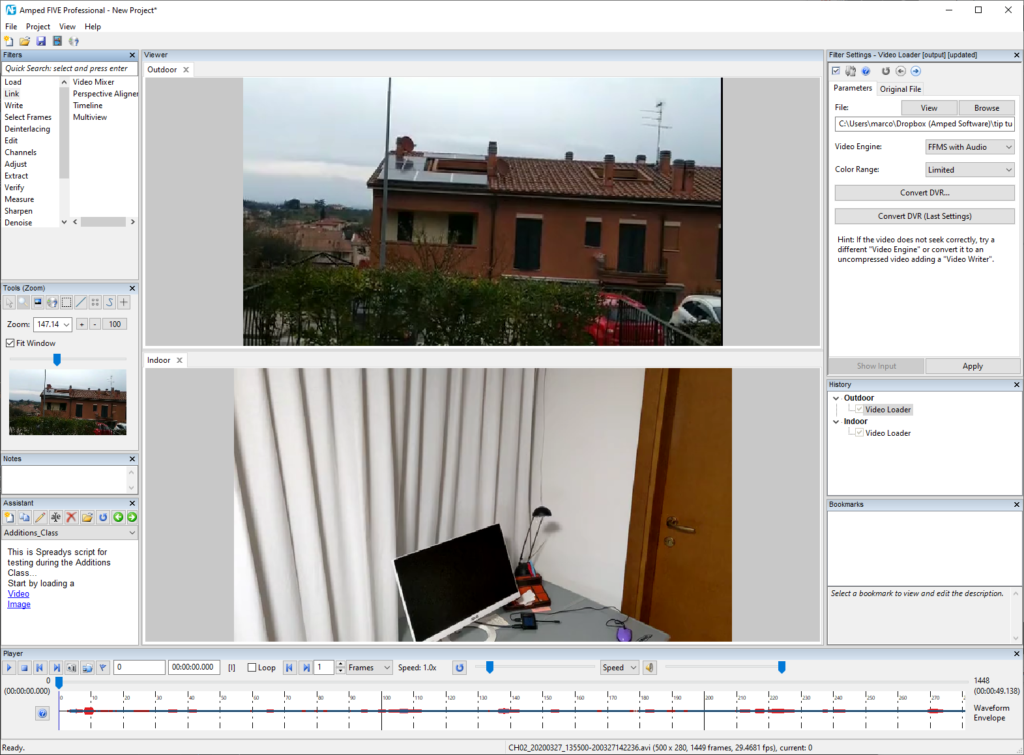
Let’s start with a case study: we have two video tracks, captured by two different devices, that depicts two different scenes (one outdoor and one indoor) at roughly the same moments in time.
You can download them by clicking on the buttons below (10 MB total) or watch them.
Unfortunately, however, they are not synched, and we don’t know the amount of delay between the two. Our goal is to create a collage showing the two video streams, synched in time. We can assume that both videos have the same, constant frame rate.
Since there is no visual element that is common to the two recordings (e.g., a flashlight, or something/someone passing by in both scenes), there’s no chance we can synch the videos based on what we see. But, don’t forget, videos often come with audio tracks! And, luckily, sound propagates much better than light in some situations! That is to say, there could be some distinguishable sound that reached both cameras’ microphone, allowing us to synch the tracks!
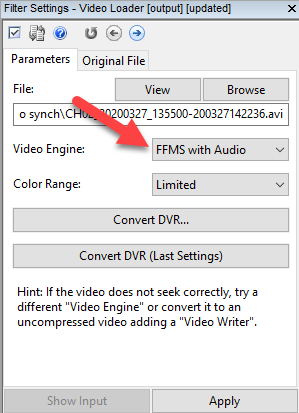
Let’s make sure we’ve loaded both videos with the FFMS With Audio engine:
Then, as explained in a recent tip, we can go with the mouse over the Player panel, hold SHIFT and scroll the mouse wheel to zoom the audio track vertically. We do this for both videos, and we notice that there’s a spike in both the audio tracks!
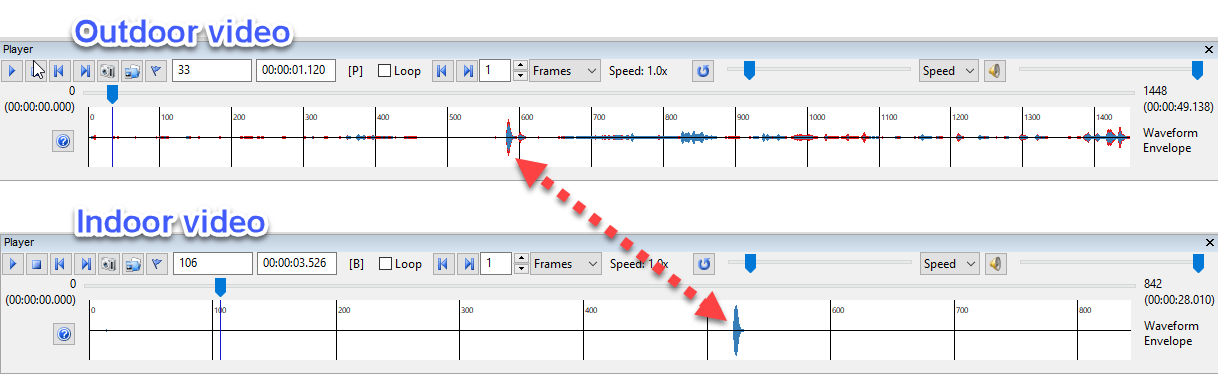
It’s definitely time to listen to both audios to get confirmation that the spikes could indeed be related to the same moment in time. Audio inspection reveals that… yes! There’s a strong “knock” that we hear in both videos. After that sound, the Indoor scene slightly moves, suggesting that the camera was somewhat influenced by the event.
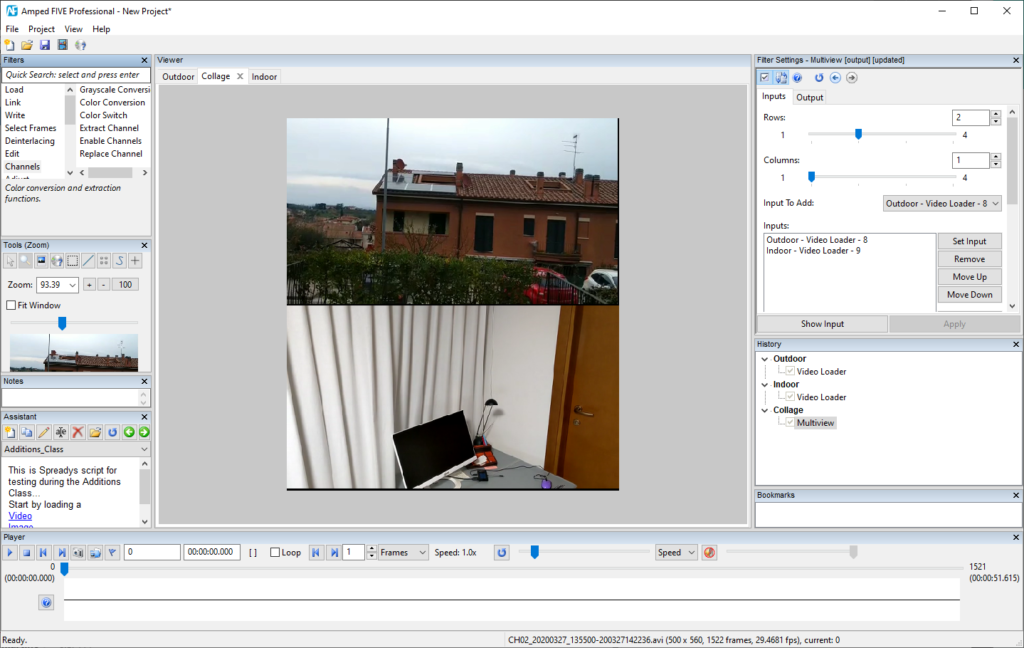
Assuming we don’t have to worry about strange/variable framerates, it makes sense to use this shared sound like a landmark to guide the synching process. Let’s head to the Link filter category and select the Multiview filter (if you’ve never used it, take a look at this past tip).
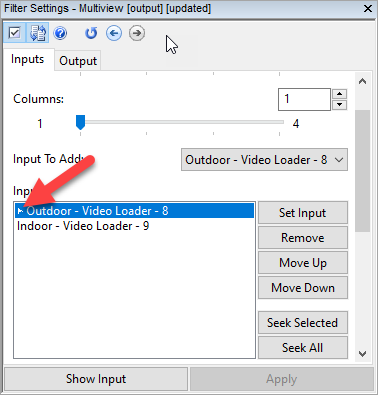
Since we only have two videos to combine, we configure the Multiview filter to arrange them on 2 rows and 1 column, setting such values in the Inputs panel:
Synch Videos
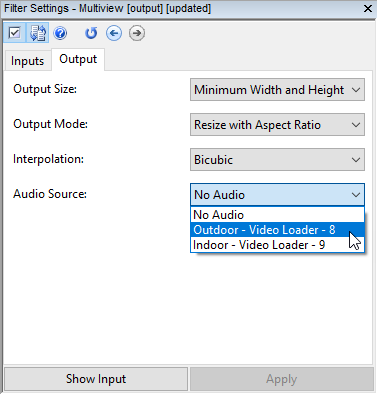
Let’s now synch the videos. When you combine videos that have an audio track, the Multiview filter lets you choose which one you want to use as the audio source. Let’s click on the Output panel and select the Outdoor scene as the audio source.
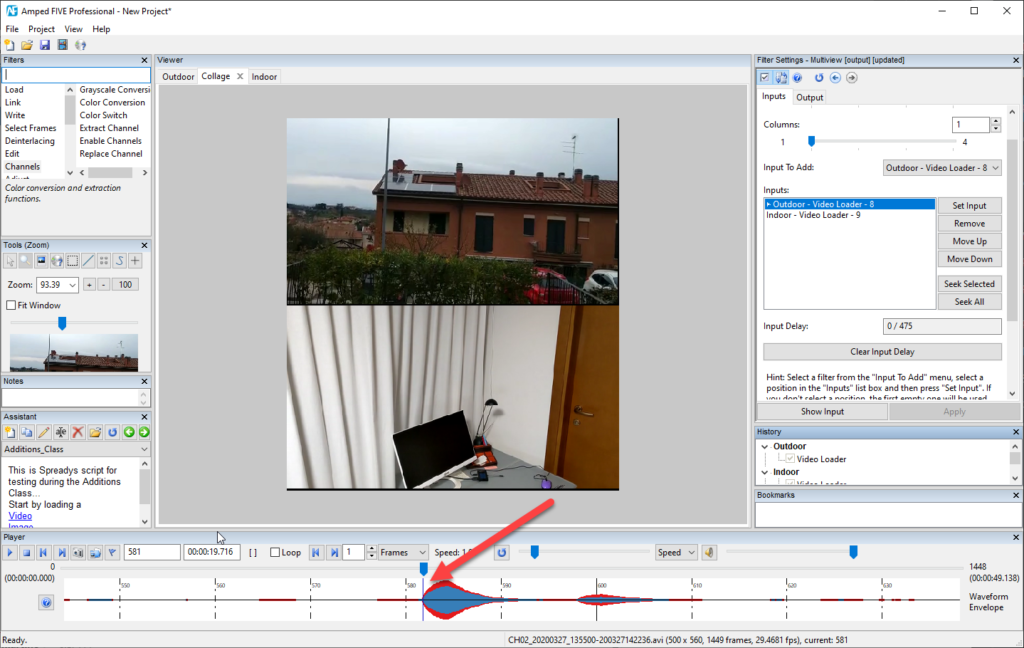
Now we go back to the Inputs panel, and we double click on the Outdoor input track. This will allow us to seek that specific track while leaving the other still. You’ll see the selected track will show a “play” symbol close to its name:
And now, we drag the player cursor to the very beginning of the audio spike. Remember you can zoom horizontally (CTRL + mouse wheel) and vertically (SHIFT + mouse wheel) in the audio panel to make it well visible!
Ok, this track is done. Let’s now work on the second one. We go to the Output panel and select the Indoor scene as the audio source. Then, double click on it in the Inputs panel to seek it. Place the player cursor at the beginning of the waveform spike.
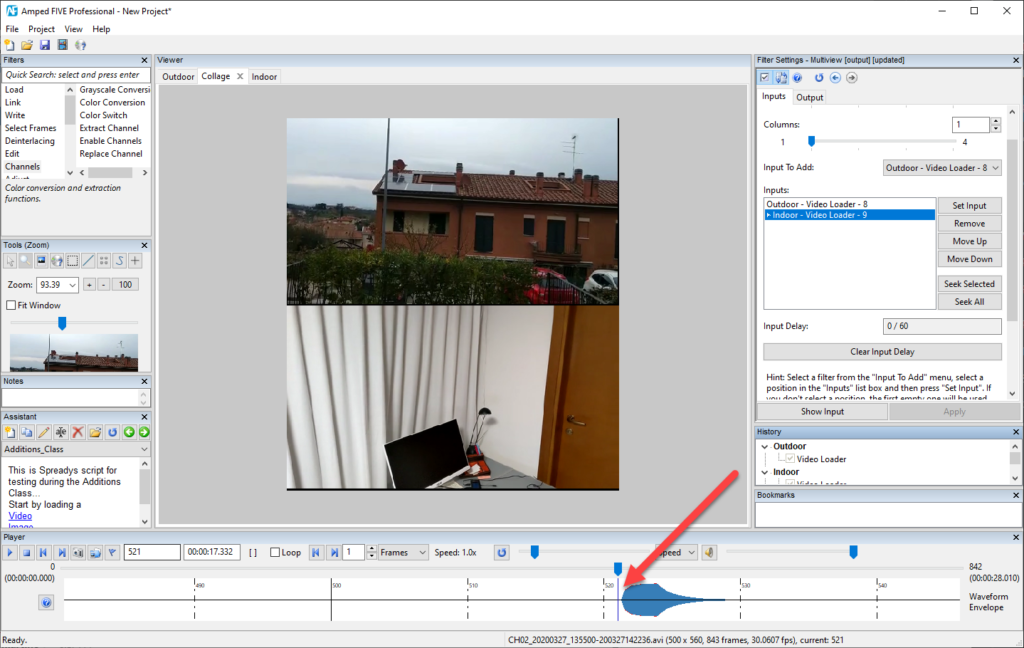
And we’re done! If you look at the Multiview filter settings panel, you’ll see that the Input Delay has been set to 0/60. It means that, based on our synching operations, the Indoor track has a delay of 60 frames compared to the Outdoor track.

Outdoor scene
We can select the Outdoor scene as the audio source. Click on the Seek all button on the Multiview filter’s Input parameter panel, and we’ll see both videos playing.
Notice that, just when we hear the “knock” in the Outdoor video track, the camera moves in the Indoor video. That means we synched videos the right way! Of course, remember this was just a tip. Video timing is a delicate topic that requires careful evaluation. Metadata in the container remains the most valuable source of information (when you have it!).
Conclusion
Updated on April 1, 2020
One of our attentive users noticed that for synchronization purposes. We should take into consideration also the distances between the two recording devices since sound travels much slower than light. In our specific example, the two videos were taken from a few meters apar. So, this shouldn’t matter much. However, if you use this technique in an actual case, you must be aware of this and estimate the possible error rate. Thanks for reading our posts with a critical attitude!


