
Dear Amped Blog fellows, welcome to one more tip! It’s Amped Replay‘s turn. We’re digging a bit into one of the features that rolled out with release 15666! Now, it lets you easily handle multiple annotations. You may have noticed that, when you apply any annotation tool, the player bar now shows colored lines to indicate the range of frames to which the annotation is applied. This apparently simple feature will make things so much easier. Keep reading to find out why!
When we started developing Amped Replay, usability was among the top priorities. We wanted a tool to allow quick and easy video redaction and annotation, something so intuitive that virtually no manual was needed. We also wanted it to be essential and functional. This way our users could get what they want in the fewest number of clicks.
Take a look at the example below. It took less than 10 minutes to annotate and redact the video this way, with one tracking and one static magnification, several moving pixelations and a colored text label.
Now, let’s focus the attention on how the player bar gets colored when we click on the Annotation tab. You see, we have several black lines, one long yellow line, a red line, and a green line. What are they?
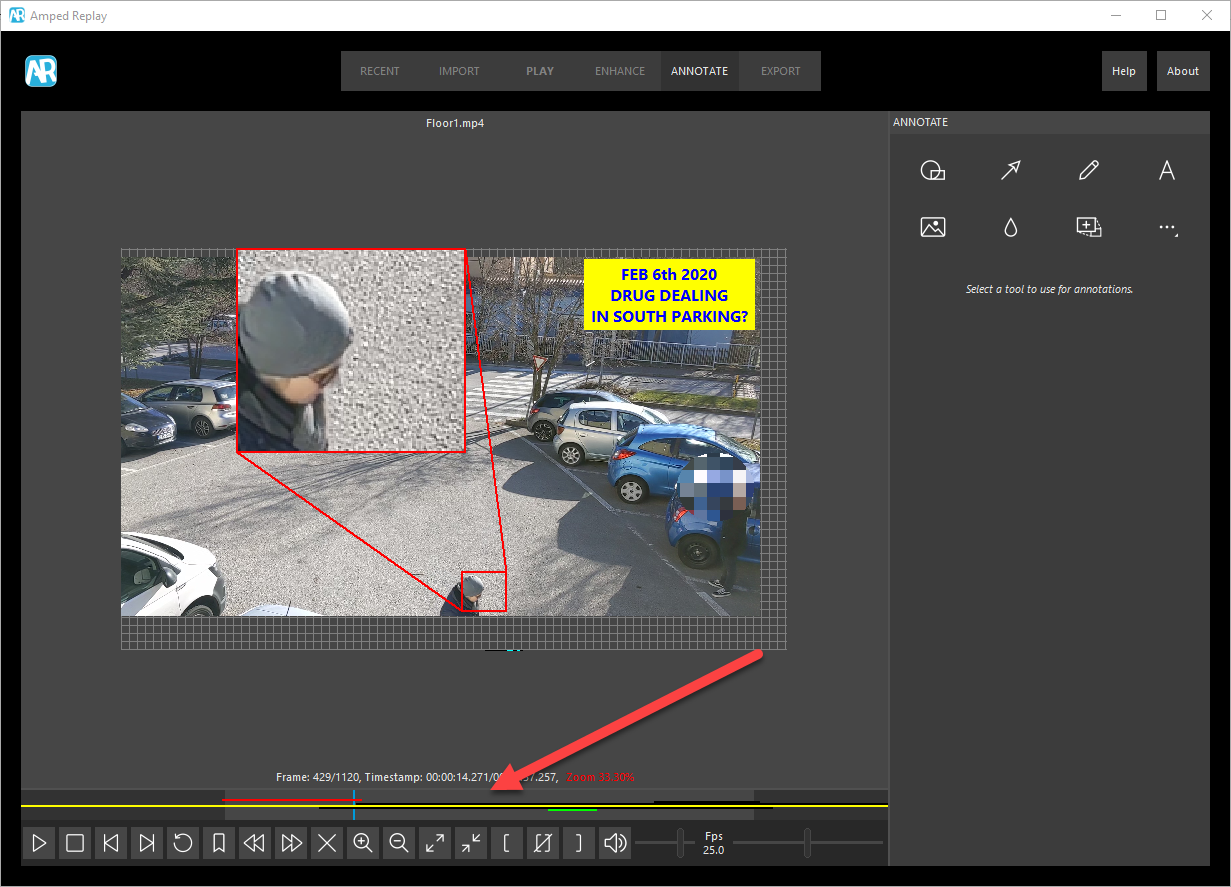
Each line is related to an annotation. Black lines mark frames where the Hide tool is being used to redact something. If you hide several regions in the same frames, you’ll simply get several black lines. The other colored lines mark frames where the Magnify tool is active (red and green) and where the Text tool is active. The color of each line is determined by the color the user sets for the annotation object. This is a quick and easy way to distinguish different annotations straight from the player bar!
There’s more than that, however. The vertical order with which lines stack over each other is not random: it reflects the current layering of annotations. So if we just bring to front an annotation, its line will move up to the top (below is what you get if you bring the green magnification to the foreground).

That’s a very effective and simple way to know which is the current layering of all annotations in every frame.
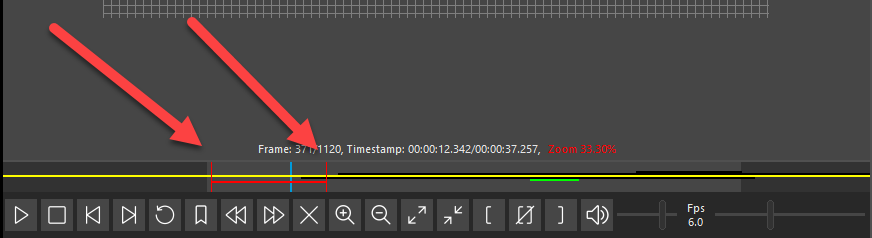
Finally, look at what happens when you click on an annotation object: you notice those two vertical segments? It’s a way to quickly show where the currently selected object appears and disappears from the video. This is especially useful when you have many annotations, and therefore many lines in the player, as in our example.
Conclusion
Handling multiple annotations has become much easier with the latest Amped Replay release. We’ll keep adding features, mostly building on the feedback we receive from our users. So if you think we’re missing something, just let us know!


