Dear Amped blog followers welcome to this week’s tip! Today we’re getting to know a very useful, but often underestimated, filter in Amped FIVE: the Perspective Aligner. It can be a game changer when you have to integrate or compare two pictures that are captured from different perspectives, and thus impossible to align with simple scale/rotation transformations. We’ll see how it works with a practical, cool example. Keep reading!
When a camera takes a picture of a scene, we know we’re going to have a limited representation of reality. Pixel resolution limits the amount of detail, bit depth limits the dynamic range, etc. But we shouldn’t forget the first big loss: we lose a dimension! We’re representing the 3D world on a planar (2D) space. If we’re still able to understand what was closer or farther from the camera, that is thanks to perspective.
Sometimes, we’re given two (or more) pictures that need to be compared. If they were captured from the same camera in the same position, it would be easier. Therefore, by the Murphy Law, this rarely happens (unless we’re dealing with a CCTV camera, that is normally wall-mounted and fixed). Quite often, instead, we have to deal with images captured by different cameras from different points of view. It leaves us with something pretty hard to compare.
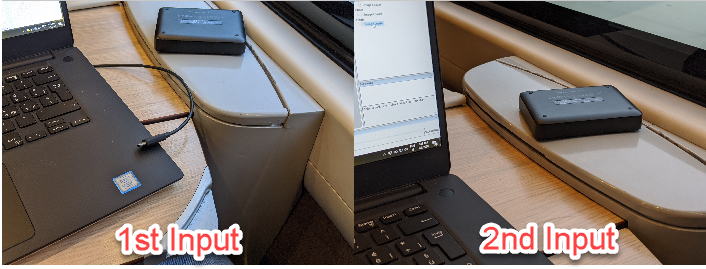
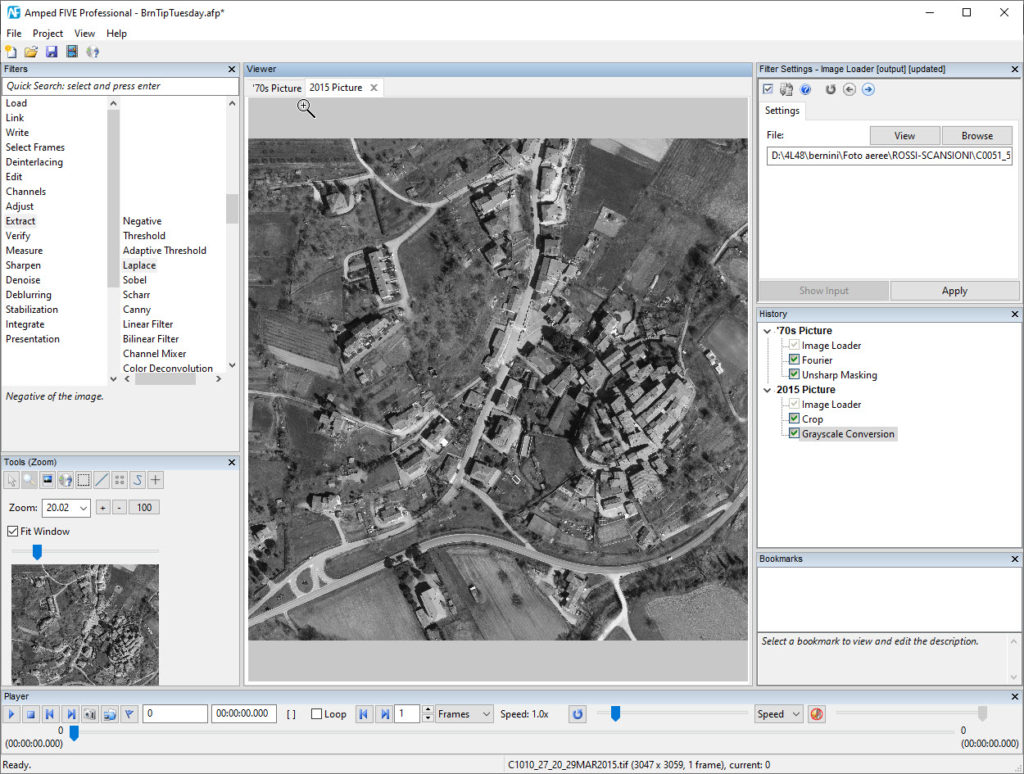
Let’s use a practical example. We’re asked to analyze these two aerial pictures, captured roughly 40 years apart, to understand whether a perimeter wall has been rebuilt (you can find these and many more aerial images at this link, if you like).
A rapid look is enough to appreciate the technological gap between the two photographs. The older one has been obtained through the digitalization of an originally analog grayscale picture and suffers from high-frequency noise. The more recent one is a natively digital, color picture, having a much better resolution. We see that in this case, the change in perspective is rather limited. The difference is mostly due to scale, translation, and rotation. Still, there is a slight change in the capturing angle that needs to be compensated to avoid errors in conclusions.
We first load the grayscale image in Amped FIVE and use the Fourier filter to reduce a bit the noise. Then, we use the Unsharp Masking filter to facilitate seeing edges.

Then, we load the color image. Since the pixel resolution of this image is higher, we need to scale or crop one of the images so that their sizes match. In this specific case, the easier way is to crop the relevant central part of the color image. Next, we turn the color image to grayscale using the Grayscale Conversion filter.
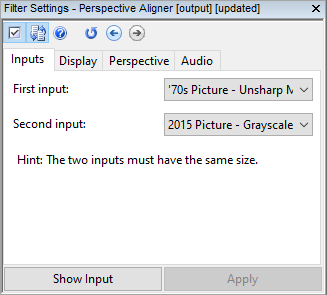
Now that the two images have the same size and number of channels, we can head to the Link filter category and choose Perspective Aligner.
This filter’s Settings panel has several tabs: Inputs, Display, Perspective, and Audio.
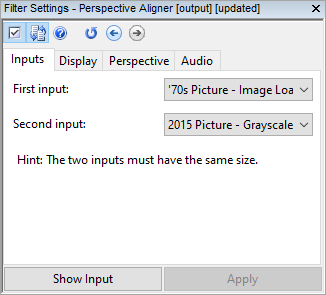
As usual for filters in the Link category, the Input tab allows selecting which images we want to link. Clicking on the dropdown menu we’ll see a list of all possible choices. In our case we want to link the last item of both chains, so we configure the tab as below:
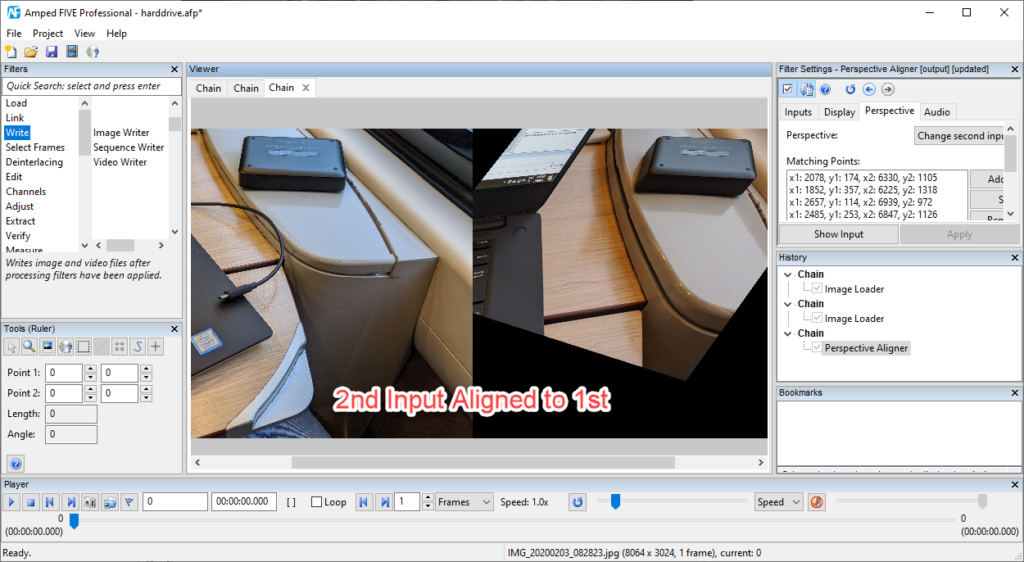
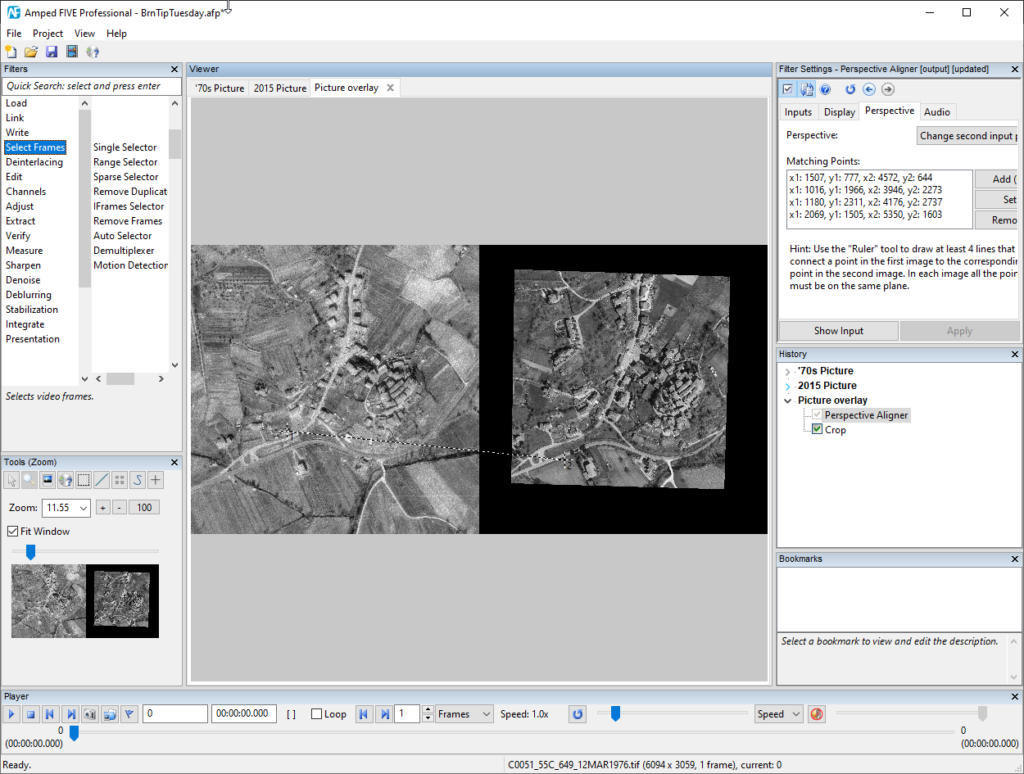
Let’s now move to the Perspective tab. This is where the game begins. We need to find at least four pairs of matching points in the two images. Indeed, Amped FIVE automatically activates the Line tool, so that we can click on a point in, say, the left image. Then, click on the matching point in the right image, and then press “U” on the keyboard to add this line. Every time we add a line, the Matching Points list in the Perspective tab is updated accordingly. We can always select an entry in the list to view the corresponding line and possibly change the points (just remember to click on the Set button to apply your changes).
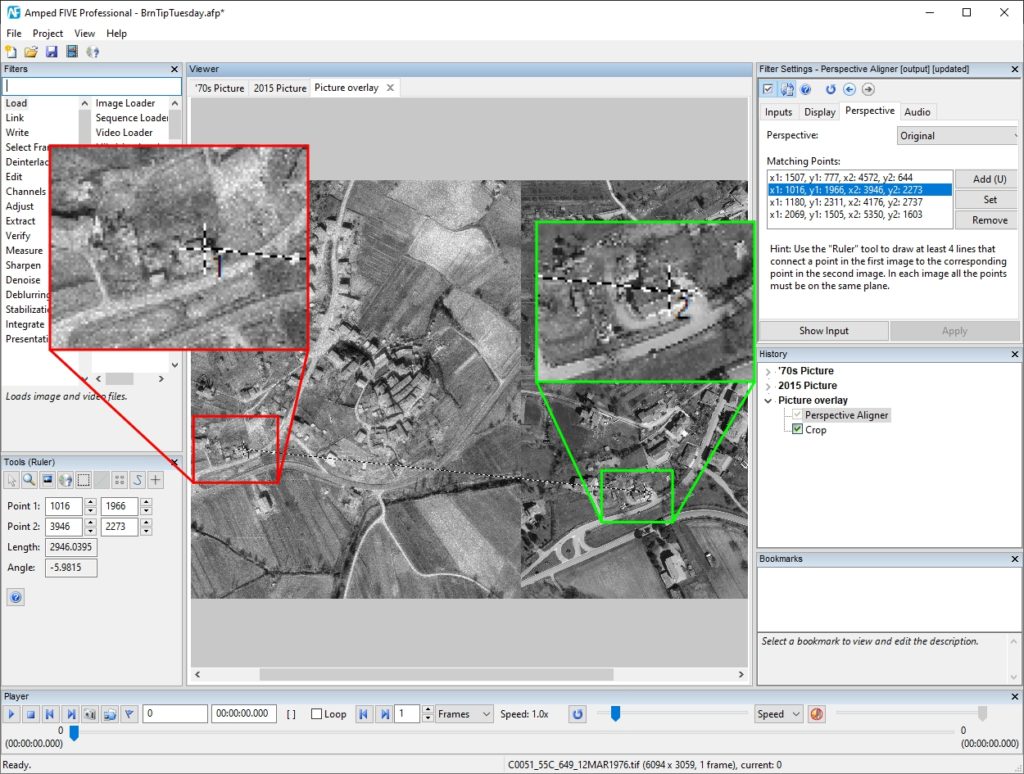
In our example, we can take advantage of historical buildings to find several matching points. It is recommended to find pairs of matching points spread throughout the images (e.g., some in the bottom left part, some in the top right part, some in the center, etc.) to allow a more robust estimation of the change in perspective.
Once we’re done, we let the magic happen. Click on the Perspective drop-down menu and choose whether you want the first image to be warped on the second, or vice versa.

This is what we obtain selecting Change second input perspective in our case:
Now that we’ve set up the perspective alignment, we can turn to the Display tab. It lets us decide how we want the two images to be linked. In the image above, we see the Side by Side Horizontally view, which is the default value because it’s the best choice for selecting matching points. But now that the perspective change is done, we can turn to more compelling views:
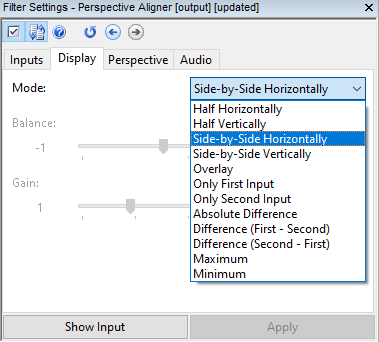
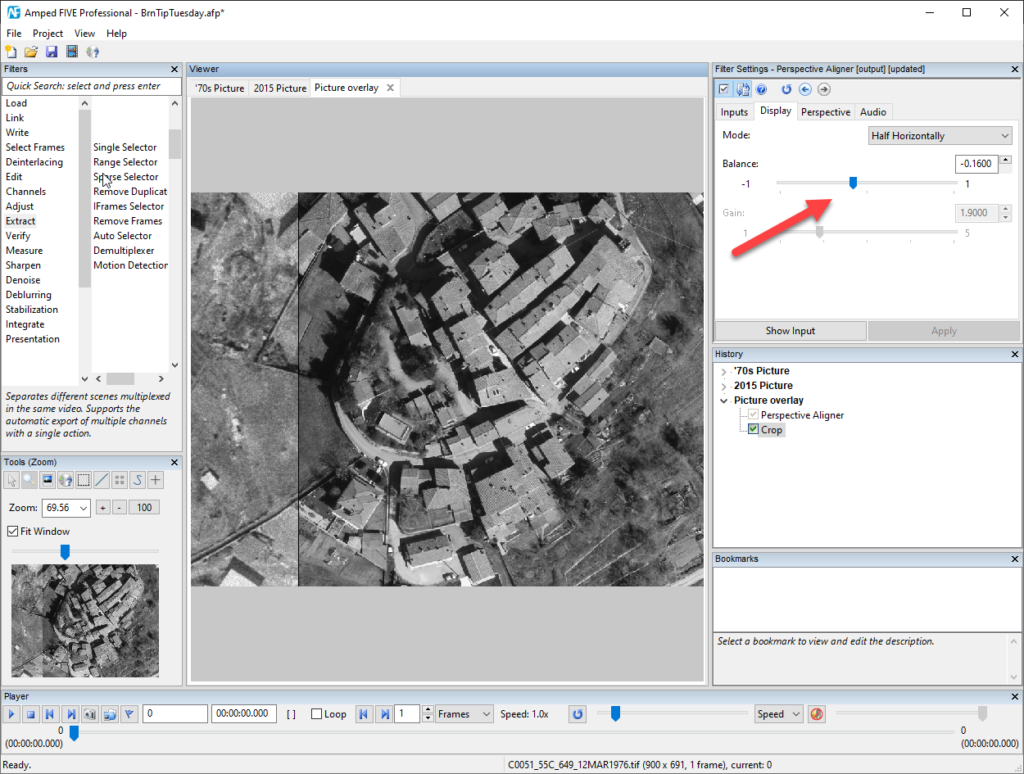
The most commonly used views are Half Horizontally, Half Vertically, and Overlay, as they all “mix” pixels of the two input images into a single picture. The two Half variations allow viewing a part of the first and a part of the second image, separated by a line. The position of the line can be set by the user through the Balance slider.
The Overlay view blends pixels of the two images. As before, the user decides the weight to be given to the first and second input.
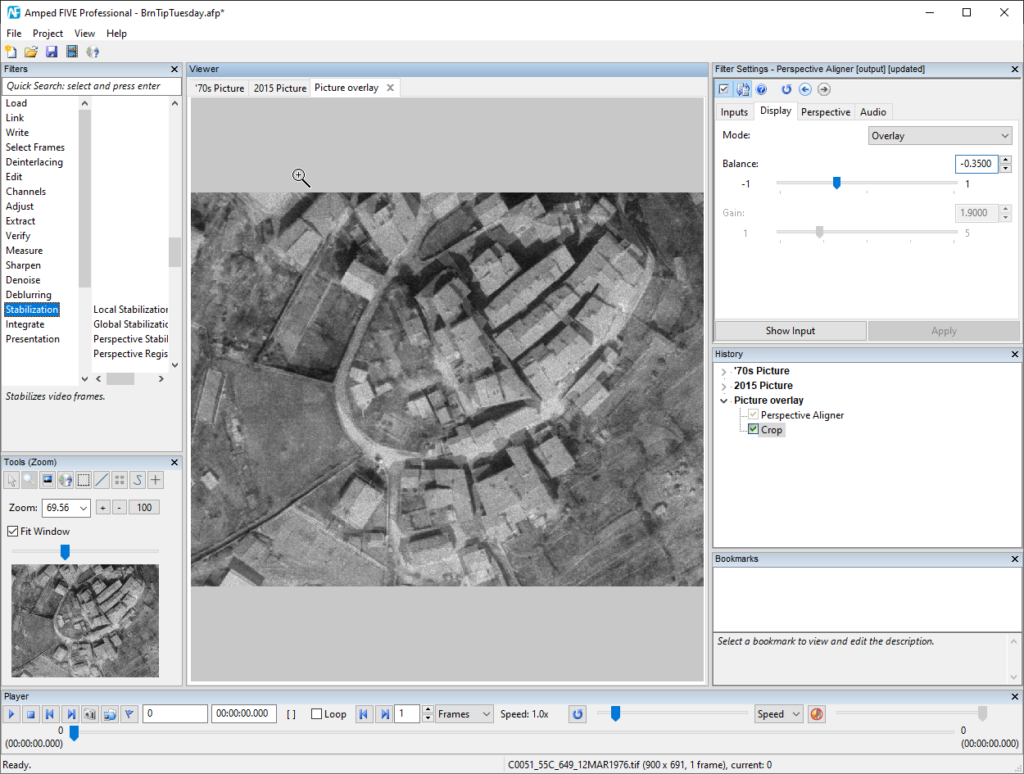
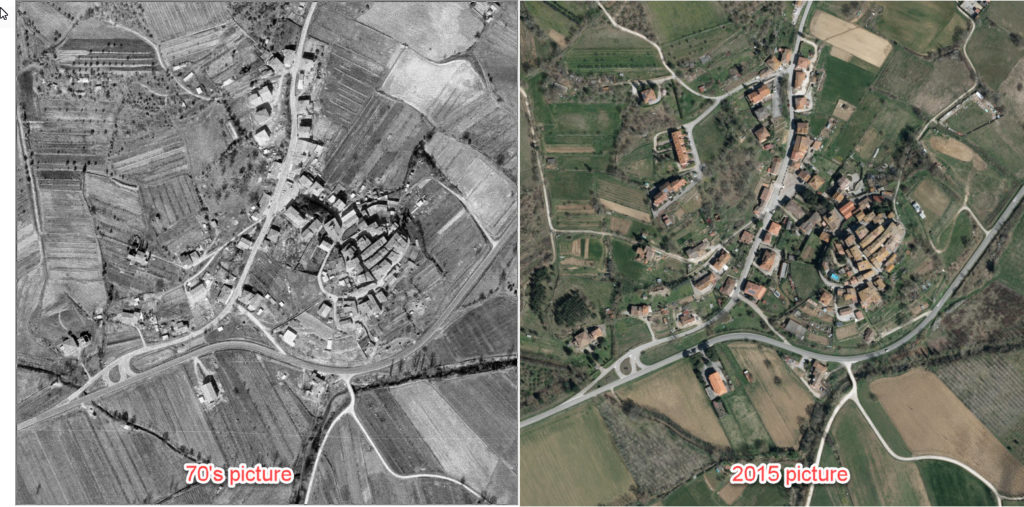
In our scenario, the most effective choice is to show how well the perimeter wall superposes by recording a video while we change the balance in the Half Vertically display mode. Of course, we can use Amped FIVE’s DVR Screen Capture tool to take the video.
We see that the alignment is well made. That is confirmed by the very good overlay achieved for other buildings in the video. Moreover, the wall seems to have not undergone any change in time. That is what we wanted to know in our example.
Before we say goodbye, there’s an important warning: you can use the Perspective Aligner tool for matching planar objects ONLY (e.g., license plates, paper on a table, lines on the ground). On the contrary, it is not appropriate to use this tool for aligning, say, someone’s face through several frames.
Apart from this important constraint, the Perspective Aligner can deal with changes in perspective much stronger than those in the example above, as shown by the following screenshots.