Dear Amped friends, welcome to this week’s tip! Today we’re showing you a pretty sci-fi feature available in our flagship solution, Amped FIVE. The Fourier filter allows you to remove periodic noise from images and videos. It’s a very effective way to gain a better view of the object of interest even starting from critical conditions. If you’re now curious, or if you didn’t understand one single word of what you’ve read until now. Keep reading and everything will be clarified!
Definition of Noise
The definition of noise is not a trivial one. There are many kinds of noises (sensor noise, compression noise, electromagnetic interference noise, etc.) which manifest in different ways. Is there something they all share? Yes: they all make it harder to catch the information we’re interested in. Unfortunately, there is no “magic button” that will remove all noises from a frame. Especially if we need to do it in a forensically sound way. We need to know what we’re working on, understand the defects and their origin. Finally, we need to apply the proper tools to reduce the impact of noise as much as possible while avoiding removing the information we care about.
Today we’re dealing with a specific kind of noise: periodic noise. “Periodic” means that there’s a kind of pattern that repeats again and again in a rather regular way in your image. Common sources of periodic noise are:
- Electromagnetic interferences: DVRs receive analog signals and convert them into digital internally. During the travel from the camera to the DVR, the video signal can get disturbed by other electromagnetic transmissions, resulting in perturbed images.
- The Moiré effect (which we already explained on our blog), that is especially common when you get to work on a video that has been screen-captured in the most terrible way, that is, using a smartphone to capture the video from a computer display. Both the display and the smartphone’s camera sensor break down to a pixel grid, and these two grids may “interfere”, as brilliantly explained in this video.
- Objects that are simply part of the scene. Sometimes you need to “clean away” some disturbing elements that are not due to interferences: they were really there. Common examples are window curtains, or the perforated vinyl often glued to bus windows.
Fourier Filter
Whenever you have to deal with this kind of noise, you’ll have a hard time if you start playing with filters in the Denoise category. The tool you need is called Fourier and you’ll find it in the (sometimes nebulous, we know) Extract category. The Fourier transform of a signal provides an “alternative representation” of it. It turns it into a sum of sinuses and cosines of many different frequencies.
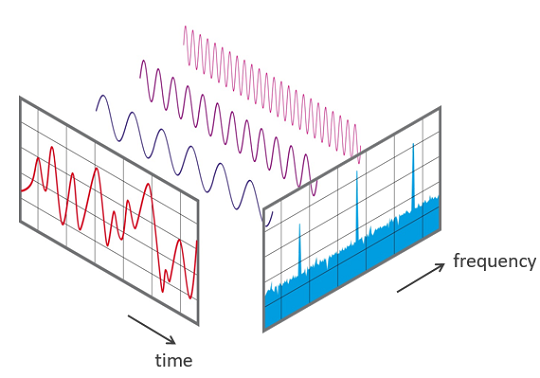
Image from Phonical [CC BY-SA 4.0 (https://creativecommons.org/licenses/by-sa/4.0)]
For this reason, the Fourier transform is an excellent way to reveal periodic components in a signal. They will appear as bright peaks (which basically mean: there’ a lot of content at these frequencies in your image!). Normally, real-world images do not contain strong periodic components. Hence, their Fourier spectrum (i.e., the output of the Fourier transform) looks like this:

We see a bright point at the center of the spectrum, where low frequencies are represented, and a slightly bright cross originating from it. Let’s now see two examples affected by periodic noise to understand how the Fourier filter works. The first one is this image affected by the Moiré effect.

Let’s load the image in Amped FIVE and then click on the Fourier filter. You’re shown the full-frame Fourier transform of the image. Do you see all those peaks that we didn’t have in our previous examples?
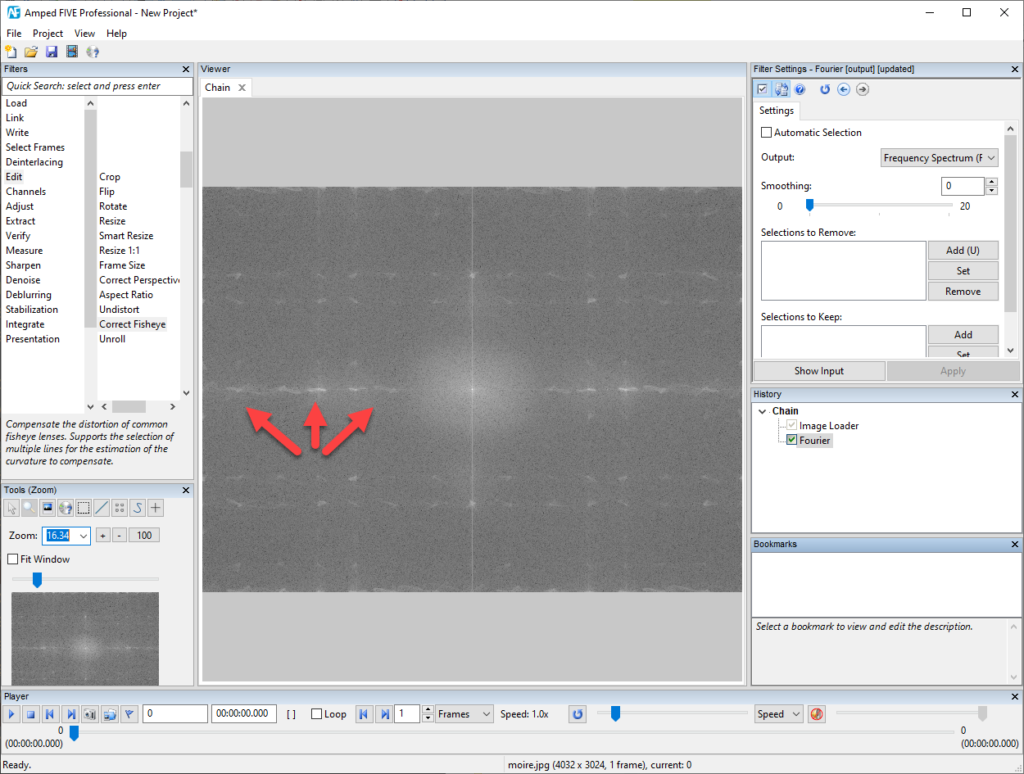
Using the Fourier filter, we can manually select the region surrounding each of them and add it to a “blacklist” (either clicking the “Add” button or the “U” shortcut key).
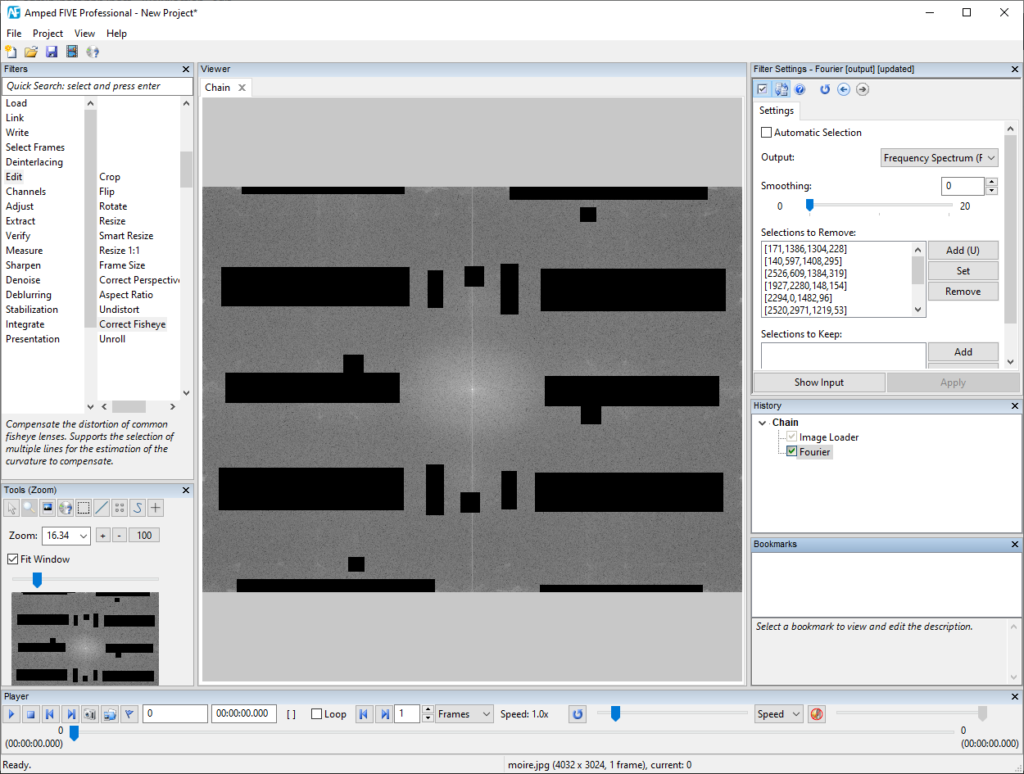
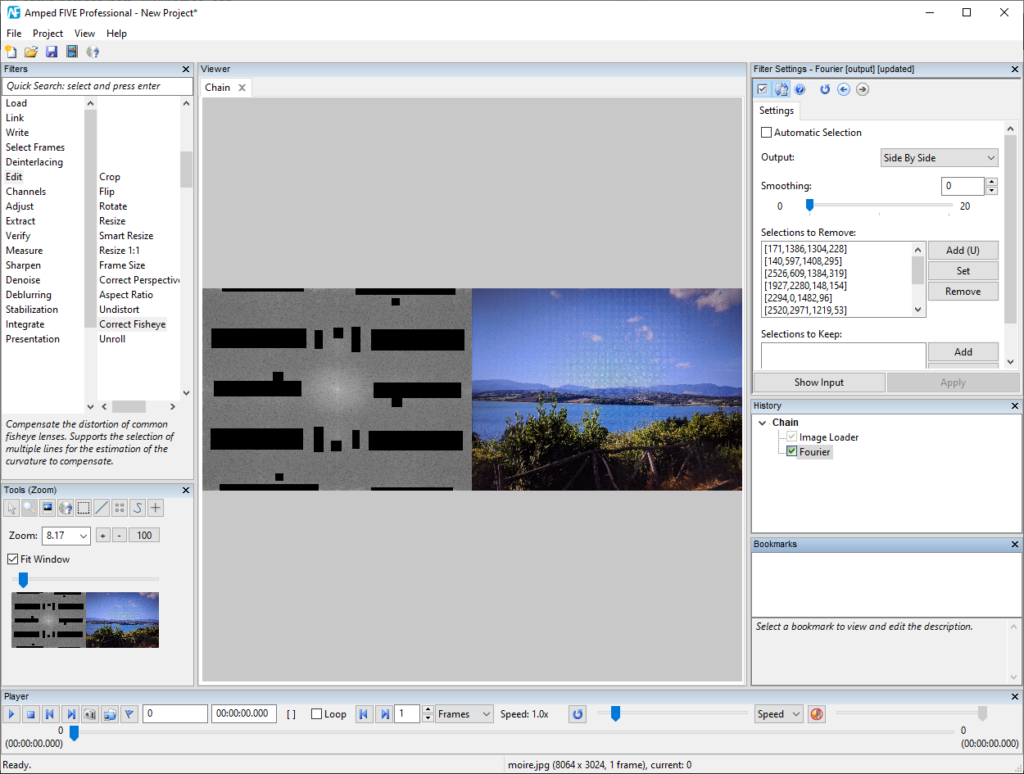
Now, if we choose “Image (IFFT)” from the Output menu, we’ll see the “cleaned” image. It looks way better! You can also use the “Side-by-side” output option to be able to constantly see the effect of removing parts of the Fourier spectrum on the output image.
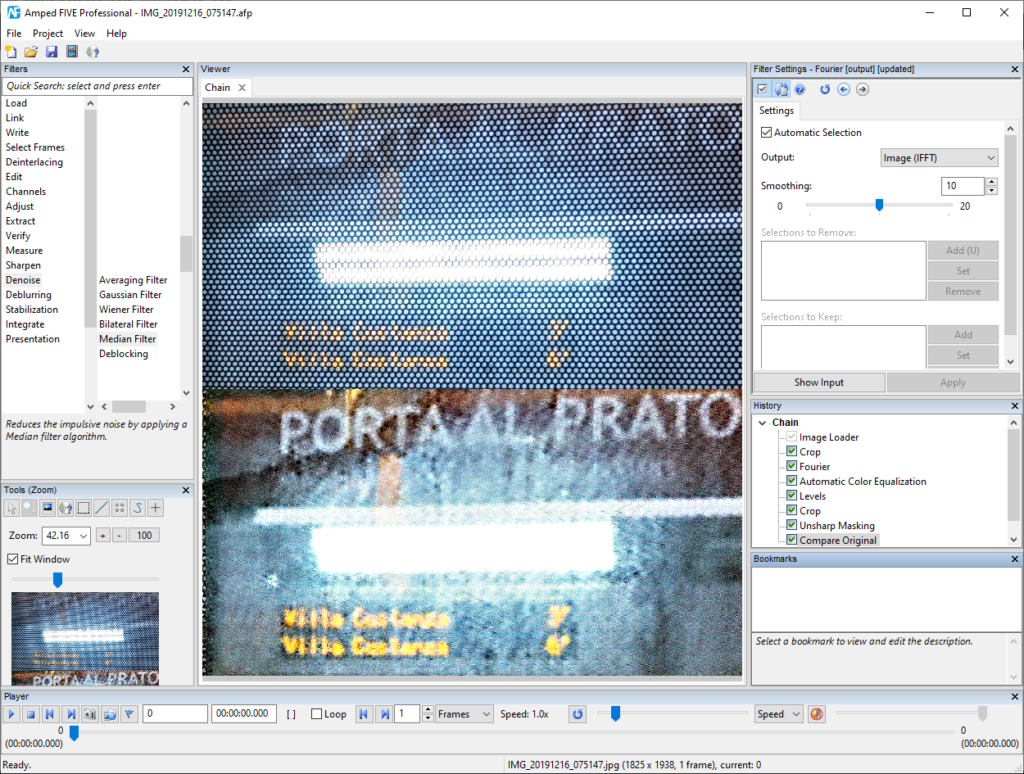
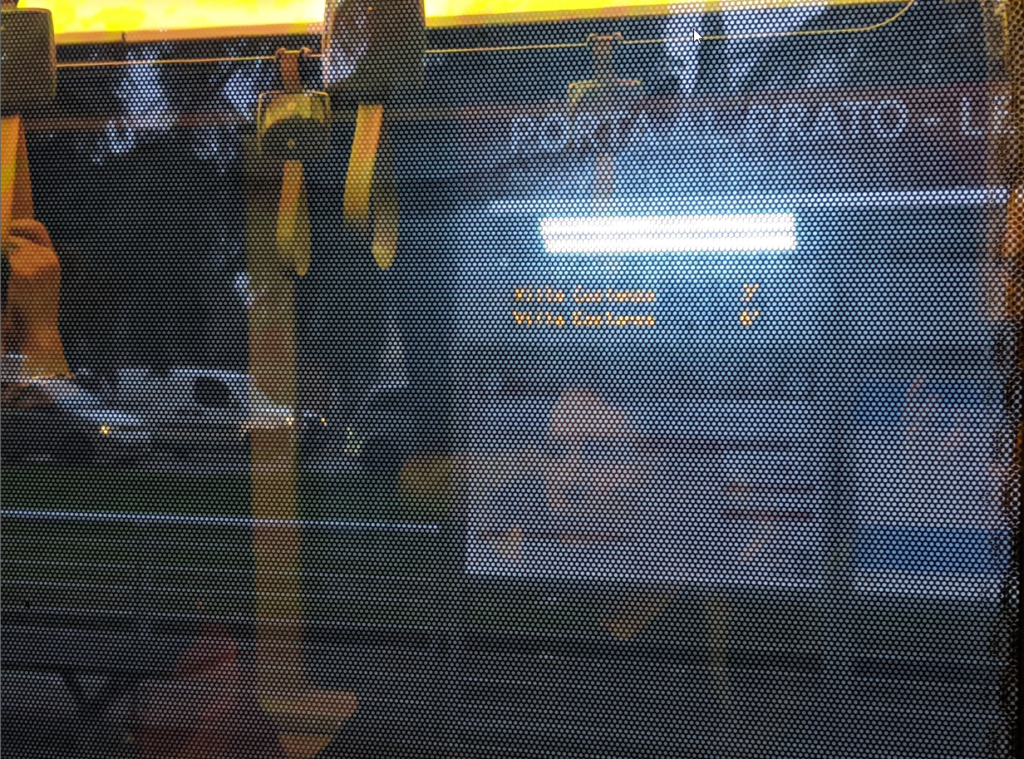
One more example: let’s say we need to get a better view of what’s written in the LED panel of the bus stop. The honeycomb structure of perforated vinyl hinders the intelligibility.
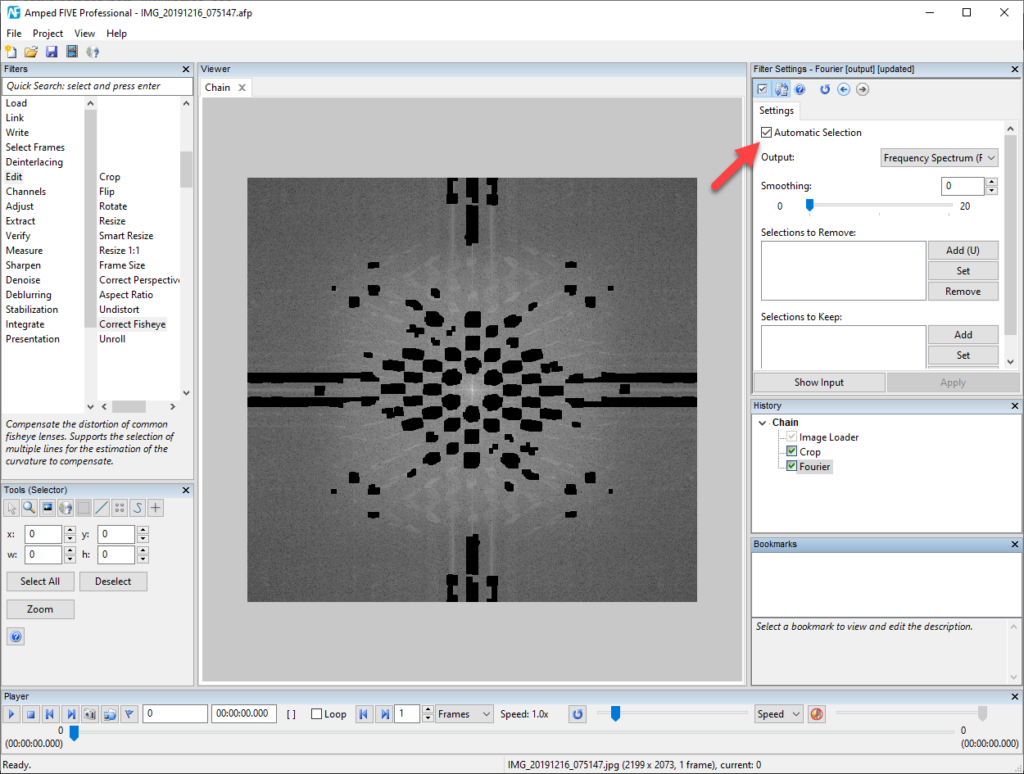
Let’s load the image in Amped FIVE, crop the part of interest, and then click on the Fourier filter. You’re shown the full-frame Fourier transform of the image. Instead of manually selecting each peak, this time we let Amped FIVE do the work by enabling the Automatic selection feature. It works great in this case yet, of course, we’re allowed to manually remove additional parts of the spectrum or, conversely, use the “Selections to keep” panel to force maintenance of parts of the spectrum that were automatically removed.
A little more processing and the final result is ready: much, much better than the original version!
