Hello, dear Amped blog followers! The inspiration for this week’s tip comes directly from our beloved users. Indeed, a few days ago, during the exciting Amped User Day in Denver, we met an Amped FIVE user who wasn’t aware of the Multiview filter. Because of this, they were wasting a lot of time to combine several enhanced videos into a single one using external software. Hey! You can do that in FIVE, and it’s simple and fast! Keep reading to find out more…
More often than not, you have more than one video depicting an investigated event. You may have multiple videos from the same CCTV system, or even videos coming from different stores on the same street, possibly with different resolution and aspect ratio. While each video will likely need a specific processing chain for being improved, eventually it may be helpful to join the relevant footage together, showing all of them on the same screen simultaneously, to reach a more complete reconstruction of what happened. Can you do that in FIVE? Sure you can!
Amped FIVE’s Multiview filter is there for you, under category Link (because it links together multiple streams to create a single video through the so-called spatial multiplexing).

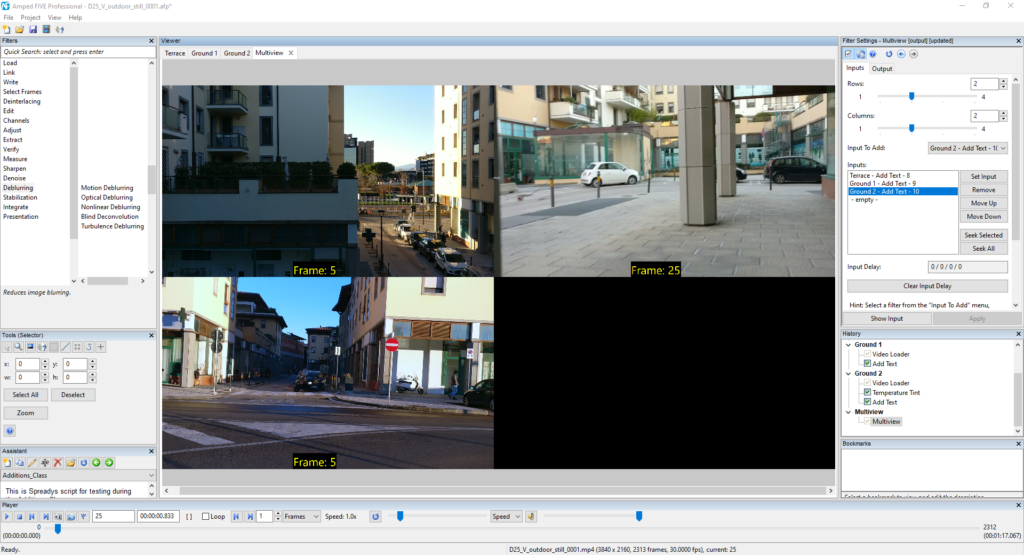
Using the Multiview filter is very simple: first, process all your videos individually to get what you need from them. Then, go to the Link category and select the Multiview filter. You’ll see that a new chain will be created, containing the Multiview filter alone. Double click on that, and you’ll see its Filter Settings appear:
The Rows and Columns sliders are pretty simple to understand: they just determine the layout of the table. You then need to specify what to use as input for each table cell, choosing from all the chains you have in your project, and picking the specific filter chain to be added (usually, you’ll end up using the last filter of each chain as the input). By default, the Multiview filter fills all the available table entries with the last filter of each chain you have in your project. In the example above, we’ve set a 2×2 table and we had three chains only, so the fourth table entry remains empty.
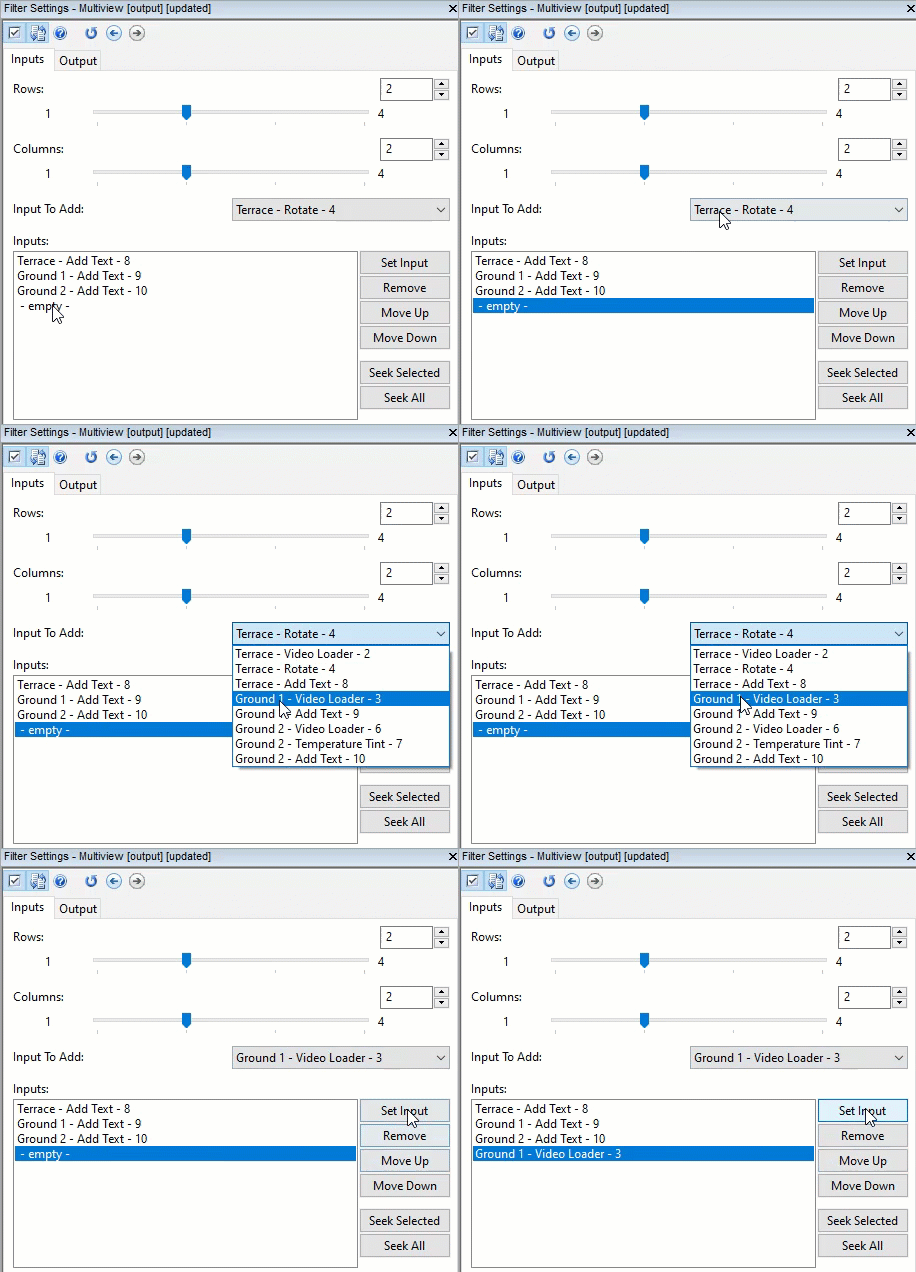
You can always click on each line in the Inputs panel and change the chain/filter to be displayed in that location, picking it from the Input to Add dropdown menu as shown below:
Okay, we’ve now placed videos one next to each other the way we like, so we can say the “spatial synching” is done. Let’s now focus on the temporal synching! We first need to choose one video as a reference, and then align the others to it. To temporally align a video, just click on its name in the Inputs list and click on the “Seek Selected” button. The video will be marked with a “play” symbol as shown below:

If we now press Amped FIVE’s play button, we’ll see that only that video plays and the others remain still. We can thus move to the proper frame to temporally align the currently sought video to the reference one. Once done, we’ll repeat the same for the second video and so on so forth. You’ll notice that the Multiview filter accounts for your temporal alignment in the Input Delay box, which tells by how many frames each video is delayed compared to the reference one (the one with “0”):

Once done, just use the Video Writer filter to save your final video to file, and voila! You’re done! No need for external software: Amped FIVE has got you covered once more.


