
Hello, dear Tuesday Tip lovers! Hope you enjoyed your Easter eggs! But, there is still one more to open – the Amped FIVE Easter egg! Let’s see what’s inside!
Today we’re going to show you how Amped FIVE’s Snapshot functionality can speed up your work and help you reach better results.
As Amped FIVE users surely know, many filters in FIVE need to be properly tuned to get the job done. There are cases where you may be undecided about which settings are best, or even about including a filter in your chain or not (this usually happens when the subjective evaluation of the output matters). It could also happen that you reach a nice result that you don’t want to lose, but you still wonder whether you can get an even better result. In all these cases, wouldn’t it be nice to have a quick, seamless way to store the current result and continue working without interruptions? Of course, Amped FIVE has got it.
Amped FIVE’s Snapshot function is what you need: just one click allows you to save to an adequately named file what you are currently seeing and the Amped FIVE Project file that leads to that result. This way, you can continue experimenting while being sure you do not lose what you had. Moreover, by saving multiple snapshots, you will be able to quickly compare the obtained images and keep only the project file corresponding to the best result.
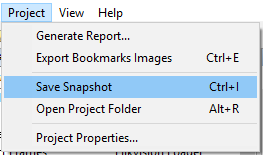
The Snapshot command is available from the Player panel, from the Project menu in the top bar, or via a convenient keyboard shortcut (Ctrl + I), as shown below.

By default, the Save Snapshot command will save:
- The currently displayed image to a file called <mediaName>_ddmmyyHHMMSS.<fmt>, located in the same folder as your project file (where <mediaName> stands for the name of the image/video file to which the chain is applied, the rest stand for date and time when the command was issued, and <fmt> stands for the default image output format, as defined in the Program Options);
- Your current Project to a file, located in the same folder and with the same name as above, followed by “.afp“.

That said, you can customize what Amped FIVE should do when you issue the command: you can do it by simply right-clicking on the button in the player, which reveals these self-explaining options:
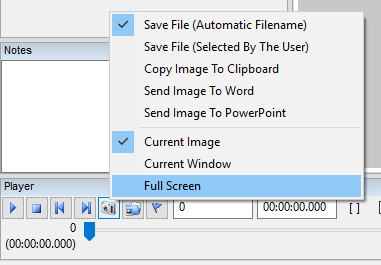
As suggested by the “Send Image To Word” and “Send Image To Powerpoint” options, we believe Snapshots are very convenient when you are writing your report and want to include some figures from your chain.
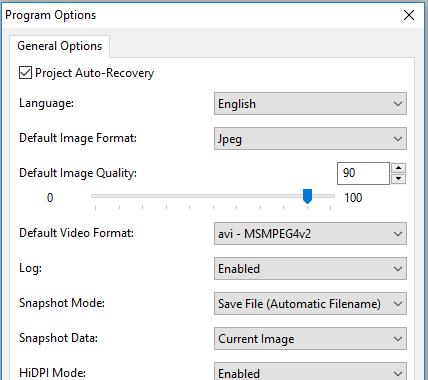
You may also configure your Snapshot command from the Program Options panel, available under the View menu. Here you can even set the default output image format and quality.
At this point, Amped FIVE geeks may be wondering: how does the Snapshot command differ from the Image Writer filter? Well, there are two main differences:
- The Image Writer filter lets you configure the output file format/quality for each instance of the filter, while for Snapshots you’d need to edit the Program Options each time you want to use a different format.
- Most importantly, the Image Writer filter is a… filter, which means it becomes part of your chain. This ensures full documentation of the workflow, including the parameters you used to generate the output images in your analysis. Moreover, the Image Writer filter will check for the existence of the output file when the project is loaded and, if it is missing, it will re-create it as part of the chain processing… this is something Snapshots cannot do.
Therefore, we recommend that you use Snapshot in the development of your analysis and, once you reach your goal, use Image Writer to create the final data, so to endow your analysis with the best reproducibility.


