

Many months of filter development and product expansion have resulted in a very big update to Amped FIVE!
As a result, we created two blog posts on this update. This is the first post. The second will come soon…
I have said it before, and I’ll say it to you again now… most of these development ideas have come from you, the user. If you suggest an idea, it goes onto the list. That list drives the updates. We are committed to providing you with the most advanced software for all of your needs in image and video forensics.
New Filters
Resize 1:1
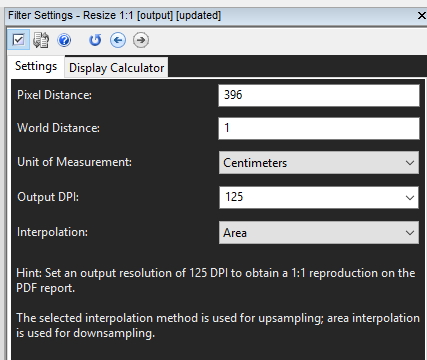
Calibrating an object to a known scale is important in fingerprint, footwear mark and other analysis and comparison tasks. Resize 1:1, located under the “Edit” category, now enables you to use the scale shown in the image to present the image at the actual size.

When the filter is chosen, the “Ruler” tool will be automatically selected. By plotting the distance on the scale shown in the image, and inputting the measurement parameters in the real world, the image can be quickly resized to the original proportions.
Interpolation methods can be chosen manually.
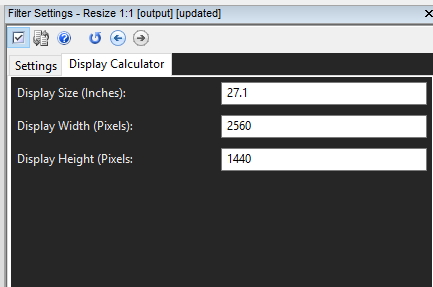
The “Display Calculator” tab allows you to use the pixels in the display as a reference. So, it will automatically enter the pixel size, but you must enter the size in inches. It may be worth researching this, since some monitor sizes are slightly different than advertised, as they may hide a certain part behind the bezel.
It really makes the process of 1:1 scaling so much easier.
Perspective Aligner
The Link category now has a new filter.
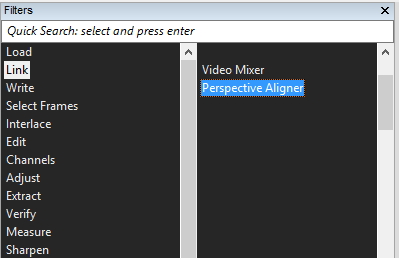
It aligns the perspective of one image to the perspective of another.
We have two images here that have been taken at different angles, and they could even be at different zoom lengths.
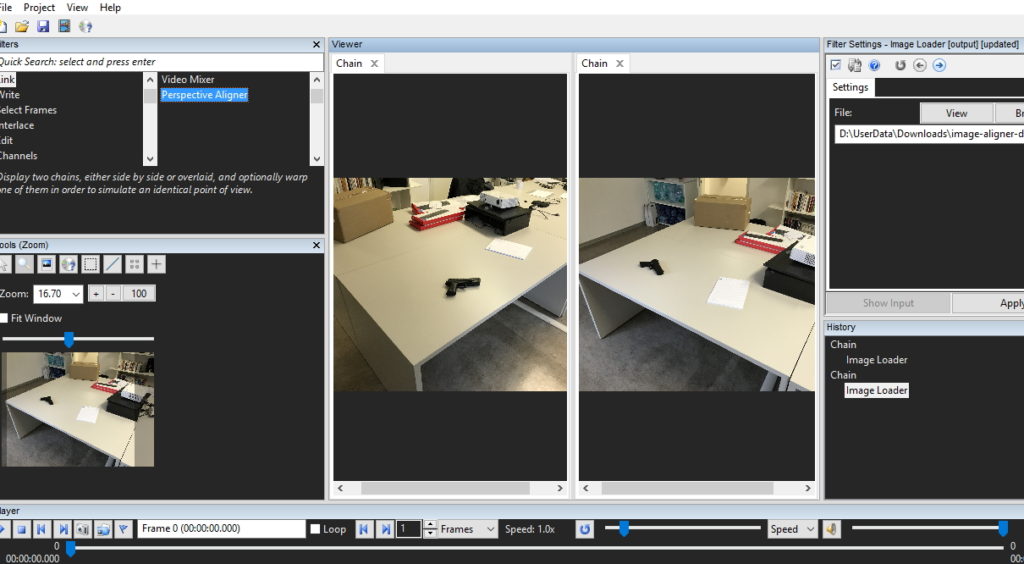
It is now possible to align Image 2 to the perspective of Image 1.
The first tab selects your input chains.
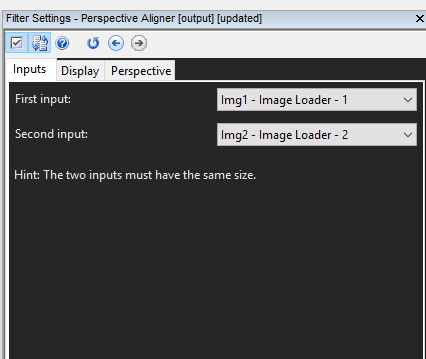
Although I only have two images here, I could use multiple images and simply use the result of a previous perspective alignment as my first input.
Under the “Display” tab, is your current view.
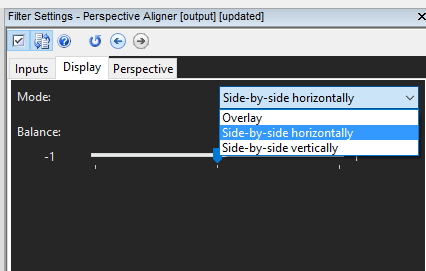
It’s easiest to use the default “Side-by side” at the start, but when the perspectives have been aligned, it’s sometimes handy to come back here and select “Overlay”.
Lastly, we have the plotting of points under the “Perspective” tab. Simply use the “Ruler” tool (automatically selected) to plot at least 4 constants in both images that are on the same plane.
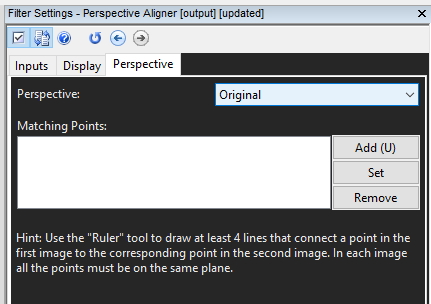
The “U” shortcut key is active here again to make adding those points quick and easy.
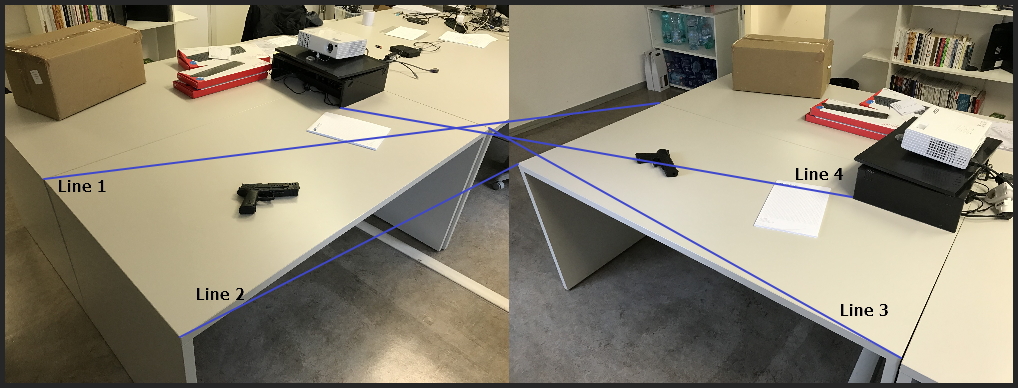
I have added in the lines used here to demonstrate the points used.
You can then go and change the perspective of one of the images to match the other.

And remember to go back and check the “Overlay”…
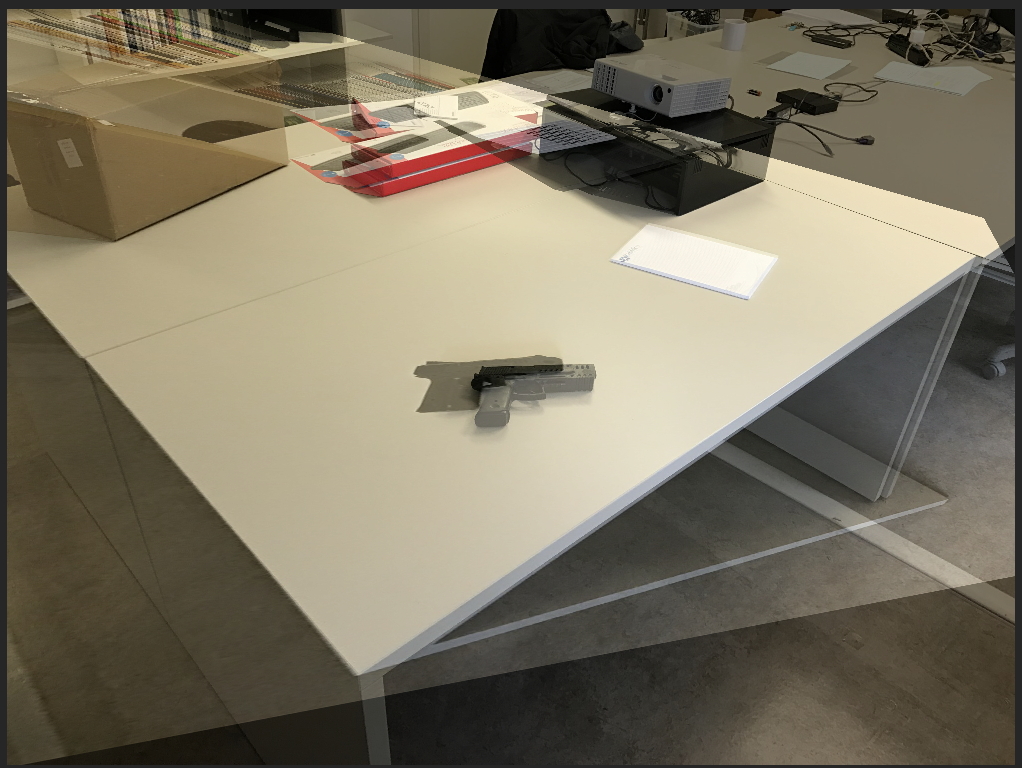
I can now see that my desk corners all match, the notepad matches… but the gun was in a different position.
It’s so quick to do.
Block Difference
Many CCTV manufacturers have chosen to create their own hybrid video encoding method. A consequence of this is that they do not allow some of the higher-level analysis afforded to us in MPEG type video.
When analyzing block structure in MPEG video, we can use the Macro-block Analysis filter to visualize the information held within the MPEG stream to identify what’s new and what’s copied.
When analyzing a hybrid encoded video, that also uses a block structure, we can use the differences in pixels to visualize and identify what’s new and what’s copied at a block level.
The new filter, found under the Verify category, enables you to do this.
The settings are really simple and it works in real-time.
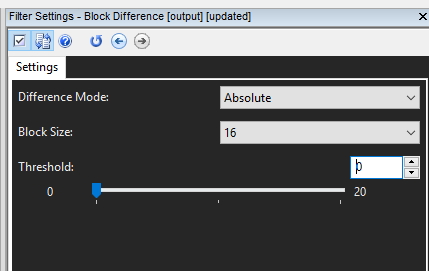
First, select your mode. There are two modes: “Absolute” and “Relative”.
“Absolute” is the default as it equates the absolute difference based on the threshold. “Relative” however could be useful to visualize differences in dark areas as it divides each block by the average pixel value.
8×8, 16×16 or 32×32 blocks can be chosen for block size.
You will then see what is new from the previous frame, with everything the same being black.
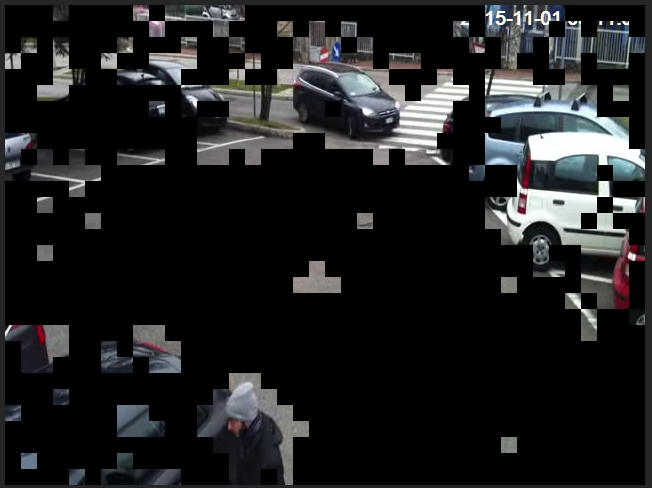
In digital video, there is often very little change in much of the footage. The changes are not caused by movement, but from encoding artifacts.
The threshold slider allows you to increase the difference threshold.

That’s three, new, very powerful filters to assist in your analysis and presentation.
New Tools
I am a very excited about this, as it’s another small step in enabling you to quickly analyze the data behind the video without leaving Amped FIVE. After all, that’s one of the main goals of the software – to be the only software you need!
Many of you may have followed my own blog over the years, where I discussed how I was forced to use various pieces of software to achieve a desired task.
Many of those tasks are now catered for in Amped FIVE, and when we add new functionality, we always ensure that it’s much easier and simpler. We also try and make it better!
Advanced File Info Tool
“Frame Analysis”, “GOP Analysis” and “Hex View”.
Yes folks, it’s all now here under one roof… and it rocks!
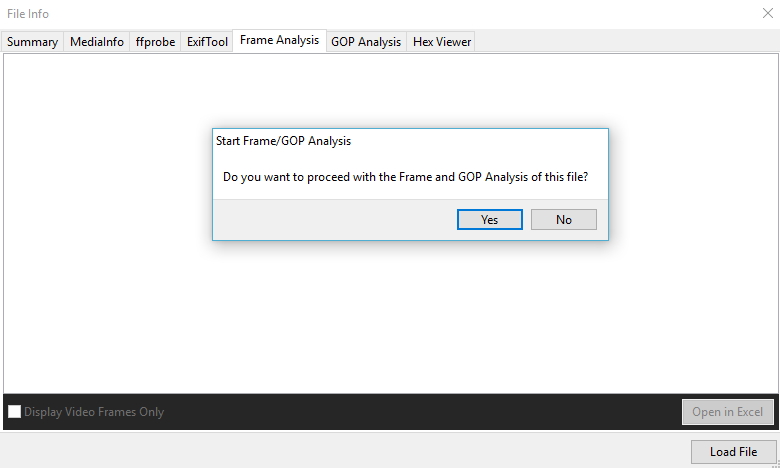
When you have a chain open with a video loaded, the “Advanced File Info” viewer now has three extra tabs.
When you move to the “Frame Analysis” tab, you will be asked if you want to proceed.
You don’t have to – if you only need format and stream information then you may not want to conduct frame analysis.
After processing the file, each individual frame information is displayed.
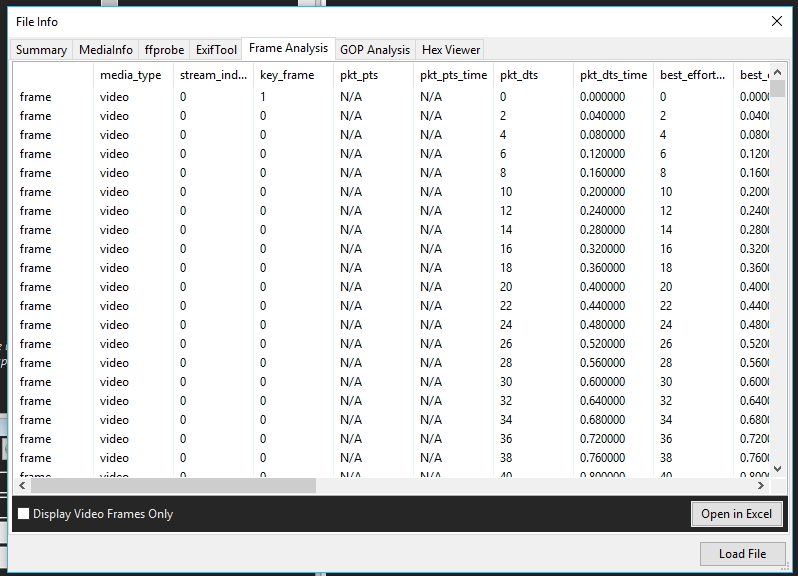
You can choose to show video only, by selecting the tick box at the bottom.
You can also open this information in a spreadsheet if required by using the “Open in Excel” button.
This is great, but there is some ‘Amped’ magic behind the right click!
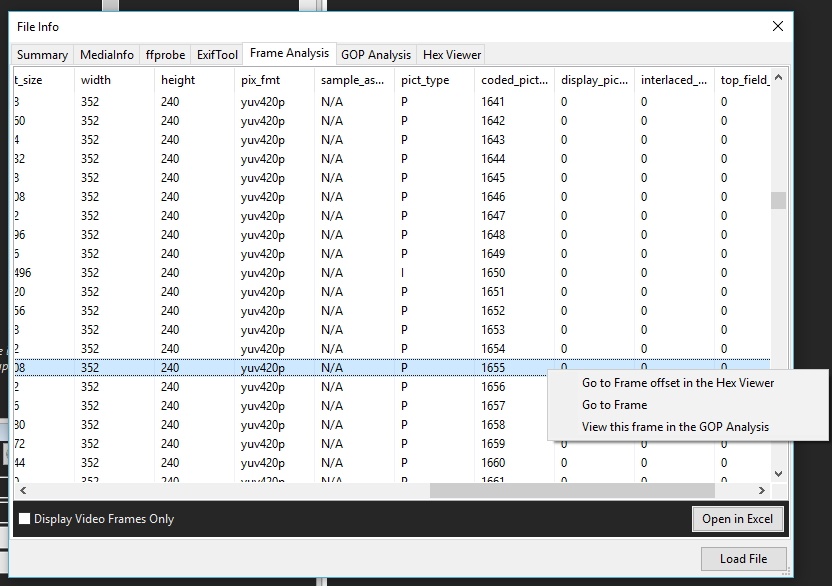
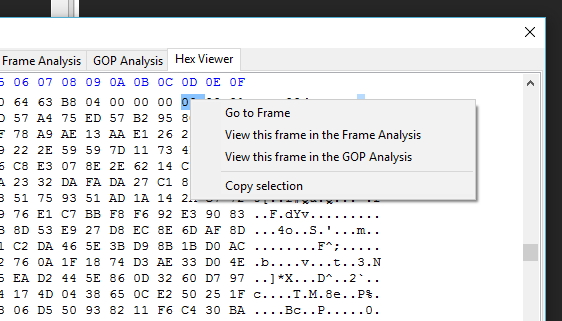
Right click a frame’s information and you have some options:
- You can view that frame’s data in the Hex Viewer…
- You can navigate to that frame within the viewer window…
- You can view the frame within the GOP structure… let’s have a look at this one first!
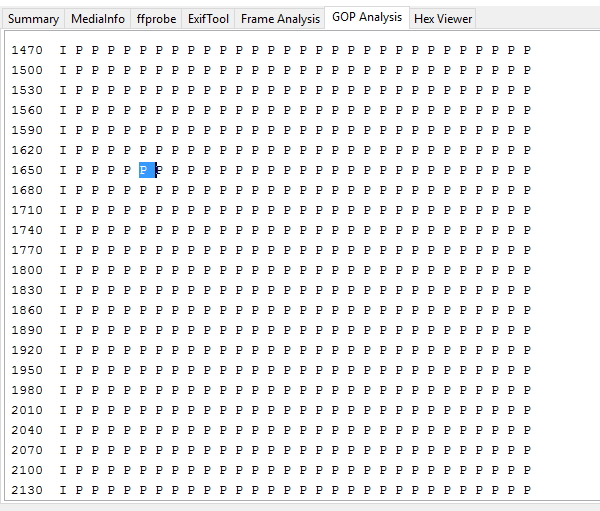
This brings up the GOP layout, with the selected frame highlighted.
This is also interactive, so if you right click here…
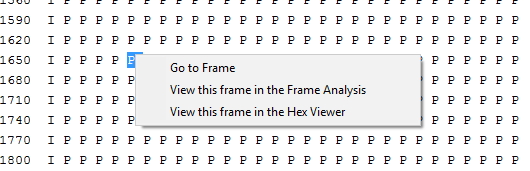
The same options apply.
It’s worth remembering also that at the bottom is a summary of the GOP.

Now then, from the “GOP Analysis” – let’s use the right click to take us to the “Hex Viewer”.
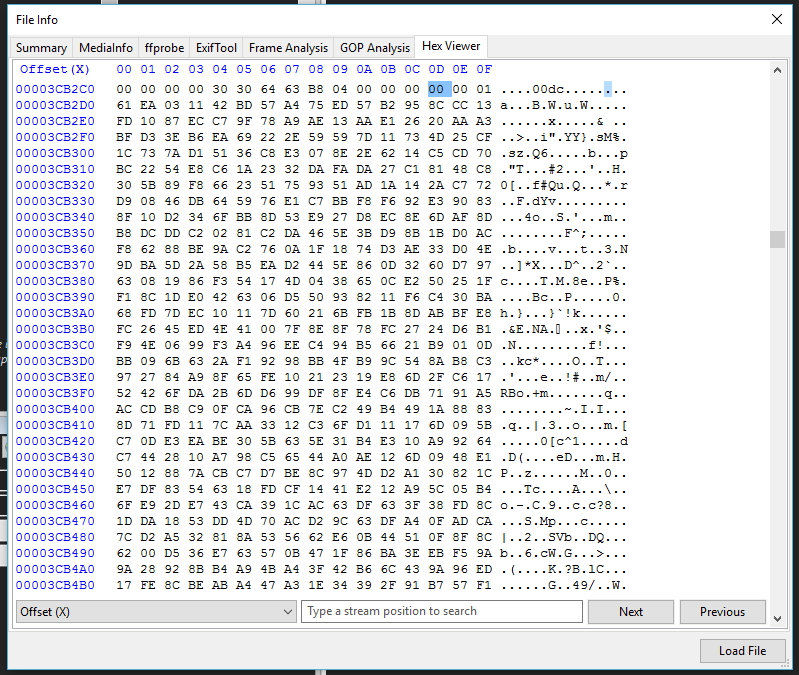
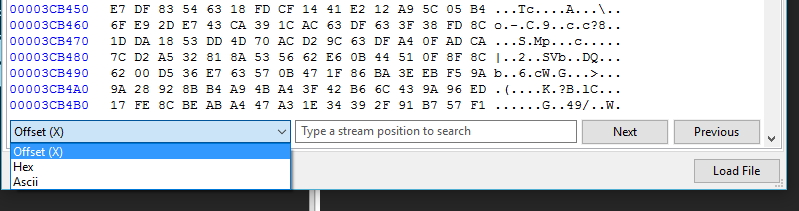
This also has some added searching capability at the bottom.
And guess what? The Hex is interactive as well!
You can now move freely between the format, the stream, the frame, the position in GOP, the hex and the visual image… all without leaving Amped FIVE!
In post two, I will be looking at all the filter updates and interface enhancements. Be on the lookout for this post…it will be available soon!
Don’t Delay – Update Today
If you have an active support plan you can update straight away by going into the menu “Help” > “Check for Updates Online” within Amped FIVE. If you need to renew your SMS plan, please contact us or one of our authorized partners.


