
Amped FIVE gets a bunch of new features, following requests from the rapidly increasing user base.
One of the benefits of working within a tight community of analysts and investigators is that new ideas and requests flow into the developers on a daily basis. The more people that require a specific function, the quicker it gets integrated for you, the user.
All of the new functions seen here have come about after being requested by FIVE Users.
FFMS Decoder with Audio
When you first drag a file into FIVE main window, interrogation of the format and codec will take place. The order of decoders is set automatically so if the media can be decoded, then that engine will be chosen. The first one is FFMS.
There is now another Decoder at the top of the list.
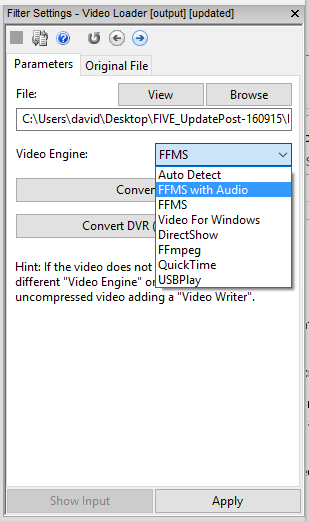
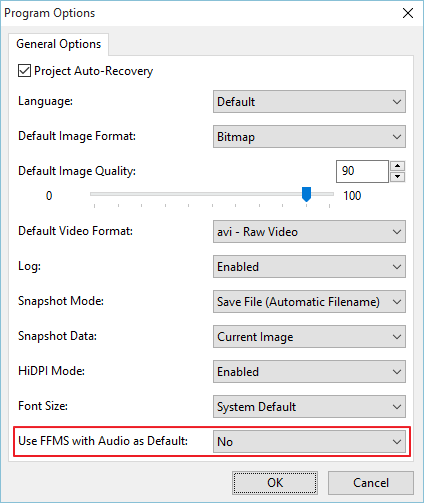
FFMS with Audio is not used as default. It is an extra decoder to be used and tested if the presence of an audio stream is detected within the file. You can change this, though, by using the option highlighted below in the Program Options.
The audio track of the video is supported both in playback and for writing. If you use FFMS with Audio, and after this you add a Video Writer, the output file will have the audio track too. Some filters, especially most of the ones in the “Select Frames” group, remove the audio track. “Range Selector” will trim only the desired portion of audio, but “Sparse Selector” and most of the others will simply remove it. Remember, this is an experimental feature, feel free to contact us if there is any issue with some of your files.
Furthermore, in the main interface, there is an audio ON/OFF Speaker Icon within the video controls bar, and a volume slider.

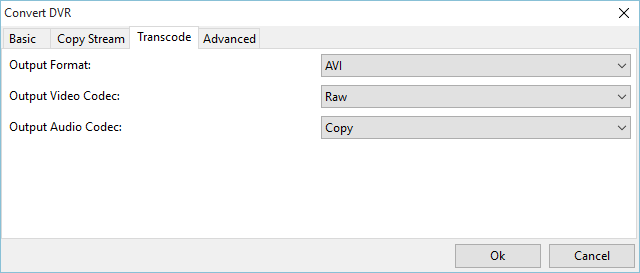
For Converting and rewrapping of DVR exports, Audio is also now catered for, with the inclusion of an Output Audio Codec option within the Convert DVR interface.
It’s worth mentioning, before we move on, that Audio from proprietary video surveillance systems can be a bit of a challenge. Many systems use old audio codecs once designed for telephony, and the decoding information is embedded in the proprietary player.
Some systems also place a silent audio stream into the container to control timing.
Identifying the presence of audio at source, during the initial acquisition, is usually a good idea. If there is no capability within the DVR, or no microphone connected then it may save you a lot of time trying to decode a silent audio stream.
Where this new function will really help though, is from handheld devices, smartphones and bodycams.
So, how do we detect the presence of an audio stream in the first instance?
Advanced File Info
During the initial analysis of a multimedia file, it is important to understand its structure and contents. How many streams, how are they encoded, is there audio?
FIVE has always had a basic file information table, within the Tools interface:
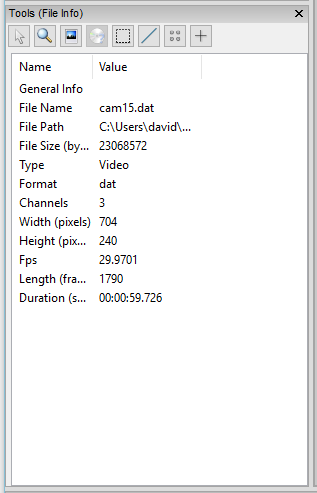
This is great for a quick understanding of some of the important metadata but many times we need to dig a little deeper…
Up in the Top Left, you have the quick Launch bar, with a new icon – The Advanced File Info…
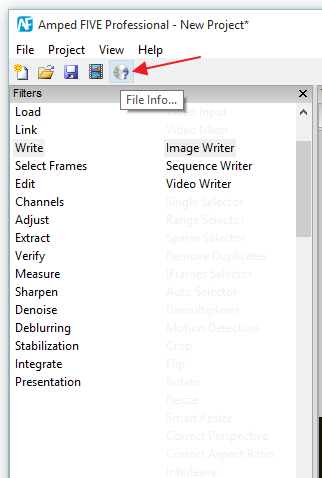
This opens the File Info interface with a selection of tabs. Each tab presents the information supplied by a separate tool.
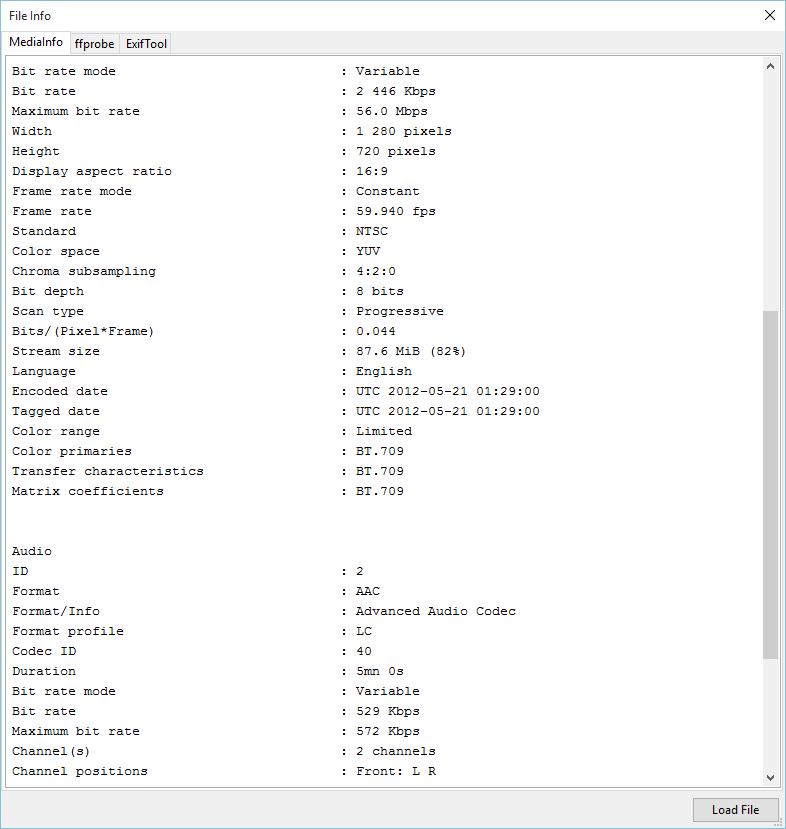
At the bottom, you can see the tools ability to load a separate file in, in order to review its metadata without the need to load it fully into FIVE.
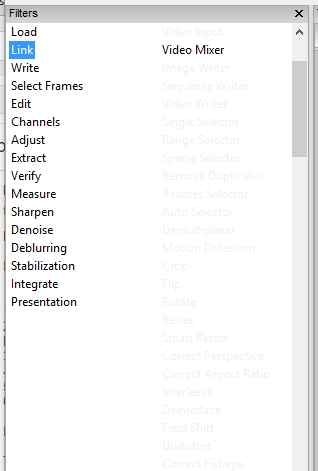
Video Mixer
I introduced this filter a few weeks ago, and the team have had some great feedback as a result of the post. There are so many ways in which it can be used, and some of the suggestions have already been implemented.
I regularly analyse the differences in images between the various versions of a video. I could have a screen recording version, I could have a player exported version and I could also have the native data. It’s important to review these in order to identify any differences in the imagery that could harm further enhancement or interpretation.
For the Mixer filter to work, you must have two or more chains open. Remember, the Mixer filter is in the new Link category
When Video Mixer is loaded, a new chain will be opened that can contain a ‘mix’ of any other two chains you chose.
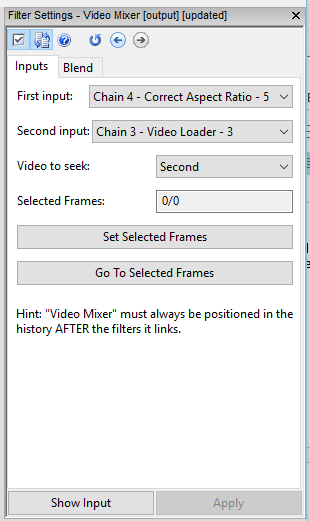
In the example above, in Chain 4 I have my native video, but have selected it to be used after the Correct Aspect Ratio Filter.
My second Input is a video created by the player’s ‘Convert to AVI’ function. (It’s always fun to see what sort of damage is caused by these players!)
It’s in the Blend Settings though, where all the new magic happens!
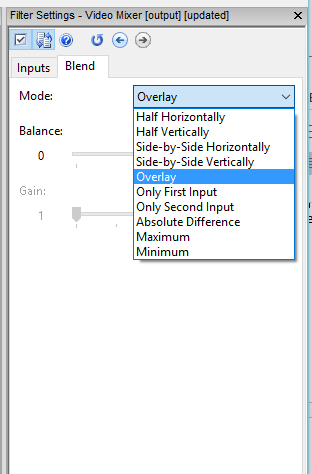
We now have many more options on how to mix the two chains together.
Overlay gives you transparency controls so you can blend between the two inputs and this was highlighted in the original Mixer Post.
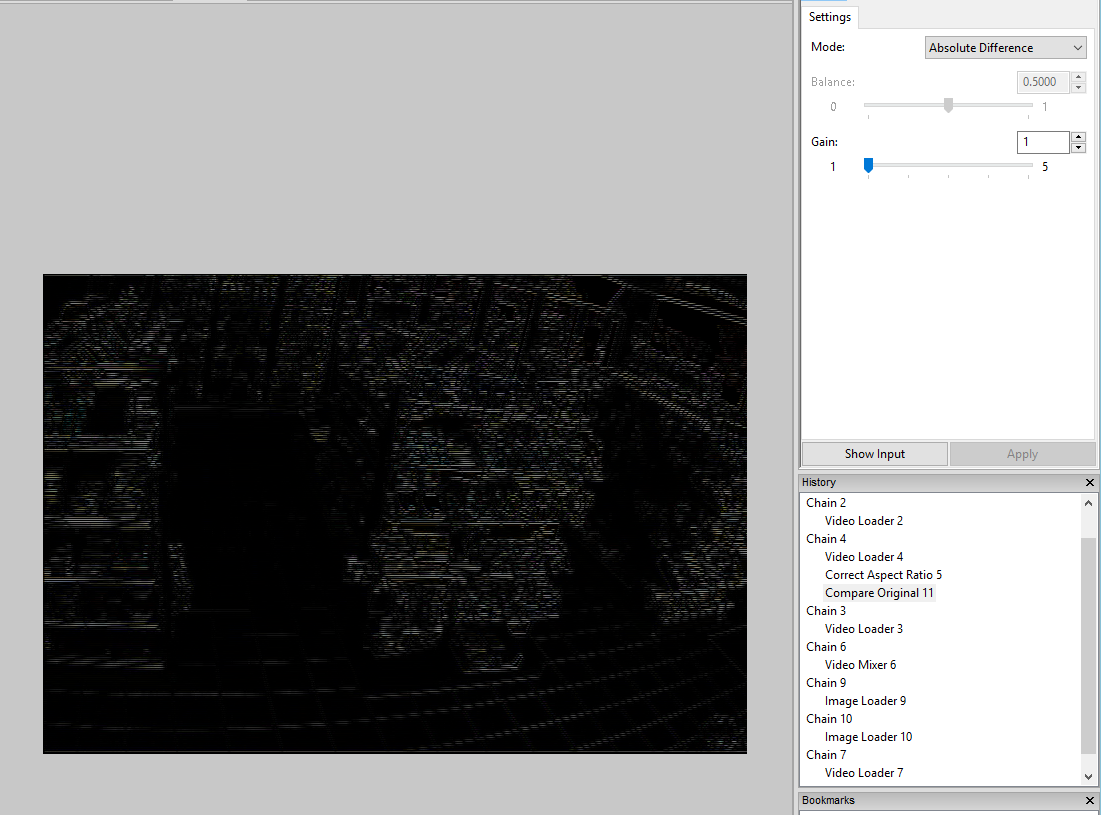
One of the new options is Absolute Difference.
To explain this better, I used a jpeg image, and then changed the brightness in a 2x pixel block. This was then re-saved as a new jpeg.
By loading the two images into chains and applying Video Mixer, I am able to visualise the differences in values. My change was clear to see… Including how the change has effected the adjacent pixels.

Compare Original
It has been possible to make before and after comparisons for some while by using the Compare Original filter within the Presentation category. All of the new blending modes seen for Mixer are all now also included within this filter.
Having these filter settings in both the Mixer and the Compare Original Filter really gives you a lot of flexibility when dealing with multiple chains of video and images.
Frame Type Macro
A new feature to the Add Text Filter, and one that I was very pleased about, is the Frame type Macro.

Red – Plain text
Yellow – Macros
There are many different Macro’s that you can enable, allowing you to automatically add certain pieces of information to your text overlay. I use the frame type information regularly, so being able to print this directly onto the video is a real time saver. (Big thumbs up from me on that one!)
WMV Export
Under the Video Writer options, there is now support for the WMV Container format.
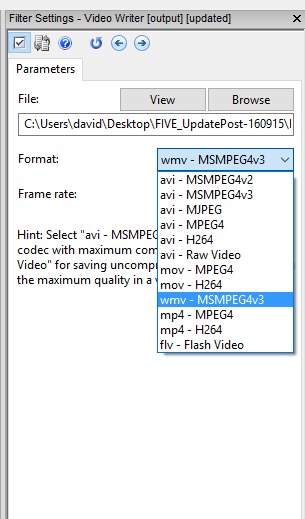
This, I am sure, will be a welcome sight to those departments that have to produce their final video’s for inclusion into MS Powerpoint or for playback within Windows Media Player.
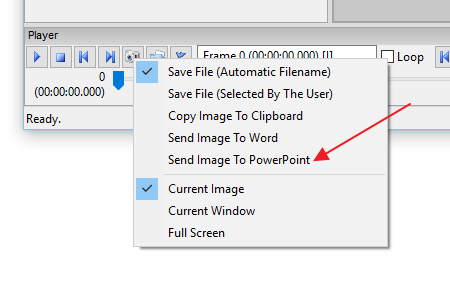
….finally, talking of MS Powerpoint – remember that exporting images directly to Powerpoint is already supported. Just right click the snapshot button and select!
So, what are you waiting for….?
Update Now!
If you have an active support plan you can update to the latest version of Amped FIVE by going into the menu “Help” > “Check for Updates Online”. If you need to renew your SMS plan please contact us or one of our authorized partners.


