

Dear loyal summer readers welcome to this week’s tip! As investigators, one of the questions we should always ask ourselves is: “am I using the best possible evidence?”. This is vital to ensure that we can interpret the native data correctly and have the best chance to obtain visual information after any restoration and/or enhancement process. Today we’ll see how Amped FIVE can greatly help you compare two videos at the visual level to understand whether they’re exactly the same or quantify the difference between them. Keep reading!
The “best evidence” issue returns quite often in video forensics. The challenge is that we have multiple versions of the same thing: which one is the native, and if there are differences, why? The most common issue (and it’s a question that gets asked regularly) is: why does the player show me one thing, it outputs a standard AVI file which looks different and then Amped FIVE plays the proprietary file, but it looks different again, and actually worse?
The easiest change to see is when a player automatically “line doubles” the footage. You see a normal-looking video inside the proprietary player. This player produces an AVI which is ‘smoothed’ to remove any artifacts caused by the line doubling so the human eye likes this better! However, in Amped FIVE you see a squished looking video. We explained the reason behind this in a past tip. However, in a nutshell: contrary to consumer and many proprietary players, Amped FIVE does not apply automated, undocumented enhancements. It leaves the power to the user.
The difficult changes are when you cannot easily see the difference. Perhaps there is an encoding difference. You may have to decide what method is best to recover footage. As a result, you need to conduct some tests. You may have a version from the USB output and then a version recovered over a web interface. Are they the same? You may be reviewing a case conducted by another person and they have used screenshots of the player’s output and not the original. Are there differences, and how much are those differences? All of these questions and many more can be answered using Amped FIVE’s Video Mixer.
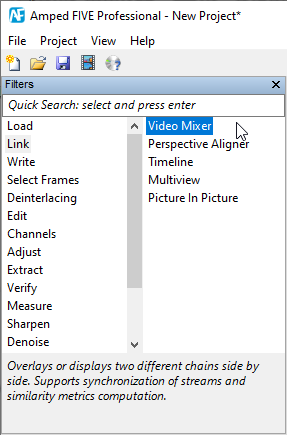
As explained in the brief filter description in the image above, the Video Mixer is designed to compare, side by side, or with several overlay options, two different videos/images. Let’s see how it works with a first, easy case. We’re given two versions of this video, having different containers, largely different sizes. We need to determine whether one is at a higher quality than the other or if they’re comparable.

We drag both videos in Amped FIVE, and they’re automatically loaded in two different chains. Then, we can name the two chains like the corresponding video files for easy referencing. Then, we head to the Link filter category and select Video Mixer. Here is what appears on the Filter Settings panel:

We see that we can choose which chain should be used as first and second inputs. In our case, we only have two chains with a Video Loader each, so there’s not much to choose from. The Video to Seek menu determines whether both videos will play if we advance through frames, or only one should advance while the other remains still. It is a simple way to synch two videos which are off by a fixed delay. You can refer to this past tip to get a hint about time syncing.
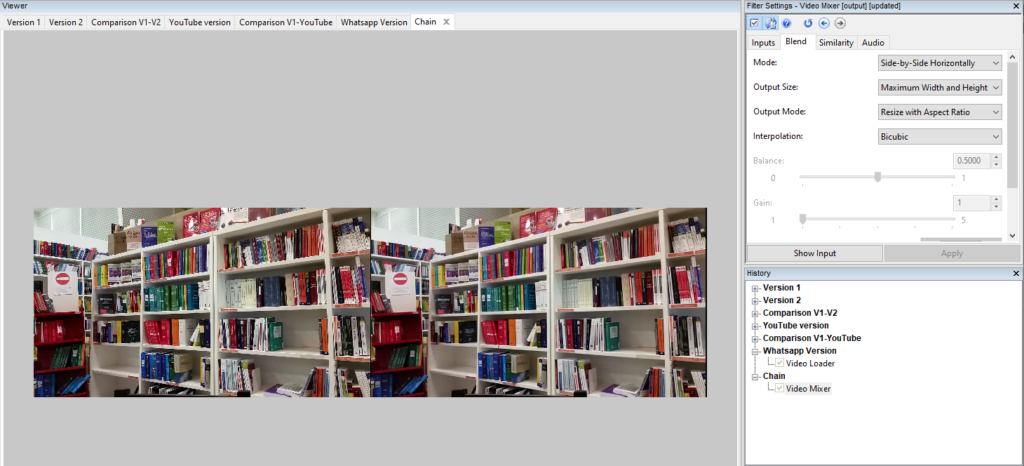
Let’s now take a look at the Blend panel:
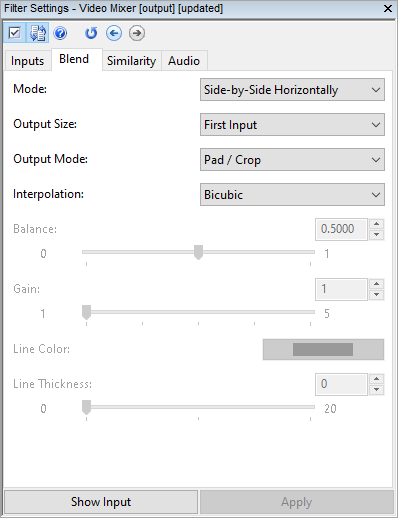
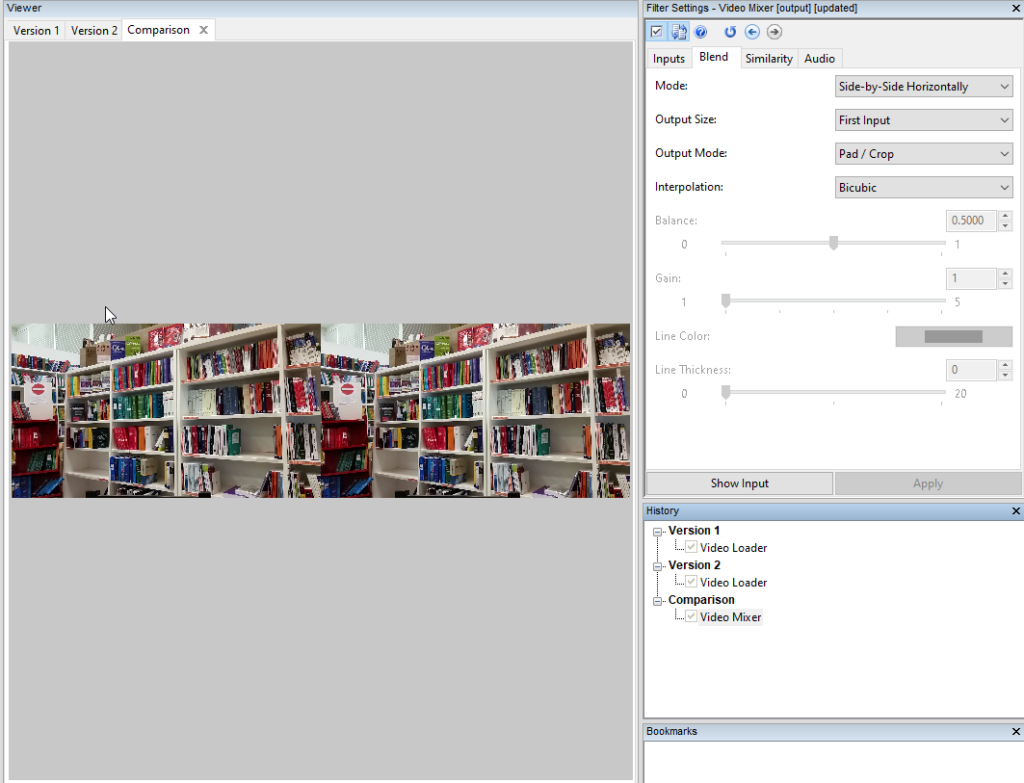
These options determine how the two videos should be arranged spatially. The default is Side-by-Side Horizontally, which produces quite an intuitive output:
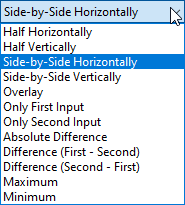
There are many other blending options available in the Mode menu, among which you find several ways of computing the visual difference between frames of the videos:
The Output Size, Output Mode, and Interpolation are used when the two input videos have different sizes. How should Amped FIVE make them comparable? You can choose among several combinations. When your goal is to compare video quality, I would normally use the following settings:
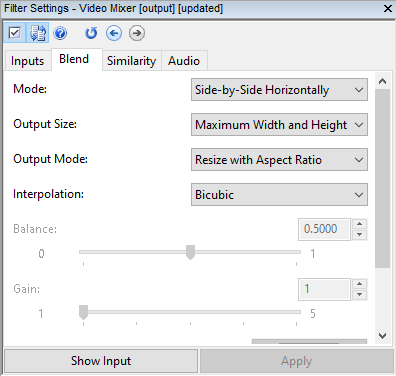
However, if the question is “which is the best evidence?”, the answer is always “the video at the native resolution”. We don’t want a higher resolution or better-looking video that is so because it has been enlarged/enhanced by the player. We want the actual recorded pixels. Therefore, if your videos have different resolutions, try to investigate which is the native one in your case, and go with that one.
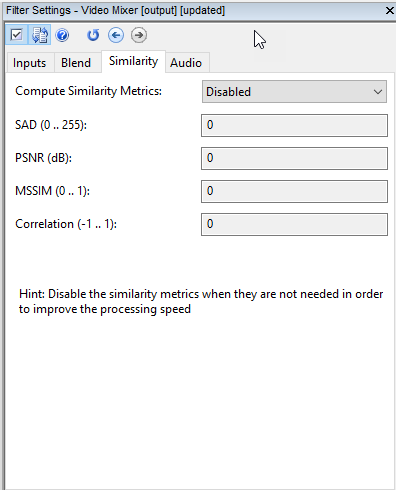
Okay, we’re ready to go to the Similarity tab. A similarity index between two videos tells how much they are similar/different according to some objective criterion. For example, SAD stands for “Sum of Absolute Differences”. The two frames are subtracted pixel-by-pixel and the absolute value is taken. Then the whole difference frame is averaged to get a single value. (Side note: the absolute value is needed so as to avoid that positive pixel differences and negative pixel differences, which are “equally bad”, compensate each other when adding them up). So smaller SAD values mean more similar videos.
The PSNR (Peak Signal-to-Noise Ratio) is a bit more of a technical measurement, well explained in Wikipedia, where higher values mean more similar videos. The MSSIM is the average value of the “Structural Similarity Index, which aims to measure in an objective way the perceptual similarity between frames, rather than the numerical similarity. It ranges from 0 to 1, and values closer to 1 mean higher fidelity. Finally, the Correlation computes the “Pearson Correlation Coefficient” between the two videos (you can read its definition here).
You’ll notice that computation of similarity metrics is disabled by default. That’s to avoid wasting processing time when you don’t need them.
Once you enable them, you’ll see the updated similarity scores as you move from frame to frame. In our example above, this is what we get for the first frame of both videos:

The above values indicate that the two frames are just identical, in which case you may also check that the hash values of their pixels are identical (as explained in this past tip!). Notice that, in this special case, PSNR reads “0” to signify it cannot be computed (because there is no difference at all between the inputs).
Similarity values are computed on a frame-by-frame basis. So you have to advance in the video to see whether all frames are actually the same. In our example, this happens to be the case. So, despite their difference in container and file size, these two videos have the very same pixels.
Now, let’s compare this video with another version of it, obtained by uploading and downloading from YouTube. Although videos are visually very similar, the Similarity tab highlights there is some difference between the two!
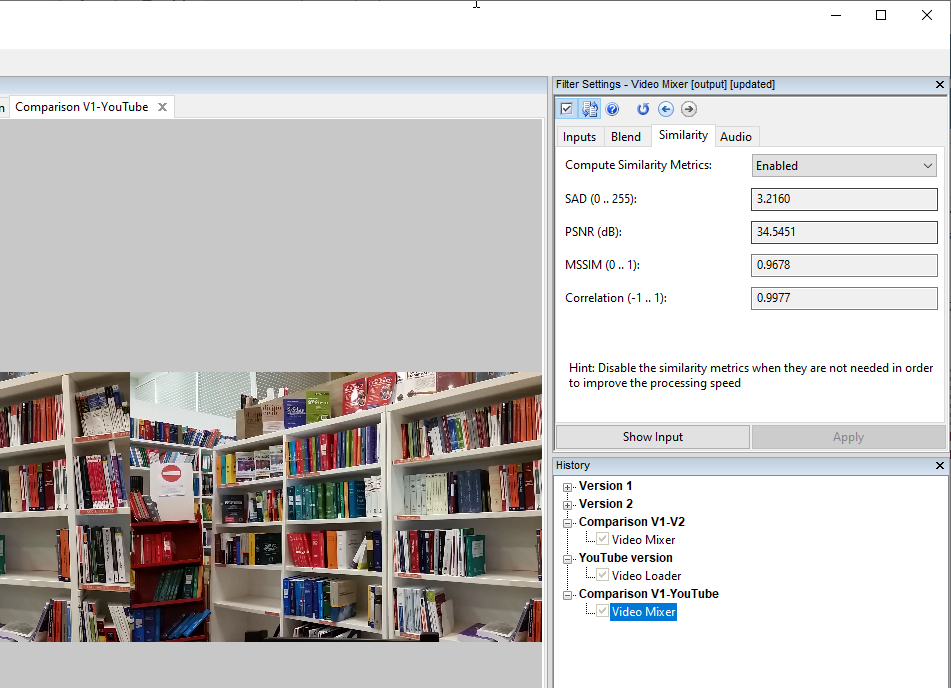
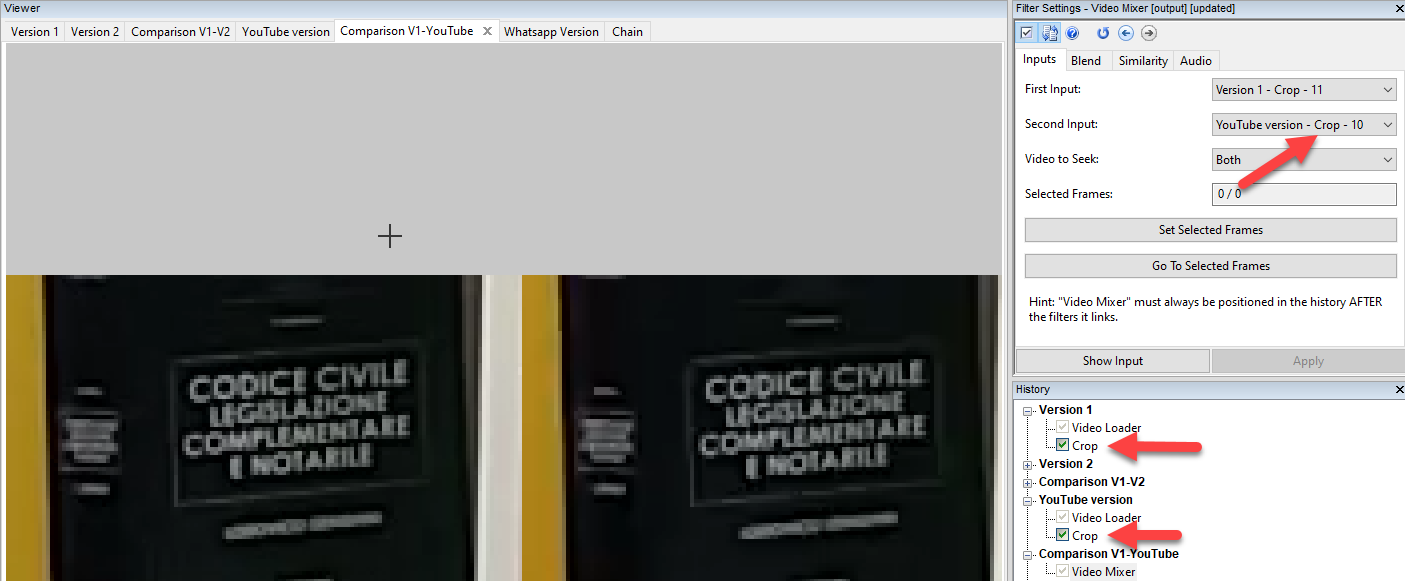
How much is that? Well, a SAD value of 3 is not tiny (we normally call “almost visually lossless” a video with SAD of 1 or lower), and a PSNR valued 34.5 is lower than what we’d like to have. However, we can still claim the quality is definitely comparable. To check this visually, we may add a Crop filter to both chains and tell the Video Mixer to compare chains at the crop position:
Let’s now transmit Version 1 via WhatsApp, and then load the shared version. Using the Video Mixer, we already notice that resolutions are different, the video has been downscaled as part of the sharing process!
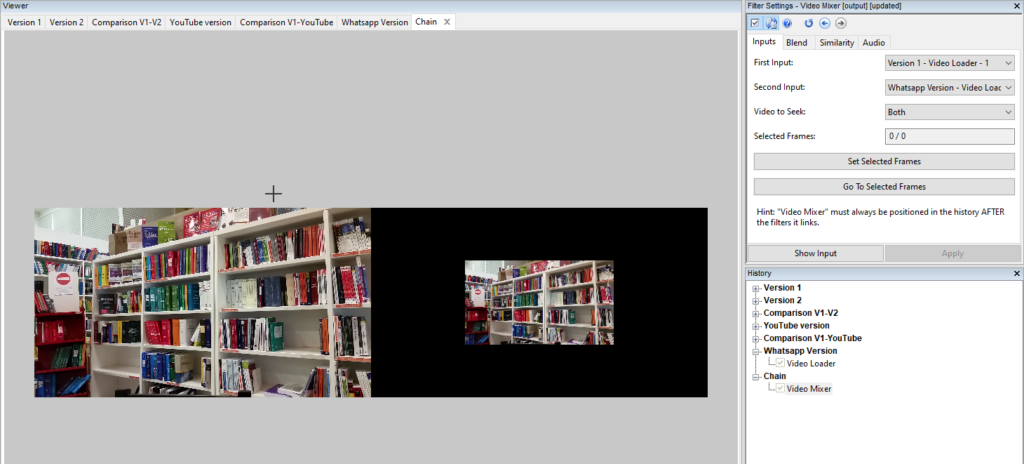
Using the Blend tab in the Filter Settings, we can configure the mixer to bring the smaller video to the same size of the reference one:
After enabling the similarity metrics computation, we see scary numbers:

These values indicate a severe degradation in quality. We can use the same cropping test as before to get a confirmation:

If you face a situation like the one above, it means a lot of information was lost passing from the left-hand video to the right-hand video!


