
We have a very huge update to Amped FIVE for you guys today! FIVE is our one-stop toolkit for all your video and image enhancement needs, and we’ve been working tirelessly behind the scenes to perfect our latest features! We are extremely excited to show you the new features so let’s dive right in…
Annotate
The first new filter I would like to show you is the Annotate filter. Those of you who have used Amped Replay will recognize the features of this filter since it gives you access to the same annotations as in Amped Replay.
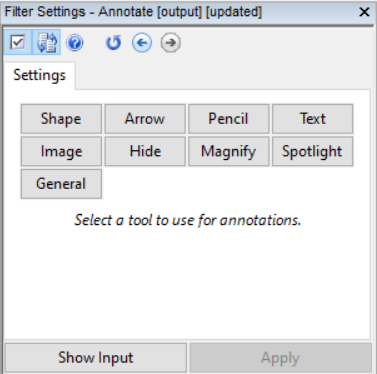
Applying the annotations is extremely simple and quick and provides users a reliable and efficient way to annotate your evidence. You can see examples of the annotations below:
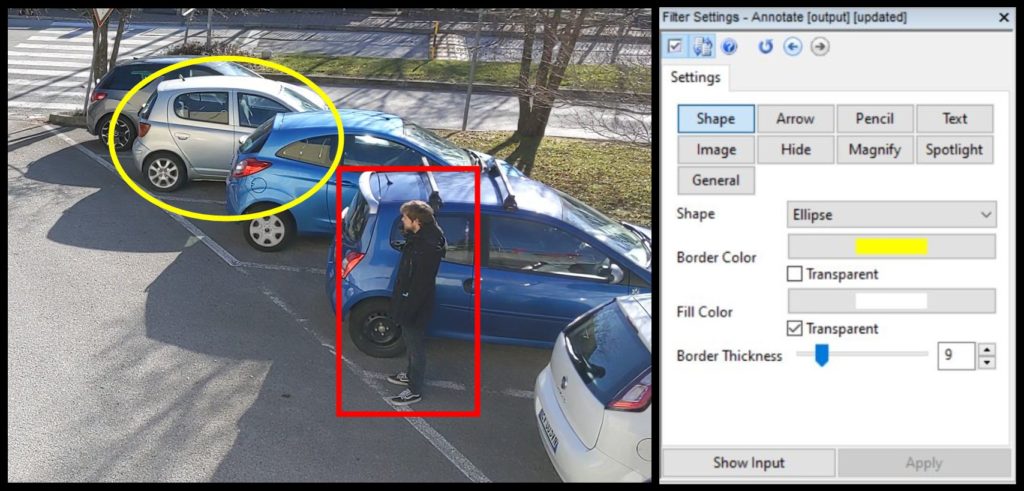
Shape: Draw either square or ellipse shapes onto your videos and images.
Arrow: Draw arrows and simple lines over your videos and images.
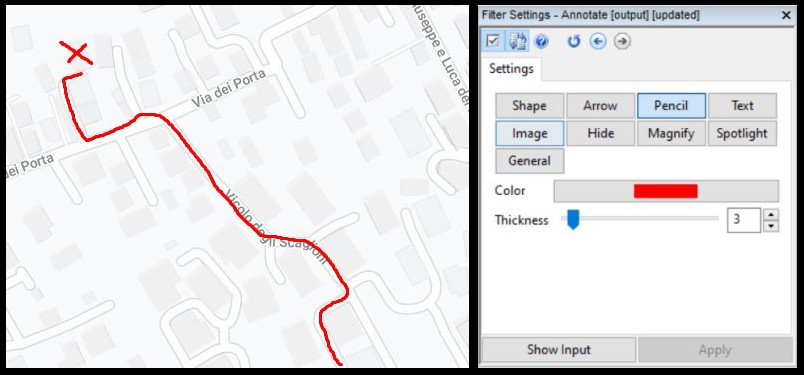
Pencil: Freehand drawing on images and frames.
Text: Add text to your frames or images including macros.
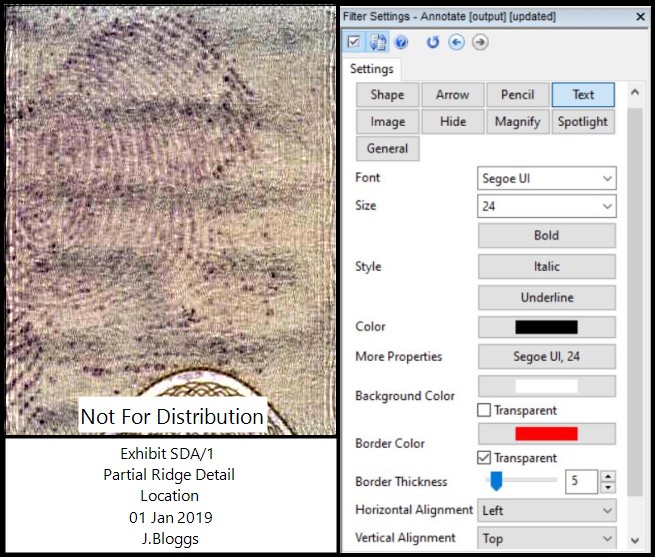
Image: Add an image to your images or frames, useful for overlapping maps or adding a company logo.
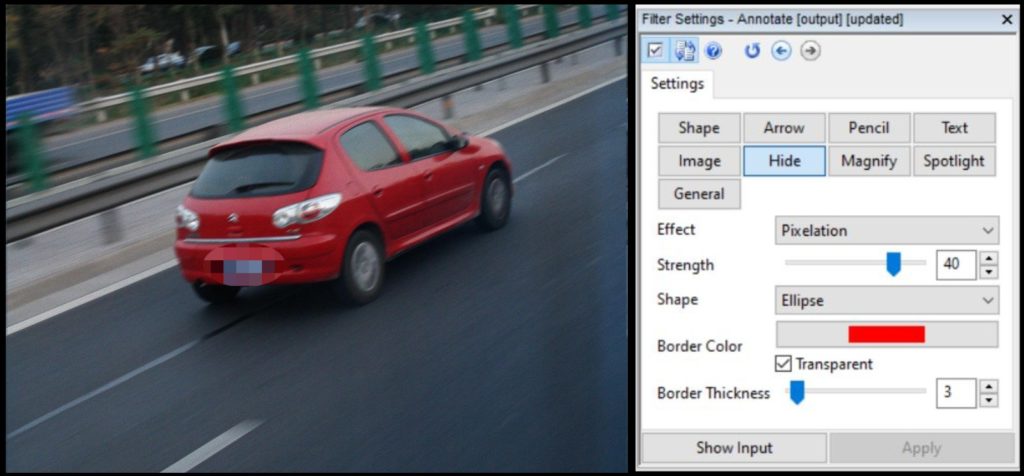
Hide: Blur or pixelate areas in videos and images.
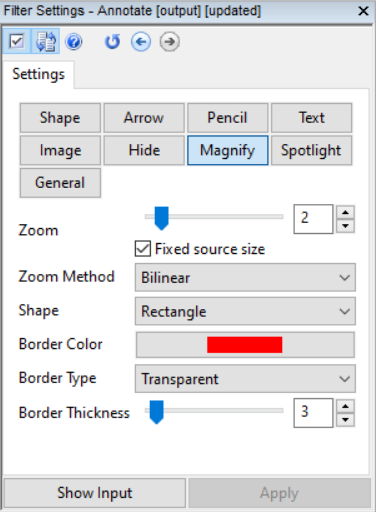
Magnify: Enlarge an area of interest within a video or image.

Spotlight: Highlight an image region by adjusting the brightness and contrast.

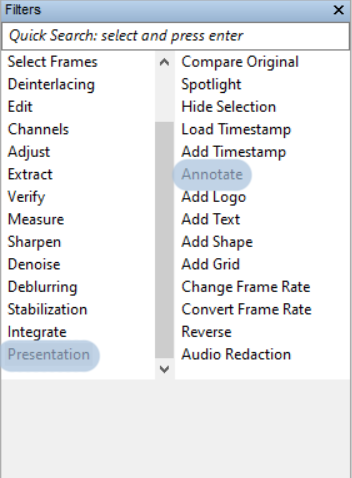
Annotate is found under the Presentation tab. Once the filter is applied you’ll have access to all the different annotations.
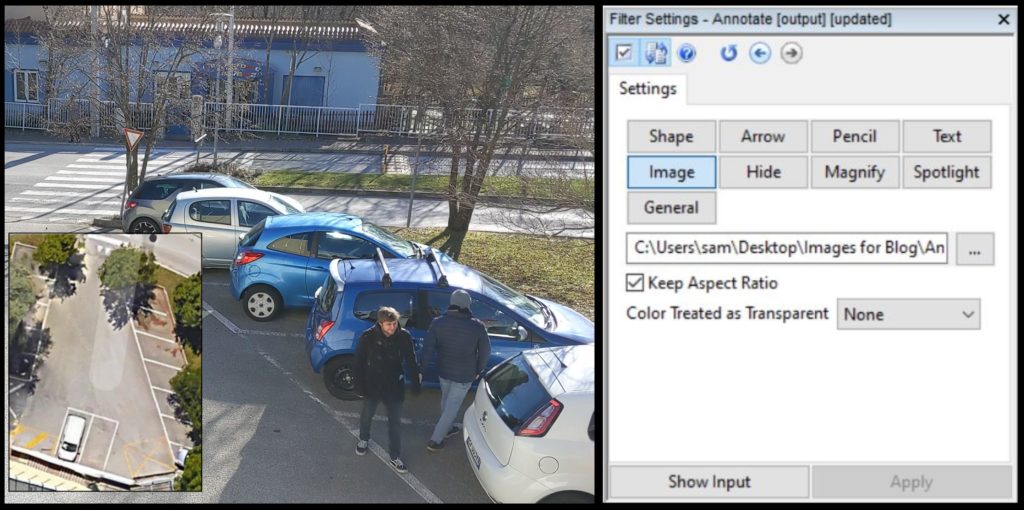
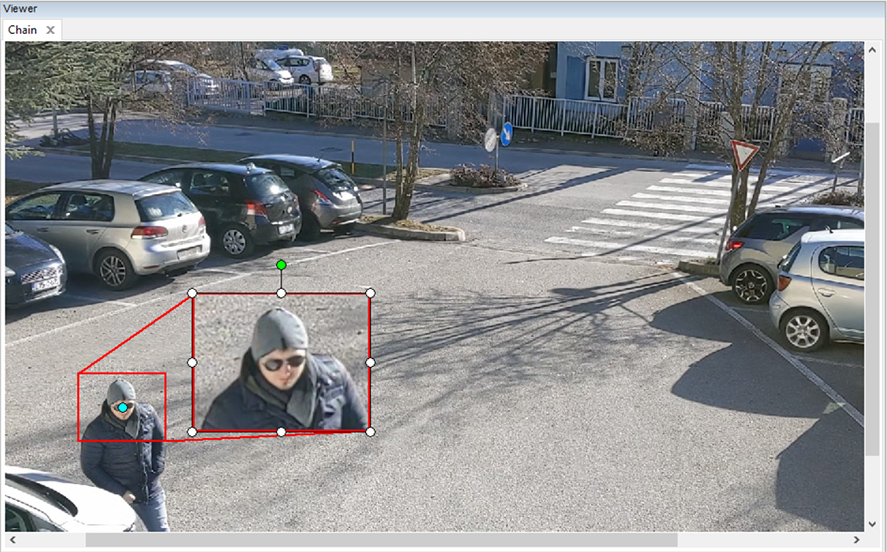
Once you’ve applied the filter and chosen the annotation you want, the filter settings for that annotation will appear in the Filter Settings. With the example below, I will show you how to magnify an area of interest.
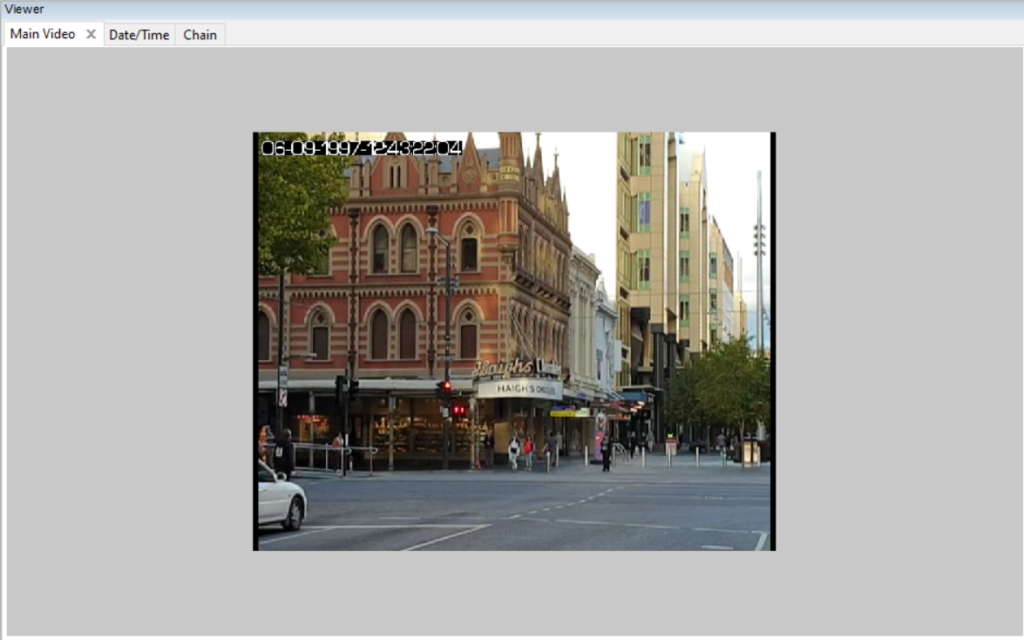
With the Magnify option, we create a selection box on our media in the viewer tab window.
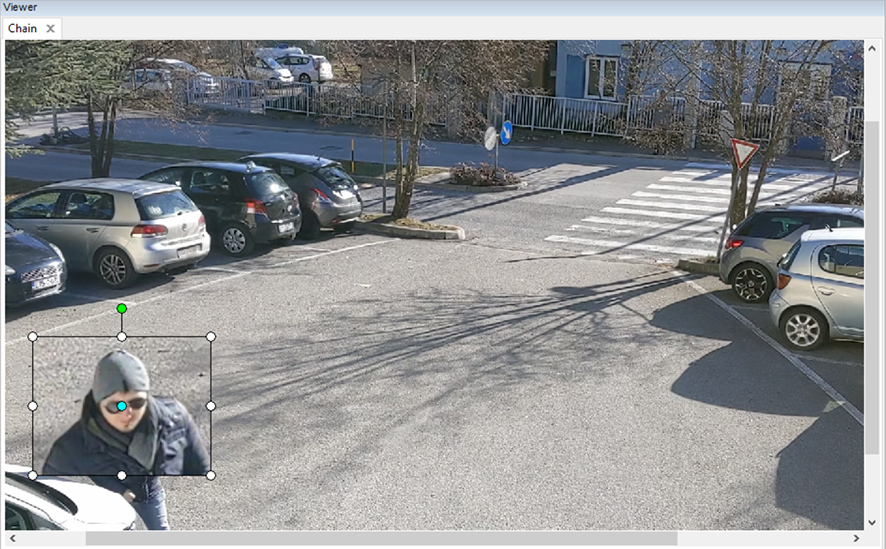
We can move this selection around and adjust the size after we have created it. The blue dot in the center of the selection is the area that will be zoomed, this means we are able to move the selection to another area of the video but keep the blue dot on our point of interest.
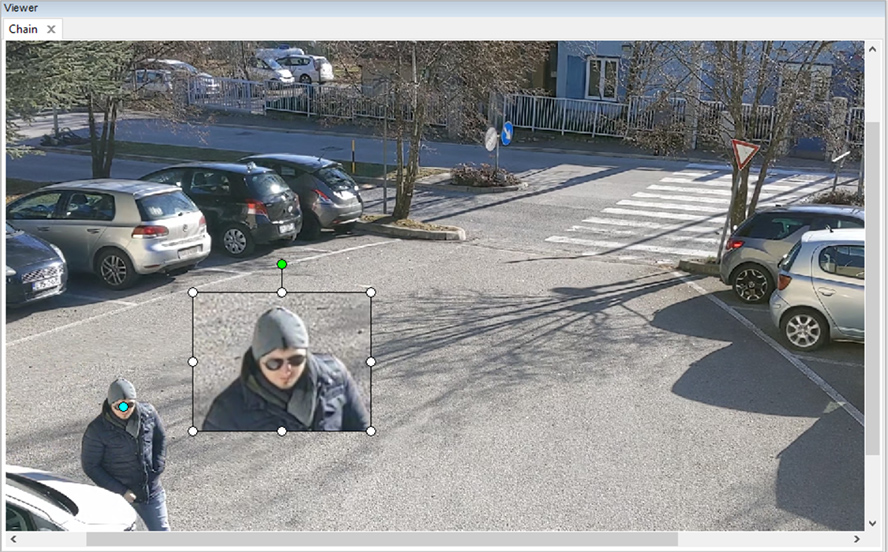
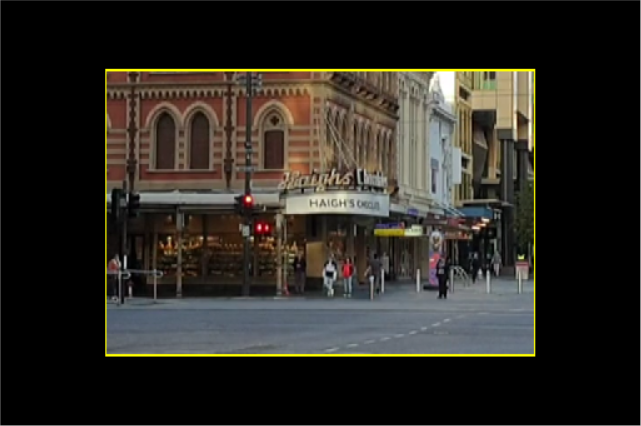
In the Filter Settings we are able to customize how this zoom appears: we can change the magnification of the subject, we can add borders and customize the color. I changed the settings in this example so that a border was present.
All the features within the Annotate tab are as intuitive as the next and we hope you enjoy experimenting with them.
Convert Frame Rate
The next new filter I would like to introduce to you is Convert Frame Rate, also found under the Presentation group. The Convert Frame Rate filter allows you to change the frame rate of the video without altering the playback speed. This differs from the Change Frame Rate filter, which would change the frame rate by altering the playback speed.
This filter is great when dealing with a series of clips and videos that you want to run at the same frame rate for a timeline of events. An example would be, following a suspect who appears on various different CCTV systems that all run at different frame rates.
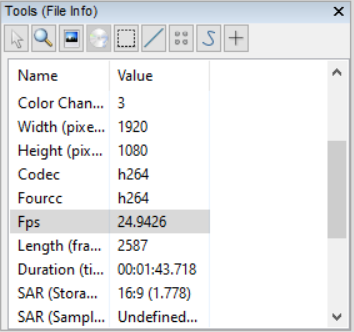
Using our built-in File Info Tool, we can see that we have two different fps rates for our clips following the suspect: one of them has been recorded at 30fps and the other at 25fps. They both playback in real-time but we want the fps to match.

To get our clip that is running at 25fps to match the other, we simply go to the Filter Settings of the Convert Frame Rate filter and select our Frame Rate.

This will be applied automatically. The filter works simply by duplicating frames (to increase the frame rate) or by dropping frames (to reduce the frame rate) without altering the playback speed.
Picture in Picture
The final new filter of this update is an exciting one – Picture in Picture. PiP has an endless amount of uses when it comes to presenting your evidence in a new way. With PiP you can overlay images or videos onto another image or video. Some of the common uses I expect to see are:
- Overlaying a map onto a video
- Overlaying the time stamp that may have been lost after cropping a video
- Overlaying and syncing two videos relating to the same scene
Let’s get started at exploring the filter! Picture in Picture can be found under the Link group.

For this example, I have a video that I would like to crop to a smaller size, however, when I crop it I lose the timestamp of the video. Let me show you how to use Picture in Picture to recover the timestamp and present the video how I want it to appear.
With the video loaded we can make our adjustments to it, such as cropping the video.
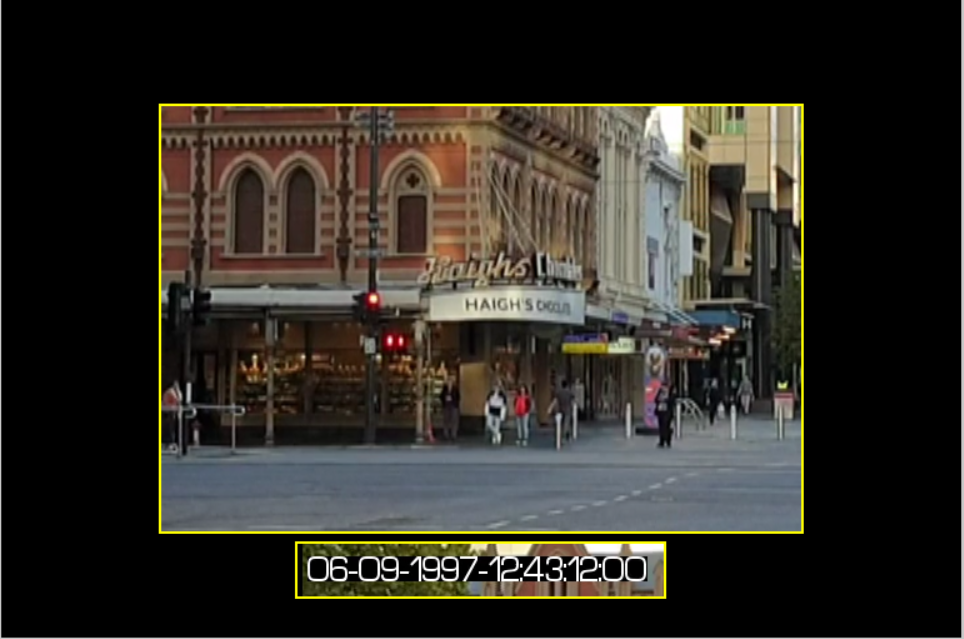
As you can see, now that I’ve cropped the video I have lost the timestamp. This is where Picture in Picture can be used. I’m going to simply create a new chain of the video, but this time crop the video so that only the timestamp remains. I’ve increased the canvas size so that once I have the timestamp I can place it below.

Now that we have both our chains set up, let’s apply the Picture in Picture filter and take a look at the Filter Settings together.


In the main settings, we can select our two inputs, which we want in the foreground and in the background. We can also play around with the positioning of them and if we want to apply any transparency. We also have settings available to control and create a border, audio, and selection.
Using our two videos and the settings above we are able to create the following result.
Convert DVR Output File Suffix
The conversion engine in FIVE has always been a powerful feature and the reason why you should use Amped FIVE for your video and image forensic needs. It is an original feature of FIVE and I am excited to share the most important update it has received.
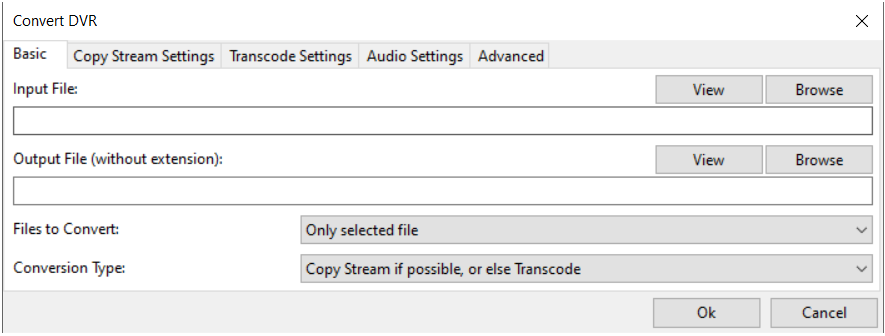
When converting proprietary video, the default setting is to Copy Stream if possible, or else Transcode which is great as it allows you to play the majority of videos by either copying the stream and putting it into a new familiar container or by transcoding the codex completely.
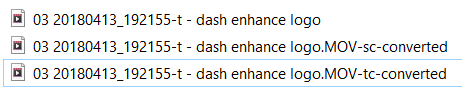
Copying the stream is the preferred option always as this allows you to take the original video and simply place it into a new container. Our new update now allows you to simply recognize whether or not the converted video was a product of ‘Copy Stream‘ or ‘Transcode‘. We have done this by changing the naming convention of the converted file.
If the file was processed through ‘Copy Stream’ then the new file will contain the naming convention -sc, if the file was processed through ‘Transcode’ then the naming convention will be -tc
Chain Collapse/Expand
If you often find yourself working with a large number of chains in your projects, this next feature was built for you in mind!
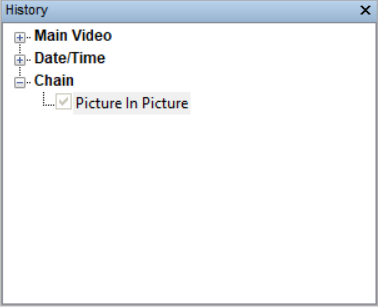
In the History panel, we have now added a + and – icon next to each chain. This allows you to simply minimize a chain after you have finished working on it.

After clicking on the – icon, the chain will be minimized and the icon replaced with a +.
H.264 Quality
In the last update of Amped FIVE (Update 16112), we introduced the following quality settings for exporting H.264 video through the video writer:
- Default = Good quality, high compatibility, low file size
- High = High quality, high compatibility, medium file size
- Visually Lossless = Best quality, high compatibility, high file size
In today’s update, we have now enabled these quality settings throughout all of the filters in Amped FIVE.
Do you need to create visually lossless H.264 files after demultiplexing a file? Wherever you have a video write function, H.264 settings are there.
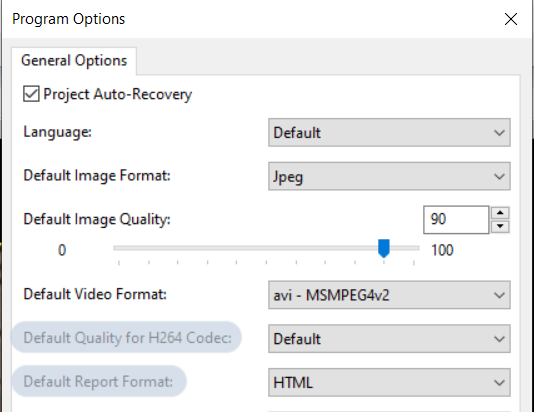
Program Options
And last but not least, there are now two new Program Options built into FIVE:
- Added new option to set the default report format
- Added new option to set the default quality value when using H.264 codec
To access the Program Options you just need to select the view tab at the top of FIVE.
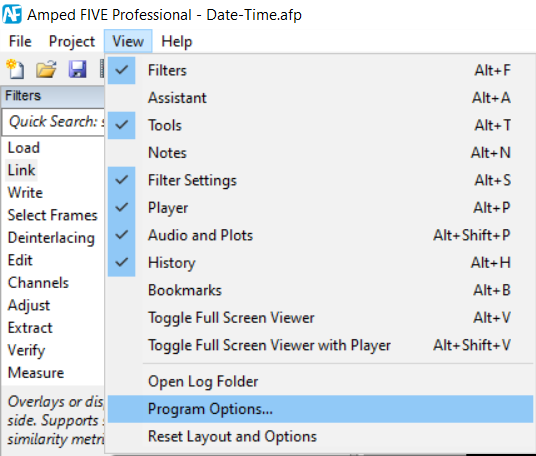
Once you open the Program Options you will be able to see the new settings.
Don’t Delay – Update Today
If you have an active support plan you can update straight away by going into the menu About > Check for Updates within Amped FIVE. If you need to renew your SMS plan, please contact us or one of our authorized partners. And remember that you can always manage your license and requests from the customer support portal.


