Dear Amped blog loyal friends, welcome to this Tip Tuesday! Today, we’ll play the part of James Bond, and see what miraculous things he could have achieved if he only had Amped FIVE! Jokes aside, we’ll see how two rarely used filters can help you read very hidden writings on paper.
This tip really needs an example to start from. We are given this picture of an Amped Software pen (if you still don’t have one, visit our booth in one of the upcoming events we’ll take part in!), and we’re asked to “find the message in it”. And no, this is not a tip about metadata!
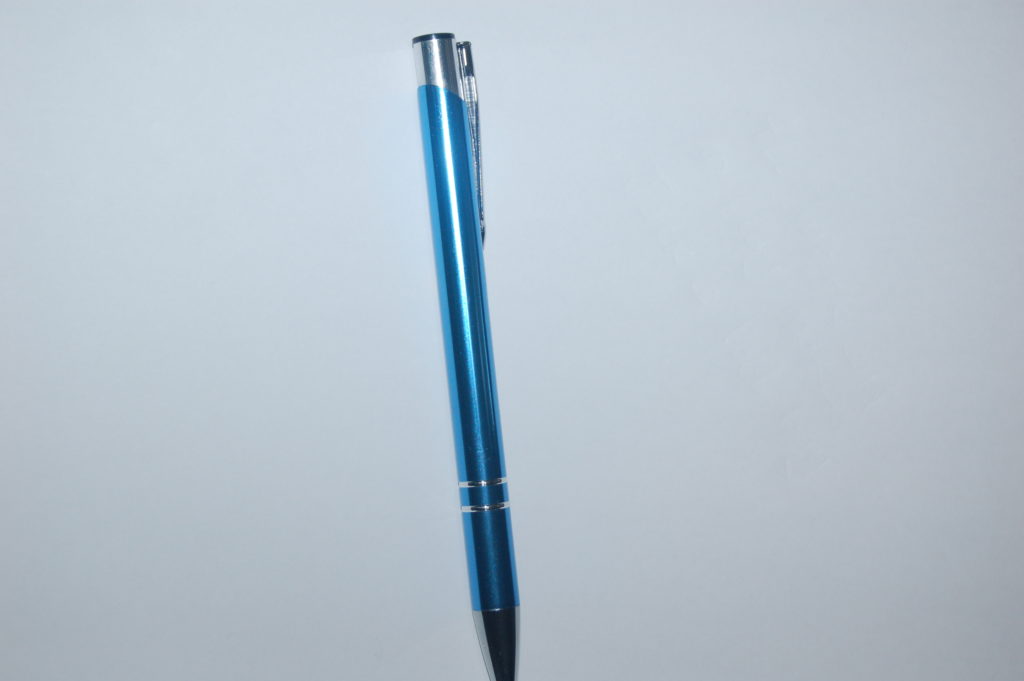
The image has nothing special at a first glance: it’s just a pen sitting on a white sheet. But you know, there are many white levels in pictures so… let’s load it in Amped FIVE, convert it to grayscale with the Grayscale Conversion filter (we’re not interested in colors) and apply Histogram Equalization. This is what we get:
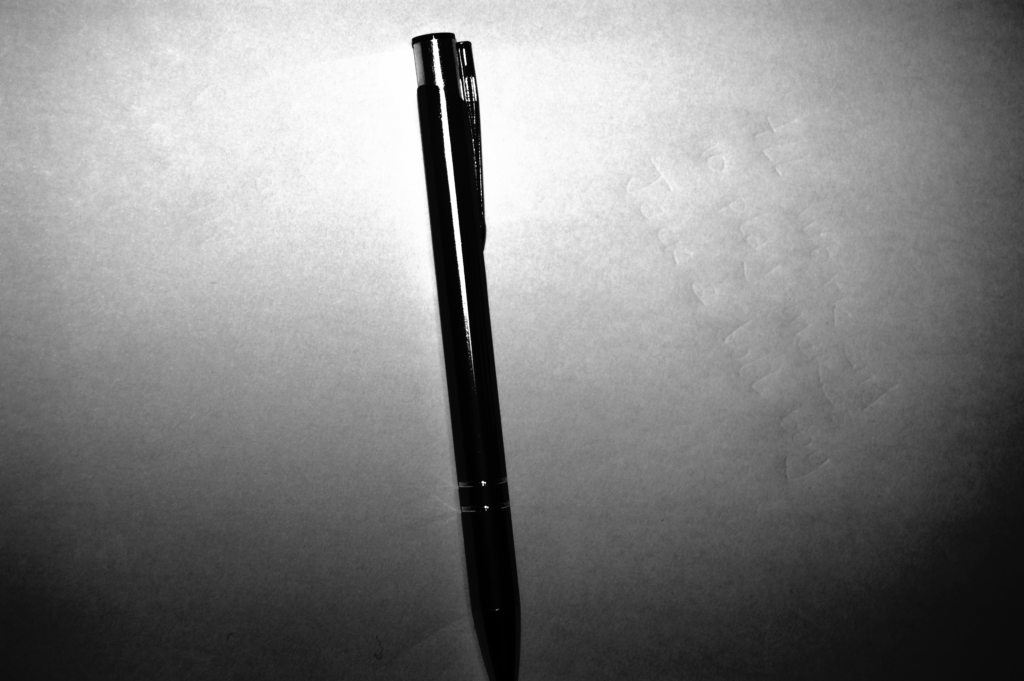
If your display is good enough, you should notice that something is written on the right side of the pen: that’s the message we’re looking for. It’s a message that was written on a sheet sitting on top of the one we’re seeing; then the sheet was removed, but the writing pressure left a message “ghost” on the sheet below. Let’s put it in a favorable direction with the Rotate filter and isolate it with the Crop filter, both available under the Edit category:
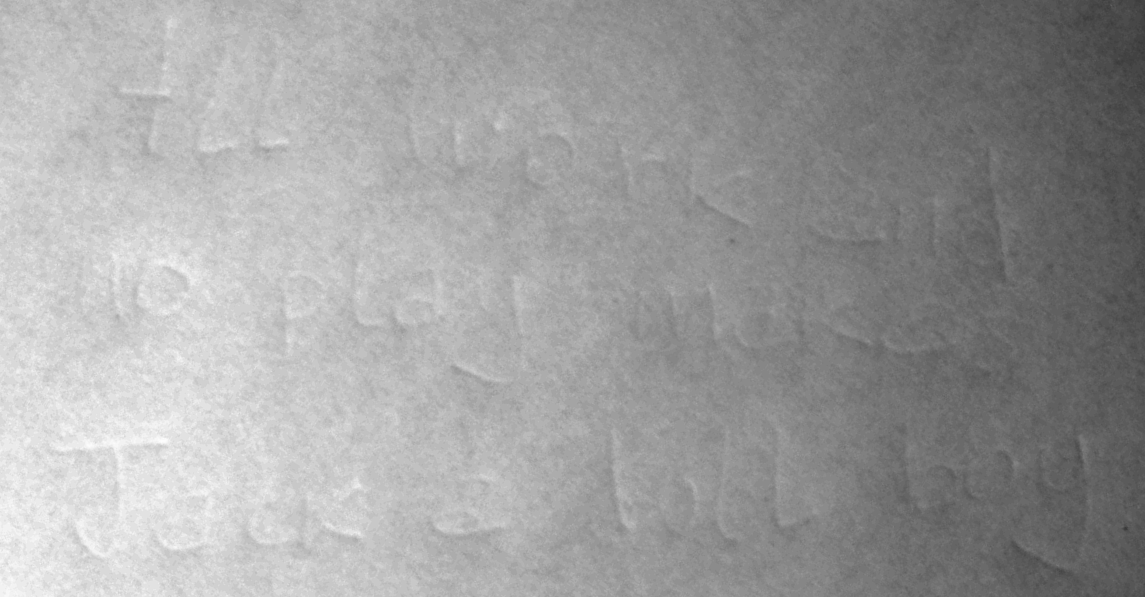
That’s already a nice view, and probably most of you can read something. But let’s make it better. We’re in a case where we need to exalt differences between neighboring pixels (in order to expose the embossment). This is something typically achieved with “derivative” filters, that are, filters which boost the differences between neighboring pixels. Amped FIVE features several of them, under the Extract category. Scharr is an example, and it yields the following (we’re using it setting the Direction parameter to “Vertical“):
It’s perhaps too aggressive, and it boosts only vertical edges. That’s a common problem with these “well known” image processing filters: they rarely fit perfectly to your specific problem. Luckily, Amped FIVE gives you the possibility of writing your own filter! Just go to the Extract category, and choose Linear Filter. And you are presented with this scary Filter Settings panel:
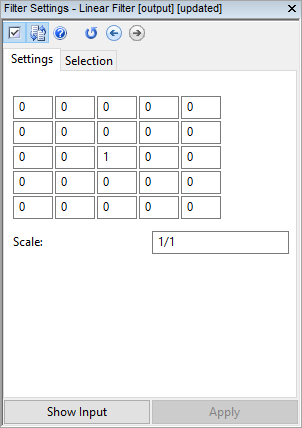
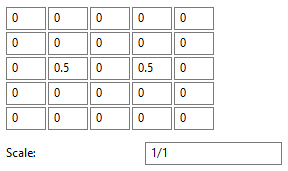
That panel allows you to define a convolution matrix, a.k.a. kernel, to be used to filter your image. You can think of it as a weighting mask that is iteratively placed on top of each pixel, and used to compute the output pixel value based on neighboring pixel values. Amped FIVE allows you to set a 5×5 kernel, as shown above, meaning that each output pixel’s value will be computed from its neighboring pixels in a 5×5 window. The central element (set to 1 in the image above) is the one corresponding to the current pixel, and the other values tell how much the pixel in each position should be weighted. The default kernel, shown above, is “neutral”: it will just copy the pixel value to the output (all neighbors are weighted 0), so nothing will change. Instead, this kernel below would substitute each pixel in your image with the average of its left and right neighbors, ignoring the original pixel value (indeed, the central element is 0):
And the kernel below computes each pixel as the average of itself and its neighbors in a 3×3 window (we’re weighing each pixel 0.11 because we’re averaging 9 pixels in total, and 1/9 ≈ 0.11):

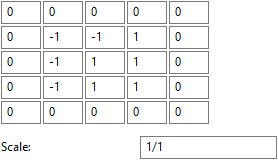
Now, in our case, we don’t want a simple averaging filter. On the contrary, we want to exalt transitions in the vertical, horizontal and diagonal direction. This is better achieved by a kernel like the one below, where contributions of pixels on the left/top and on the right/bottom are put “in contrast”:
Once applied to our image, this is what we get:

Like all derivative filters, our hand-crafted filter boosts noise together with details. We can go back one step in the chain, go to the Denoise category and pick a Gaussian Filter. It will hopefully reduce the graininess while leaving our message rather visible. This is what it looks like after adding it to our chain:

Finally, we see a rather annoying disparity in illumination: the left side of the image is brighter than the right side. We can either apply two Levels separately to the left and right side… or we can just remember that Amped FIVE features the Homomorphic Filter, under the Adjust category, which is specifically made for situations of “uneven illumination”, which is just what we’re facing. Here is the result:
Now we may use the Unsharp Masking filter (under the Sharpen category) to boost details a bit:

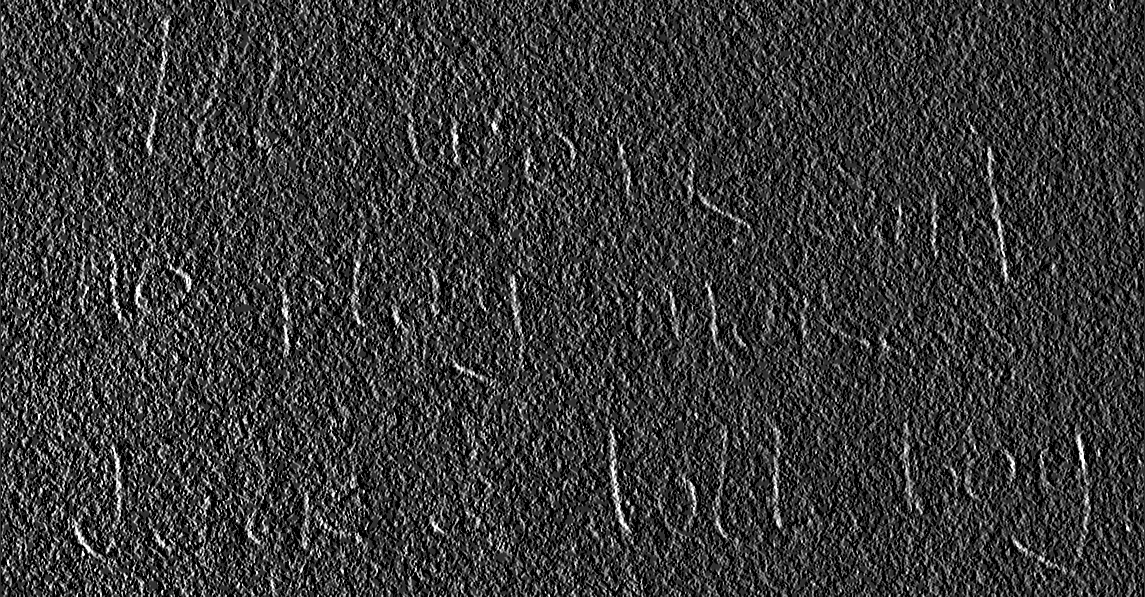
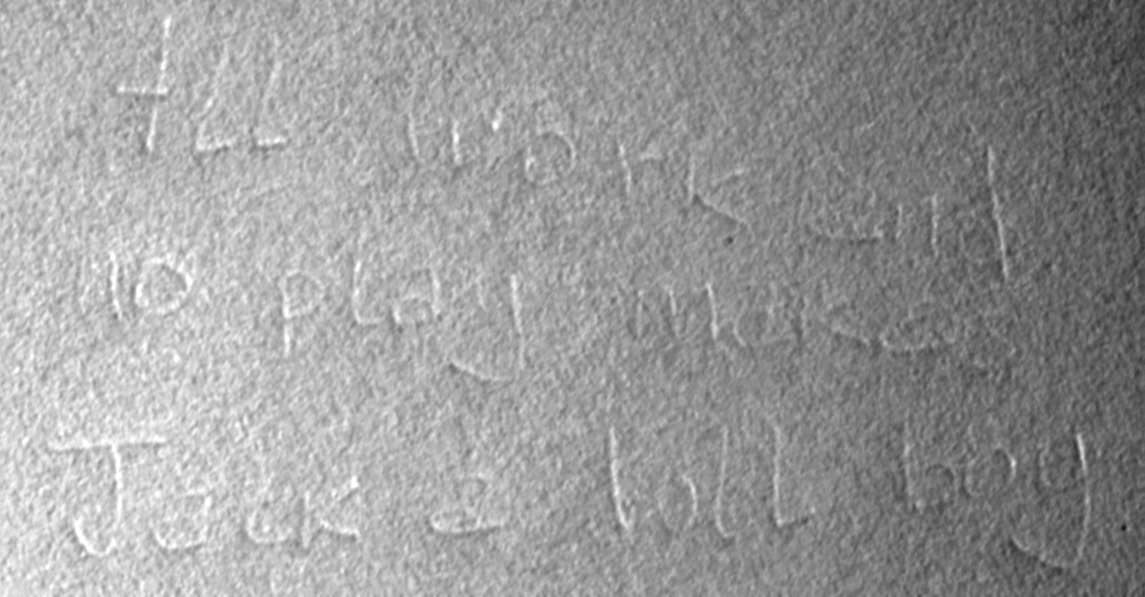
And there we go! If you still don’t read the text, you’ve probably never watched The Shining, by Stanley Kubrick, which is a serious stain in your career!
This week’s takeaway is: nothing that’s in Amped FIVE is useless! While some filters find applications in almost all of your projects, there are some which deal with special cases, but are definitely needed there!