
If you have attended an Amped FIVE training (if you haven’t yet, here is the list of upcoming classes), then you know how much stress we put on the “correct order of filters.” The footage you’re working with is the product of a long acquisition and processing chain, which usually introduced several artifacts. The most reasonable way to go is to compensate for these artifacts in the reverse order. If you like math, here you can find some reasons supporting this choice, which is also summarized by the drawing below. As you can see, if going from X to Z involves passing first through f and then through g, then going back from Z to X requires going through the inverse of g first, and then the inverse of f.
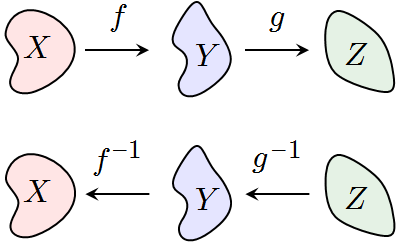
If you’re more on the practical side, it’s still quite intuitive: if you first put on your socks and then your shoes, you’ll have to take off the shoes first and then the socks. In this trivial example, “take off” is the inverse function of “put on”, and it is evident that you need to take off clothes in the reverse order of how you put them on!
We should thus keep in mind that, in general, the acquisition chain begins with defects due to the scene (bad perspective, distant subject, etc.), then limitations of the camera lens come (distortion, chromatic aberration, etc.), then camera sensor defects (noise, poor contrast, etc.), then encoding (interlacing, blocking artifacts, etc.) followed by possible artifacts introduced in the acquisition process (e.g., bad proprietary players exporting with wrong aspect ratio and poor quality). Lastly, there may be defects due to the analyst’s viewing system.

Okay, okay… but will it make any difference if I get it wrong? If you’re one of those who needs to see things in practice before believing them, let’s take a look at the difference it makes to use filters in the proper order or not. We’ll make three examples with very simple chains: deblurring & perspective; deinterlacing & stabilization; crop & undistort.
Deblurring & Perspective. Let’s work with this boarding pass: we need to take out the passenger name and flight number.
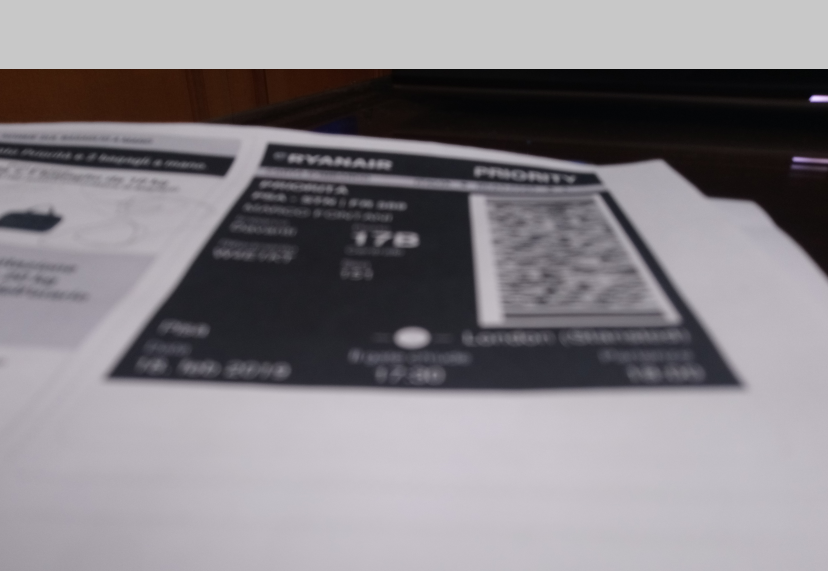
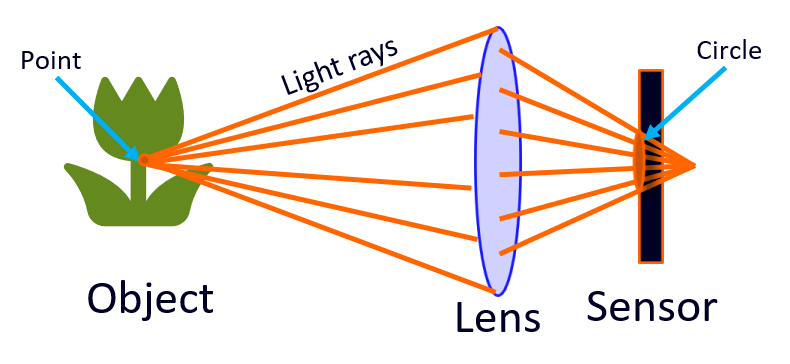
We see the image is strongly blurred, and its perspective is not favorable. “Easy to fix, with Amped FIVE!”, I can hear you say, and you’re right! We just need the Optical Deblurring filter (under the Deblurring category) and Correct Perspective filter (under the Edit category). But in which order should we use them? Let’s think about it: in the acquisition chain, the position of the document with respect to the camera is at the very beginning of the story, it’s just the way the things were in space at that moment the picture was taken. The blurriness came after: when light traveled from the paper through the lens, the lens failed to properly focus it on the camera sensor, turning something which should correspond to a single pixel into a circle in the image.
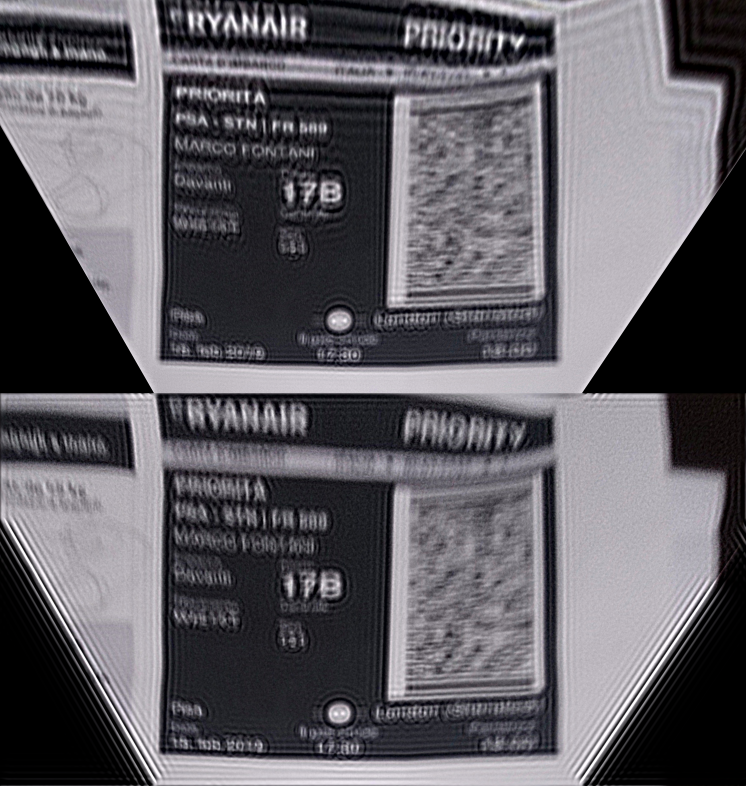
Therefore, we will first need to compensate for the last step (optical blur) and then correct the perspective. The image below shows the result if you use the right order (top figure), and the result if you use the wrong order (bottom figure). Indeed, if you first change the perspective, each pixel is no longer a circle, it becomes an ellipse, and Optical Deblurring will hardly restore it.
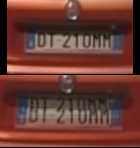
Deinterlacing & Stabilization. Let’s now turn to this other case. This time we need the license plate, but we see that the video has poor resolution and is interlaced.

We can use the Deinterlace filter to remove the “jagged lines” effect, and then use Local Stabilization followed by Frame Averaging to get the best possible view of the license plate. Again, which order should we choose? The poor resolution is due to the distance of the car from the camera, while interlacing has been added well later in the acquisition chain. Therefore, we first need to apply Deinterlacing and then stabilize the video and average frames. Like we did before, we show what happens if you use filters in the right order (top image) or if you reverse and put deinterlace after stabilization and averaging (bottom image): quite a difference, isn’t it?
Undistort & Crop. The last example involves taking out a good image of the glass skyscraper on the right side of the image below: it doesn’t take much expertise to notice there’s a strong lens distortion in this picture.
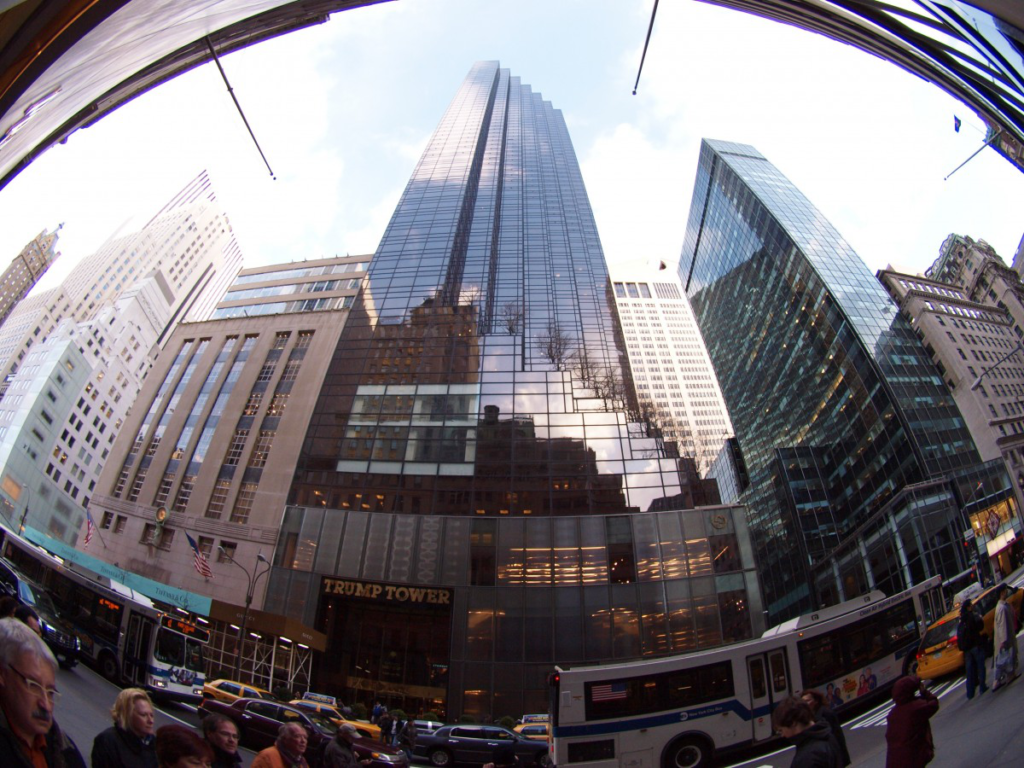
Luckily, this is no problem with Amped FIVE! We just need the Undistort and the Crop filters to reduce the distortion and keep only the object of interest. Which order should we opt for? This time, it comes handy to know the underlying assumptions of the Undistort filter (which, of course, are explained during training and documented in the Filter Reference Guide, available under the Help menu). It reads:
The center of the image must coincide with the optical axis of the lens (i.e. the filter cannot be applied to cropped images).
Therefore, we must first remove distortion and then crop our object. We are again showing below the result of applying filters in the right order (top image) and in the wrong order (bottom image). Once more, a huge difference!
As you can see, the order of filters matter, and most of the time, a little reasoning will guide you in the right decision.


